Start a workflow from a webhook
Agents
An event-triggered agent starts when something happens in another system. On Katonic it is a workflow with a webhook trigger: an address the other system sends a request to when the event happens. This tutorial builds claim intake. When a claim form arrives, the workflow extracts the details, checks them against the policy wording and prepares a recommendation for a claims handler. It is the fourth form in Which builder for which agent.
Who can use it: the Builder role or higher, in a tenant licensed for agents and knowledge.
Prerequisites
- A system that receives the claim form and can send an HTTP request when it does, and someone who can change that system.
- A knowledge source that holds the policy wording; see Add a knowledge source.
- A team you belong to, for the Owner team. The request that starts a run must come from a user who can use the workflow: its owner, a member of the owner team, or someone it is shared with. Ask your administrator how the calling system should obtain a token for such a user.
Build the workflow
- Start a blank workflow
In Studio, open My Agents and select New agent. Select Automate a process, pick the Blank card and select Continue to build.
- Name the flow and pick the owner
On Identity, type the Workflow name
Claim Intakeand a Description, and pick the Owner team. - Set the webhook
Open Trigger and select the Webhook card. In Trigger label, type
Claim form received. In Path, type/hooks/claim-intake. The path is kept with the trigger as a name for the event; the address to call is shown after you publish.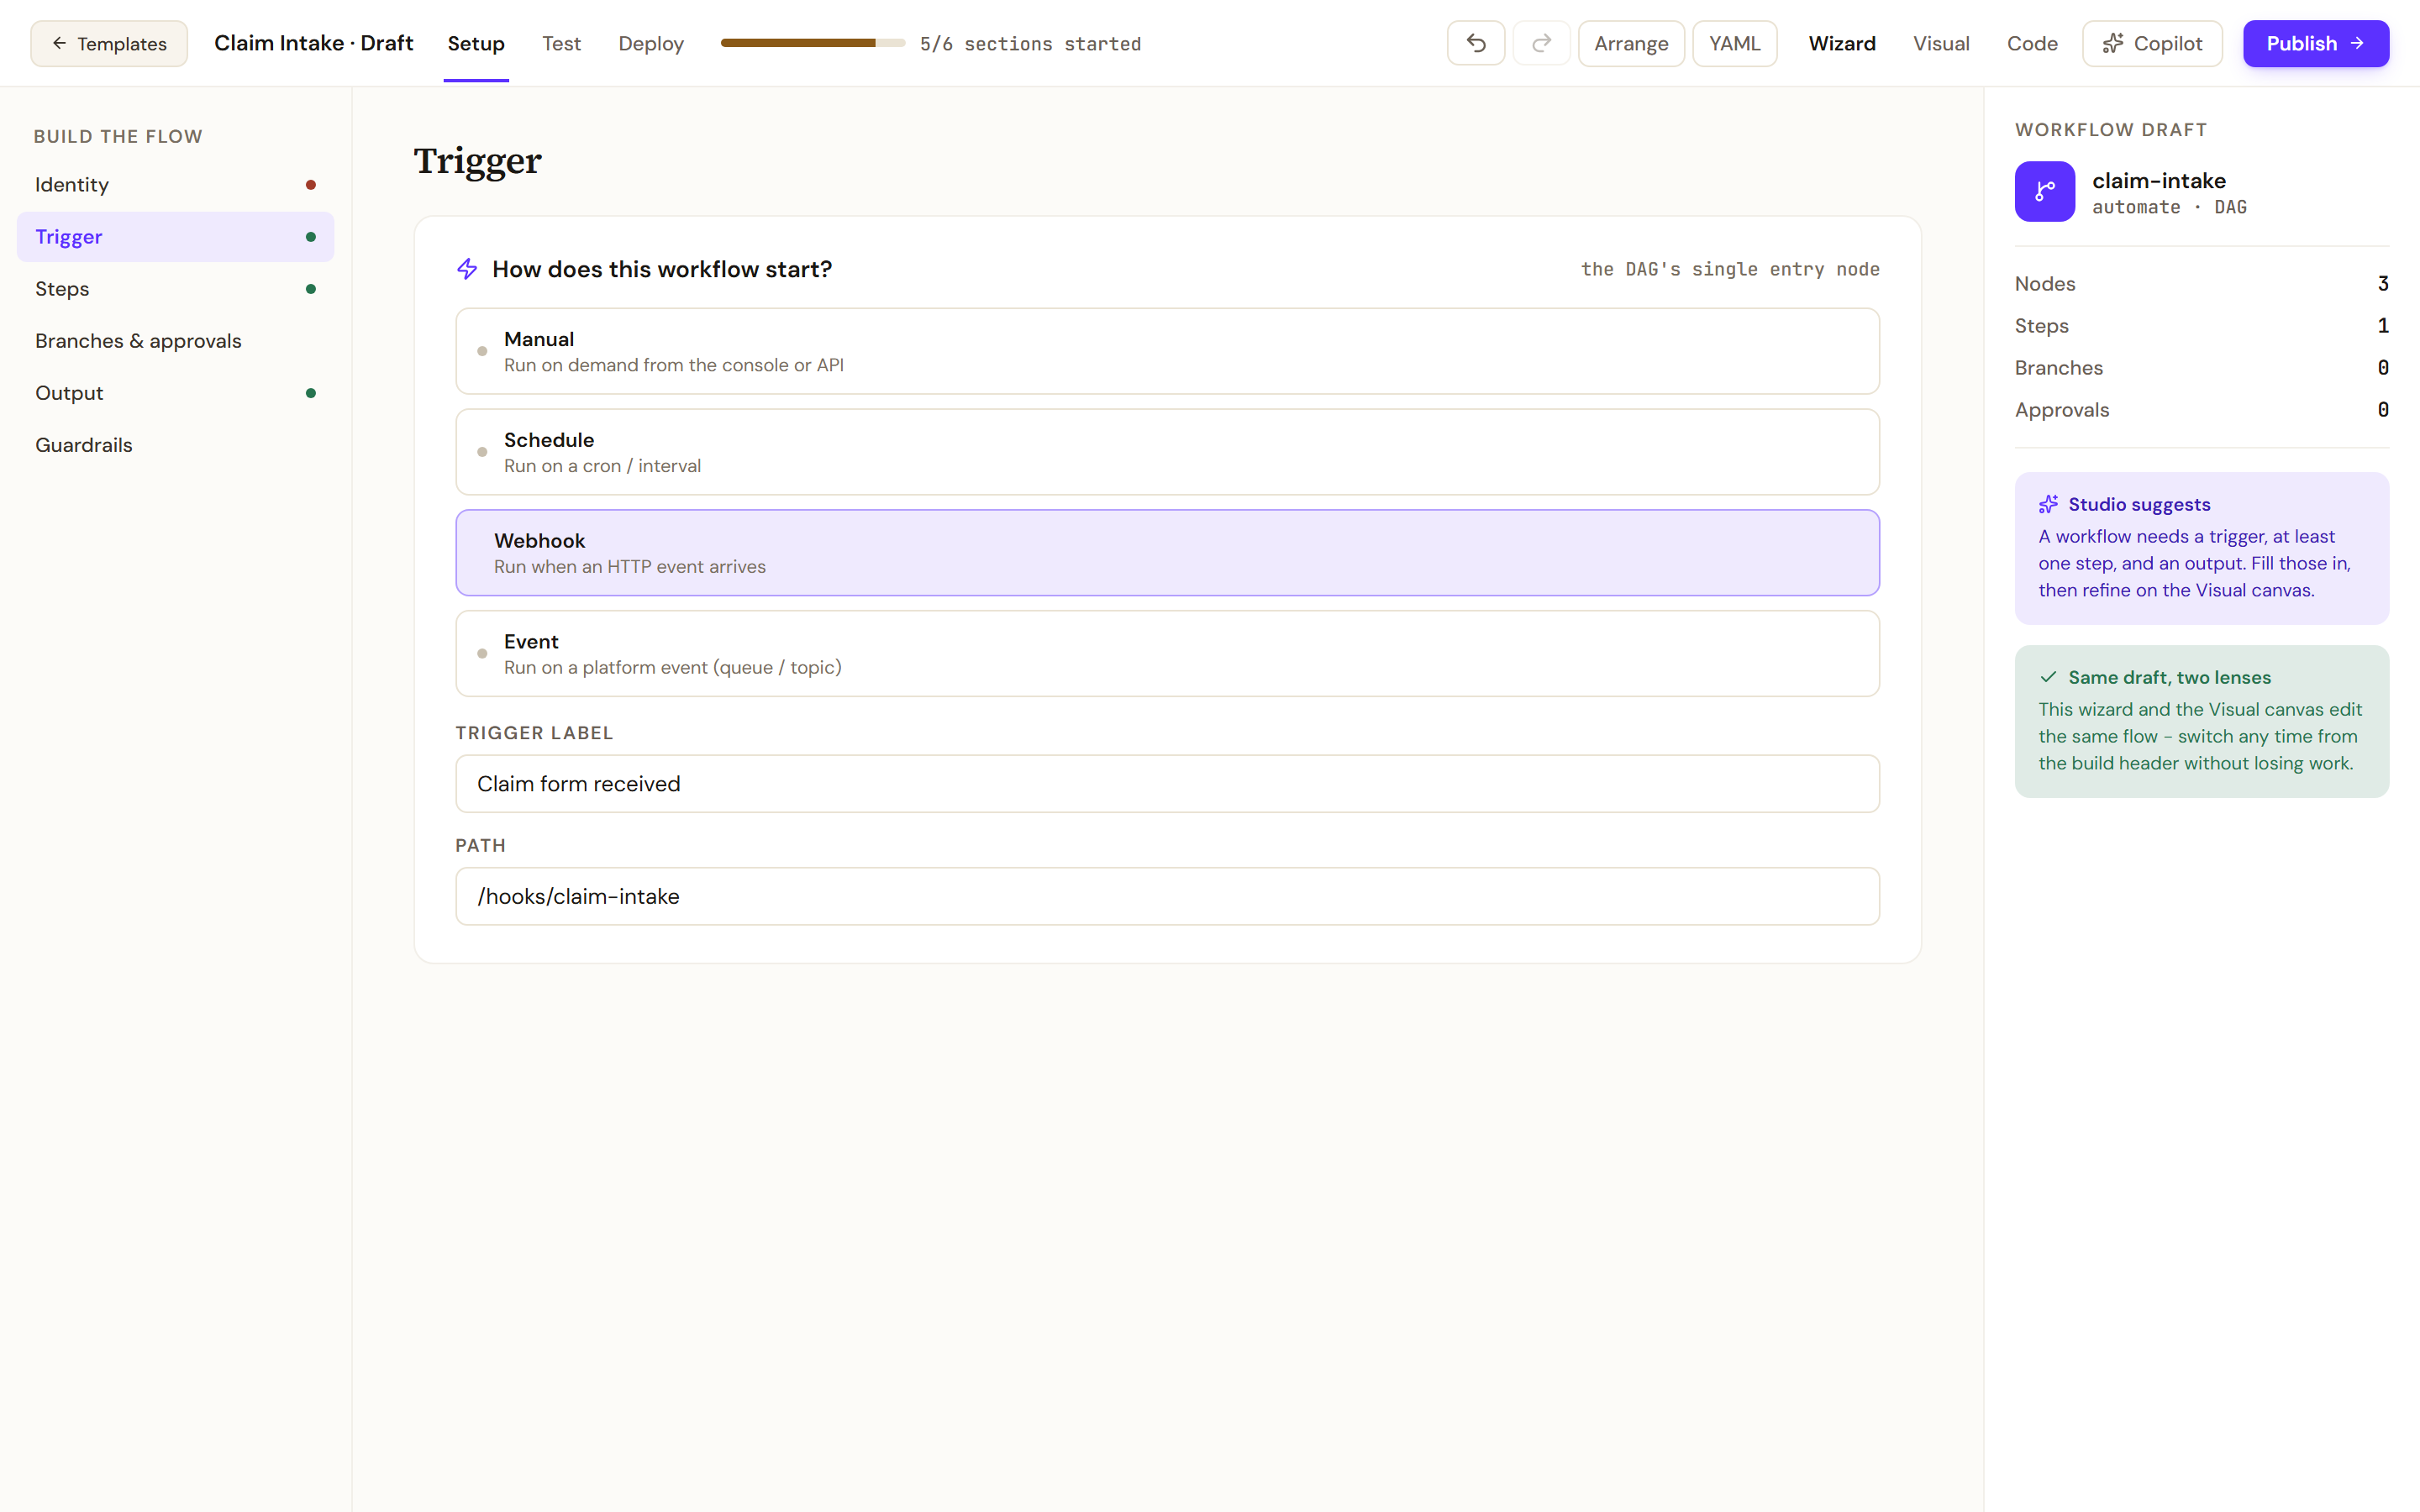
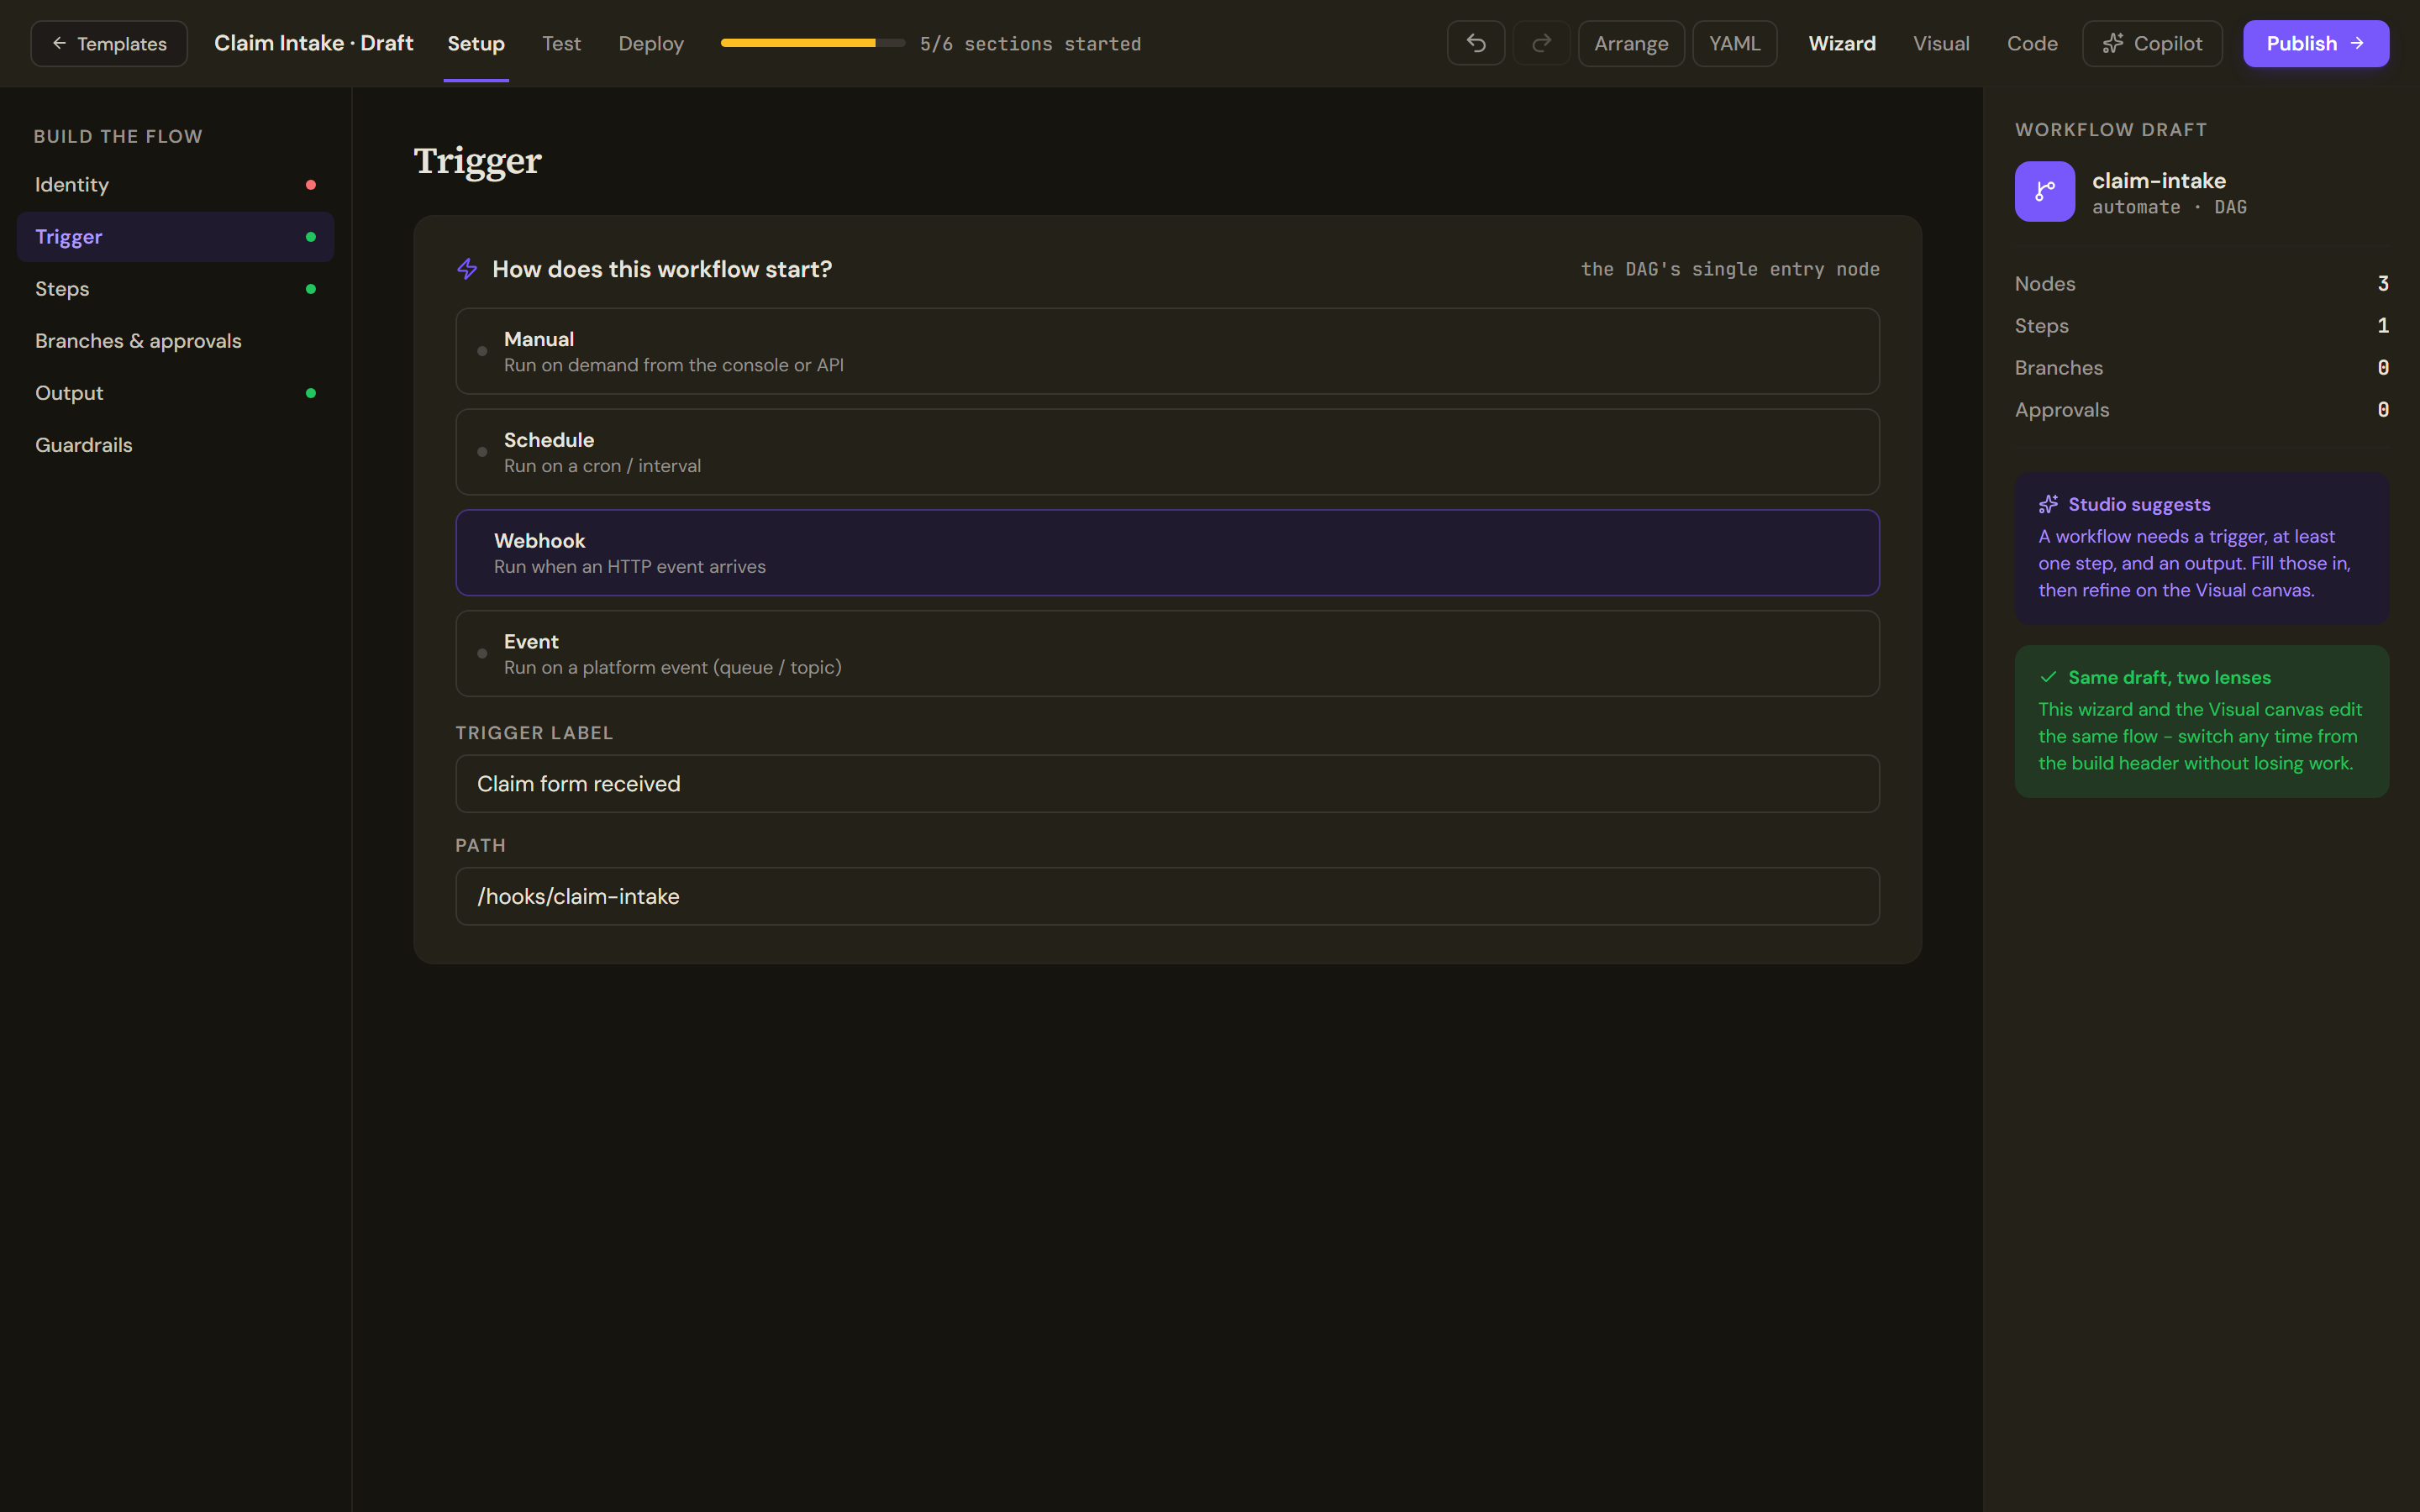
A webhook trigger takes a path. The system that receives the claim form posts to it to start a run. - Name the steps and give them their text
Open Steps. Open the LLM step the flow starts with, a step that sends text to a model, and fill in the first block below. Then use Add a step twice: Knowledge, then LLM.
Step name: Extract the claim detailsInstruction: Read the claim form and list the claimant, the policy number, the date of loss, what happened and the amount claimed. Write "not stated" for anything the form does not say.Step name: Find the policy wordingKnowledge base: the source that holds the policy wordingStep name: Write the recommendationInstruction: Compare the claim details with the policy wording you are given. Recommend one of: accept, refer or decline. Give the clause each reason rests on. You do not decide the claim. - Add the approval
Open Branches & approvals and select Add approval. In Approval label, type
Claims handler review. In Reviewers / channel, type the channel to notify, here#claims-handlers. The run pauses at this step until a reviewer decides. You should now see the Workflow draft rail count one approval.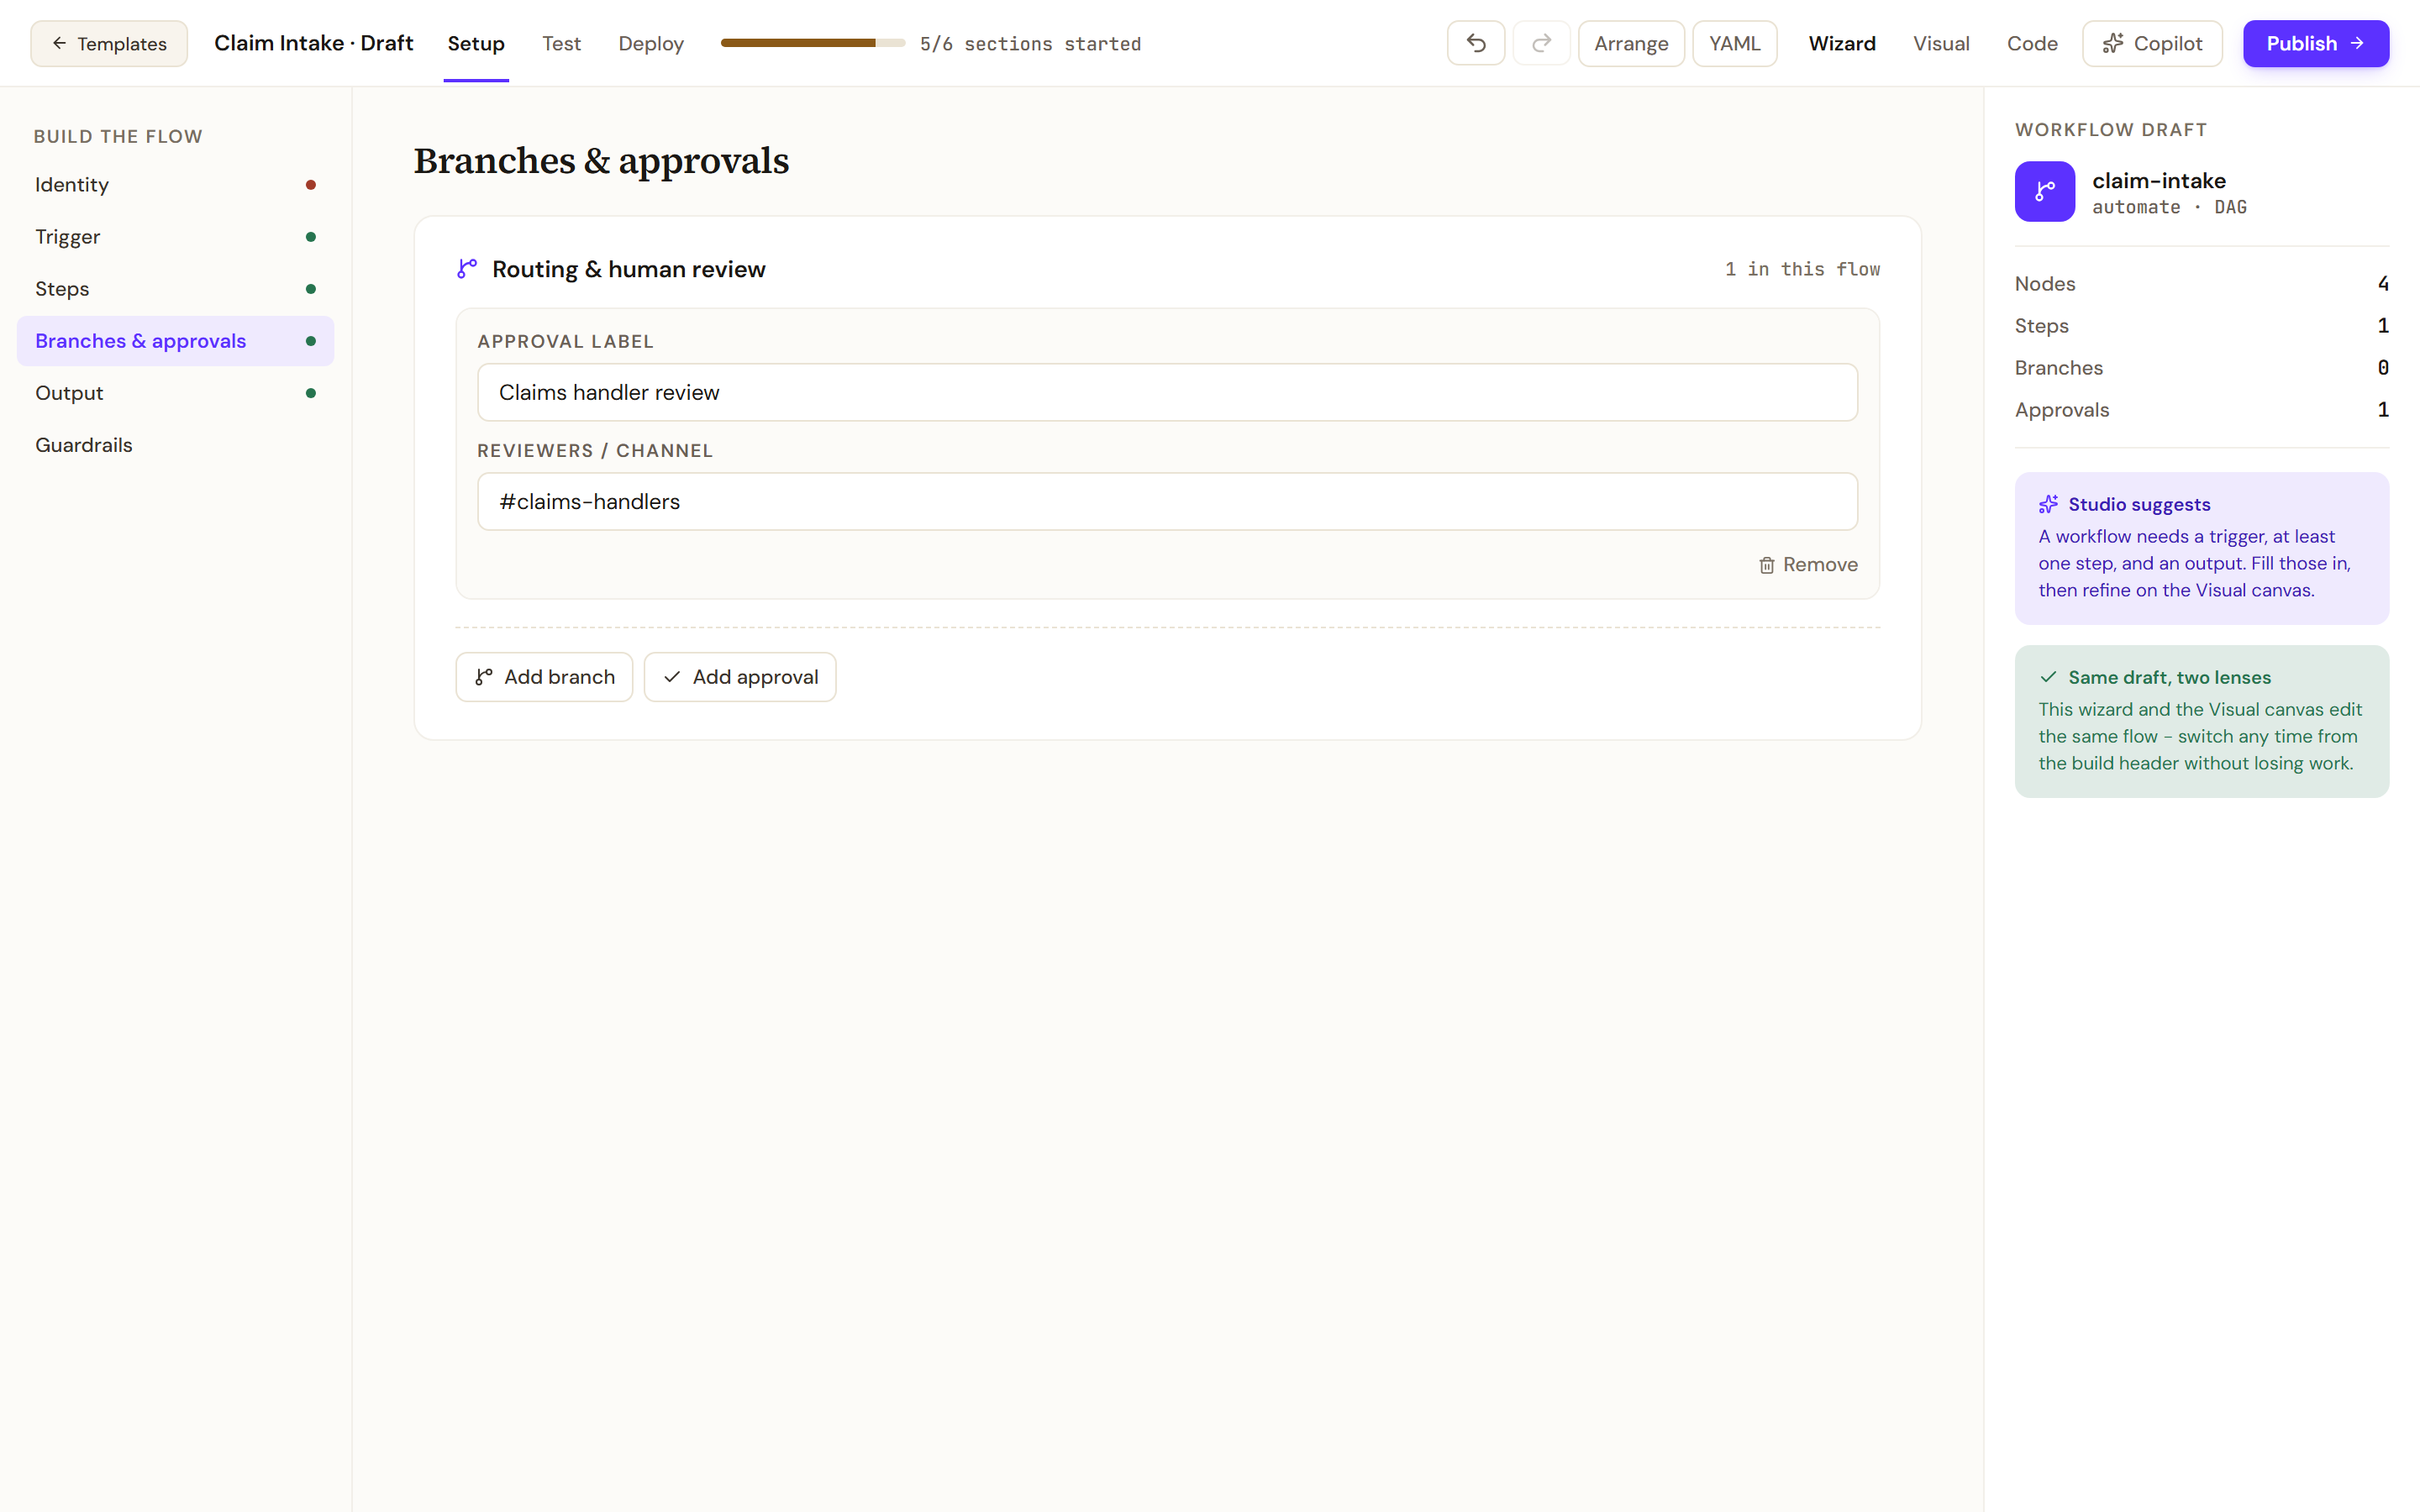
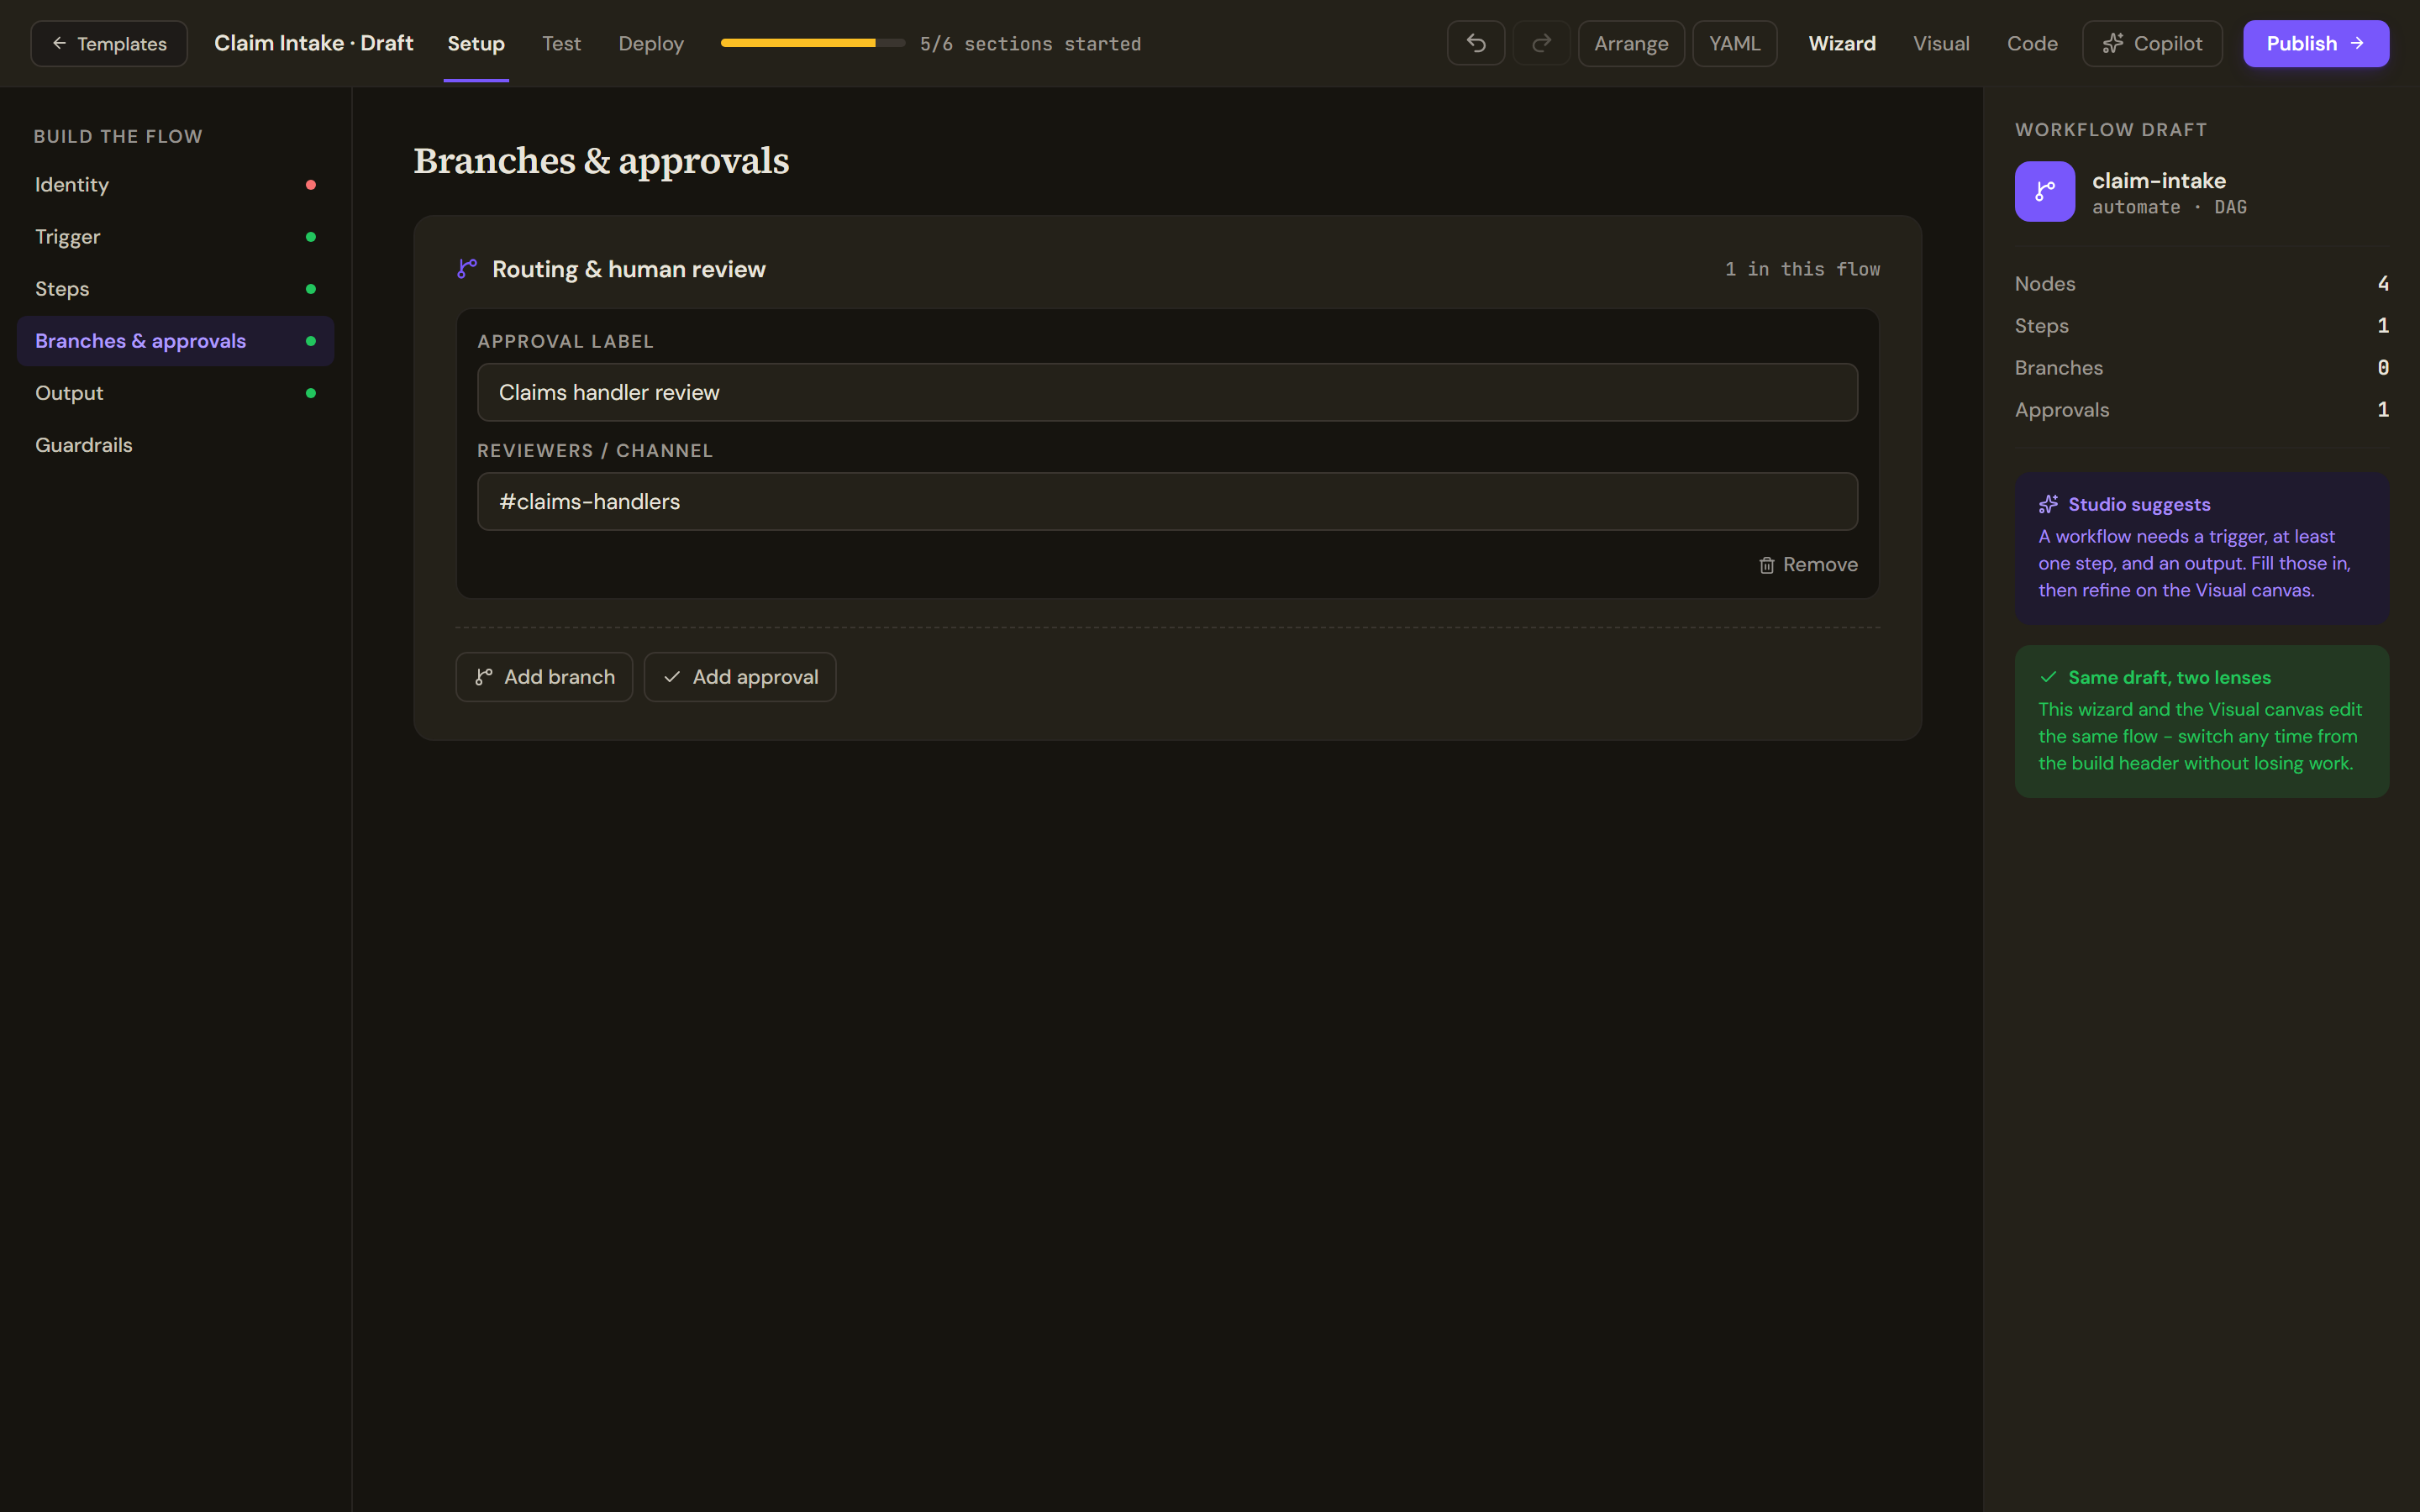
An approval gate pauses the run for a person. Name the gate and the reviewers or channel to notify. - Name the output and set the guardrails
Open Output. In Output label, type
Case recommendation, and in Destination,return to caller. Open Guardrails and switch on Customer-facing tone & PII, because a claim form carries personal data.
Test and publish
- Run the draft
Open Test, paste the text of a claim form as the message and select Run. Every step reports in the Run trace. The sandbox continues the approval automatically, so this run does not prove the pause.
- Publish with the API channel on
Select Publish. Under Where it runs, tick REST API as well as Work Room: the address is shown only for an agent with the API channel on. Before you build a form of agent covers the outcomes of a publish.
- Copy the address
Open the workflow from My Agents and select Run. Under Triggers, the Webhook card shows the address and the body to send. Select Copy.
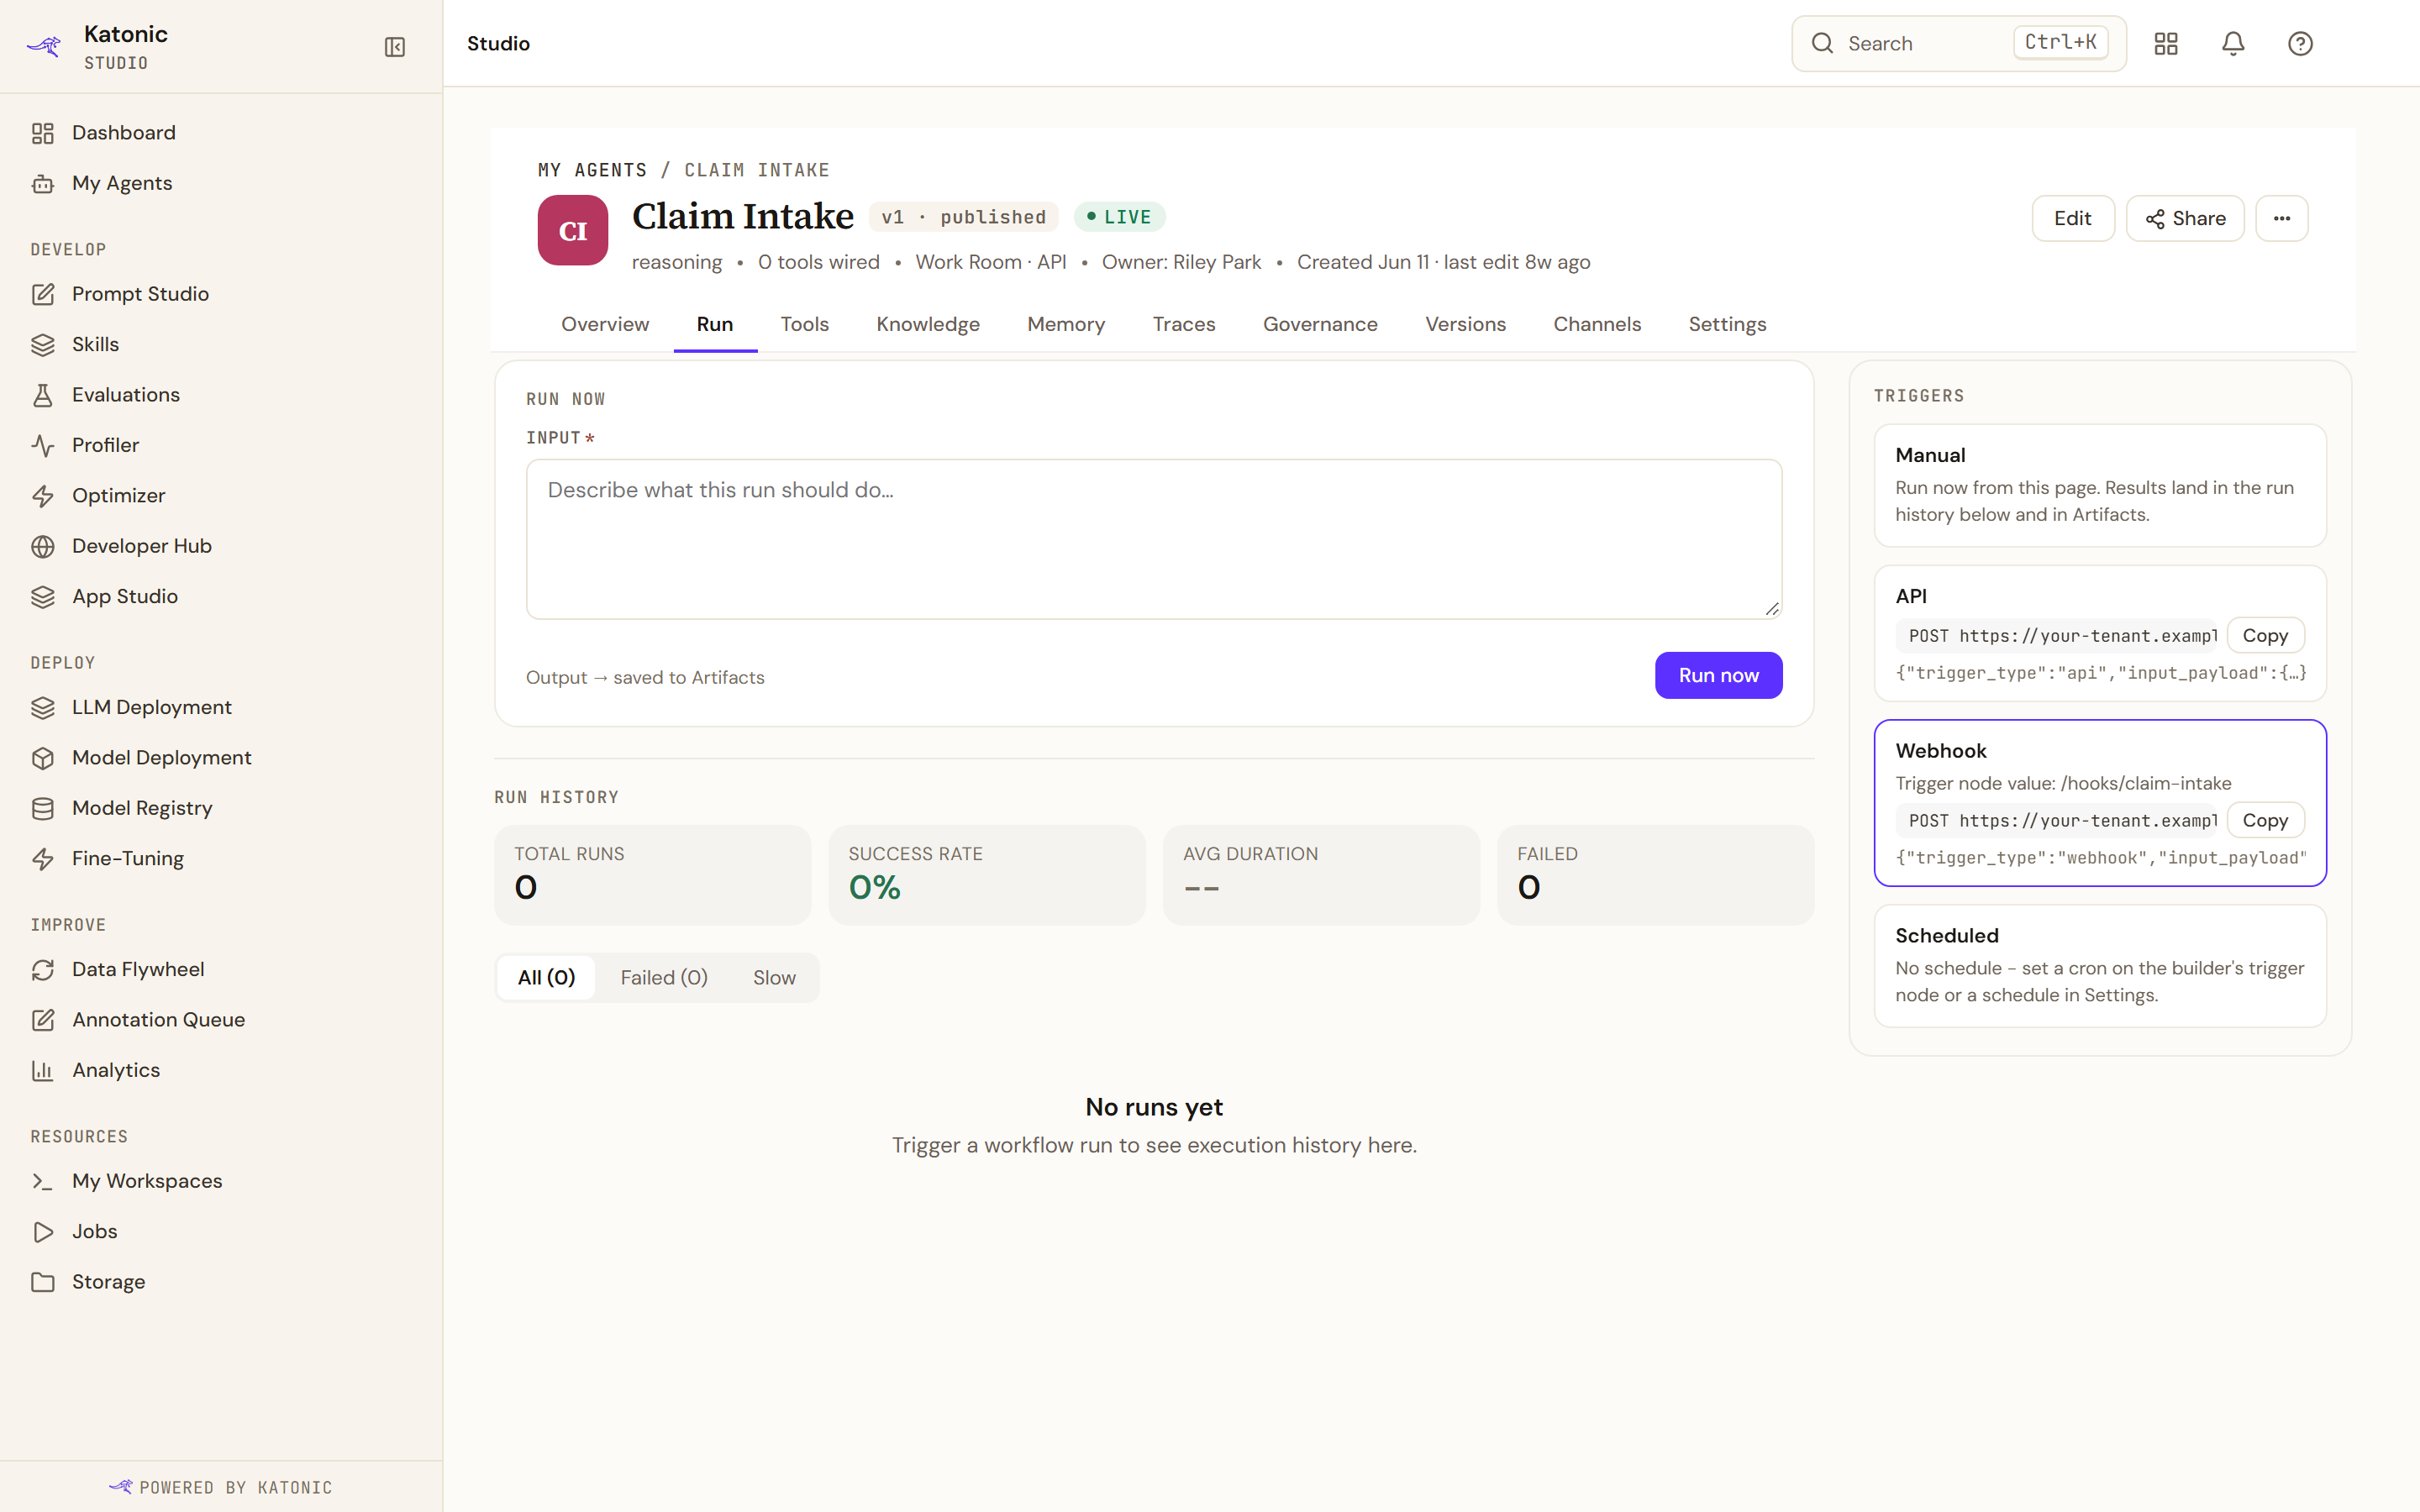
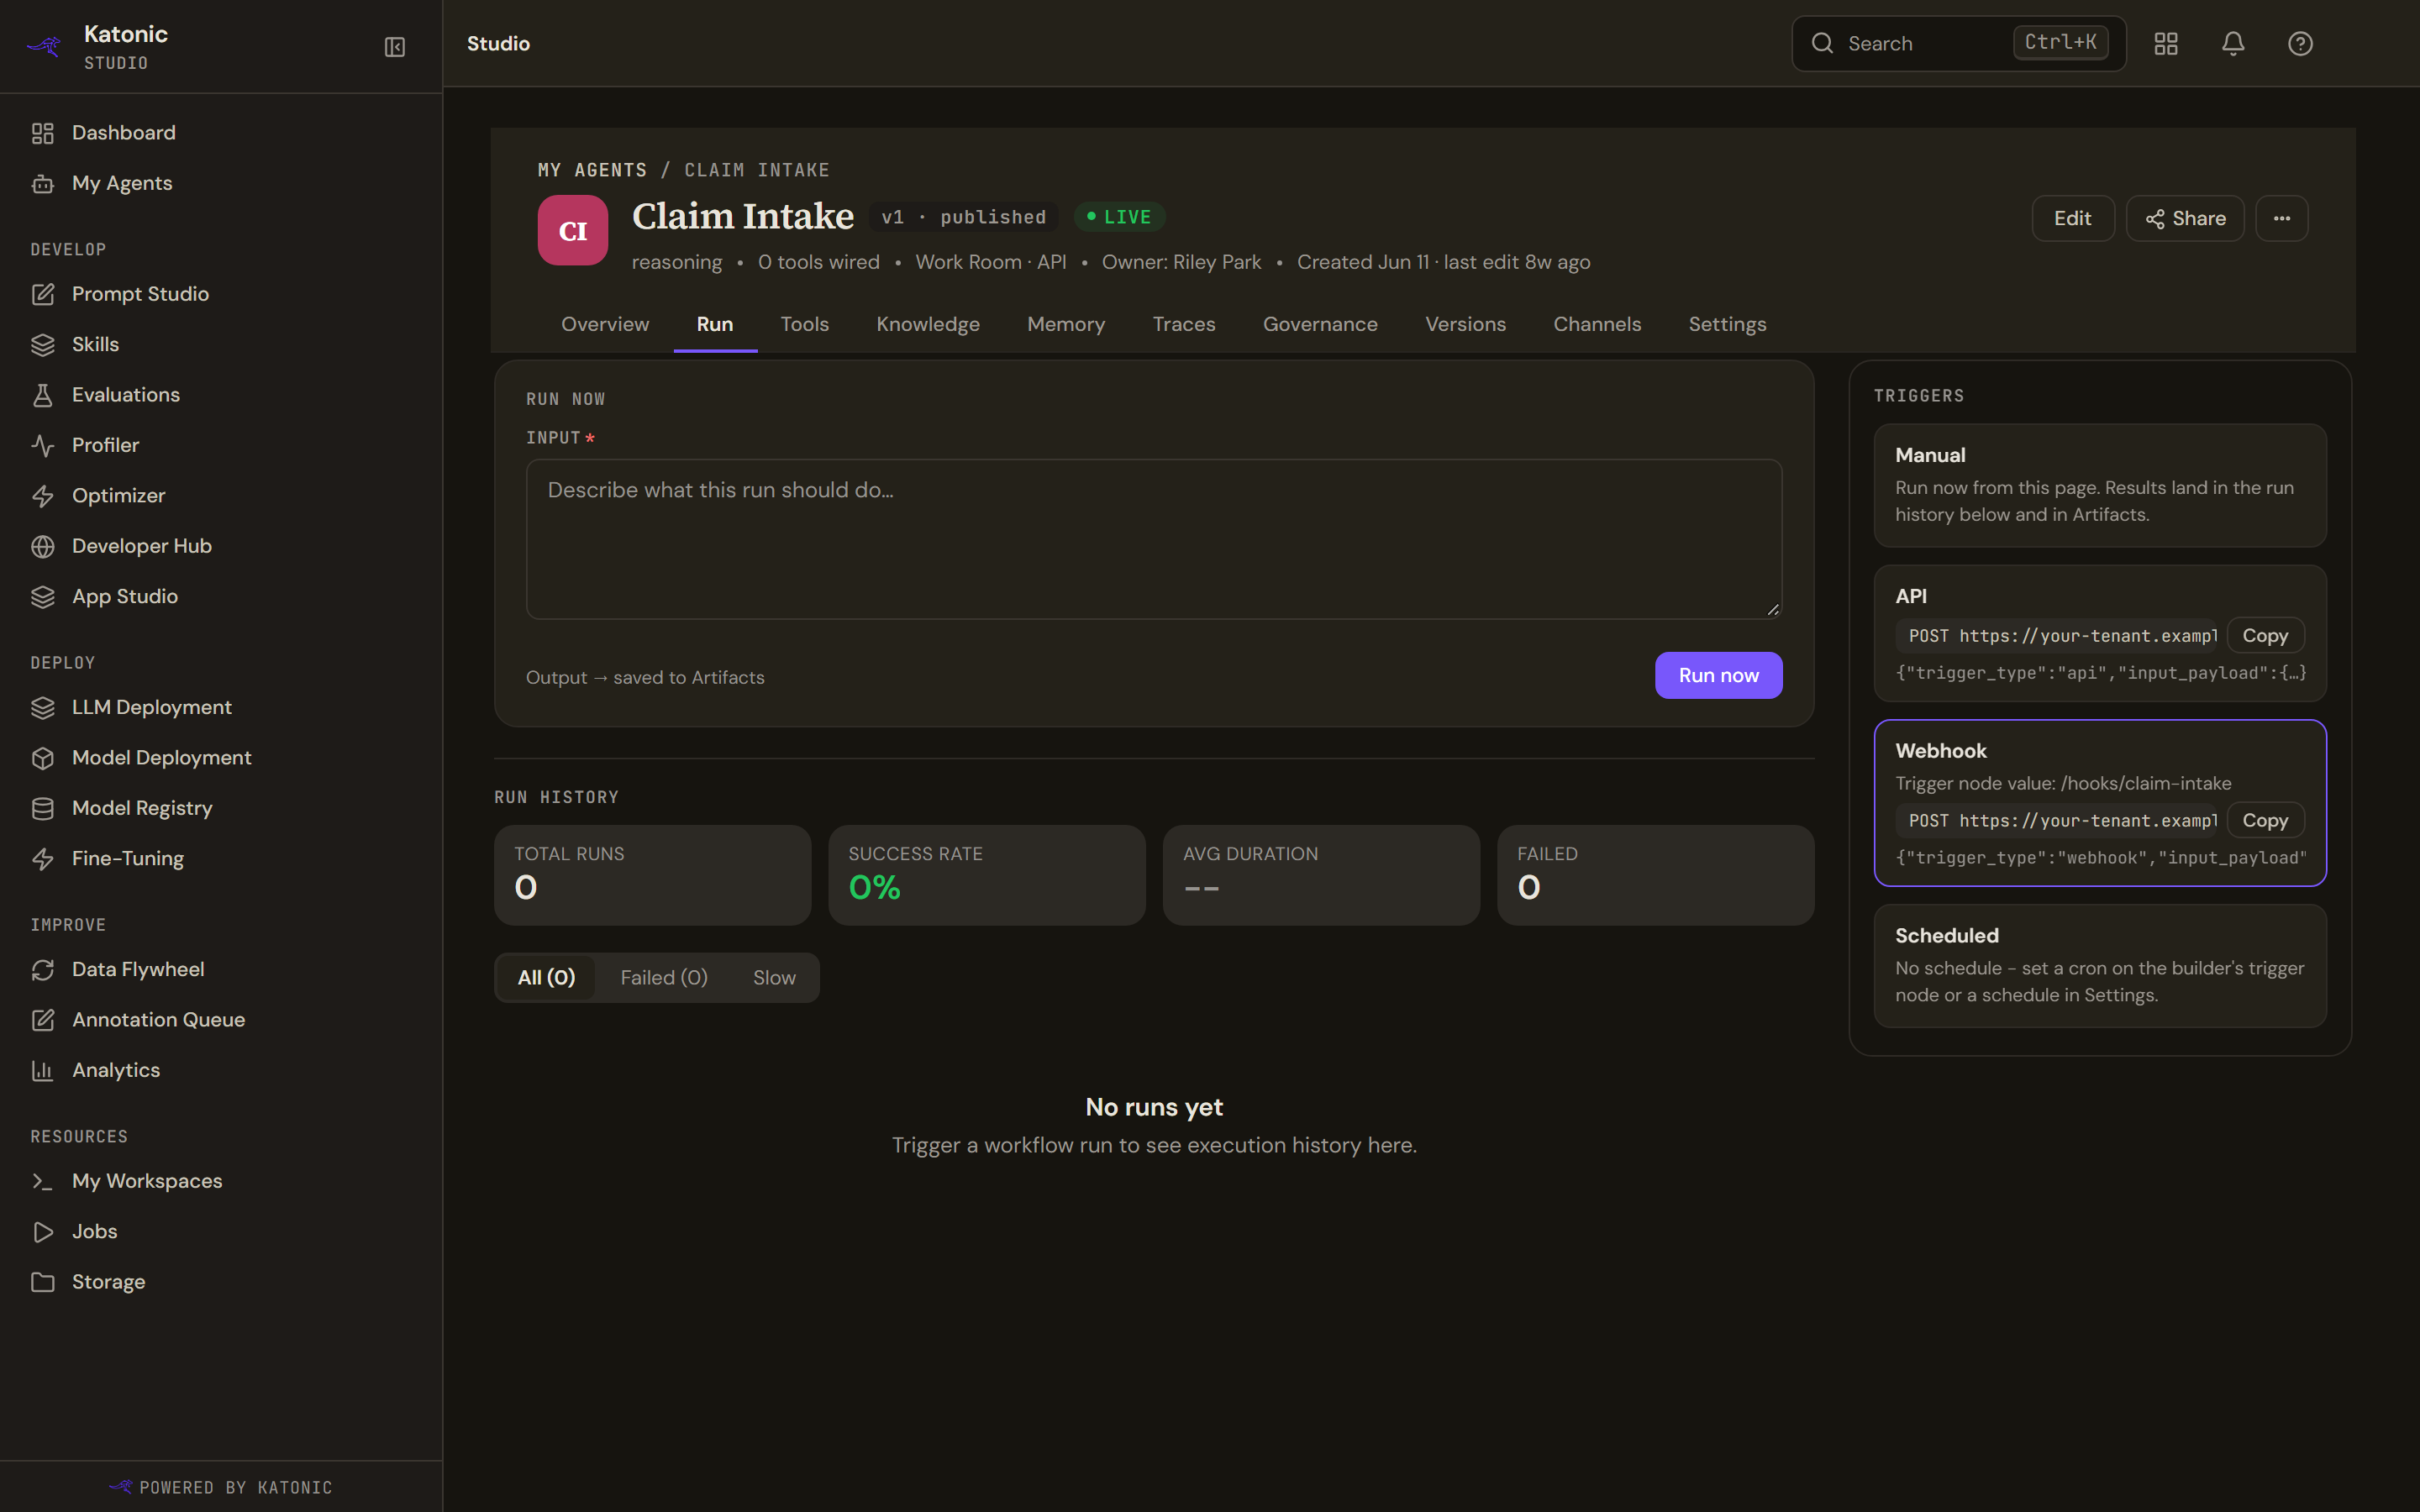
After publishing with the API channel on, the Webhook card shows the address to post to and the body to send.
Call the webhook
The address carries the workflow's id, not the path you typed. The calling system sends the claim as message inside input_payload, with a bearer token, a secret sent in the Authorization header to prove who is calling:
curl -X POST "https://<your tenant host>/api/admin/v1/agents/<agent id>/runs" \
  -H "Authorization: Bearer <token of a user who can use the workflow>" \
  -H "Content-Type: application/json" \
  -d '{"trigger_type": "webhook", "input_payload": {"message": "Claim form: policy HP-20418, water damage on 14 November, 2,300 claimed ..."}}'
The call returns at once with the new run, before any step has run:
{
  "id": "<run id>",
  "agent_id": "<agent id>",
  "trigger_type": "webhook",
  "status": "pending",
  "total_steps": 0,
  "completed_steps": 0,
  "output_payload": {}
}
To learn the outcome, the caller keeps the id and reads GET on the same address followed by /<run id>. The reply carries the status, the steps completed, each step's output and, at the end, output_payload. A status of pending, running or awaiting_approval means the run is not finished. Every request starts a new run, so the calling system must send each claim once.
Verify
Send the sample request. Then:
- The reply has an
idand the statuspending. - On the Run tab, the run appears in Run history and moves through the three steps, then stops at Claims handler review.
- A reviewer finds it in the Work Room under Automations, on the Needs approval chip, where a webhook run is listed as From a connected app. The person who started a run cannot approve it.
- After the approval, the run completes and its output is the recommendation, with a clause beside each reason.
Troubleshooting
- The Webhook card says the API surface is disabled. Publish again with REST API ticked.
- The request is refused with 401. The token is missing or has expired.
- The request is refused with 404. The agent id in the address is wrong, or the token's user has no access to the workflow at all. Add the user to the owner team.
- The request is refused with 403. The user can see the workflow but may only view it. Share it with them for use, or add them to the owner team.
- The run stays at awaiting approval. Nobody has decided. Check that the reviewers can see it under Automations; see Automations and approvals.
- The recommendation ignores the policy. Open the run and read the Knowledge step's output. If it is empty, the comparison had nothing to work from.