Katonic Platform On-Prem Installation Guide - Redhat
Katonic Platform On-Prem Installation Guide - Redhat
This guide describes installing, operating, administering, and configuring the Katonic Platform in your own Kubernetes cluster. This content is applicable to Katonic users with self-installation licenses.
Deploying Katonic involves two discrete steps:
- Set up compatible Kubernetes infrastructure for Katonic
- Install the Katonic application on Kubernetes
If you are interested in running Katonic as a managed service in your cloud or in a single-tenant vendor cloud, contact Katonic. Managed service customers will have installation, operations, and administration handled via professional services, and the content of this guide will not be required or applicable.
Overview
Katonic runs in a Kubernetes cluster with a set of master nodes, worker nodes dedicated to hosting Katonic platform services, worker nodes dedicated to hosting compute workloads and a set of worker nodes dedicated to storage, and a load balancer that regulates connections from users.

The Katonic application hosts three major workloads:
- Platform nodes
These are worker nodes of Kubernetes that handle platform-specific components. These components provide user interfaces, the Katonic API server, orchestration, metadata and supporting services.
These nodes are of the highest importance in a cluster as they keep all the essential components of the Katonic MLOps platform running.
No other workloads can be assigned to these nodes and they have a fixed number. The number of platform nodes required in a cluster is static.
- Compute nodes
These are worker nodes of Kubernetes that handle all the users' data. This is where users’ data science, engineering, and machine learning workflows are executed.
As the name suggests, Compute nodes handle all the computation needs of the users and so require high resources and numbers.
Compute node failures will not take the platform offline and are therefore of lower priority than Platform Nodes.
The workloads assigned to the compute nodes are dynamic and thus these nodes are usually auto-scaled to meet these demands.
- Storage Nodes
Unlike cloud deployment of Kubernetes where the cloud provider handles the storage of data for the platform, On-Premise systems need to have internal solutions to handle the storage.
Storage nodes have Katonic’s storage solution that works with the Kubernetes cluster and Katonic platform.
These nodes are reserved exclusively for pods and deployments of the storage services and are considered very Important.
The number of storage nodes depends on the storage requirement and fault tolerance required.
All workloads in the Katonic application run as containerized processes, orchestrated by Kubernetes. Kubernetes is an industry-standard container orchestration system. Kubernetes was launched by Google and has broad community and vendor support, including managed offerings from all major cloud providers. Typically, Katonic customers will provision and manage their own Kubernetes cluster into which they install Katonic.
Katonic Platform is built to be incredibly flexible and supports many different deployment environments for your Katonic application layer. After you've deployed the platform you can add all of your different worker's layers, no matter how they are hosted!
Services
The platform comes pre-deployed with proprietary and third-party open-source tools and libraries that are exposed as application services and are managed using Kubernetes. Users can view and manage relevant services from the platform dashboard using a self-service model. (Note that some services that don't require user intervention aren't visible in the dashboard.) . The platform has two types of managed application services. A description of the functionality provided by each service is as follows.
Platform services
This service layer contains the Katonic API server, Pipelines, Keycloak authentication service, and the metadata services that Katonic uses to provide reproducibility and collaboration features. MongoDB stores application object metadata, Git manages code and file versioning, Docker registry is used by Katonic Environments. All of these services run on platform nodes. The service layer also contains the dedicated master nodes for the Kubernetes cluster. These are The default services and can't be deleted by users, but service administrators can disable or restart these services and modify some service configurations.
Compute services
The execution layer is where Katonic will launch and manage ephemeral pods that run user workloads. These may host Pipeline Runs, Model APIs, Apps, Workspaces, and docker image builds. These run on compute nodes.
Pre Deployed Services
The following software packages, services, and tools are pre-deployed as part of the version 3.1 platform installation:
| Service | Namespace | Type | Description |
|---|---|---|---|
| Istio Ingress | istio-system | Networking Service | Istio extends Kubernetes to establish a programmable, application-aware network using the powerful Envoy service proxy. |
| Katonic UI | application | UI Component | The platform's graphical user interface. |
| Katonic API Server | application | API Server | The Katonic Platform’s API server and endpoint |
| Katonic File manager | default | Service | The distributed File storage and Management system. MinIO |
| Keycloak | keycloak | Identity Provider | Keycloak is an enterprise-grade open-source authentication service. Katonic uses Keycloak to store user identities and properties, and optionally for identity brokering or identity federation to SSO systems and identity providers. |
| MLflow | mlflow | Service | MLflow is an open-source platform to manage the ML lifecycle, including experimentation, reproducibility, deployment, and a central model registry. |
| MLflow-MinIO | mlflow | Service | The distributed File storage and Management system. MinIO |
| MongoDB | application | Database | MongoDB is an open-source document database. Katonic uses MongoDB to store Katonic entities, like projects, users, and organizations. Katonic stores the structure of these entities in MongoDB, but underlying data is stored separately in encrypted blob storage. |
| Monitoring (monitoring) | monitoring | Logging and Monitoring | A platform service for monitoring application services and gathering performance statistics and additional data. The gathered data is visualized on Grafana dashboards using the platform's Grafana services. |
| Pipelines (pipelines) | kubeflow | Service | The Google Kubeflow Pipelines open-source framework for building and deploying portable, scalable machine learning (ML) workflows based on Docker containers. |
| Postgres Database | application | Database | Postgres is an open-source relational database system. Katonic uses Postgres as a storage system for Keycloak data on user identities and attributes. In addition to the Keycloak data, It stores Experimentation Meta information and is also used for Feature store offline meta DB. |
| Redis | application | Database | Redis is an open-source (BSD licensed), in-memory data structure store, used as a database, cache, and message broker. It stores Katonic deployment ML Meta information and is also used for the online Feature store |
User Accounts
Katonic uses Keycloak to manage user accounts. Keycloak supports the following modes of authentication to Katonic.
Local accounts
When using local accounts, anyone with network access to the Katonic application may create a Katonic account. Users supply a username, password, and email address on the signup page to create a Katonic-managed account. Katonic administrators can track, manage, and deactivate these accounts through the application. Katonic can be configured with multi-factor authentication and password requirements through Keycloak.
Learn more about Keycloak administration
Identity federation
Keycloak can be configured to integrate with an Active Directory (AD) or LDAP(S) identity provider (IdP). When identity federation is enabled, local account creation is disabled and Keycloak will authenticate users against identities in the external IdP and retrieve configurable properties about those users for Katonic usernames and email addresses.
Learn more about Keycloak identity federation
Identity brokering
Keycloak can be configured to broker authentication between Katonic and an external authentication or SSO system. When identity brokering is enabled, Katonic will redirect users in the authentication flow to a SAML, OAuth, or OIDC service for authentication. Following authentication in the external service, the user is routed back to Katonic with a token containing user properties.
Learn more about Keycloak identity brokering
Hardware Configurations
The platform is available in two configurations, which differ in a variety of aspects, including the performance capacity, footprint, storage size, and scale capabilities:
Proof of Concept
A single platform-node cluster with a single compute node implementation. This configuration is designed mainly for proof of concepts and evaluations and doesn't include high availability (HA) or performance testing.
Operational Cluster
A scalable cluster implementation that is composed of a standard set of three master nodes, a set of worker nodes dedicated to hosting Katonic platform services, and a set of worker nodes dedicated to hosting compute workloads. This configuration is designed to achieve superior performance that enables real-time execution of analytics, machine learning (ML), and artificial intelligence (AI) applications in a production pipeline.
Set up compatible Kubernetes infrastructure for Katonic
Cluster Requirements
You can deploy Katonic into a Kubernetes cluster that meets the following requirements.
General requirements
Kubernetes 1.19+ Katonic Platform has been validated with Kubernetes 1.19–1.21.
Cluster permissions
Katonic needs permission to install and configure pods in the cluster via our Installer. The Katonic installer is delivered as a containerized Python utility that operates ansible through a kubeconfig that provides service account access to the cluster.
Namespaces
No namespace configuration is necessary prior to installation. Katonic creates the dedicated namespaces as part of the installation Node pool requirements Katonic requires a minimum of three-node pools, one to host the Katonic Platform, one to host Compute workloads and one for storage. Additional optional pools can be added to provide specialized execution hardware for some Compute workloads.
- Master pool requirements
- Boot Disk: 128GB
- Min Nodes: 1
- Max Nodes: 3
- Spec: 2 CPU / 8GB
- Platform pool requirements
- Boot Disk: 128GB
- Min Nodes: 2
- Max Nodes: 3
- Spec: 4 CPU / 16GB
- Labels: agentpool=platform
- Compute pool requirements
- Boot Disk: 128GB
- Recommended Min Nodes: 1
- Max Nodes: Set as necessary to meet demand and resourcing needs
- Recommended min spec: 8 CPU / 32GB
- Labels: agentpool=compute
- Storage pool requirements
- Boot Disk: 128GB
- Recommended Min Nodes: 3
- Max Nodes: Set as necessary to meet demand and resourcing needs
- Recommended min spec: 2 CPU / 8GB
- Labels: agentpool=storage
- Optional GPU compute pool
- Boot Disk: 400GB
- Recommended Min Nodes: 0
- Max Nodes: Set as necessary to meet demand and resourcing needs
- Recommended min Spec: 8 CPU / 16GB / One or more Nvidia GPU Device
- Nodes must be pre-configured with the appropriate Nvidia driver, Nvidia-docker2, and set the default docker runtime to Nvidia.
- Labels: agentpool=gpu
Cluster networking
Katonic relies on Kubernetes network policies to manage secure communication between pods in the cluster. Network policies are implemented by the network plugin, so your cluster uses a networking solution that supports NetworkPolicy, such as Calico.
Ingress and SSL
Katonic must be configured to serve from a specific FQDN, and DNS for that name must resolve to the address of an SSL-terminating load balancer with a valid certificate. The load balancer must target incoming connections on ports 80 and 443 to port 80 on all nodes in the Platform pool. This load balancer must support WebSocket connections.
Kubernetes Cluster Installation
Prerequisites
- In Kubernetes, all machines running Kubernetes are termed as Nodes, this term will be used in the documentation.
- 2 or more machines running Linux (Red Hat Enterprise Linux 8 is used here).
- In RHEL, if SELinux Policies are enforced changes may be required in volume mounts to conform to its security policies.
- Full network connectivity between all nodes in the cluster.
- Unique hostnames are required for each node, use the below command to set the hostname
hostnamectl set-hostname <hostname>
Pre-Install Steps
- Open all required ports for Kubernetes to work
(On Master node Only)
1. sudo firewall-cmd --permanent --add-port=6443/tcp
2. sudo firewall-cmd --permanent --add-port=2379-2380/tcp
3. sudo firewall-cmd --permanent --add-port=10250/tcp
4. sudo firewall-cmd --permanent --add-port=10251/tcp
5. sudo firewall-cmd --permanent --add-port=10252/tcp
6. sudo firewall-cmd --reload
(On Worker nodes only)
sudo firewall-cmd --permanent --add-port=10250/tcp
sudo firewall-cmd --permanent --add-port=30000-32767/tcp
sudo firewall-cmd --reload
- Ready all Packages (On all nodes)
sudo yum update
- Install Docker
(On all nodes)
sudo yum install -y yum-utils
sudo yum-config-manager --add-repo https://download.docker.com/linux/rhel/docker-ce.repo
sudo yum install docker-ce docker-ce-cli containerd.io
sudo systemctl enable docker
sudo systemctl start docker
- Verify Docker status using sudo systemctl status docker (Should be running)
Kubernetes Installation
- Add Kubernetes Packages to Yum Repository
(On all nodes)Edit /etc/yum.repos.d/kubernetes.repo
[kubernetes]
name=Kubernetes
baseurl=https://packages.cloud.google.com/yum/repos/kubernetes-el7-x86_64
enabled=1
gpgcheck=1
repo_gpgcheck=1
gpgkey=https://packages.cloud.google.com/yum/doc/yum-key.gpg https://packages.cloud.google.com/yum/doc/rpm-package-key.gpg
exclude=kubelet kubeadm kubectl
- Install Kubernetes Packages
(On all nodes)
sudo dnf install -y kubelet kubeadm kubectl --disableexcludes=kubernetes
sudo systemctl enable kubelet
sudo systemctl start kubelet
Deploying Kubernetes Cluster
- Turn off swap memory
(On all nodes)
sudo swapoff –a
- As an additional step, edit /etc/fstab file and comment out the swap mounts to prevent swap mounts after the restart.
(On all nodes) - Initiate Kubernetes master node
(On Master node only)
sudo kubeadm init
If the cluster is using a custom CIDR pool, or if you wish to manually configure it, use sudo kubeadm init --pod-network-cidr=<CIDR-IP>
- Once the above command finishes, it will display a kubeadm join message at the end. Copy the entire command.
- Configure Cluster access
(On Master node only) - mkdir -p $HOME/.kube
mkdir -p $HOME/.kube
sudo cp -i /etc/kubernetes/admin.conf $HOME/.kube/config
sudo chown $(id -u):$(id -g) $HOME/.kube/config
- Deploy pod networking
(On Master node only)
kubectl create -f https://docs.projectcalico.org/manifests/tigera-operator.yaml
kubectl create -f https://docs.projectcalico.org/manifests/custom-resources.yaml
- Join the Worker Nodes to Cluster,
(On Worker nodes only). Use the kubeadm join command copied earlier and use it.
Verify Installation (On Master Node)
- Check if all nodes are registered
kubectl get nodes
- Check if pods are running. (All pods should be running)
Kubectl get pods -A
For troubleshooting and references, visit the Kubernetes Docs.
Note: This is just one of the ways to install Kubernetes on a Linux Machine. For large scale deployments, we can use automations like Kubespray.
Katonic Platform Installation
Installation process
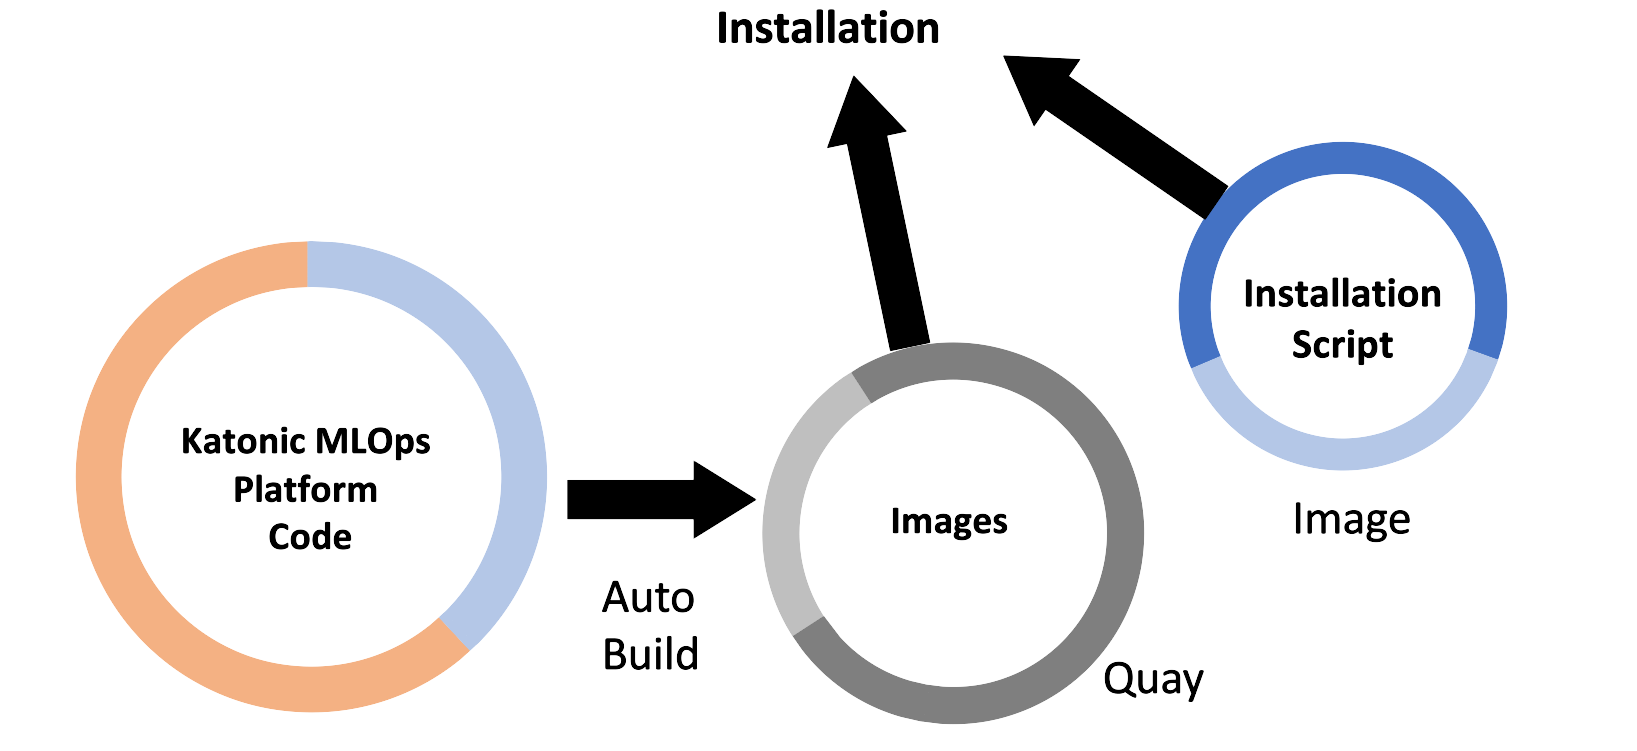
The Katonic platform runs on Kubernetes. To simplify the deployment and configuration of Katonic services, Katonic provides an install automation tool called the katonic-installer that will deploy Katonic into your compatible cluster. The katonic-installer is a Python application delivered in a Docker container, and can be run locally or as a job inside the target cluster.
Requirements
The install automation tools are delivered as a Docker image, and must run on an installation workstation that meets the following requirements:
Access to [quay.io[(https://quay.io/)] and credentials for an installation service account with access to the Katonic installer image and upstream image repositories. Throughout these instructions, these credentials will be referred to as $QUAY_USERNAME and $QUAY_PASSWORD. Contact your Katonic account team if you need new credentials. The hosting cluster must have access to the following domains through the Internet to retrieve component and dependency images for online installation:
quay.io
k8s.gcr.io
docker.elastic.co
docker.io
gcr.io
Alternatively, you can configure the katonic-installer to point to a private docker registry and application registry for offline installation. please reach out to your account manager if you would like an offline/private installation.
Create a new directory to go ahead with the installation
mkdir katonic
cd katonic
Custom certificates
Katonic MLOps platform is accessed using HTTPS protocol, for that you need to pass to files listed below to secure the Katonic MLOps platform using custom certificates.
- PEM encoded public key certificate (file name must end with .crt extension).
- The private key is associated with the given certificate (file name must end with a .key extension).
Put these files in the katonic directory.
Pull the katonic-installer image
- Log in to quay.io with the credentials described in the requirements previous section.
docker login quay.io
- Find the image URI for the version of the katonic-installer you want to use from the release notes.
- Pull the image to your local machine.
docker pull quay.io/katonic/katonic-installer:v3.2
Initialize
Initialize the installer application to generate a template configuration file named katonic.yml.
Note: This command must be entered inside the katonic directory
docker run -it --rm --name generating-yaml \
-v $(pwd):/install \
quay.io/katonic/katonic-installer:v3.1.0 init
Edit the configuration file with all necessary details about the target cluster, storage systems, and hosting domain. Read the configuration reference for more information about available keys, and consult the configuration examples for guidance on getting started.
Katonic.yml configuration file
schema: 1.0
version: 3.2
kubernetes_distribution: kubernetes
domain_name: # Subdomain for accessing platform
adminUsername: # Email ID for Admin user
adminPassword: # Password for Admin user
Installing Katonic MLOps Platform
docker run -it --rm --name install-katonic \
-e withAKS=False \
-v /root/.kube:/root/.kube \
-v $(pwd):/inventory \
quay.io/katonic/katonic-installer:v3.1.0
Installation Verification
The installation process can take up to 45 minutes to fully complete. The installer will output verbose logs, and commands to take kubectl access of deployed cluster and surface any errors it encounters. After installation, you can use the following commands to check whether all applications are in a running state or not.
kubectl get pods --all-namespace
This will show the status of all pods being created by the installation process. If you see any pods enter a crash loop or hang in a non-ready state, you can get logs from that pod by running:
kubectl logs $POD_NAME --namespace $NAMESPACE_NAME
If the installation completes successfully, you should see a message that says:
TASK [platform-deployment : Credentials to access Katonic MLOps Platform] *******************************ok: [localhost] => {
    "msg": [
        "Platform Domain: $domain_name",
        "Username: $adminUsername",
        "Password: $adminPassword"
    ]
}
However, the application will only be accessible via HTTPS at that FQDN if you have configured DNS for the name to point to an istio ingress load balancer with the appropriate SSL certificate that forwards traffic to your platform nodes.
Post Installation Steps
Domain
You can identify a domain for your cluster. This allows you to use any domain as the location for the cluster. For example, you could set the domain for the cluster as katonic.company.com.
For this option to work, you will need to set the required DNS routing rules between the domain and the IP address of the cluster after the katonic-installer has finished running.
You will need to create a CNAME/A listing for .<your_domain> with the IP address of the auto scaler for the cluster. Make sure you include the wildcard: *.
The domain is the same domain you entered as <your_domain> in the katonic-installer
To get the IP address of the cluster run the following command has been deployed:
kubectl get svc istio-ingressgateway -n istio-system | awk '{print $4}' | tail -n +2
Test and troubleshoot
- Login to the Katonic application and that all the navigation panel options are operational.
Failure of this test means you must check that Keycloak was set up properly.
- Create a new project and launch a Jupyter/JupyterLab workspace.
Failure of this test means you must check that default environment images have been loaded in the cluster.
- Publish an app with flask or shiny apps.
Failure of this test means you must check that the environment images have flask and shiny installed.