Standalone Workspace
A Katonic standalone workspace is an interactive environment for developing and running code. You can conduct research, analyze data, train models, and more. Use workspaces to work in the development environment of your choice, like Jupyter notebooks, RStudio, VS Code, and many other customizable environments. The environment is pre-configured (meaning all your dependencies are preinstalled). All the files and data in your workspace will be preserved for you, across restarts. Your workspace has automatic version control and scalable compute available so that you can use unlimited compute resources to do your data science research.
Katonic has built-in support for JupyterLab,Jupyter, R Studio, Visual Studio Code and Katonic Studio.
Supported Workspaces
There are a variety of workspaces that are supported by Katonic Platform:
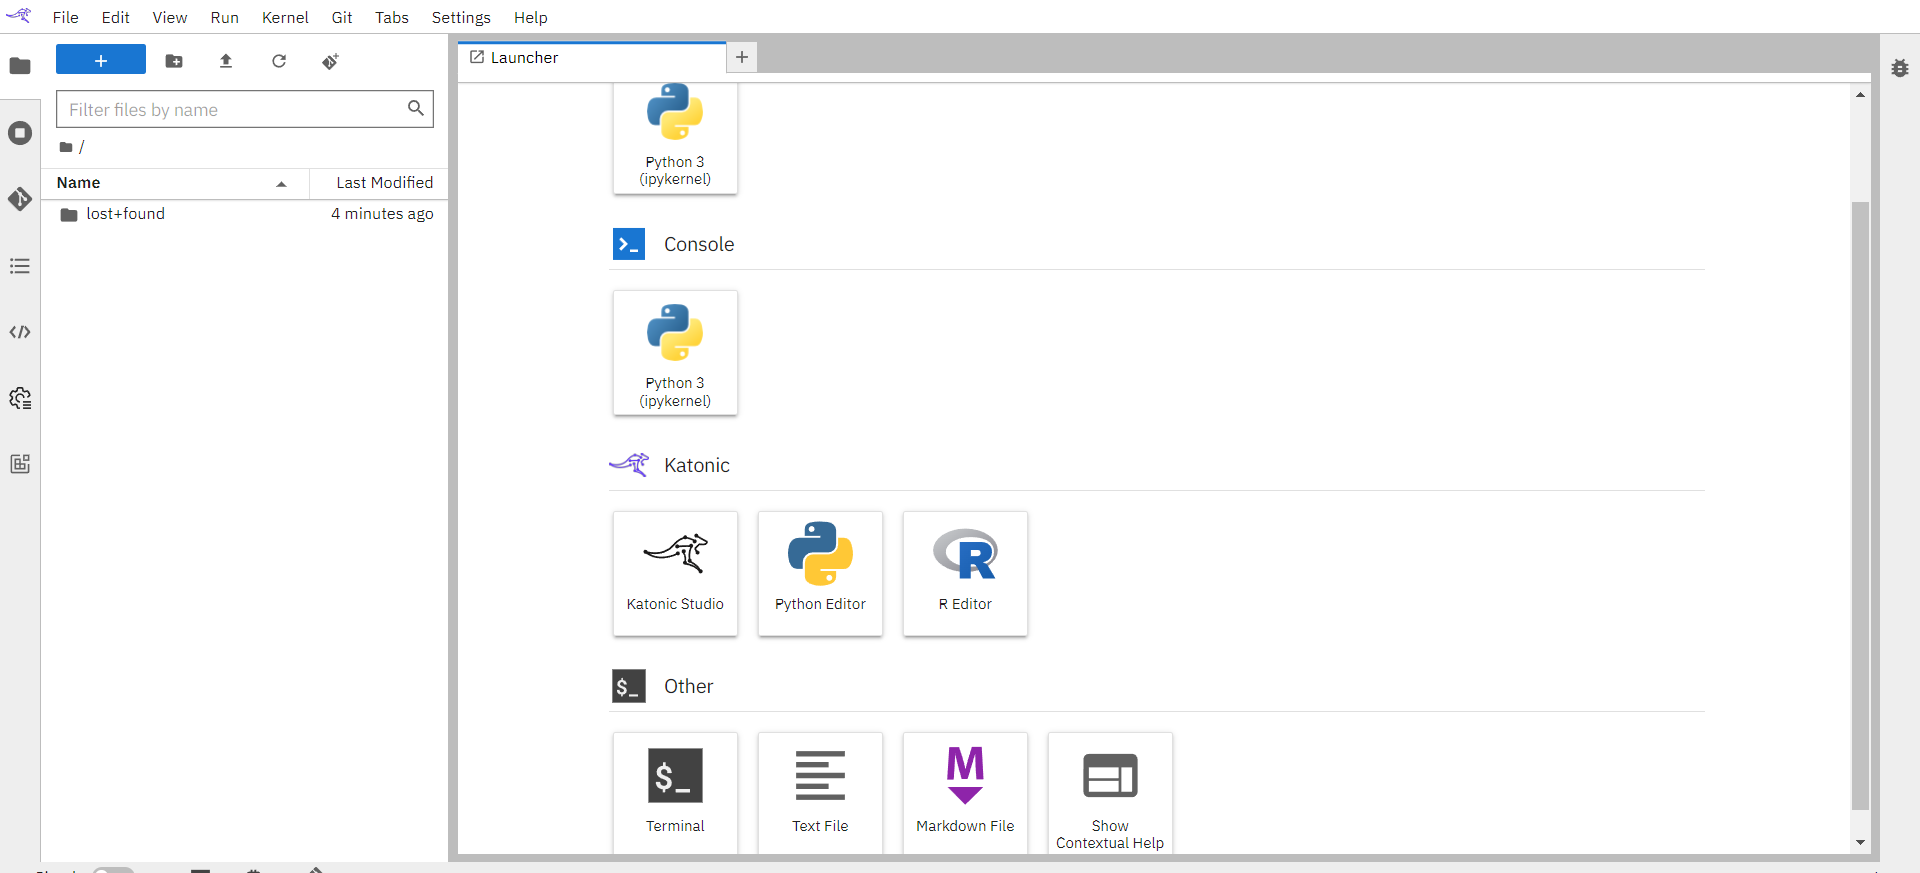
JupyterLab
JupyterLab is a next-generation web-based user interface for Project Jupyter. JupyterLab enables you to work with documents and activities such as Jupyter notebooks, text editors, terminals, and custom components in a flexible, integrated, and extensible manner.
Learn more about JupyterLab.
Various types of JupyterLab
There are different types of environment for JupyterLab that Katonic workspace can support:
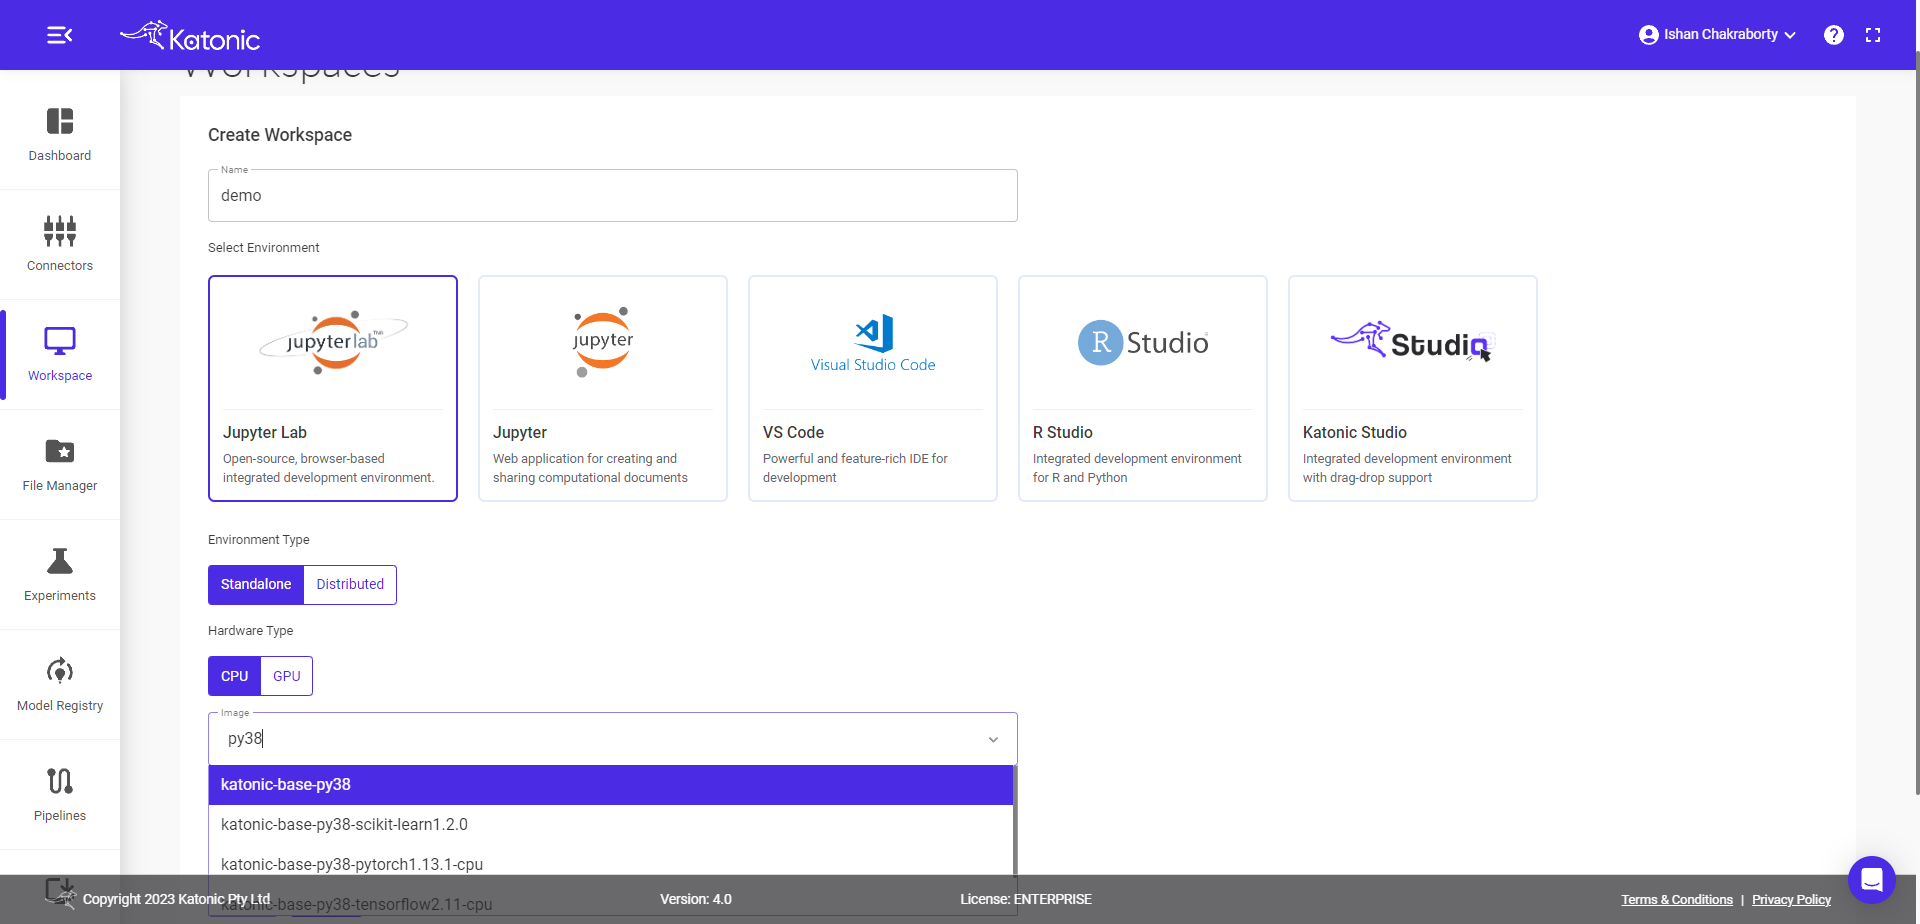
katonic-base-pyXX - Katonic base image is where you can only spin notebooks and work using different versions of python like katonic-base-py36,katonic-base-py37,katonic-base-py38 and katonic-base-py39.
katonic-base-py38-scikit-learn1.2.0 - This image will have python 3.8 along with scikit-learn packages installed in the environment.
katonic-base-py38-pytorch1.13.1-cpu - This image will have python 3.8 along with pytorch packages installed in the environment.
katonic-base-py38-tensorflow2.11-cpu - This image will have python 3.8 along with tensorflow packages installed in the environment.
katonic-R-Julia - This image is the development area for R and Julia language.
katonic-base-gpu - If you want to work with GPUs then this is the right image for you. But make sure you have GPU attached to your cluster.
katonic-s3-browser - In katonic s3 browser you will be able to attach the s3 bucket to your workspace so that you can pull or push your codes/data into it.
Jupyter
Jupyter is a project and community whose goal is to "develop open-source software, open-standards, and services for interactive computing across dozens of programming languages".
Learn more about Jupyter.
Various types of Jupyter
There are different types of environment for Jupyter that Katonic workspace can support:
katonic-base-py38-scikit-learn1.2.0 - This image will have python 3.8 along with scikit-learn packages installed in the environment.
katonic-base-py38-pytorch1.13.1-cpu - This image will have python 3.8 along with pytorch packages installed in the environment.
katonic-base-py38-tensorflow2.11-cpu - This image will have python 3.8 along with tensorflow packages installed in the environment.
katonic-R-Julia - This image is the development area for R and Julia language.
katonic-base-pyXX - Katonic base image is where you can only spin notebooks and work using different versions of python like katonic-base-py36,katonic-base-py37,katonic-base-py38 and katonic-base-py39.
katonic-base-gpu - If you want to work with GPUs then this is the right image for you. But make sure you have GPU attached to your cluster.
Visual Studio Code
Visual Studio Code is a lightweight but powerful source code editor which runs on your desktop and is available for Windows, macOS and Linux. It comes with built-in support for JavaScript, TypeScript and Node.js and has a rich ecosystem of extensions for other languages (such as C++, C#, Java, Python, PHP, Go) and runtimes (such as .NET and Unity).
Learn more about Visual Studio Code.
Visual Studio WebApps
There are different WebApps for Visual Studio Code that Katonic workspace can support:
Streamlit - Streamlit Applications with its different versions.
Dash - Dash Applications with its different version.
Node - Node Applications with its different version.
R-Studio
RStudio is an integrated development environment (IDE) for R. It includes a console, syntax-highlighting editor that supports direct code execution, as well as tools for plotting, history, debugging and workspace management.
Learn more about R Studio.
Katonic-Studio
In Katonic Studio you can drag notebooks or scripts to create a customized and scalable pipeline.
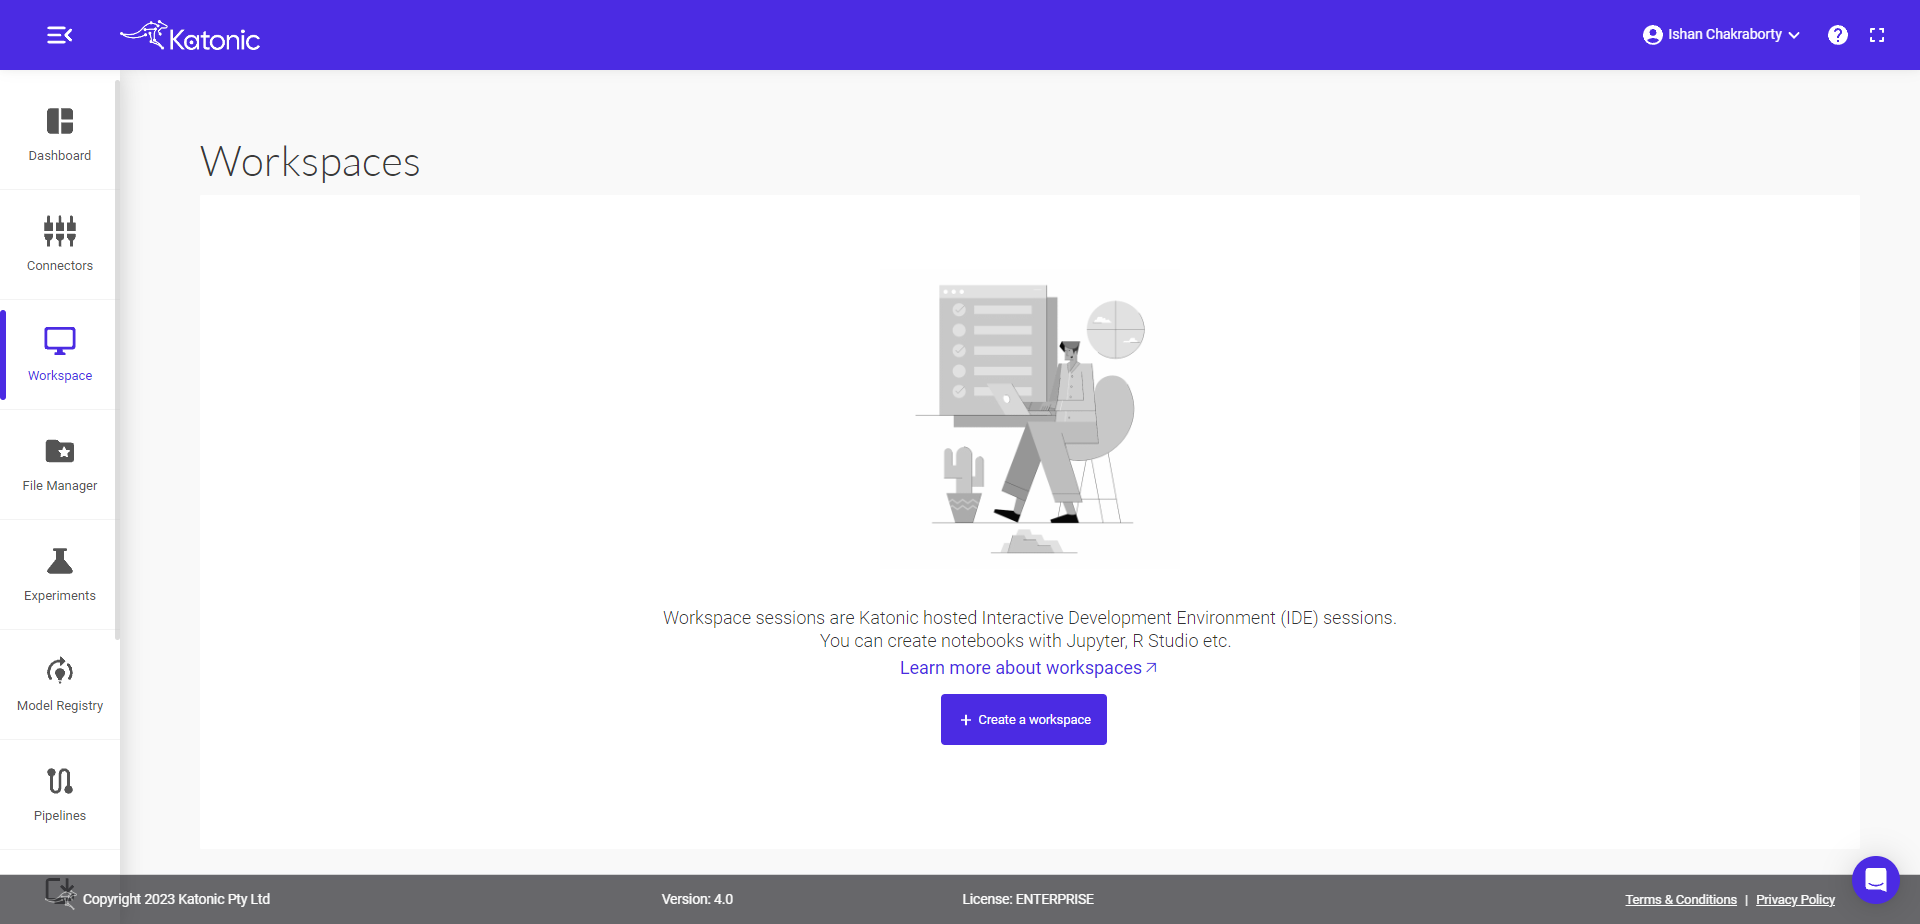
Launch a workspace
Workspace sessions are interactive sessions hosted by a Katonic executor where you can interact with code notebooks like Jupyter, RStudio and Visual Studio Code. The software tools and associated configurations available in your session are called Workspaces.
1. Launching a workspace with JupyterLab
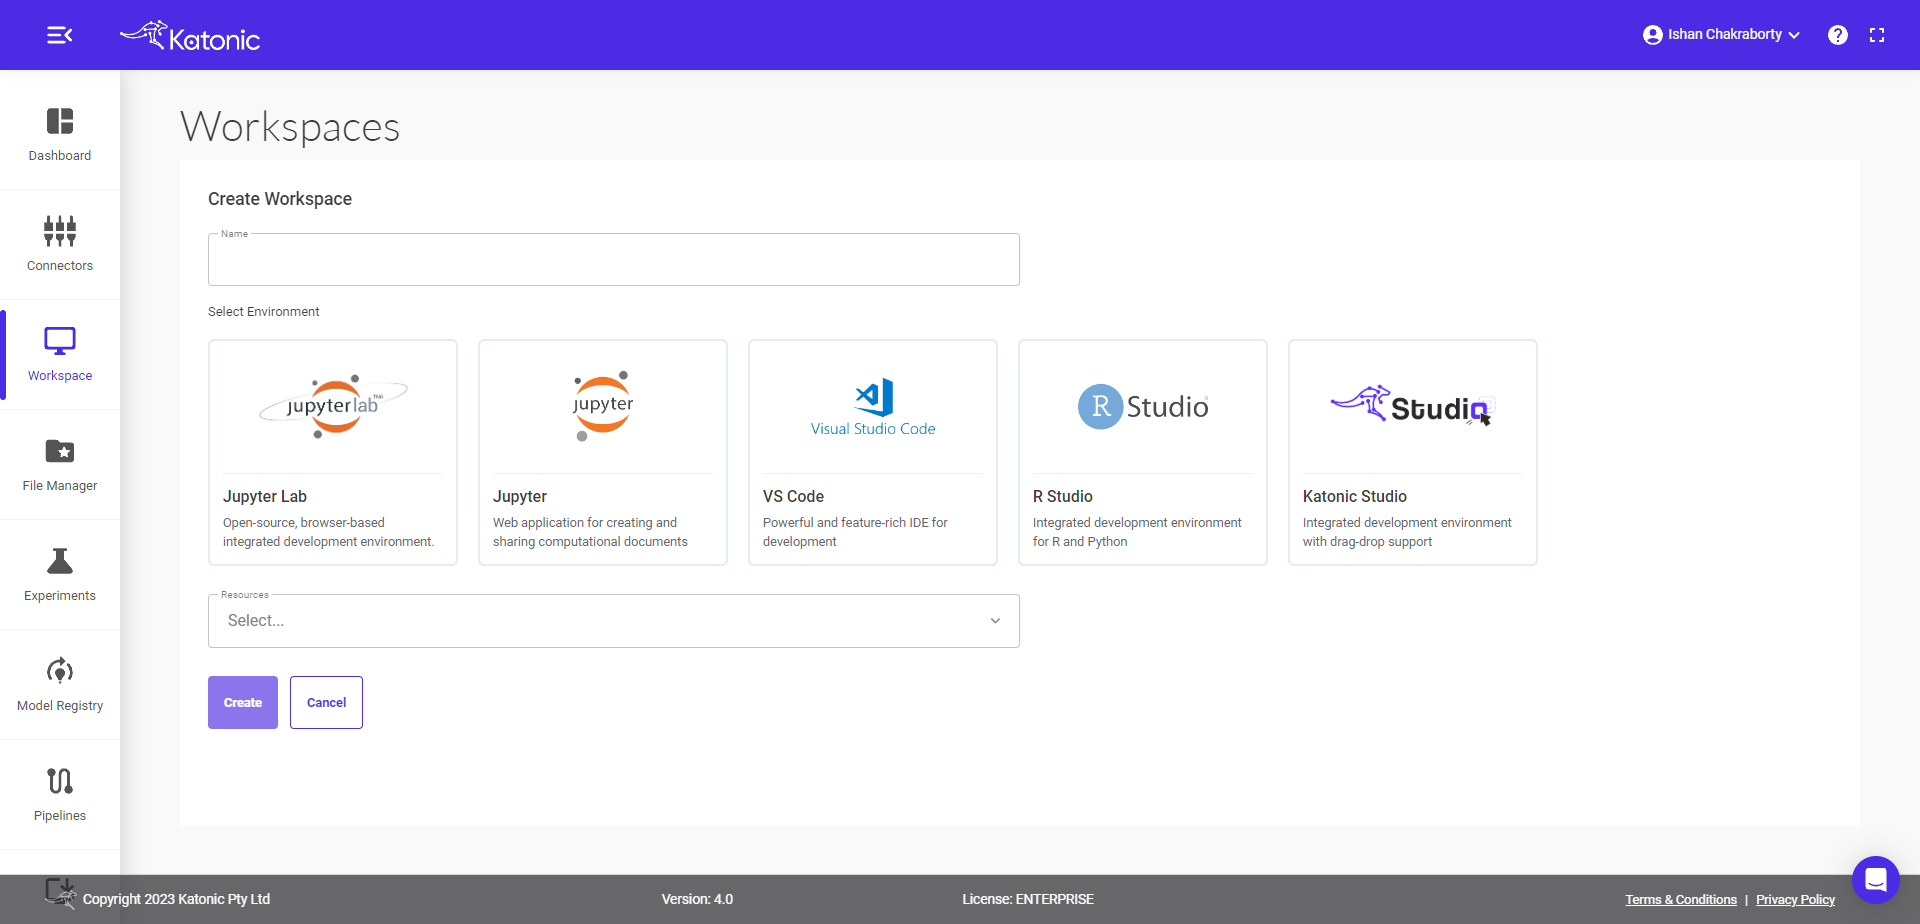
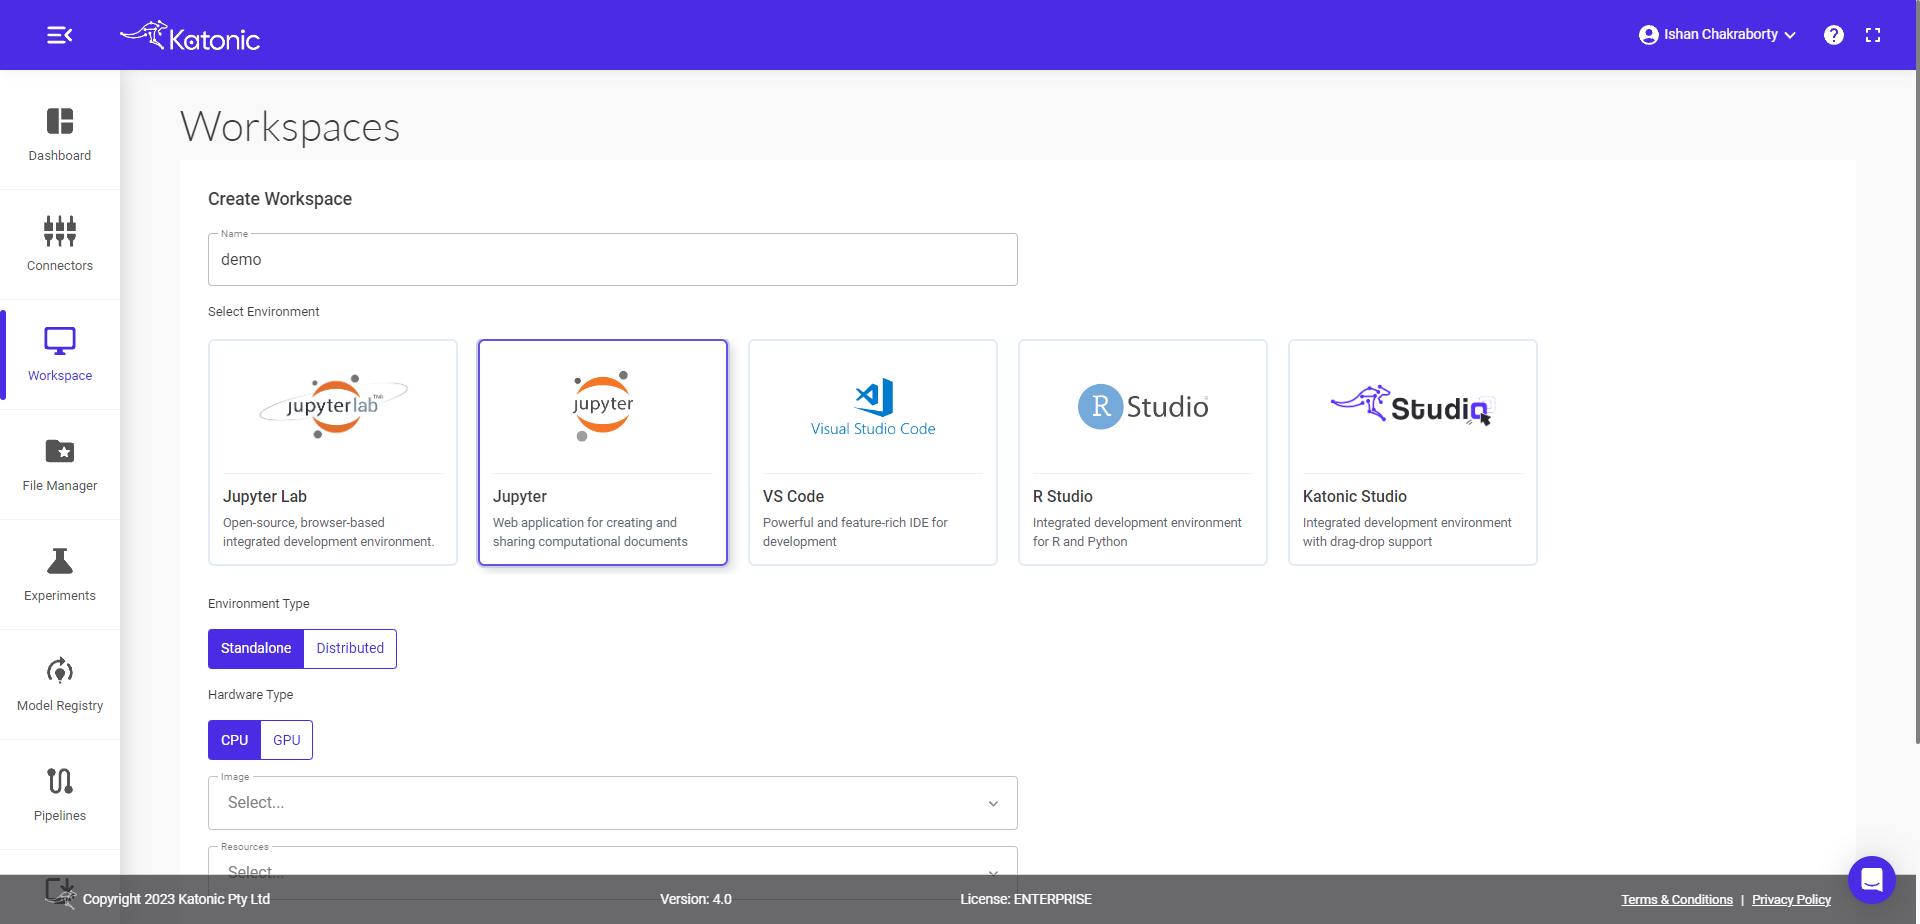
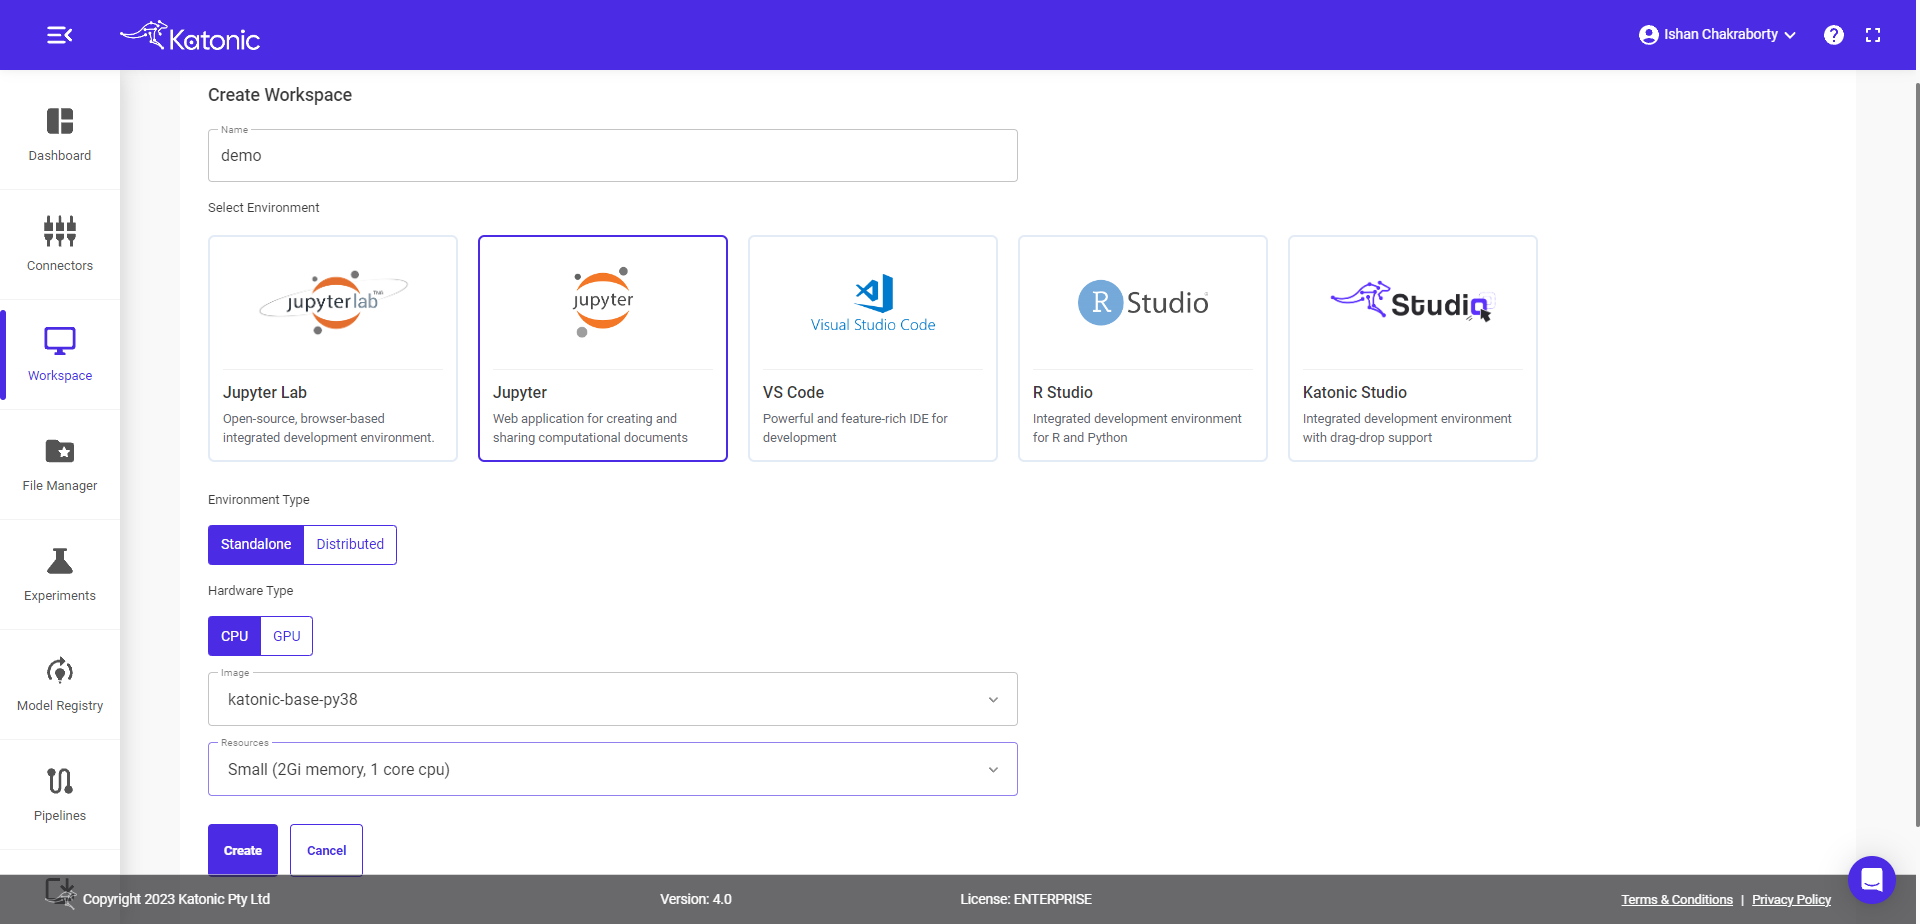
1.1. Click on Workspace from the left sidebar.
1.2. Click on "Create Workspace".

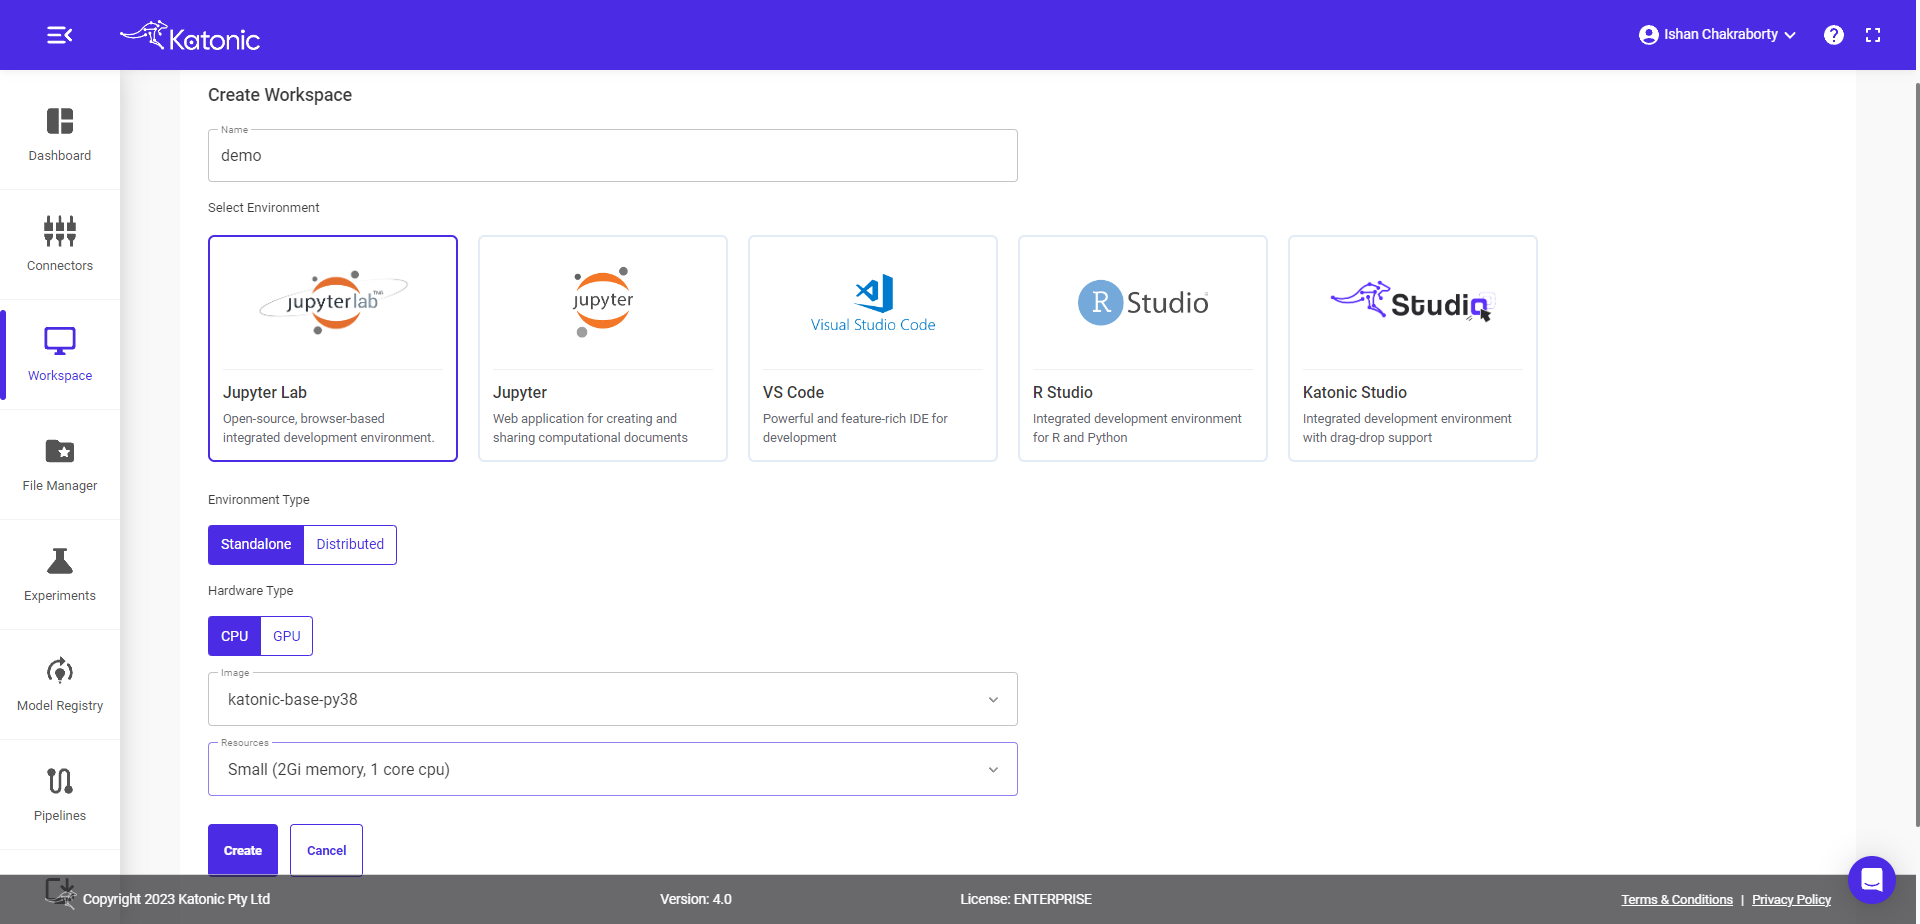
1.3. Enter a name for your workspace.

1.4. Select an environment for your workspace. An environment is the software configuration (such as language and packages) that will be used in your workspace. Select Jupyterlab for example.
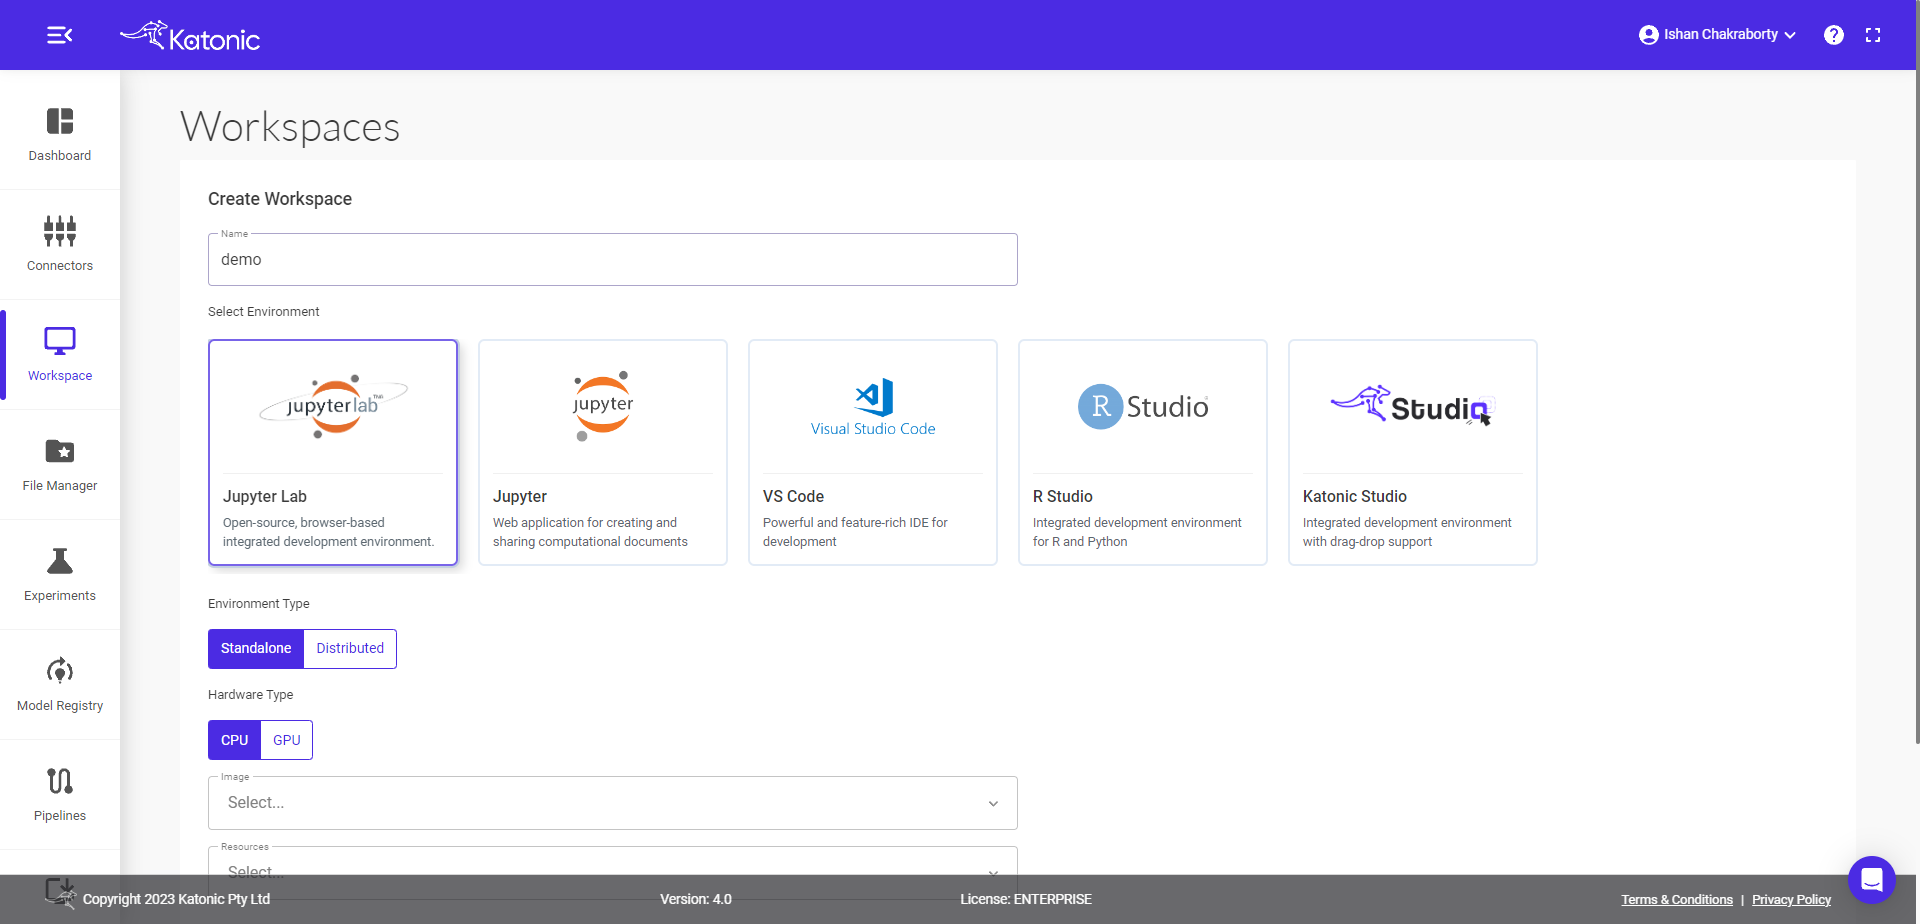
1.5. Select Image depending upon what environment you select like for JupyterLab we have Katonic Studio, Katonic Base and many more.
1.6. Select Resources. A resources represents the compute hardware used for your run. It can be a virtual instance in a cloud services provider, or a physical machine running in your deployment’s on-premise data center.
1.7. Select the Resources you want to allocate to your Workspace and Click on "Create".

Other types of JupyterLab
You can create workspace of various Machine Learning and Deep Learning algorithms by using the following drop down.
2. Start Workspace
2.1. Once you create a workspace you can see it will be in a "processing" state.

2.2. Once the Workspace is in a running state it will show the connect button with which you can connect to the environment server.

2.3. When you connect to a Workspace, a new session is created on a machine and your browser is automatically redirected to the selected environment (JupyterLab) UI in a new tab.
2.4. Once your workspace is up and running, you will see a fresh selected interface like JupyterLab interface.
3. Launching a workspace with Jupyter
3.1. Click on Workspace from the left sidebar.

3.2. Click on "Create Workspace".

3.3. Enter a name for your workspace.
3.4. Select an environment for your workspace. An environment is the software configuration (such as language and packages) that will be used in your workspace. Select Jupyter for example.
3.5. Select Image depending upon what environment you select like for Jupyter.

3.6. Select Resources. A resources represents the compute hardware used for your run. It can be a virtual instance in a cloud services provider, or a physical machine running in your deployment’s on-premise data center.
3.7. Click on Create.
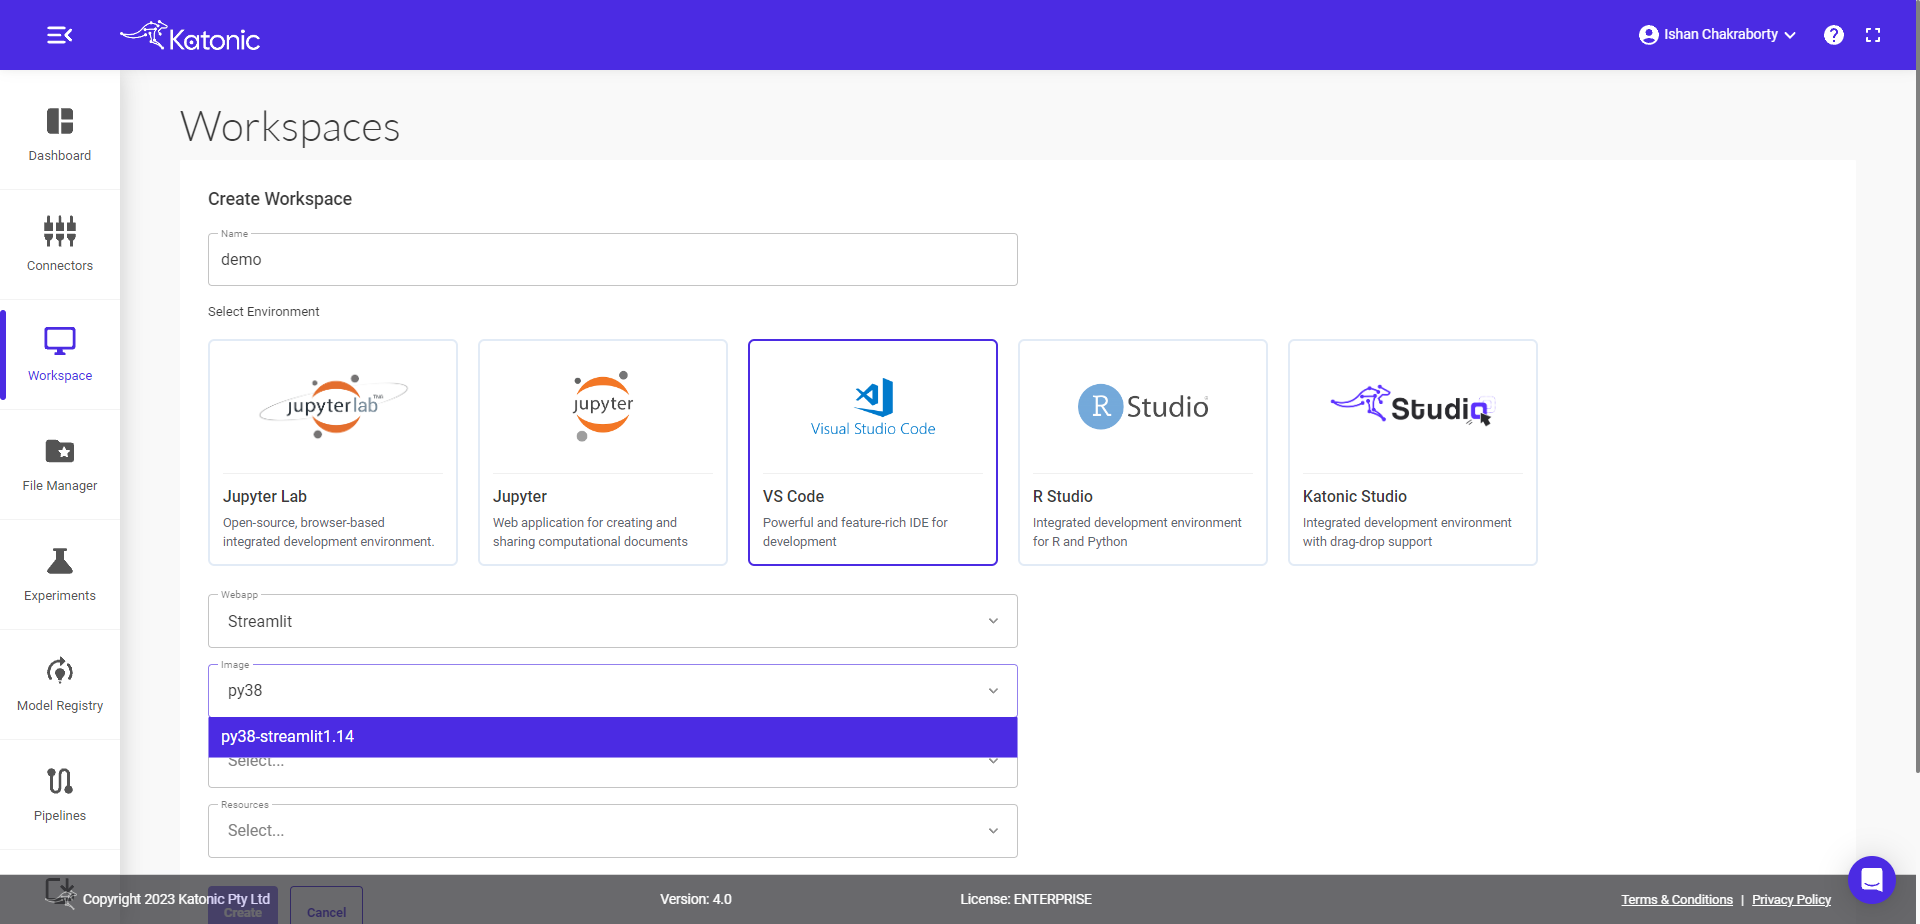
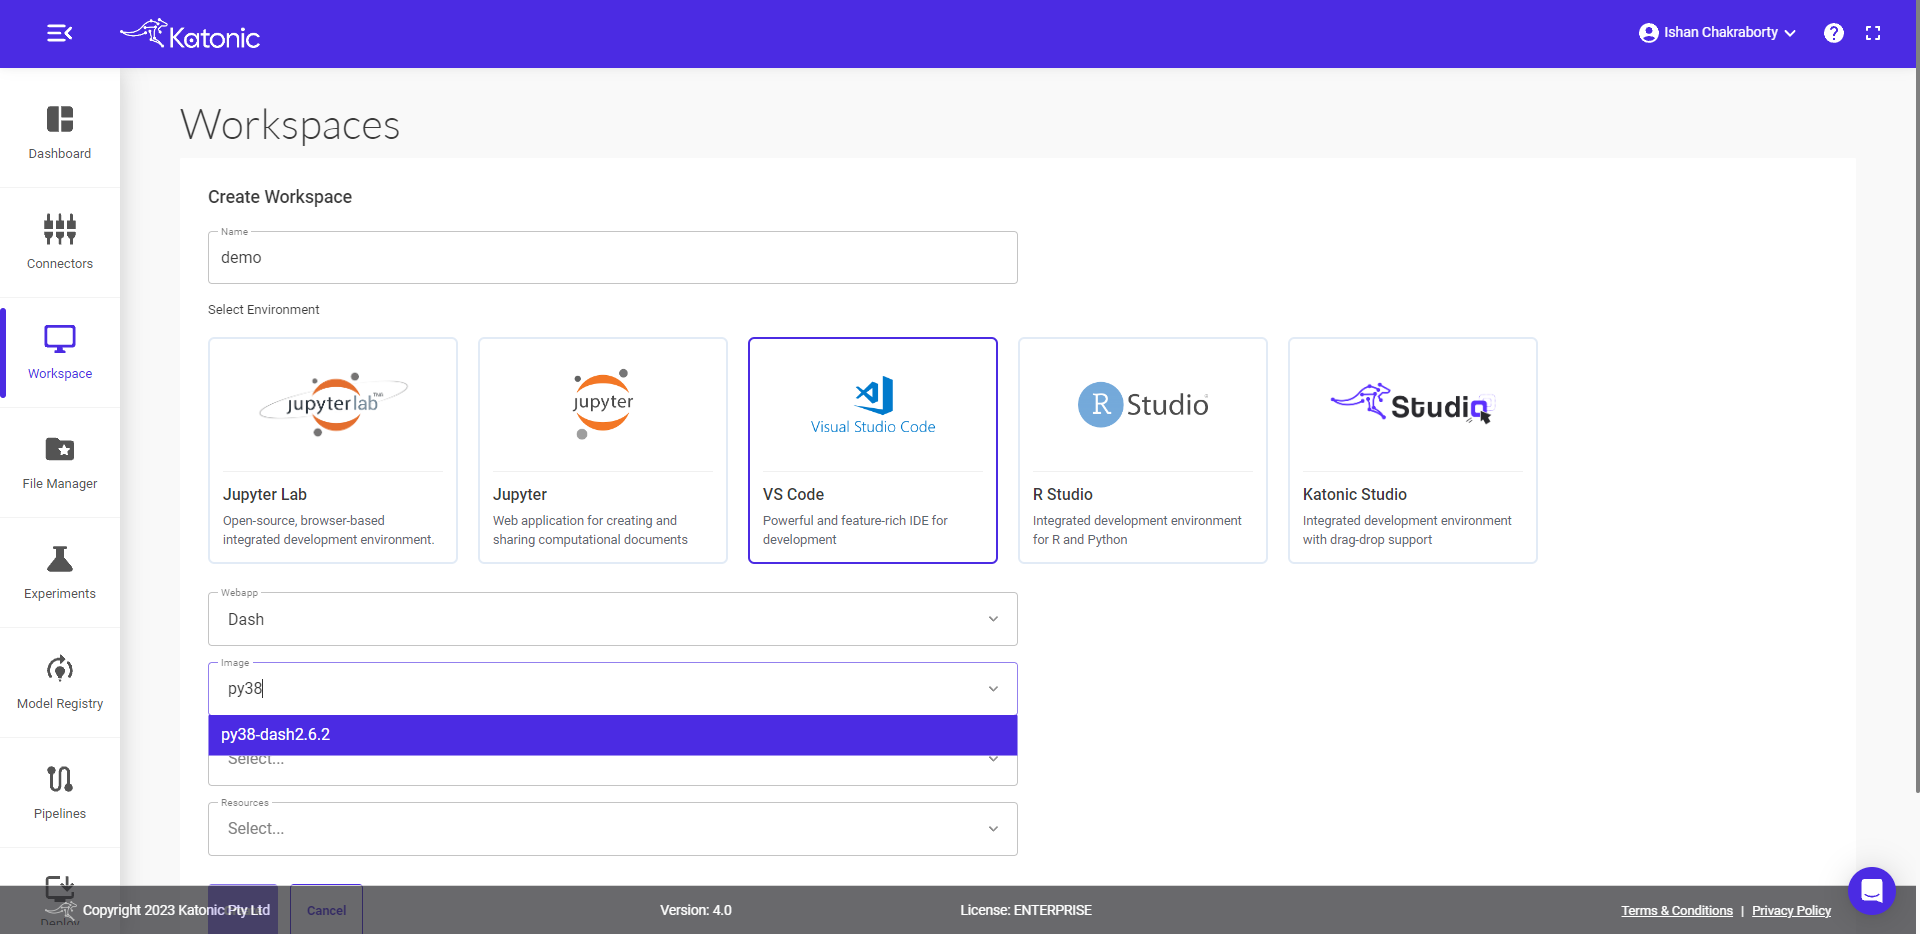
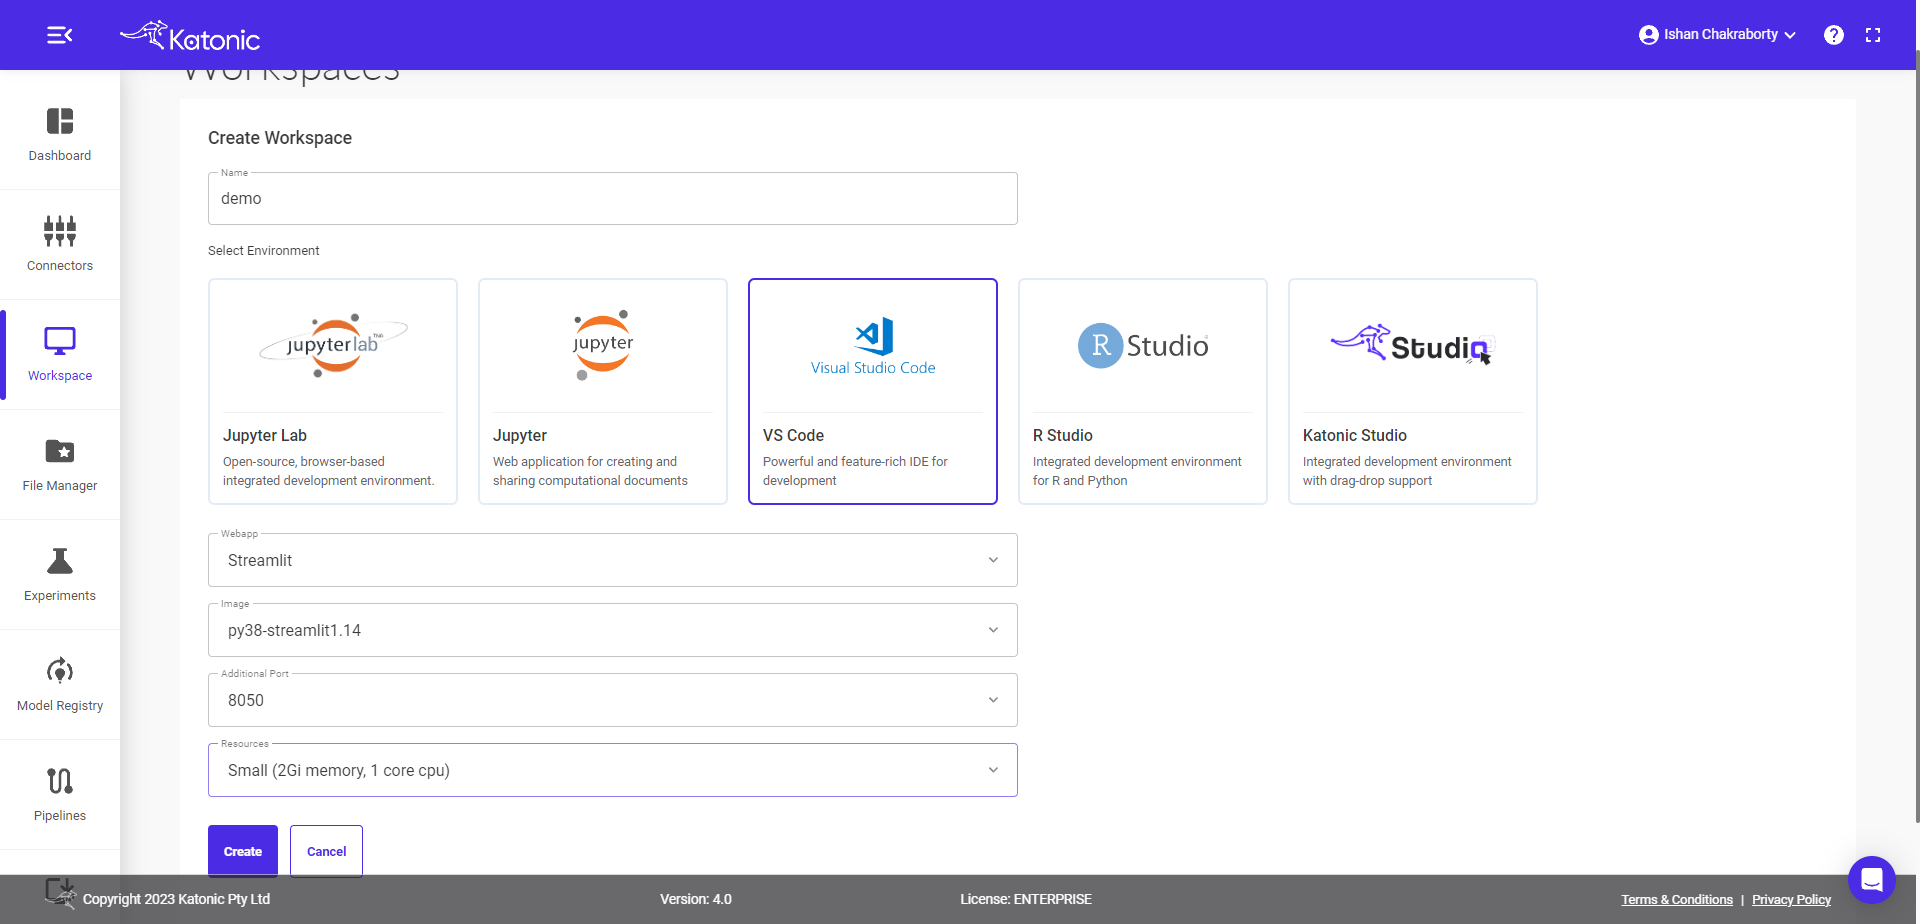
4. Launching a workspace with Visual Studio Code
When using a VSCode-equipped Katonic environment you can launch VSCode from the Workspace's Dashboard just as you would launch an RStudio or Jupyter workspace.
4.1. Click on Workspace from the left sidebar navigation menu.

4.2. Click on "Create Workspace".
4.3. Enter a name for your workspace.
4.4. Select an environment for your workspace. An environment is the software configuration (such as language and packages) that will be used in your workspace. Select Visual Studio Code.
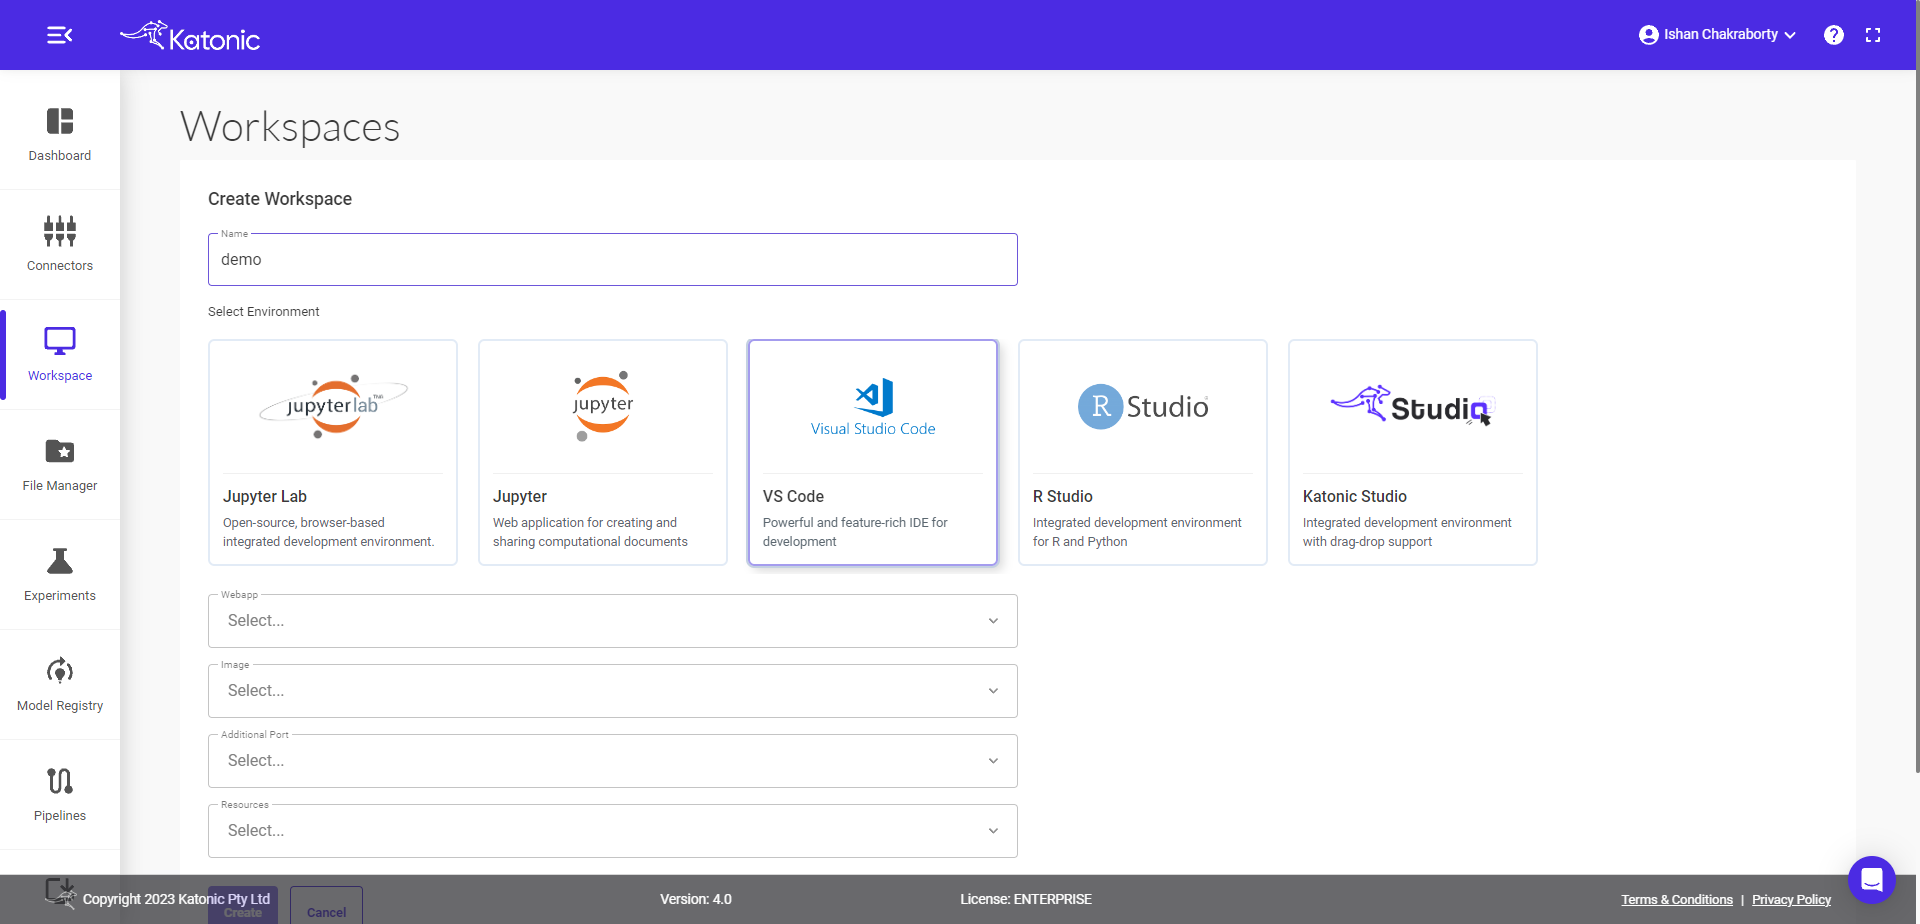
4.5. Select the WebApp you want to use for your app. For now, we are using Streamlit. Select Image from different versions for your selected application.

4.6. Select the Additional Port you want to allocate to your workspace. For now, we are using port "8050"
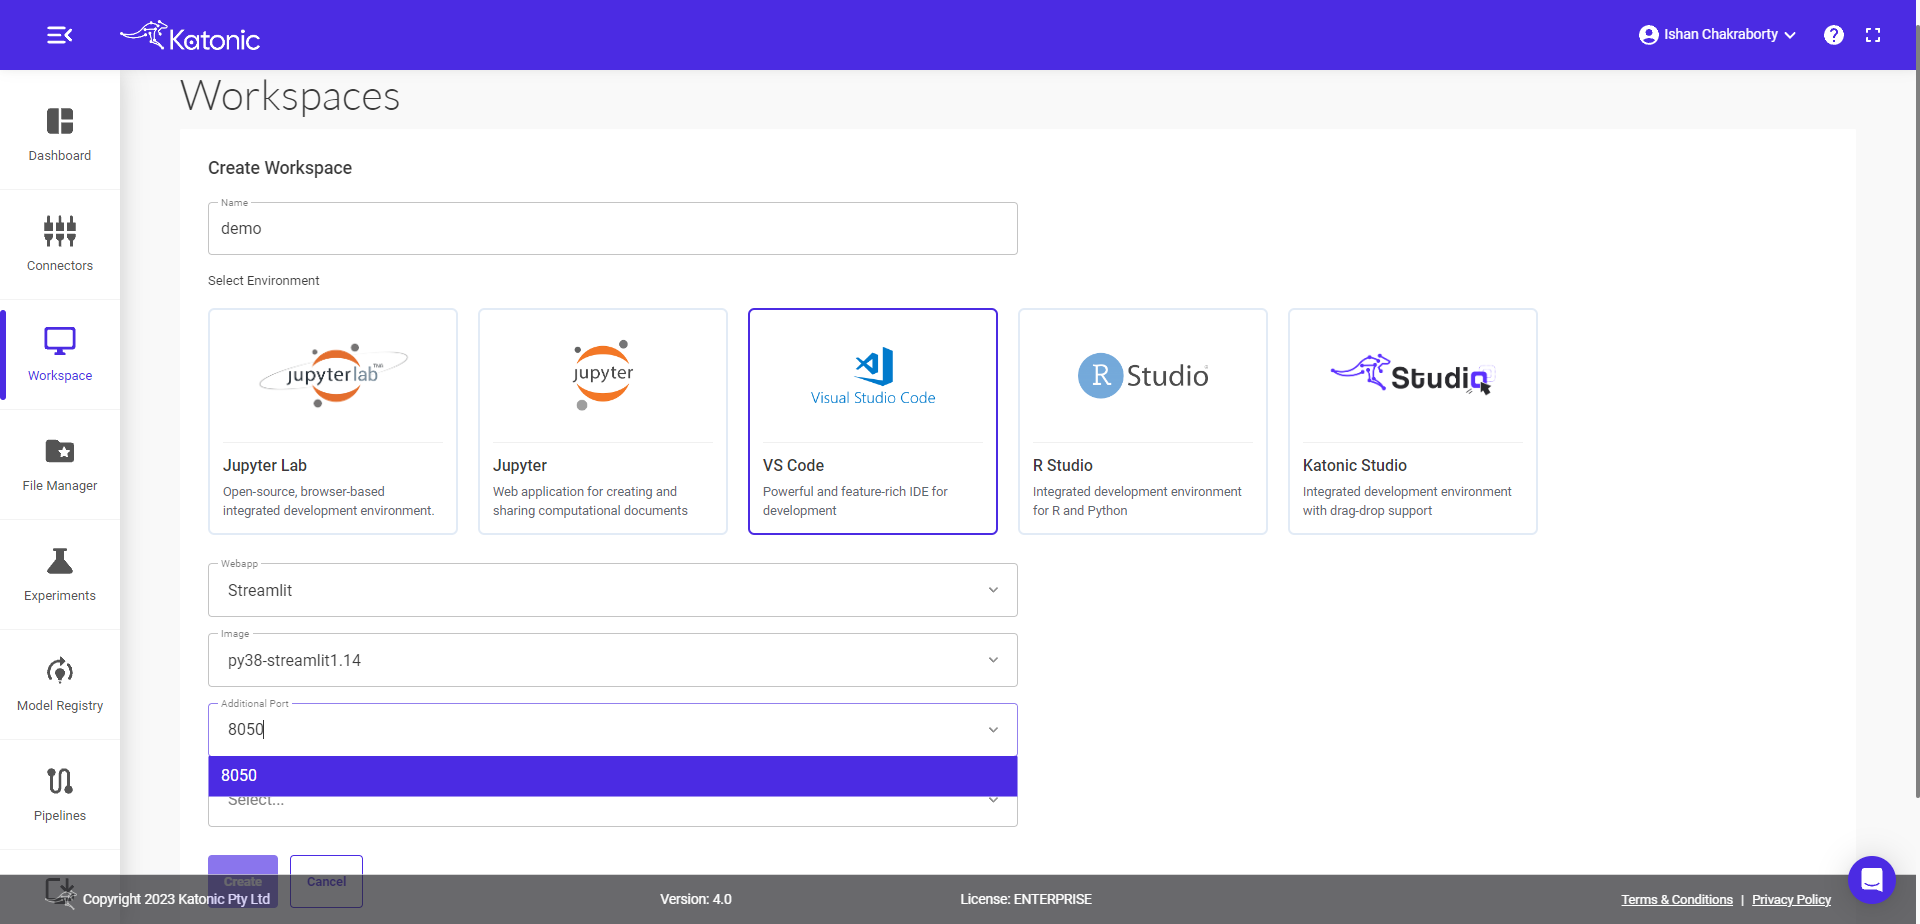
4.7. Select Resources. A resource represents the compute hardware used for your run. It can be a virtual instance in a cloud services provider, or a physical machine running in your deployment’s on-premise data center.
4.8. Click on Create.
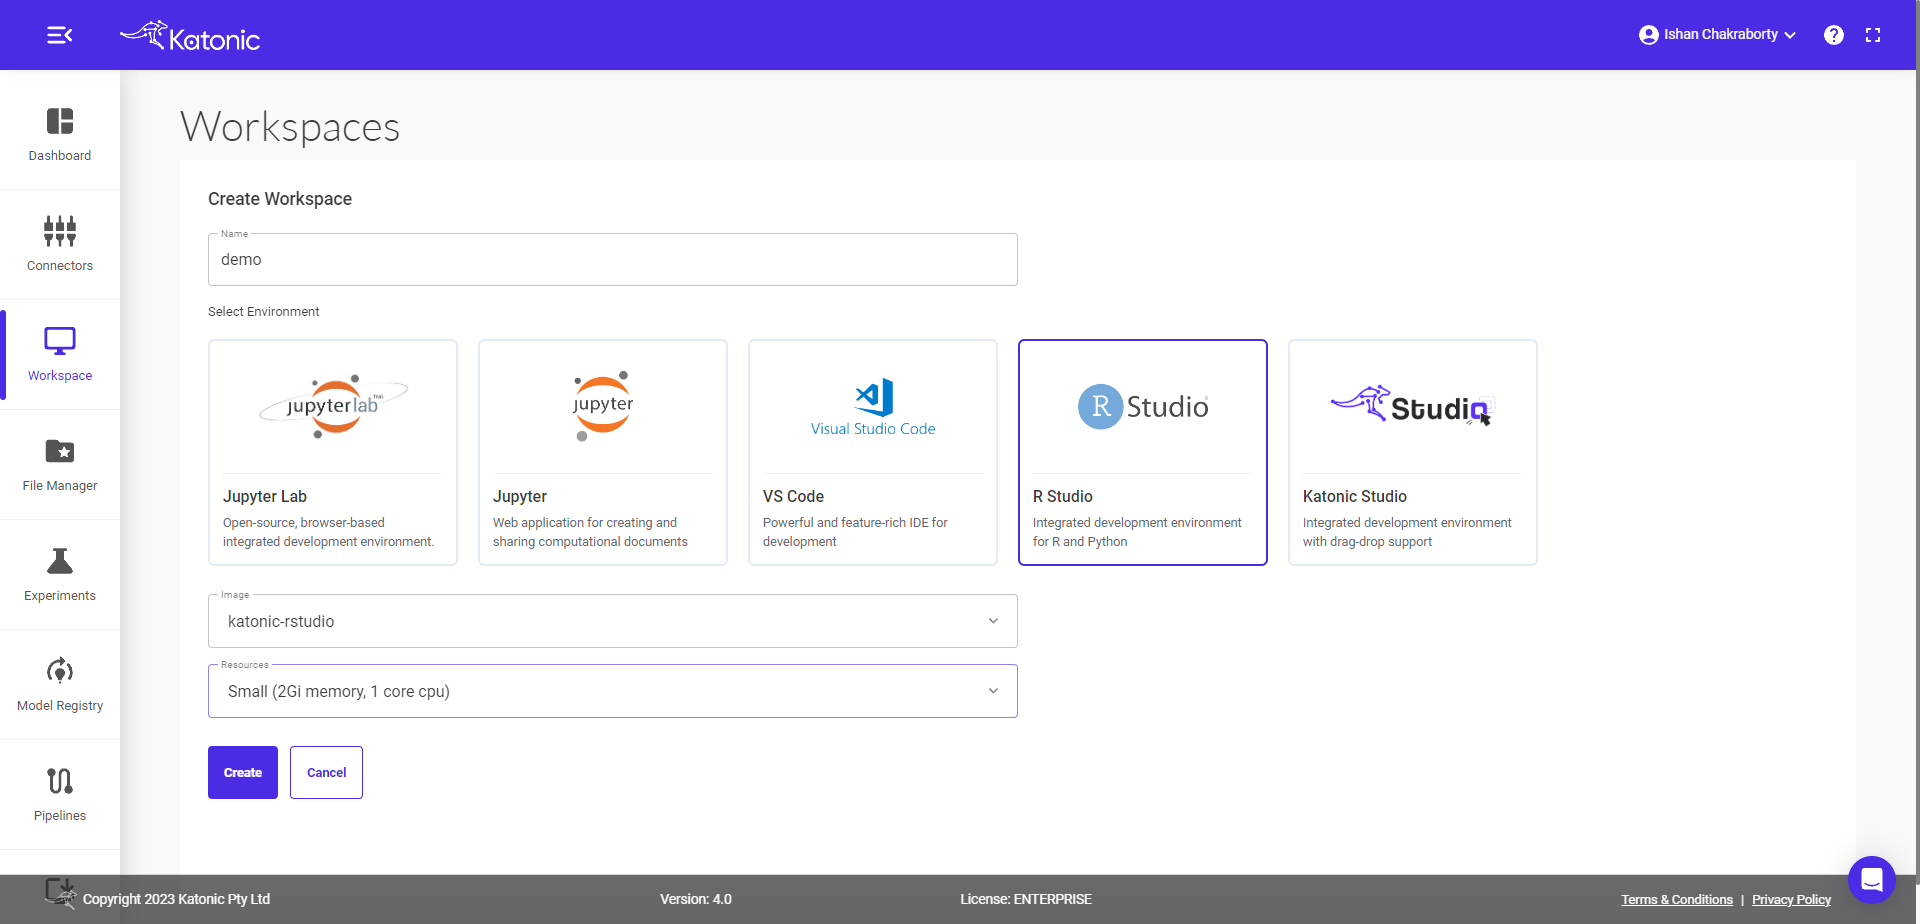
5. Launching a workspace with R-Studio
5.1. Click on Workspace from the left sidebar.

5.2. Click on "Create Workspace".

5.3. Enter a name for your workspace.
5.4. Select an environment for your workspace. An environment is the software configuration (such as language and packages) that will be used in your workspace. Select R-Studio for example.

5.5. Select Image depending upon what environment you select like for Jupyter.(example - katonic-rstudio)
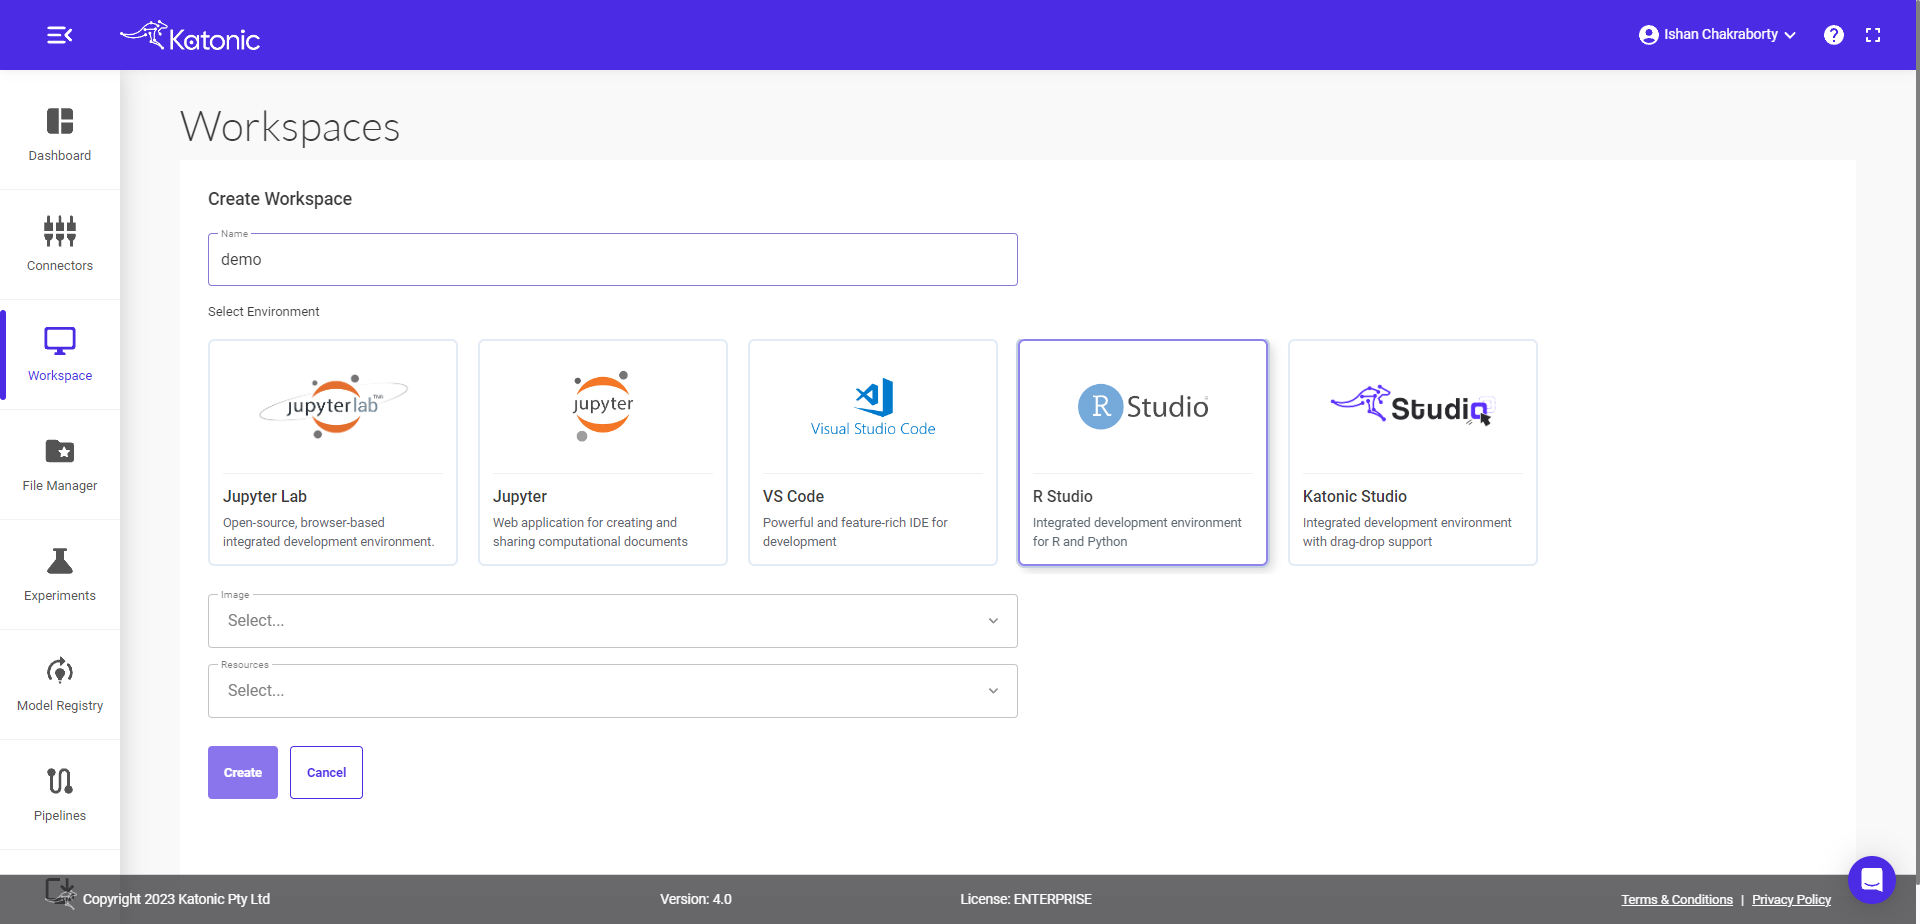
5.6. Select Resources. A resources represents the compute hardware used for your run. It can be a virtual instance in a cloud services provider, or a physical machine running in your deployment’s on-premise data center.
5.7. Click on Create.
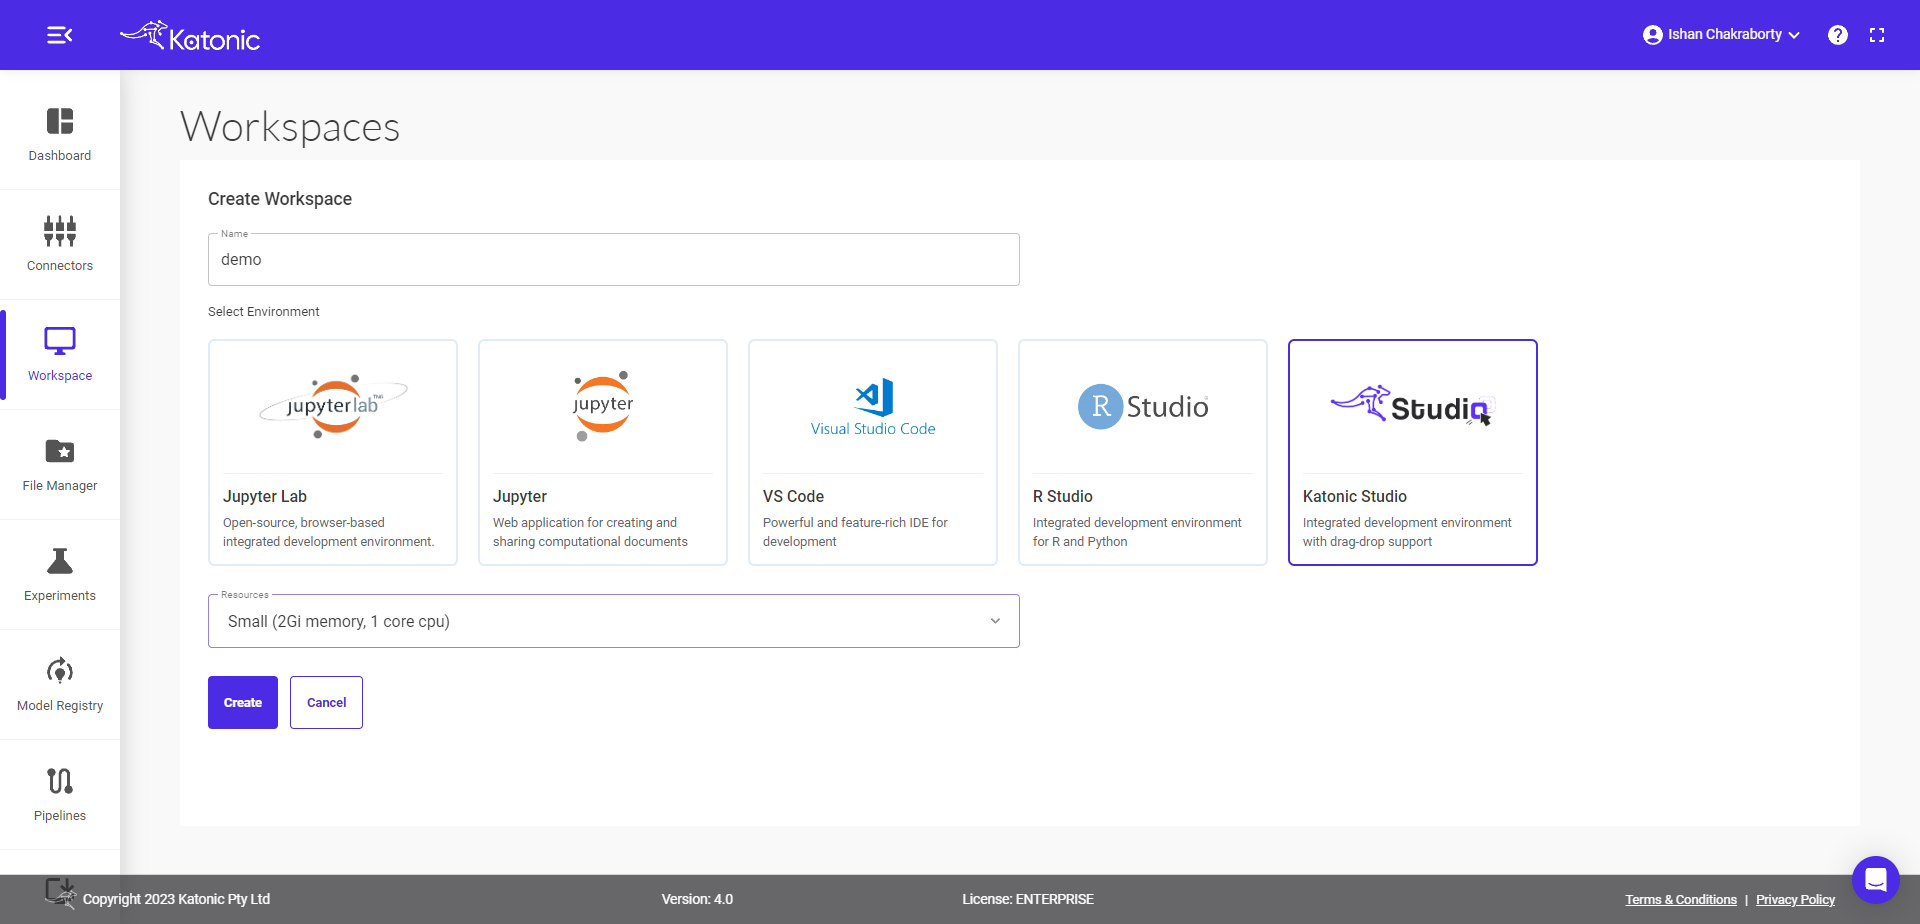
6. Launching a workspace with Katonic-Studio
6.1. Click on Workspace from the left sidebar.

6.2. Click on "Create Workspace".

6.3. Enter a name for your workspace.
6.4. Select an environment for your workspace. An environment is the software configuration (such as language and packages) that will be used in your workspace. Select Katonic-Studio.
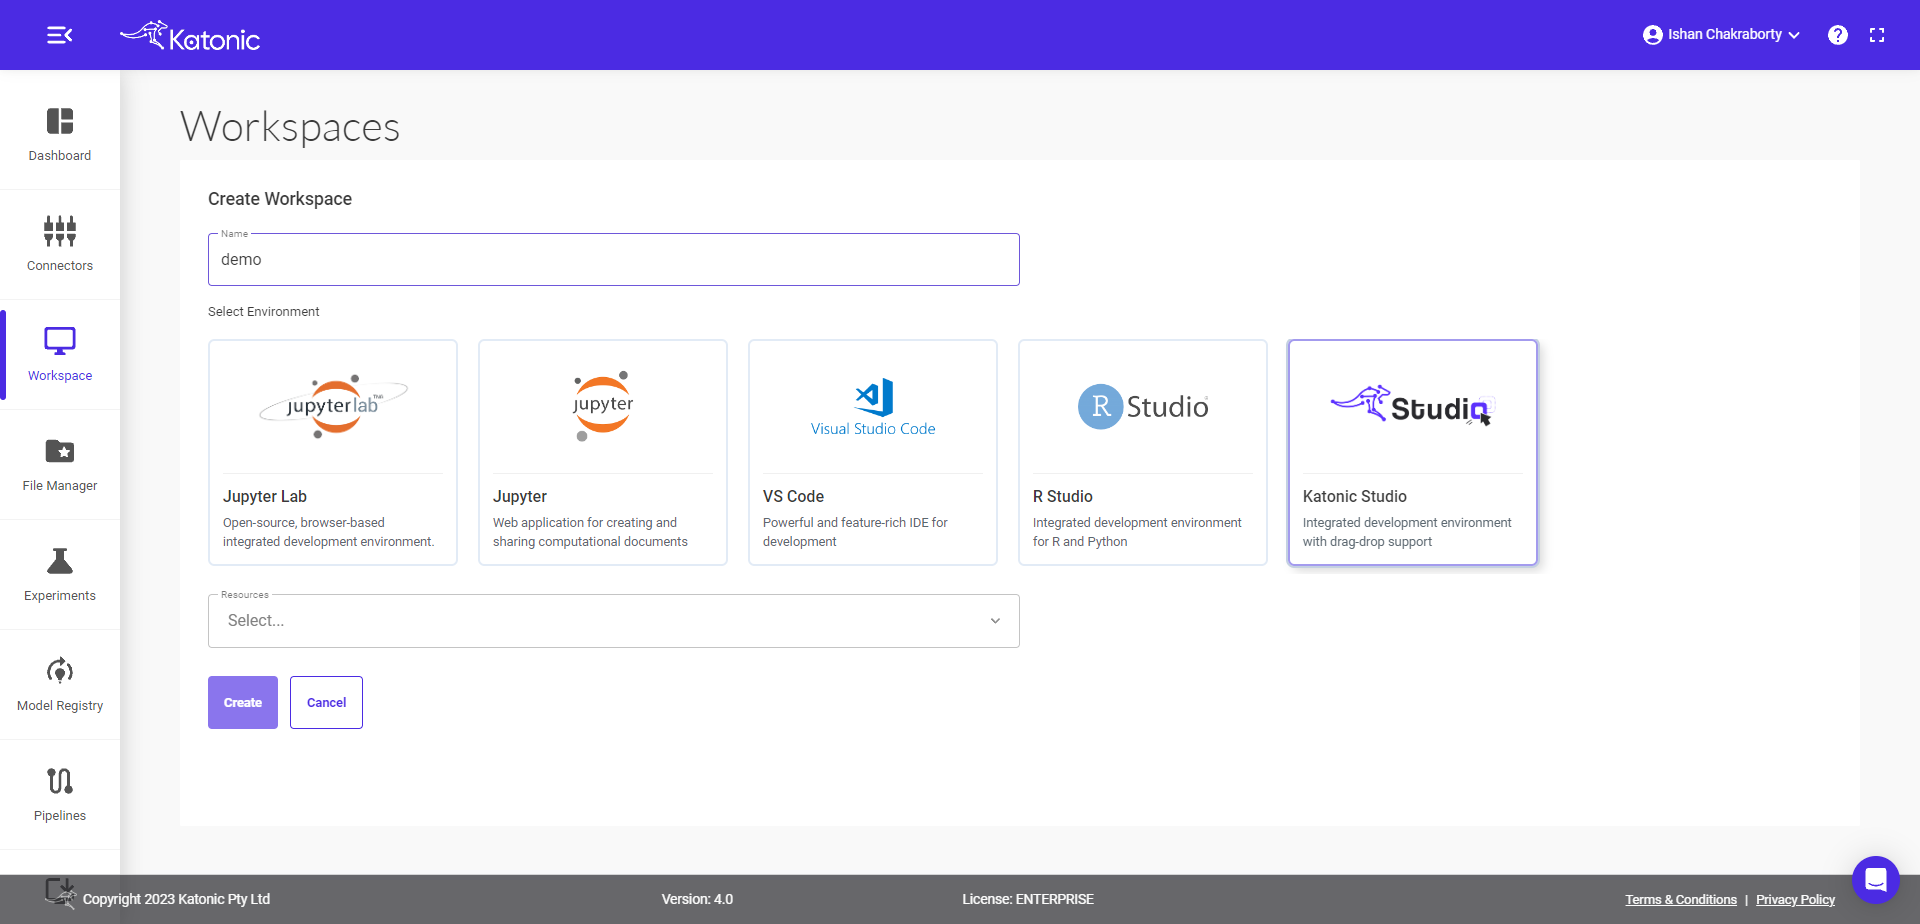
6.5. Select Resources. A resources represents the compute hardware used for your run. It can be a virtual instance in a cloud services provider, or a physical machine running in your deployment’s on-premise data center.
6.6. Click on Create.
Stop a Workspace
You can stop a workspace and resume it at a later time. Frequently stopping and resuming a workspace session is a good way to manage compute costs. To stop a workspace:
Click the "Stop" Button
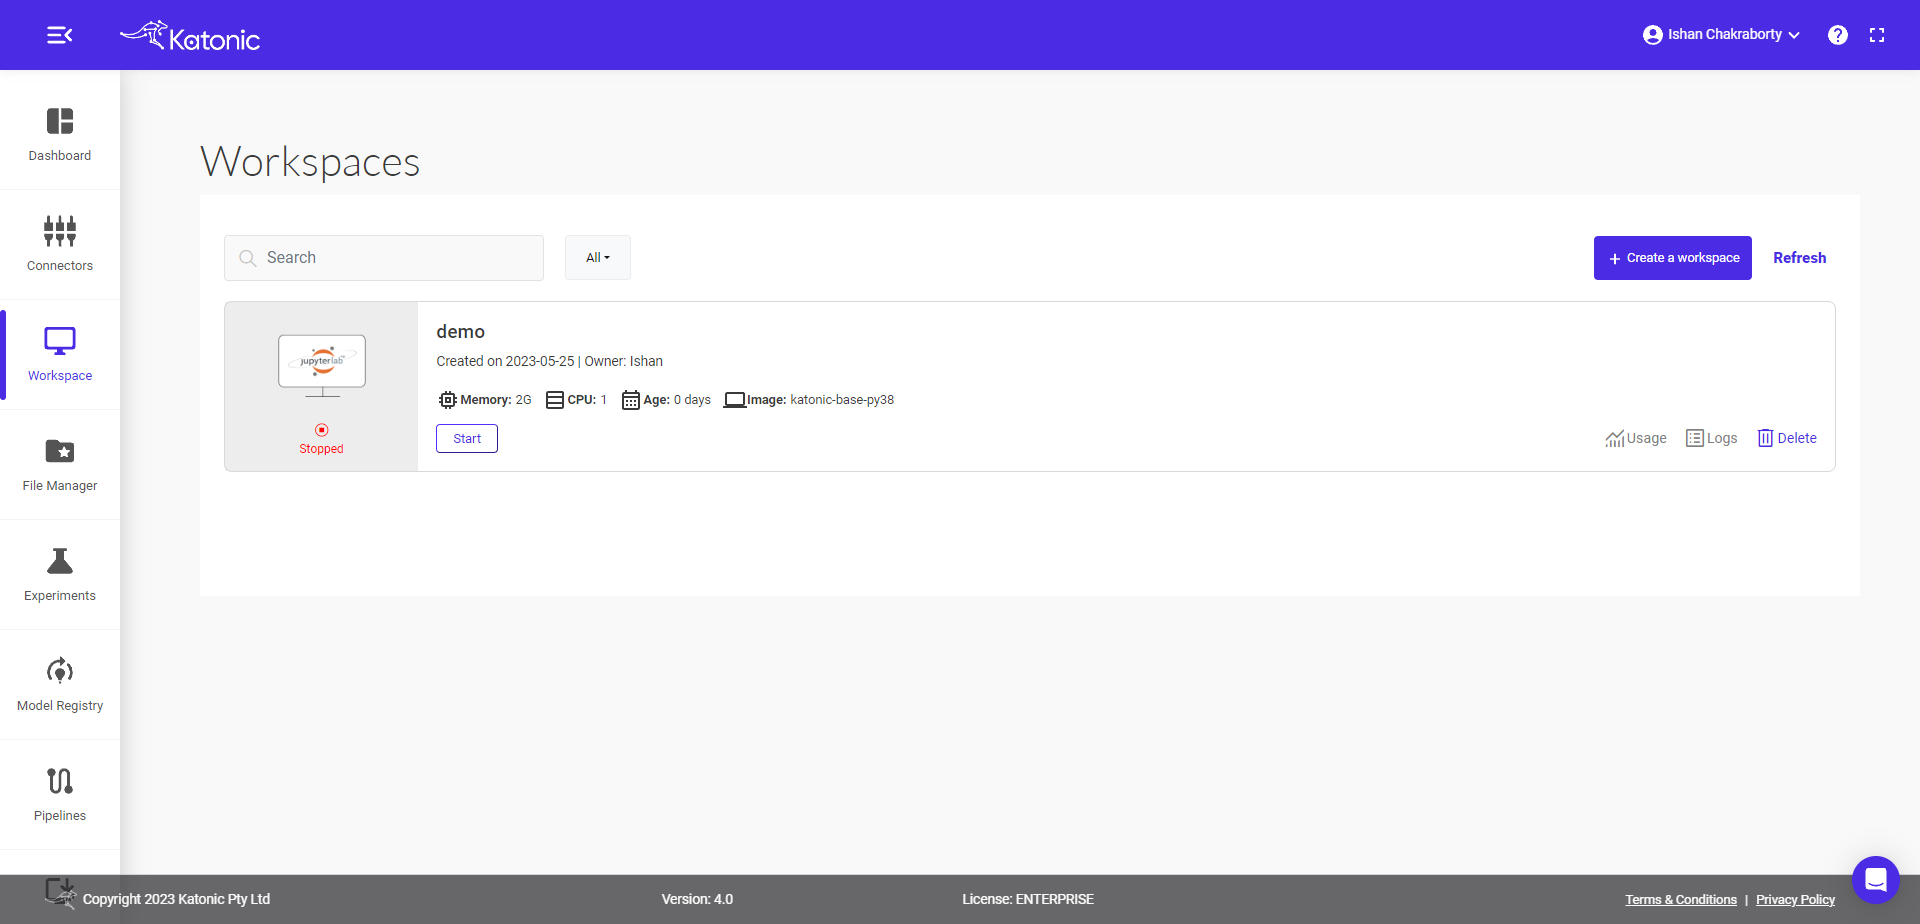
Resume a Workspace
To resume a stopped workspace:
Click Workspace in the left sidebar.
Go to the workspace in your workspace dashboard. Click Start. Your workspace will resume.

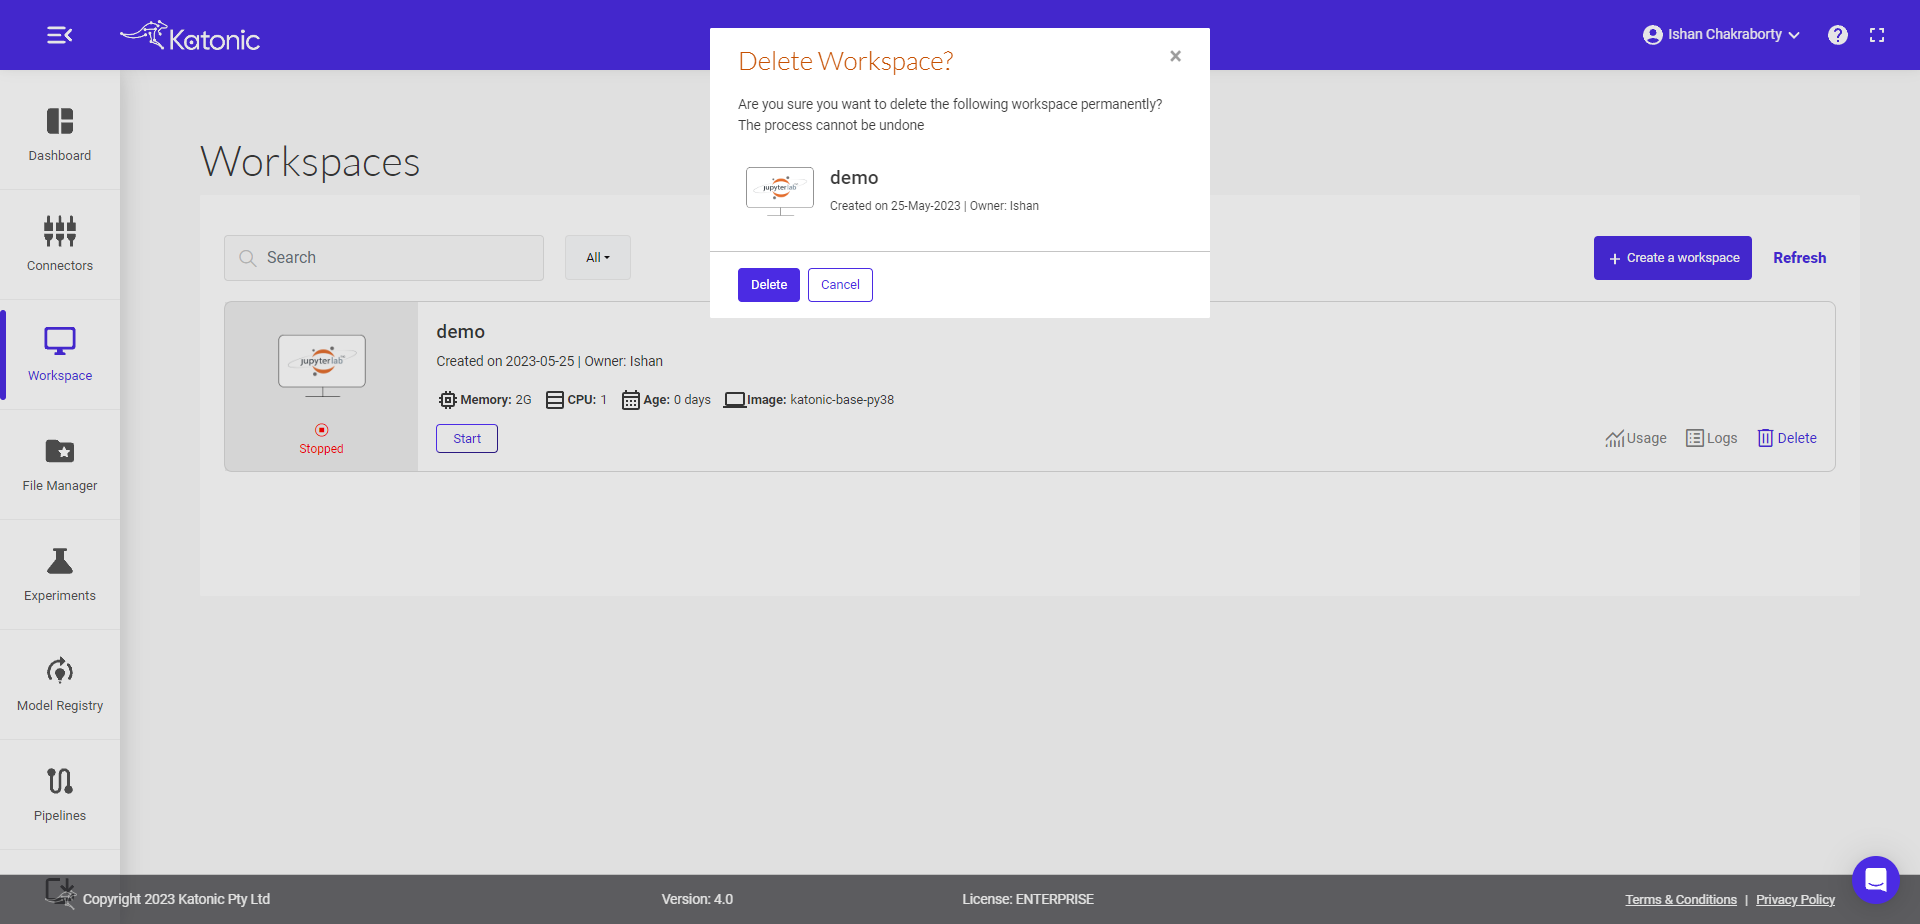
Delete a Workspace
You can delete a workspace if it’s no longer needed. Workspaces must be stopped before they can be deleted.
Stop your workspace. You can stop a workspace by clicking Stop in the workspace's section.
Go to the workspace's section. Click the "red trash bin" icon.
A pop-up will appear to confirm for deleting the workspace, click on "Delete".
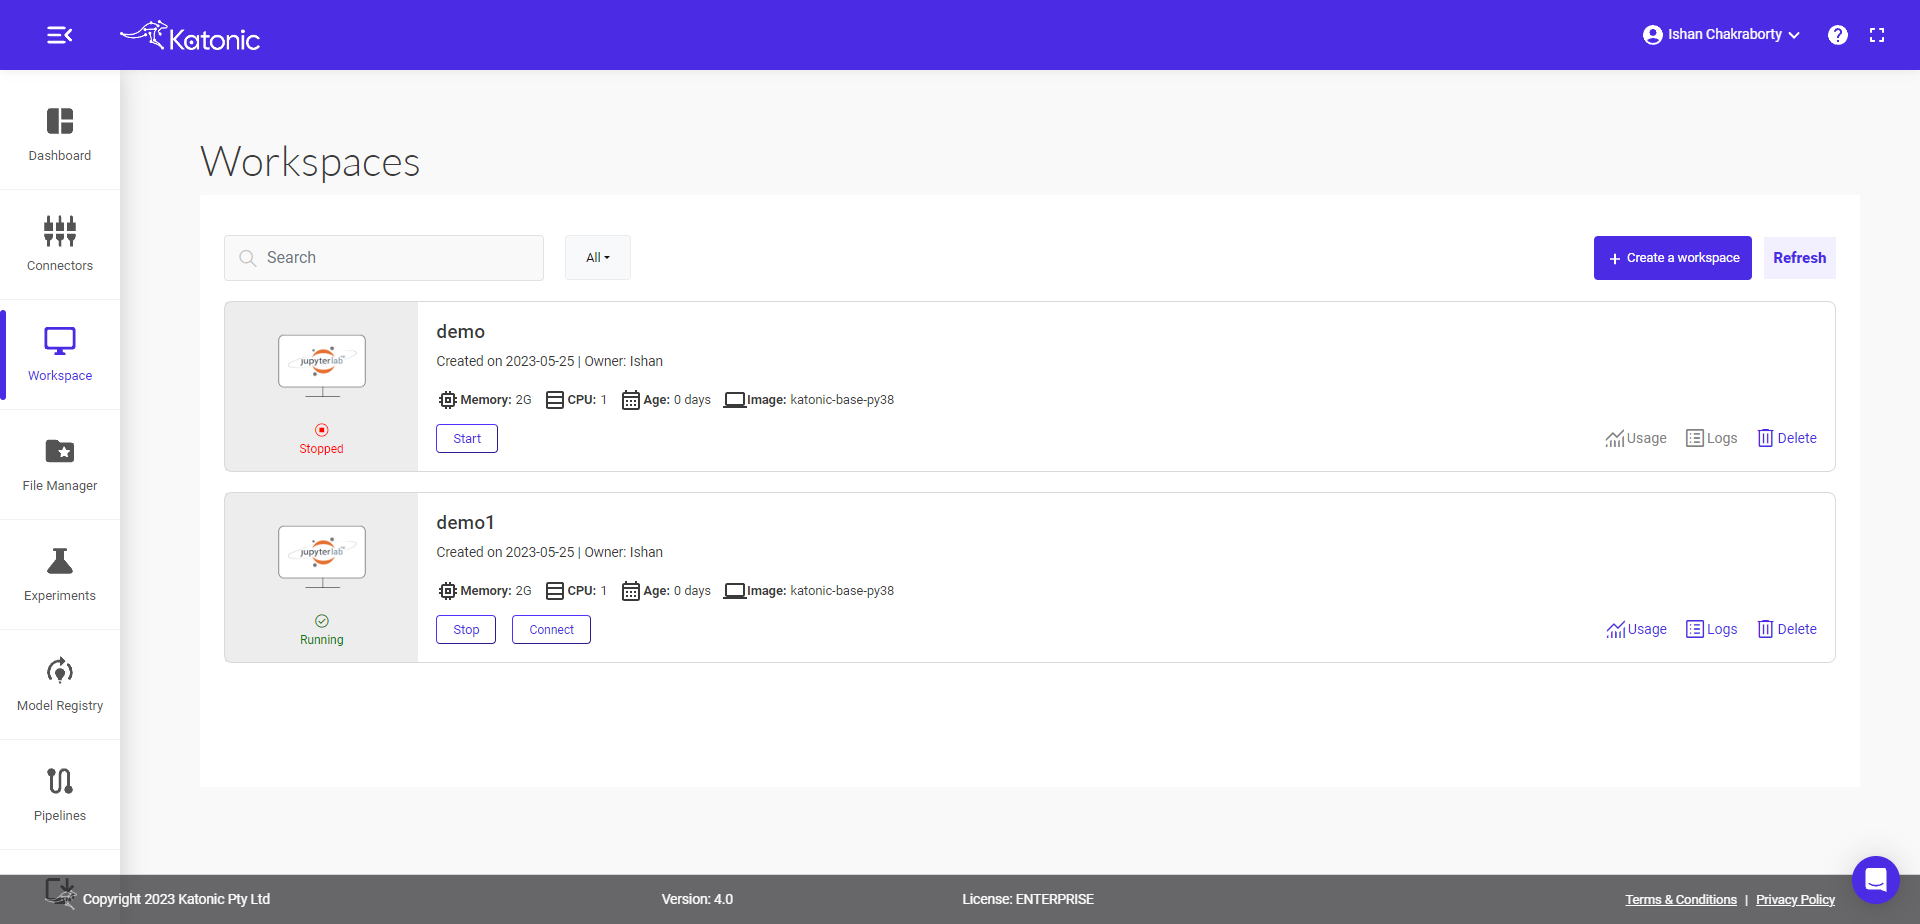
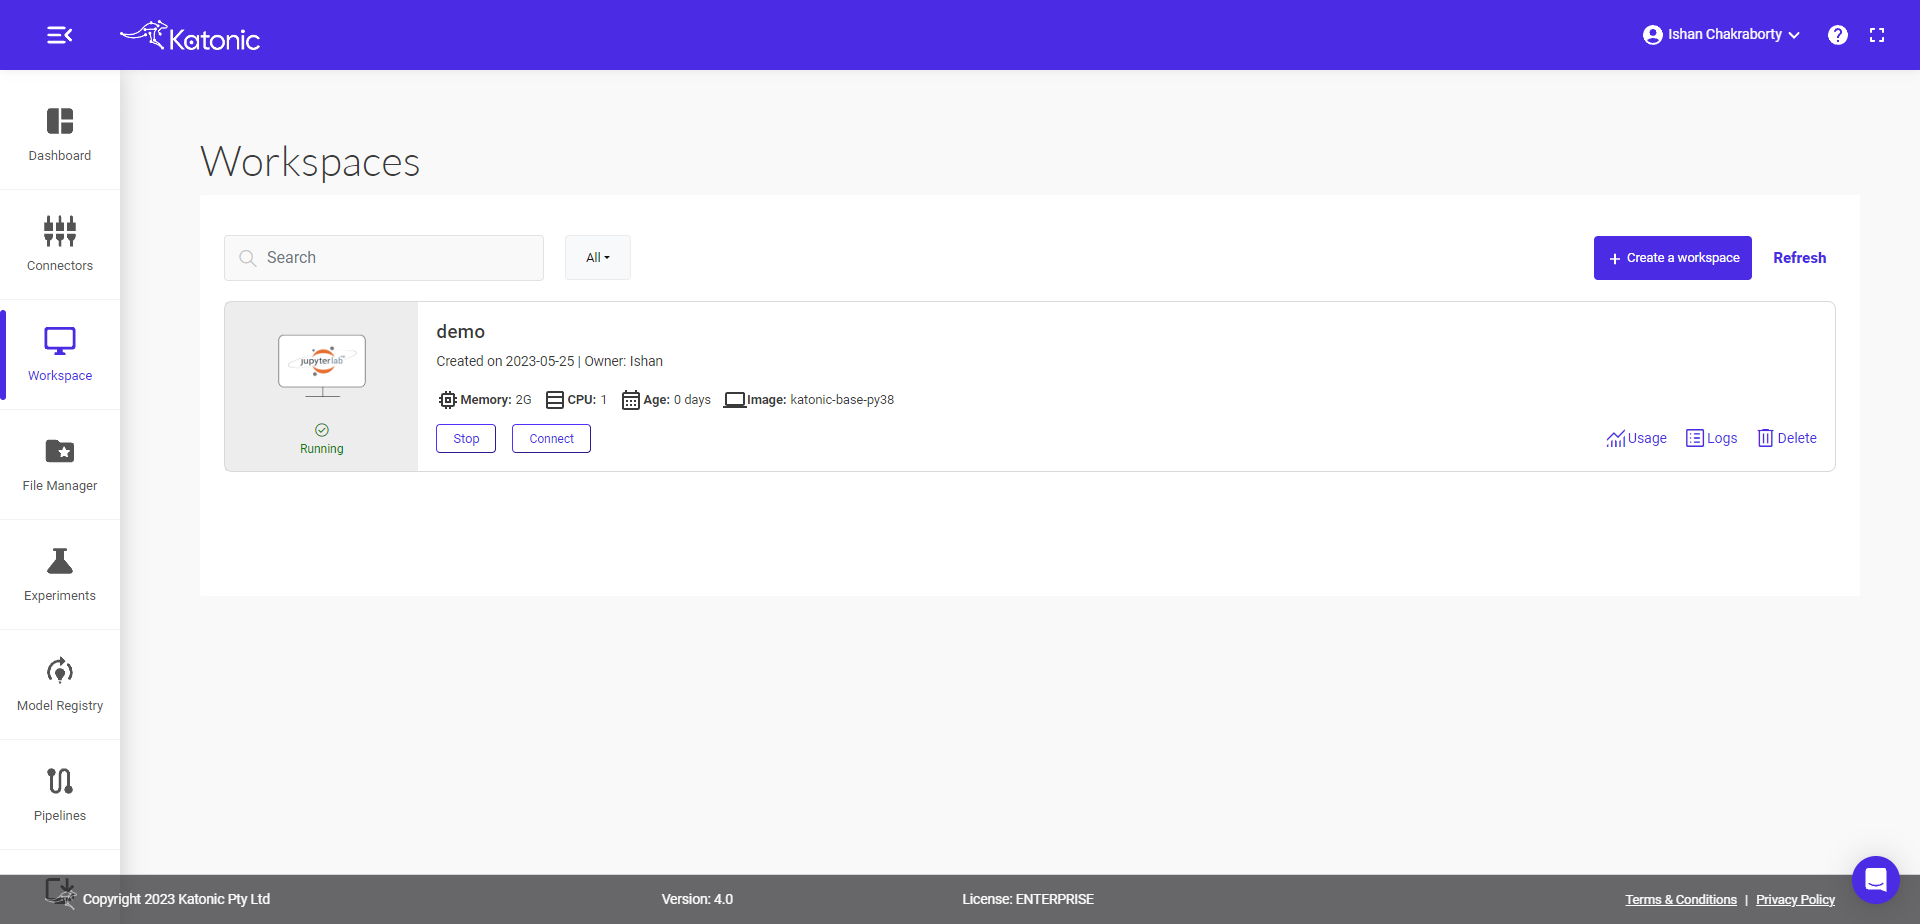
View workspaces
To view workspaces that you’ve launched:
Click Workspace in the navigation menu.
Now you can view all the workspaces in the workspace dashboard.
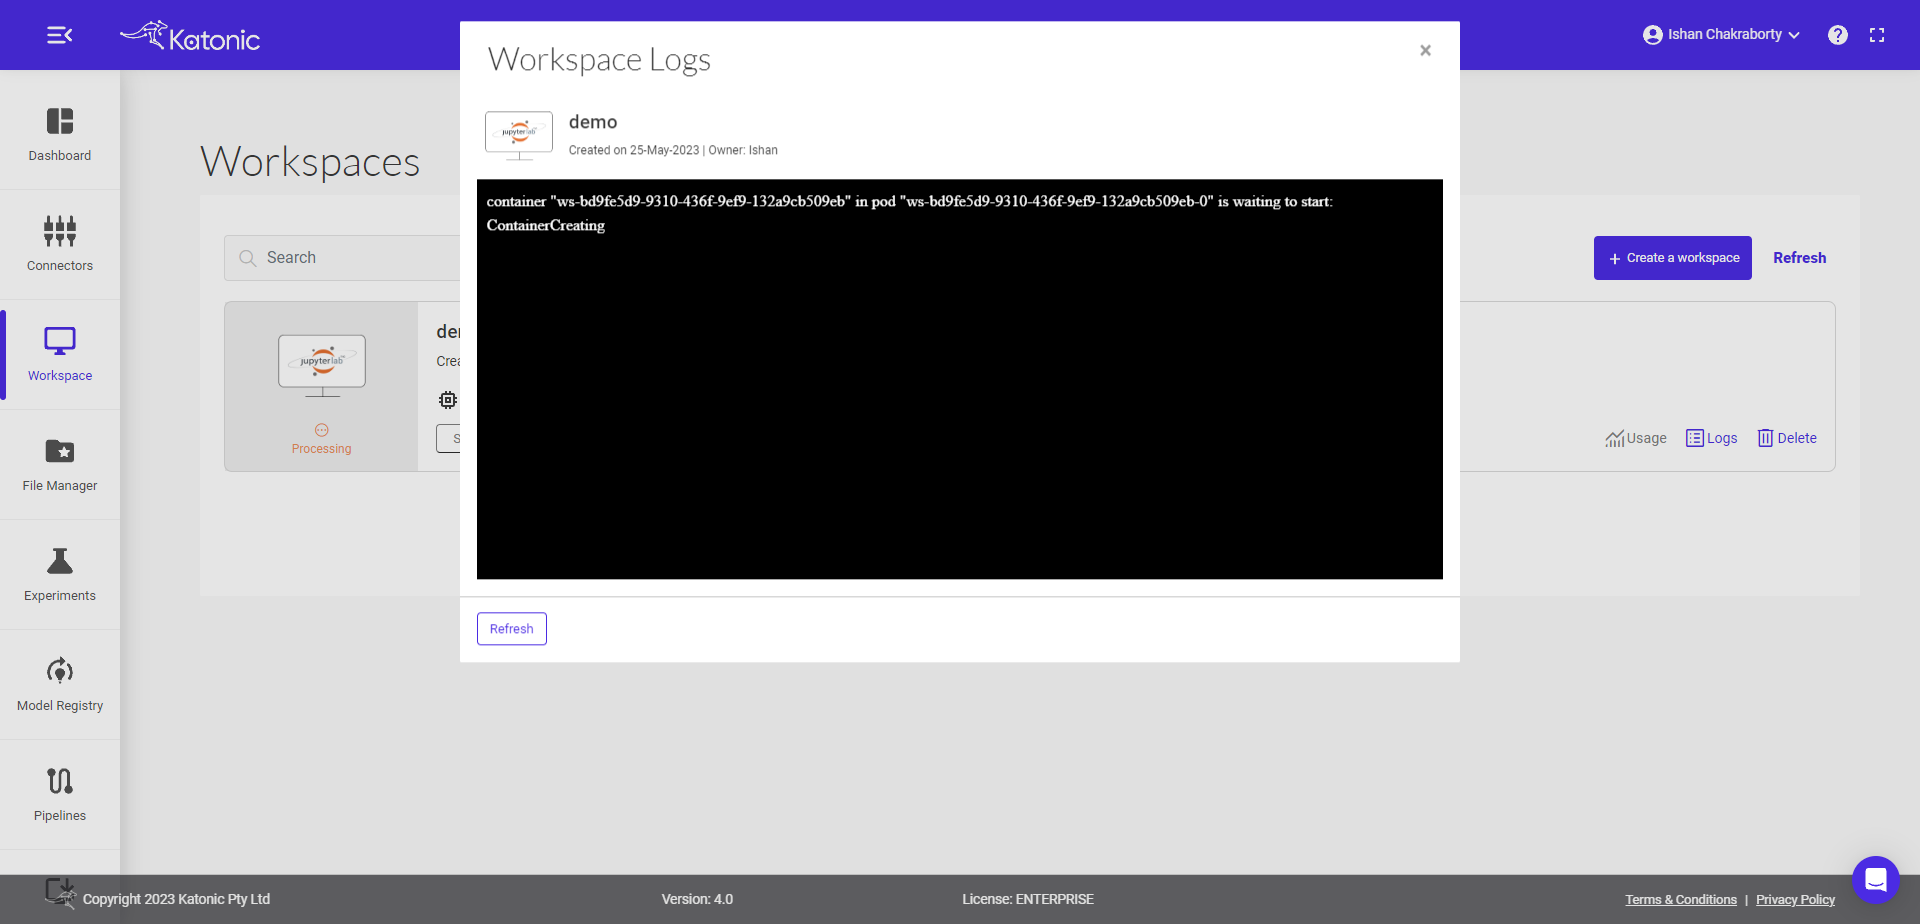
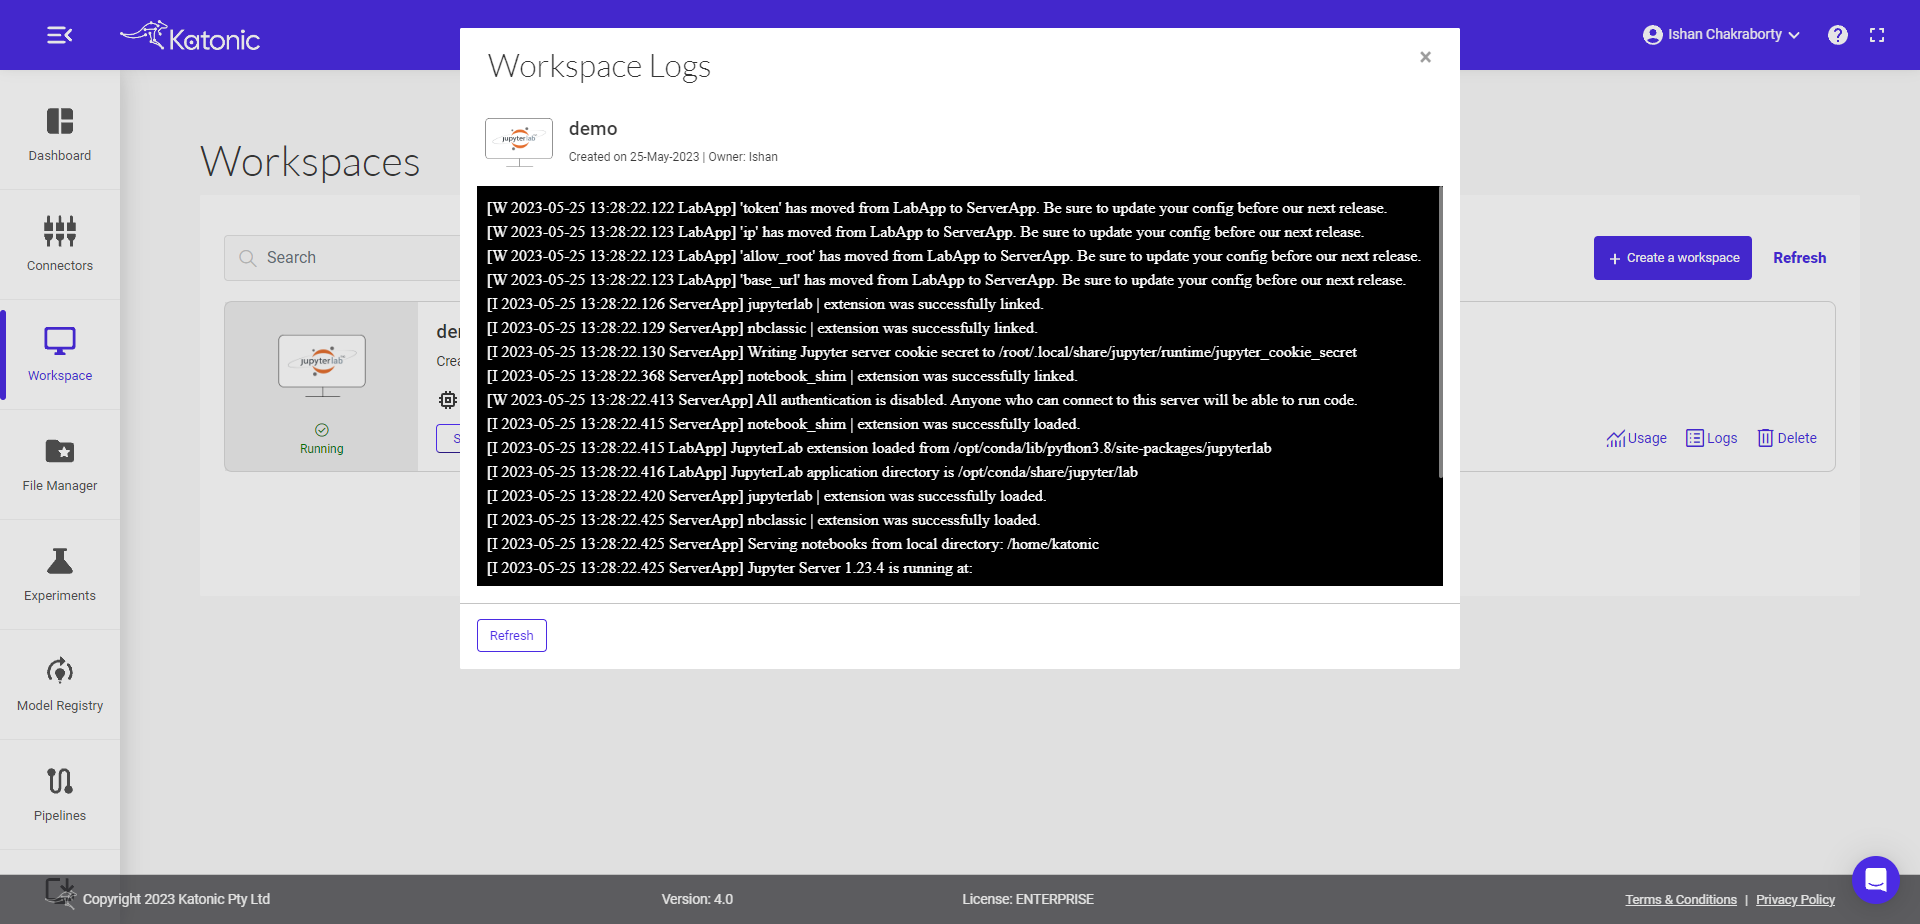
Workspace Logs
To check a Workspace log, click on the Logs icon. A Pop up will appear to show all the logs of the workspace.
You can view “User” logs and about your workspace. User logs include information about actions you take within your workspace. Setup logs contain information about Katonic and Kubernetes. If your workspace fails, the logs are a good place to begin investigating.

Workspace Logs(Processing State)
To check a Workspace log, click on the Logs icon. A Pop up will appear to show all the logs of the workspace.

You can view “User” logs and about your workspace. User logs include information about actions you take within your workspace while in it's processing state. Setup logs contain information about Katonic and Kubernetes. If your workspace fails, the logs are a good place to begin investigating.
Workspace Logs(Running State)
To check a Workspace log, click on the Logs icon. A Pop up will appear to show all the logs of the workspace.

You can view “User” logs and about your workspace. User logs include information about actions you take within your workspace while in it's running state. Setup logs contain information about Katonic and Kubernetes. If your workspace fails, the logs are a good place to begin investigating.
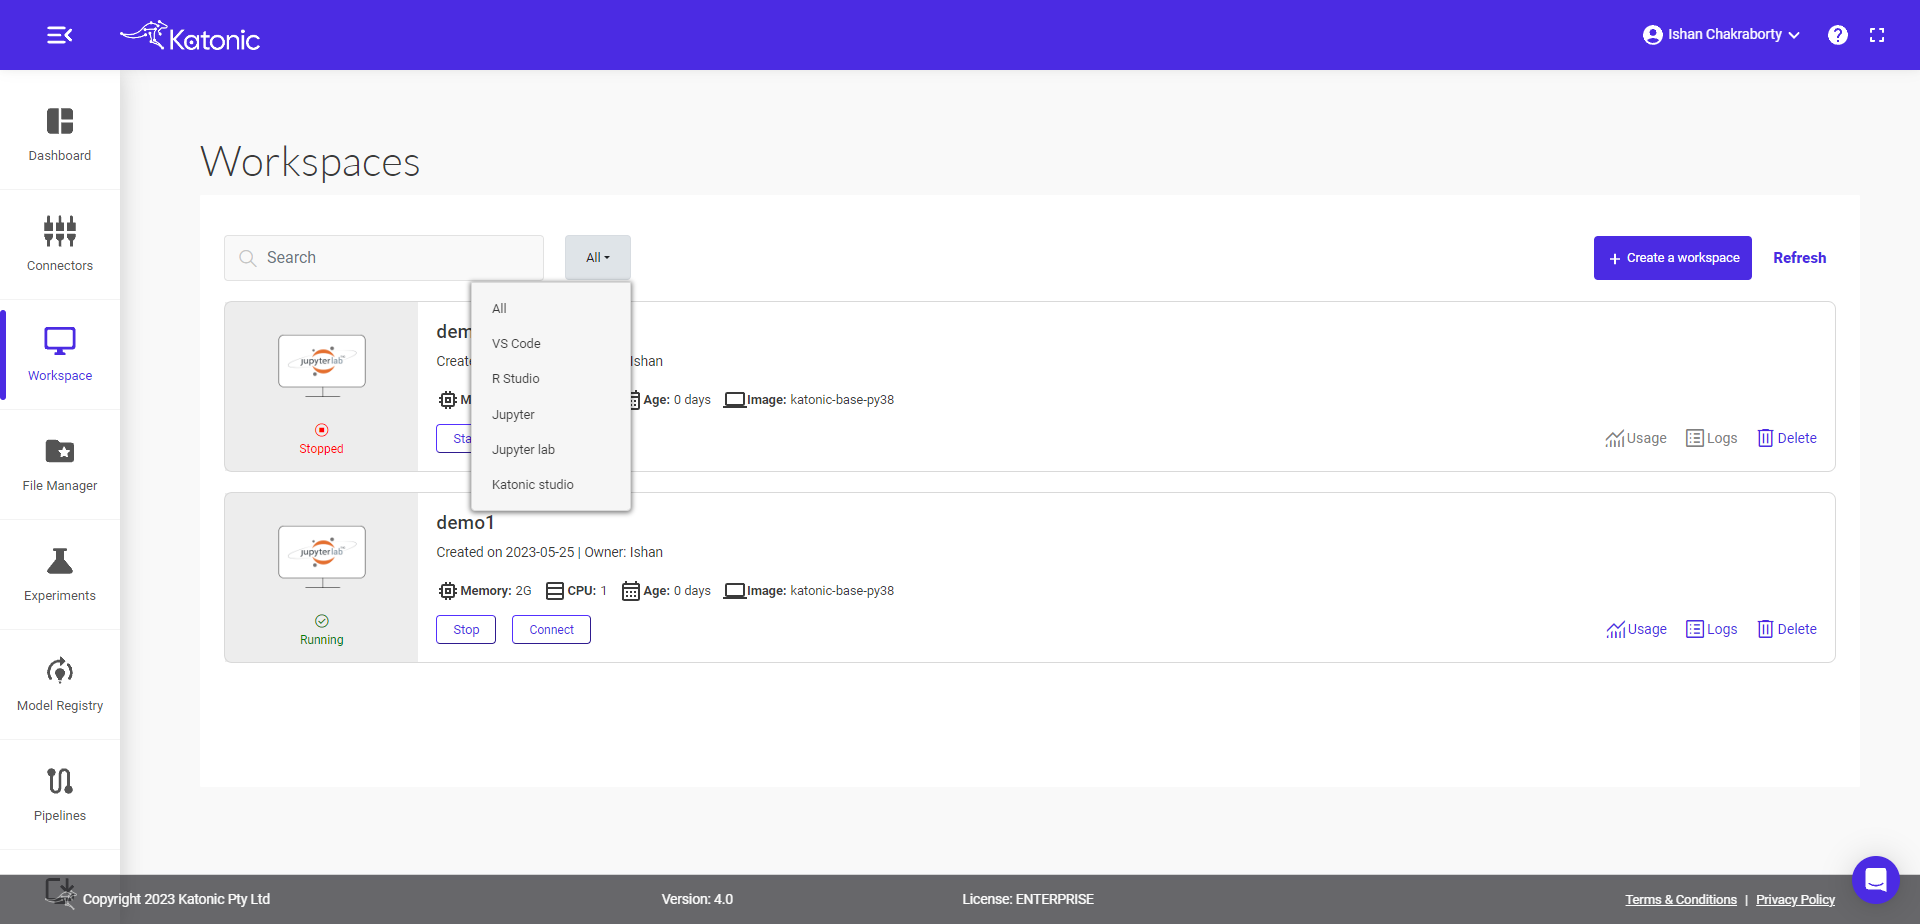
Filter Workspaces
Workspaces can be filter by clicking on the filter tab with options (VSCode, R-Studio, Jupyter, JupyterLab) select and it will filter your workspace accordingly.
To filter select the All+ button at top right corner near Create Workspace.
Select the options you want to filter the workspaces on.
Search Workspaces
Workspaces can be searched by clicking the search button and type the workspace name, it will search your workspace accordingly.

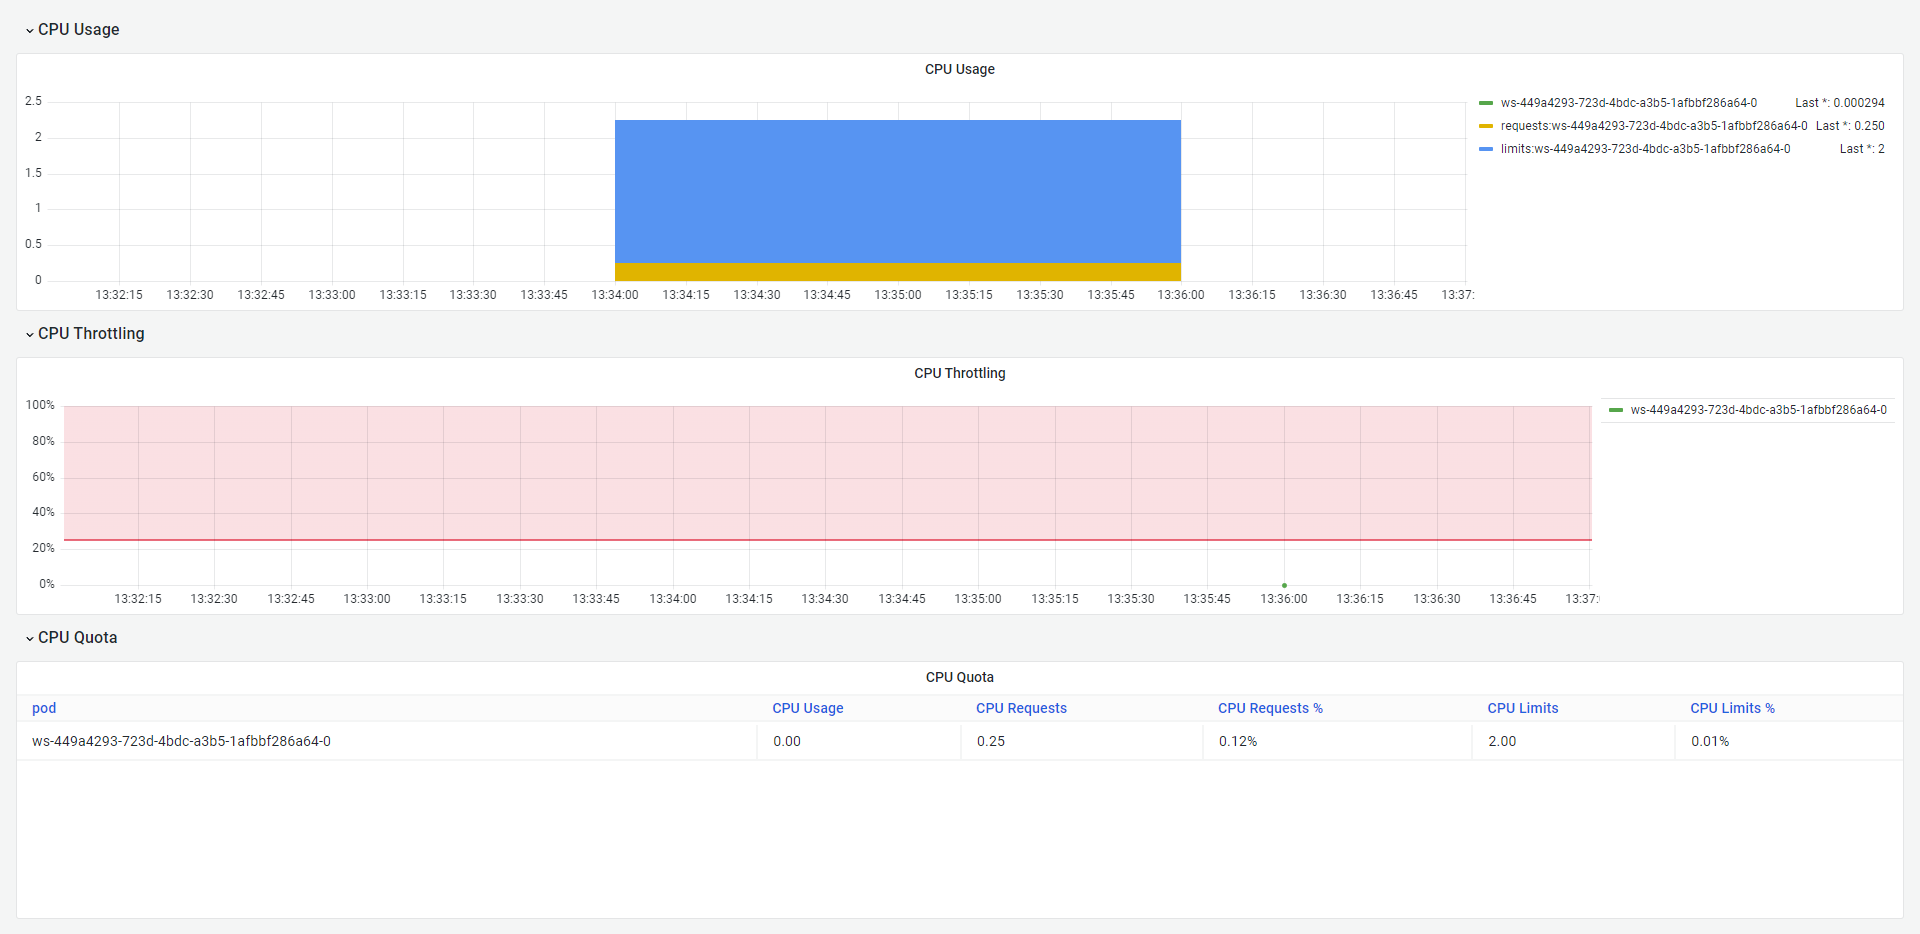
Resource Monitoring
You can also monitor your running workspace usage by clicking on Usage.
Usage