Docker Deployment
What is Docker?
Docker is an open-source platform and technology used for containerization, enabling developers to package applications and their dependencies into a standardized unit called a container. Containers are lightweight, portable, and isolated environments that can run consistently across various computing environments, such as development, testing, and production systems.
This document will help you on how to deploy a custom model on Docker.
Prerequisite for Docker deployment
The only thing that is needed to use the Docker Deployment functionality from Katonic.AI is a Docker Image of the App.
Example of how you can create a Docker Image
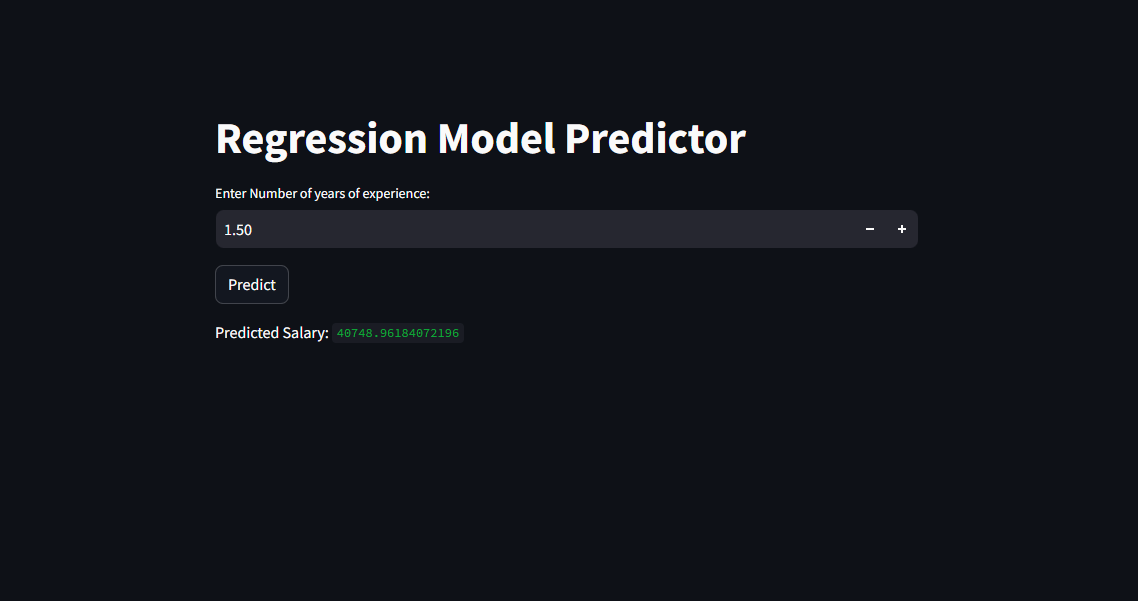
- app.py: The app.py is a Streamlit web application that loads a pre-trained machine learning model and allows users to input values to predict the output, displaying the results in a user-friendly interface.
    import streamlit as st
    import pickle
    import numpy as np

    # Load the pickled model
    def load_model(model_file):
        with open(model_file, "rb") as model_file:
            model = pickle.load(model_file)
        return model

    # Make predictions using the loaded model
    def predict(model, input_data):
        input_data = np.array(input_data).reshape(1, -1)
        predictions = model.predict(input_data)
        return predictions

    def main():
        st.title("Regression Model Predictor")

        # Load the model
        # Pickle file should be in the same Directory
        model_file = "regression_model.pkl"
        model = load_model(model_file)

        # Get user input
        input_data = st.number_input("Enter Number of years of experience:", min_value=0.0)

        if st.button("Predict"):
            # Make predictions
            predictions = predict(model, [input_data])
            st.write("Predicted Salary:", predictions[0])

    if __name__ == "__main__":
        main()
- requirements.txt: The file with all the packages associated with the Application. You can run this command to generate the file automatically.
pip freeze > requirements.txt
The File should have all the necessary packages written in it:
    numpy==1.24.0
    pandas==1.5.1
    Pillow==10.1.0
    scikit-learn==1.3.2
    streamlit
- Dockerfile: The Dockerfile sets up a Python 3.9 environment, copies the application code and dependencies, exposes a specific port for Streamlit, and runs the Streamlit app specified in "app.py" while disabling CORS.
    # Use an official Python runtime as a parent image
    FROM python:3.9

    # Set the working directory in the container
    WORKDIR /app

    # Copy the current directory contents into the container at /app
    COPY . /app

    # Install any needed packages specified in requirements.txt
    # If you have any additional dependencies, add them to requirements.txt
    RUN pip install -r requirements.txt

    # Expose the port that Streamlit will run on
    EXPOSE 8080

    # Define the command to run the Streamlit app
    CMD streamlit run --server.port 8080 --server.enableCORS false app.py
In the above example, we are using port 8080, but you can use a port of your choice.
- YAML file: GitHub Actions workflow automates the building and pushing of a Docker image to a container registry of your choice when changes are pushed to the "master" branch of the specified repository, using secrets for authentication and specified repository and tag names.
How to Deploy Your Custom Model on Docker
- Navigate to the
Deploysection from the sidebar on the platform.
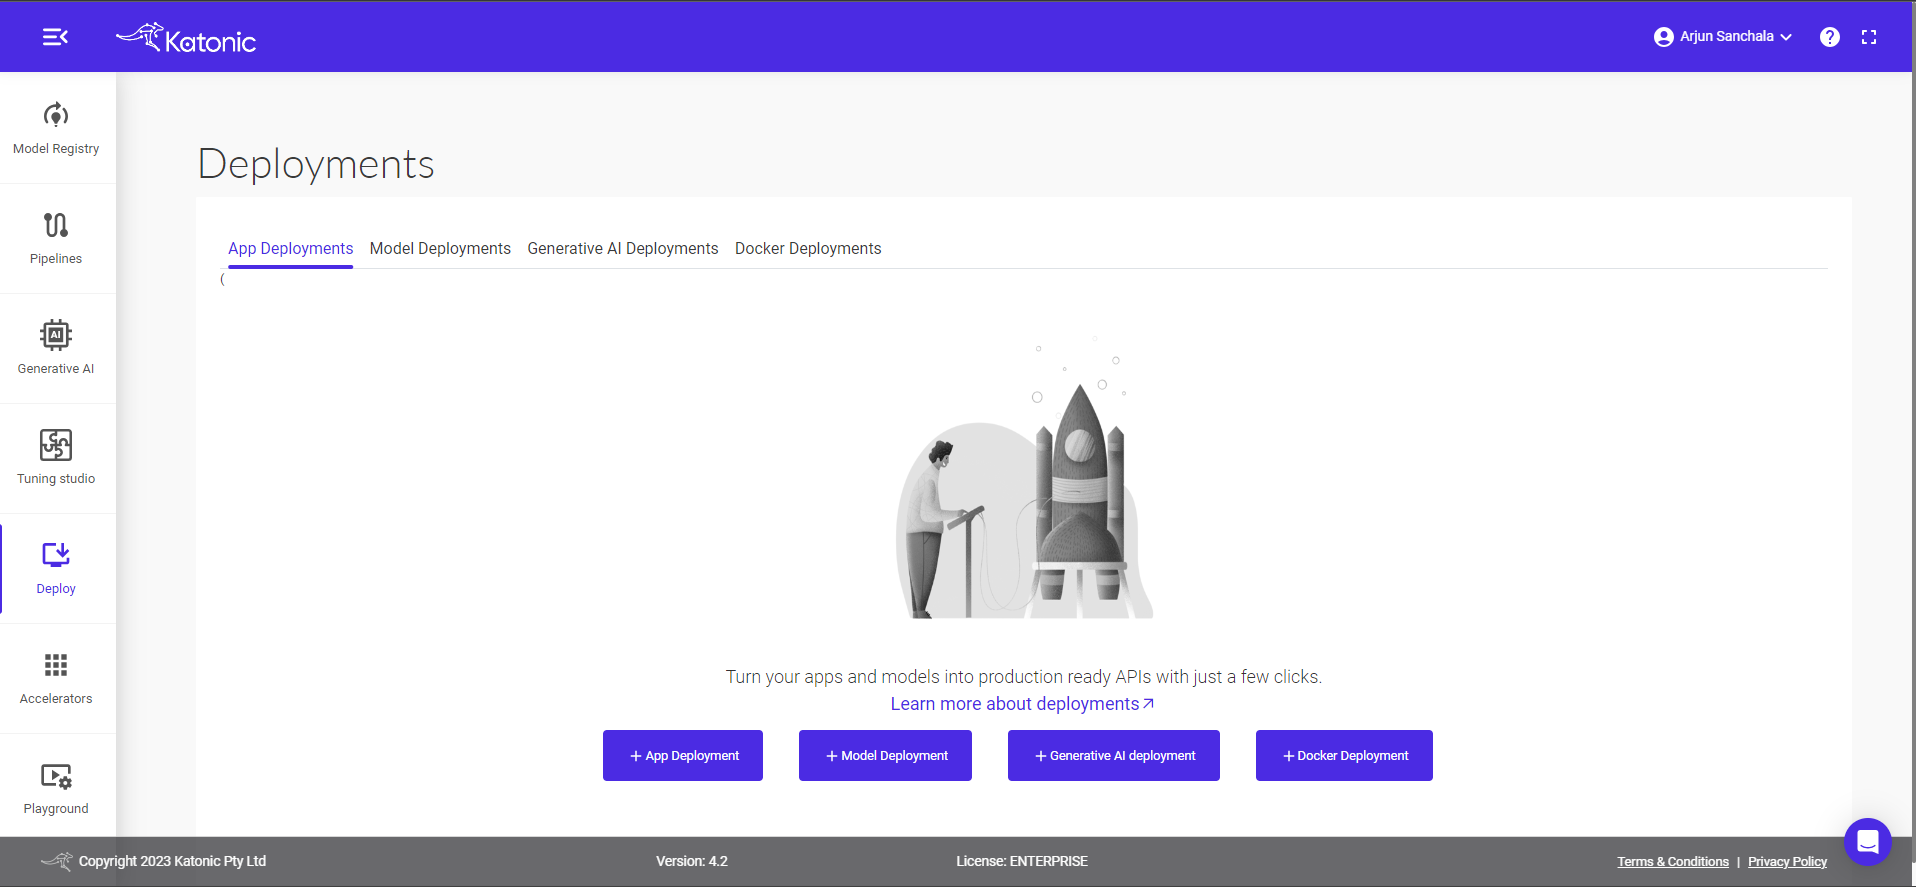
- Select the
Docker Deploymentoption from the bottom.

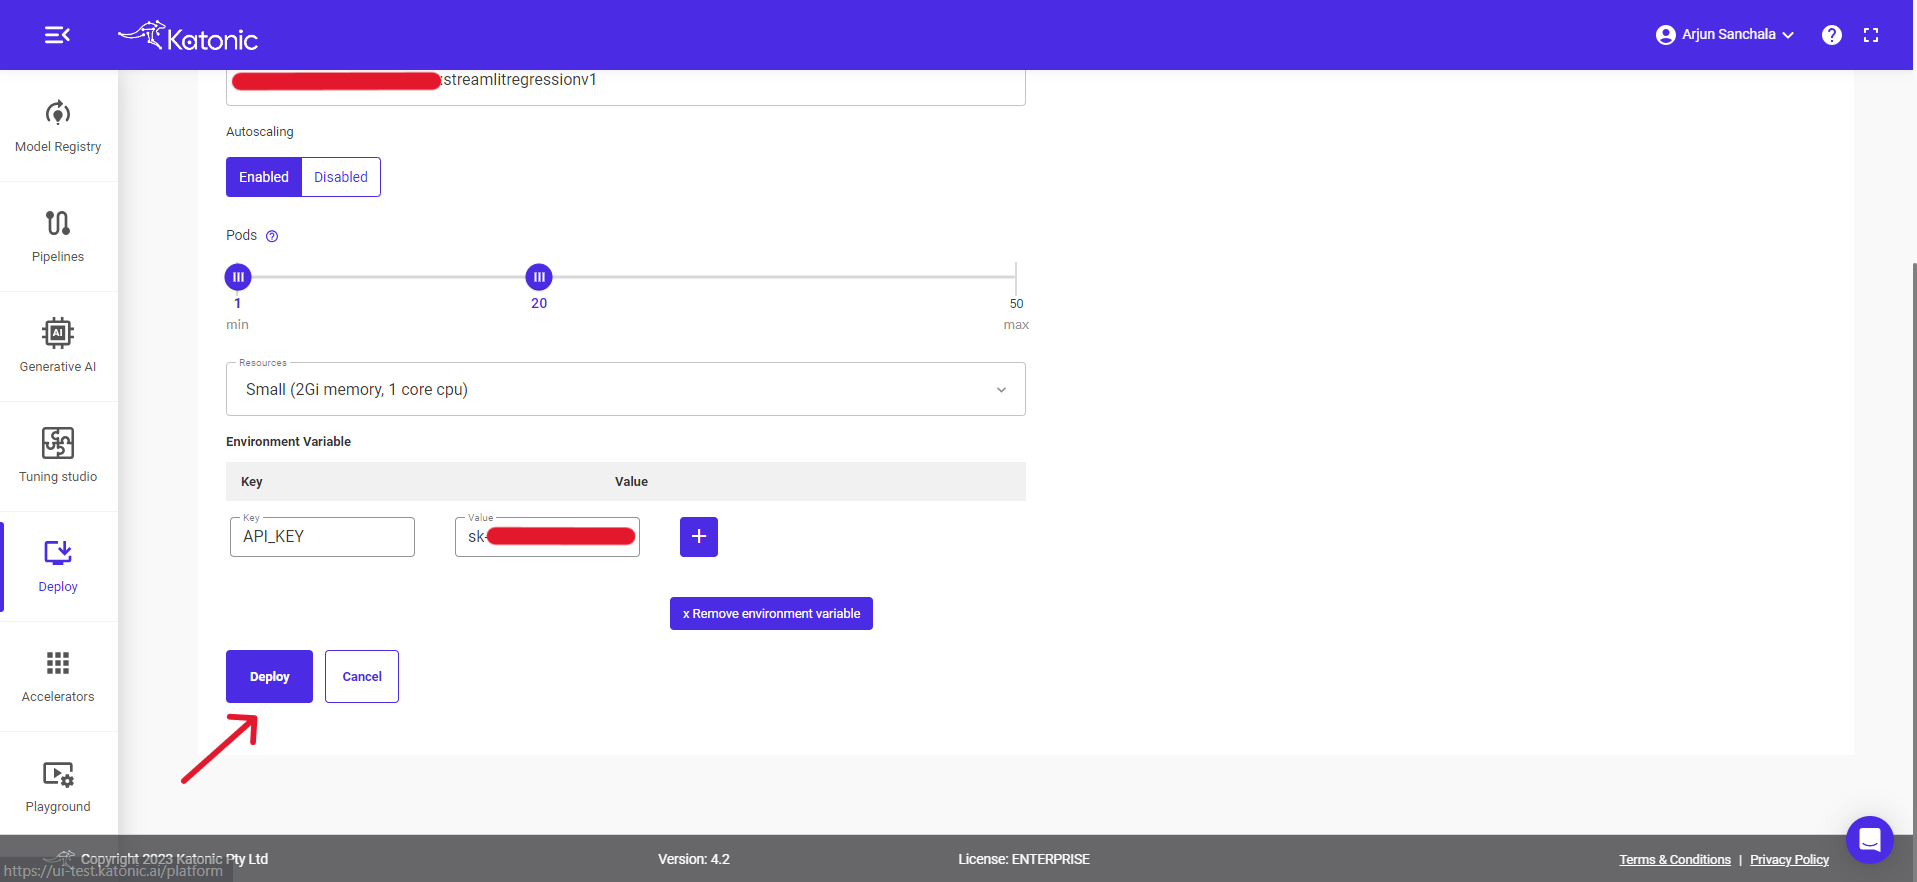
- Fill in the model details in the dialog box:
- Give a Name to your deployment, for example, "regressionModel" and proceed to the next field.
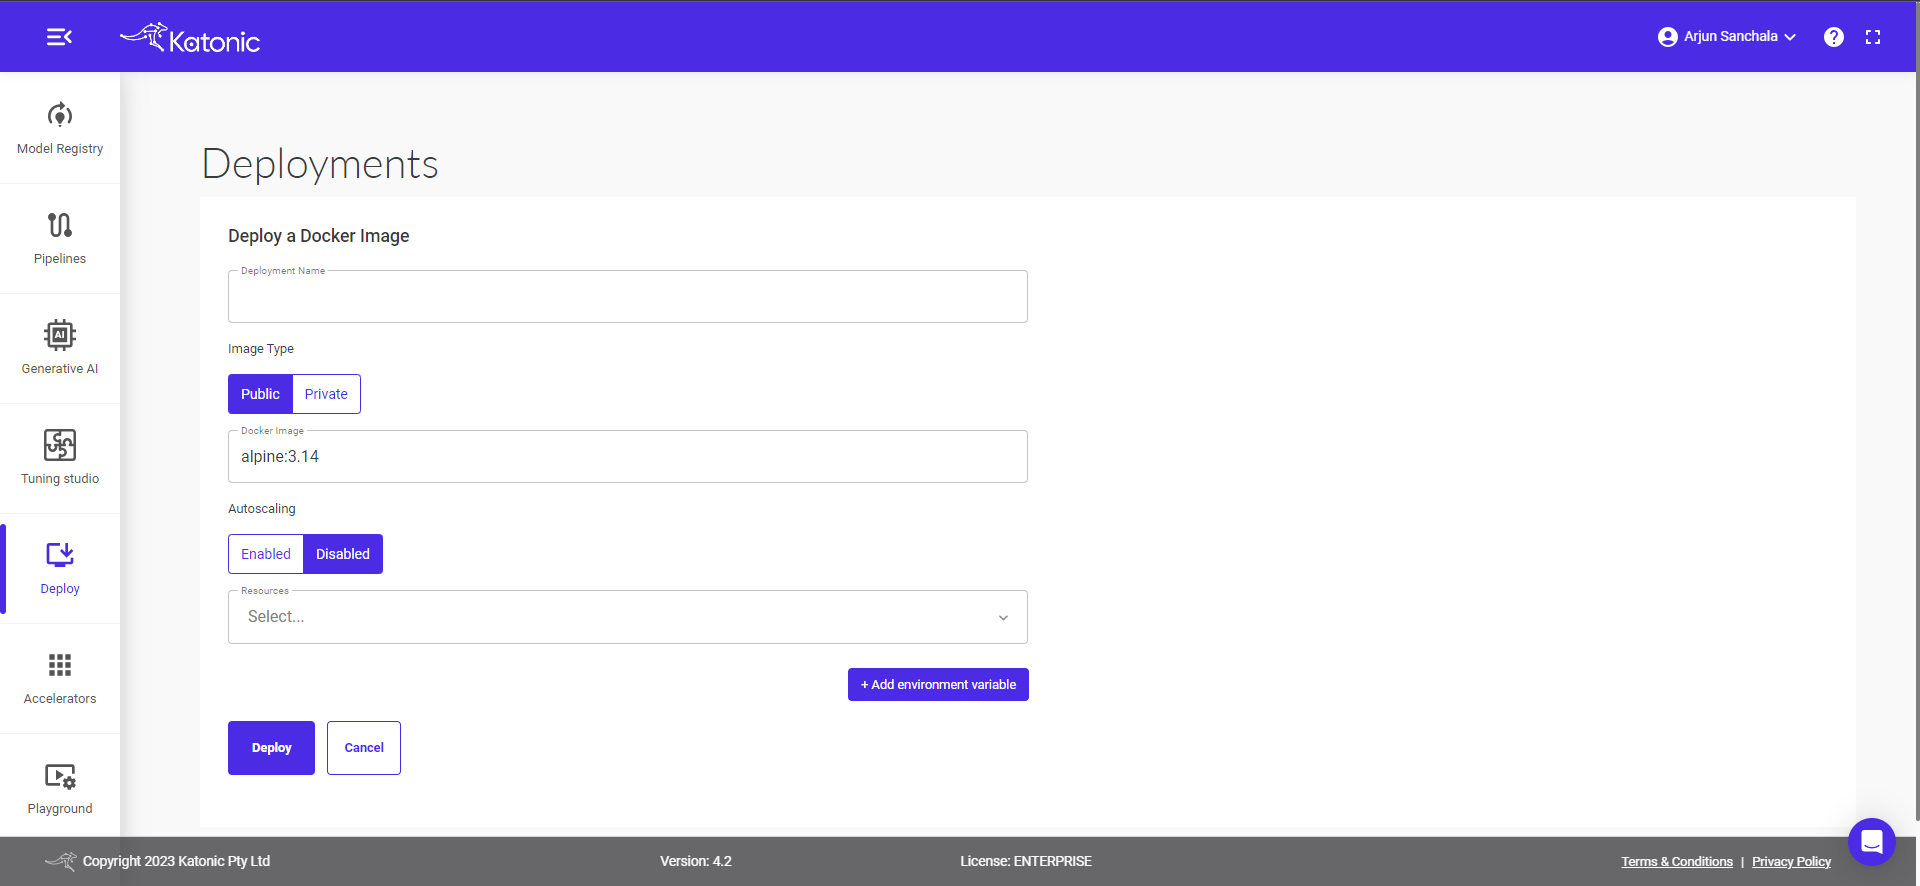
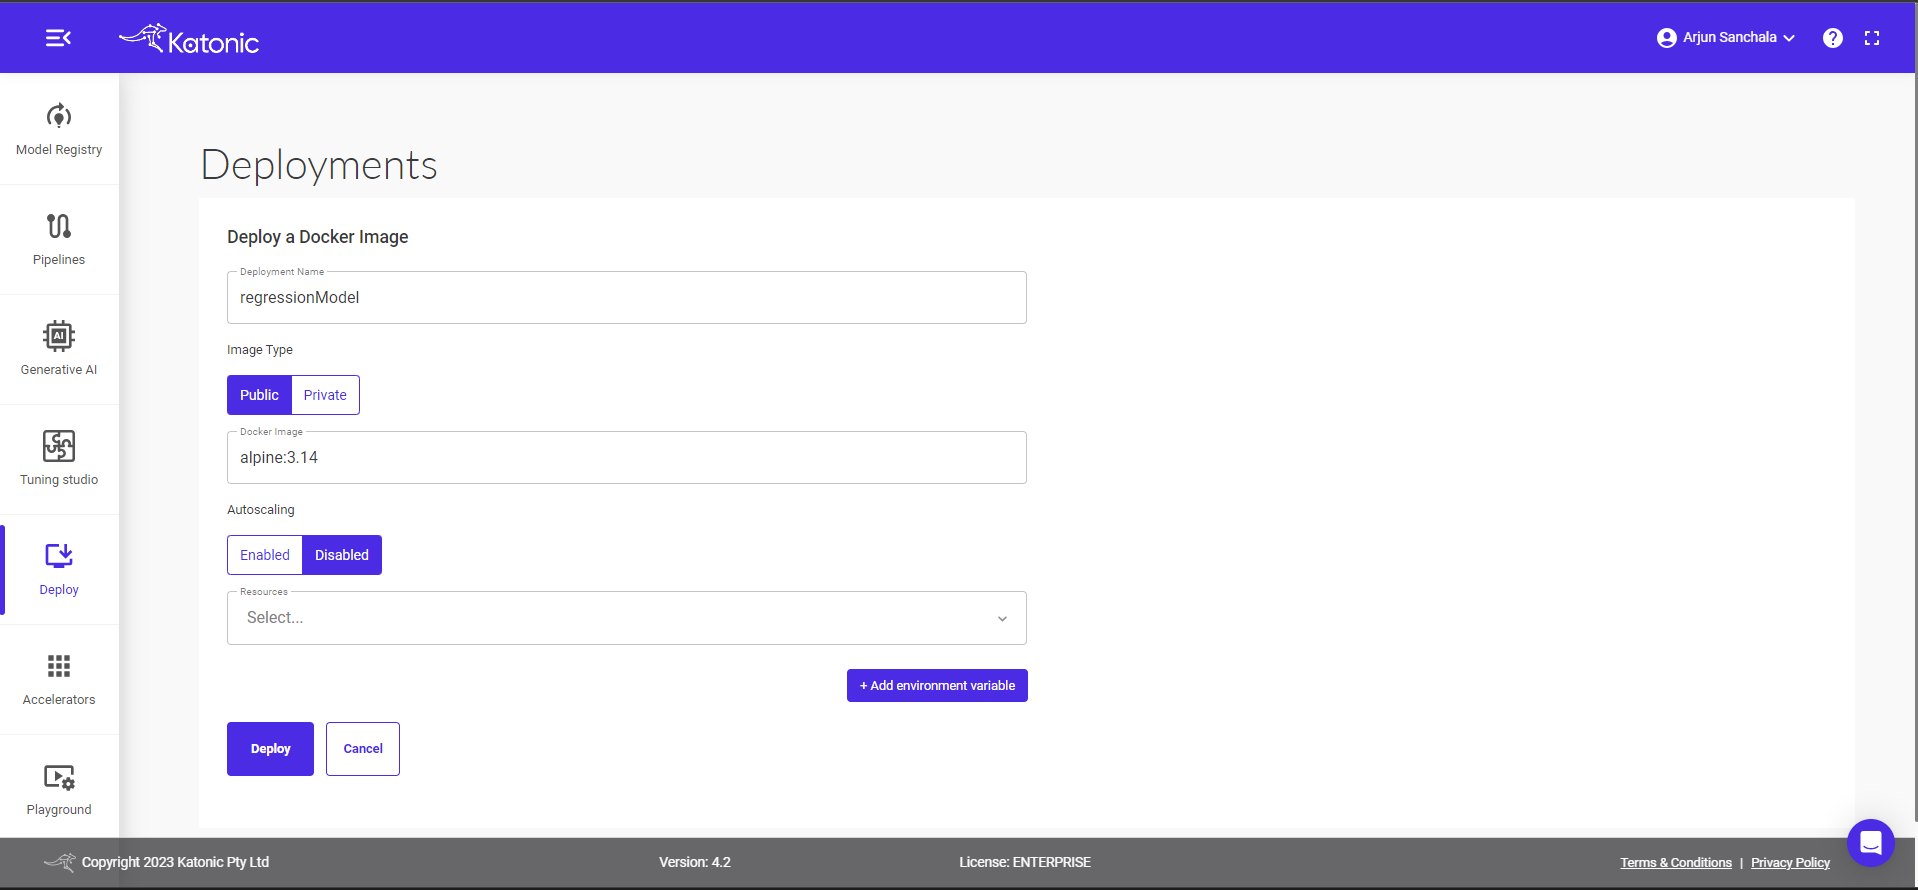
- Select your Docker visibility according to your preference. If you want the Docker to be visible to others, select "public"; otherwise, select "private."

- In the Docker image field, you need to enter the name in the format of "\${{ env.REGISTRY_SERVER }}"/"\${{ env.REGISTRY_NAMESPACE }}"/"\${{ env.REPOSITORY_NAME }}":"\${{ env.TAG }}". You can enter the values of these four environment variables by referring to the credentials in the Dockerfile.
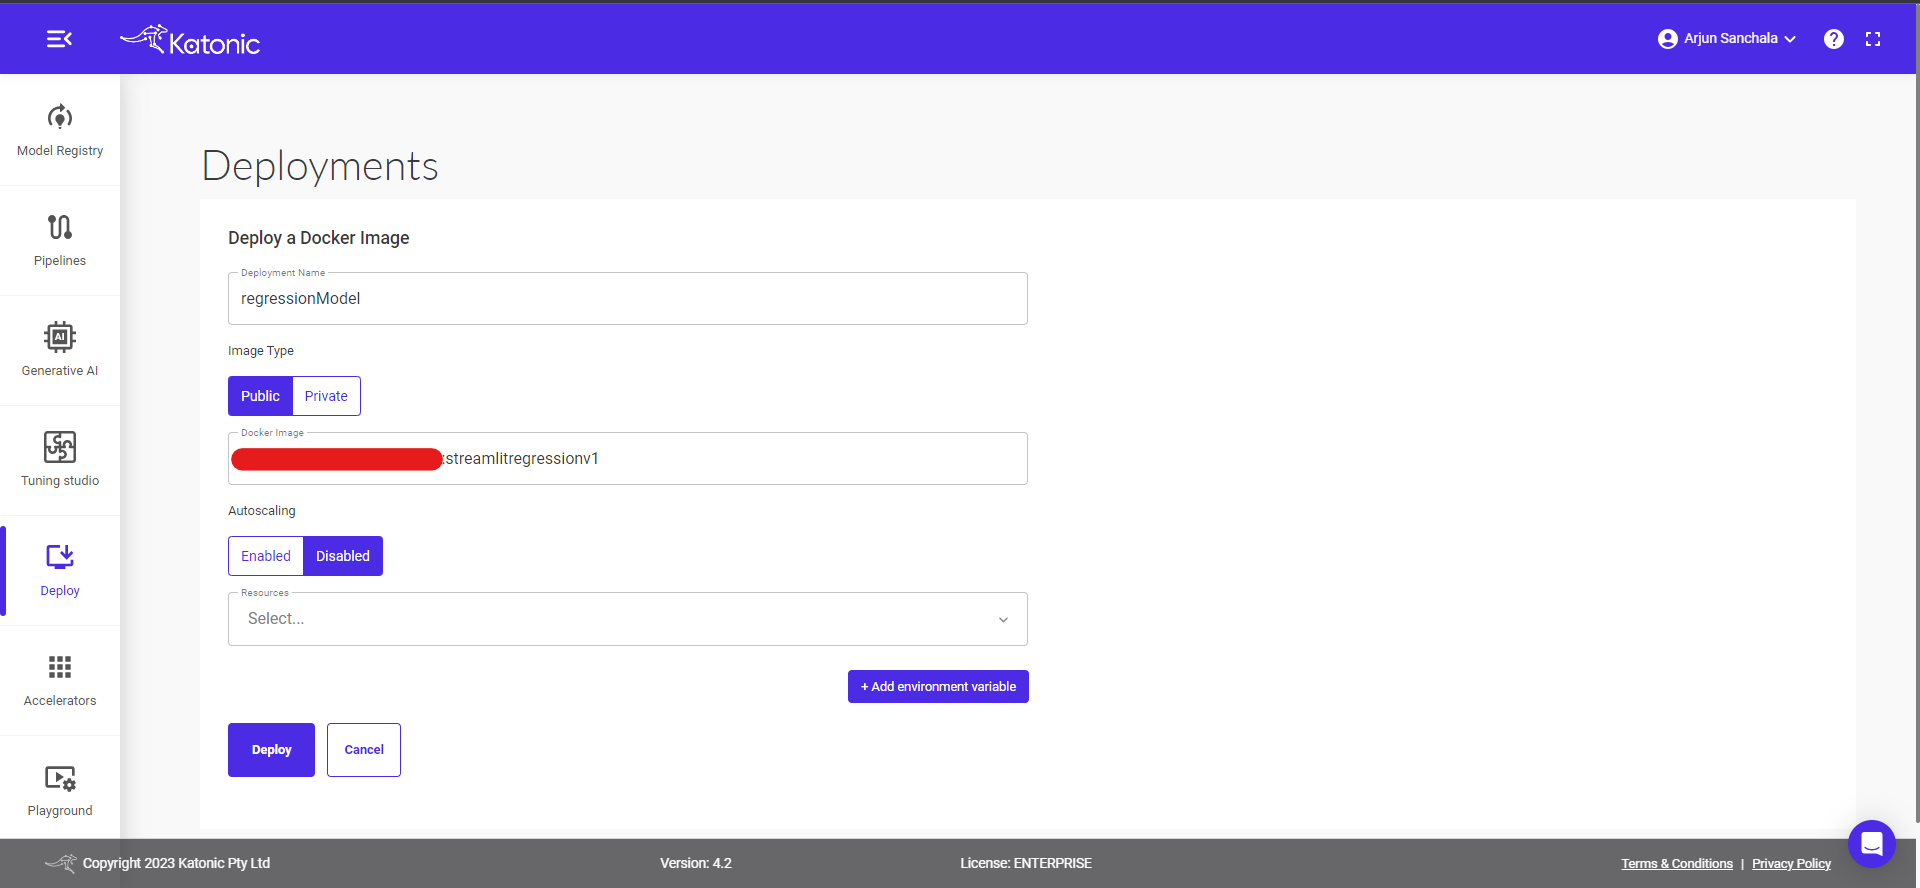
- Select the resource you want to deploy for the Docker from the drop-down menu.
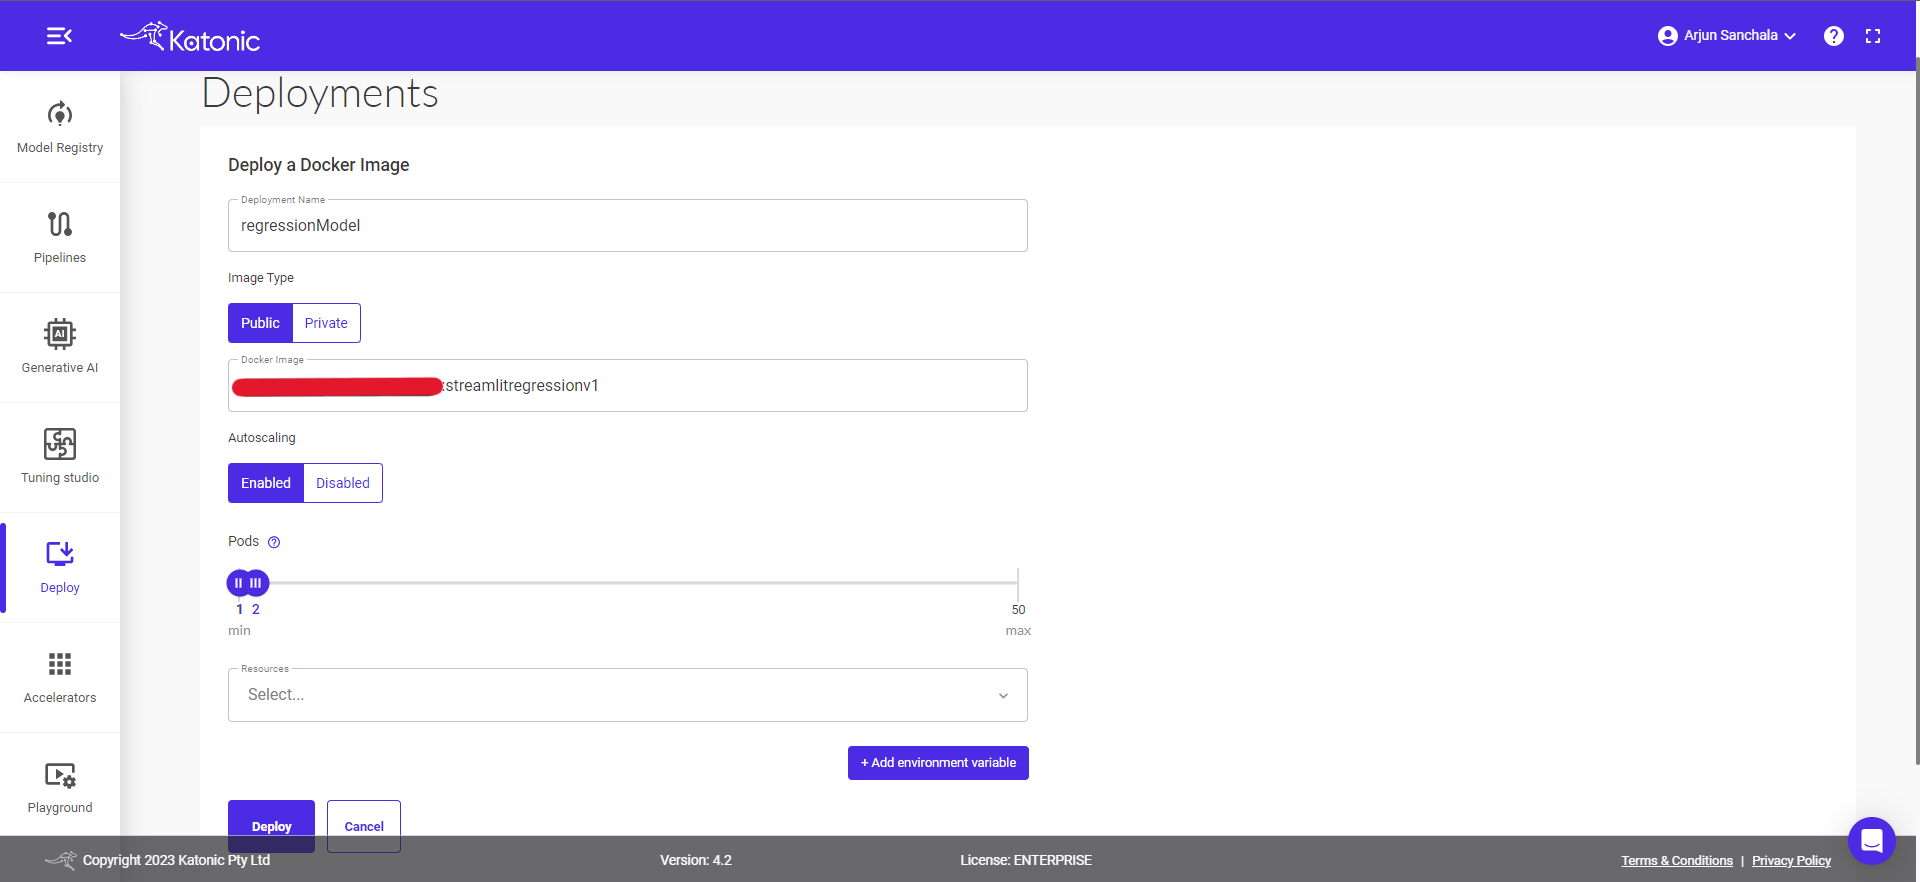

- Select +Add Environment Variables if your model contains any OS dependent parameters.
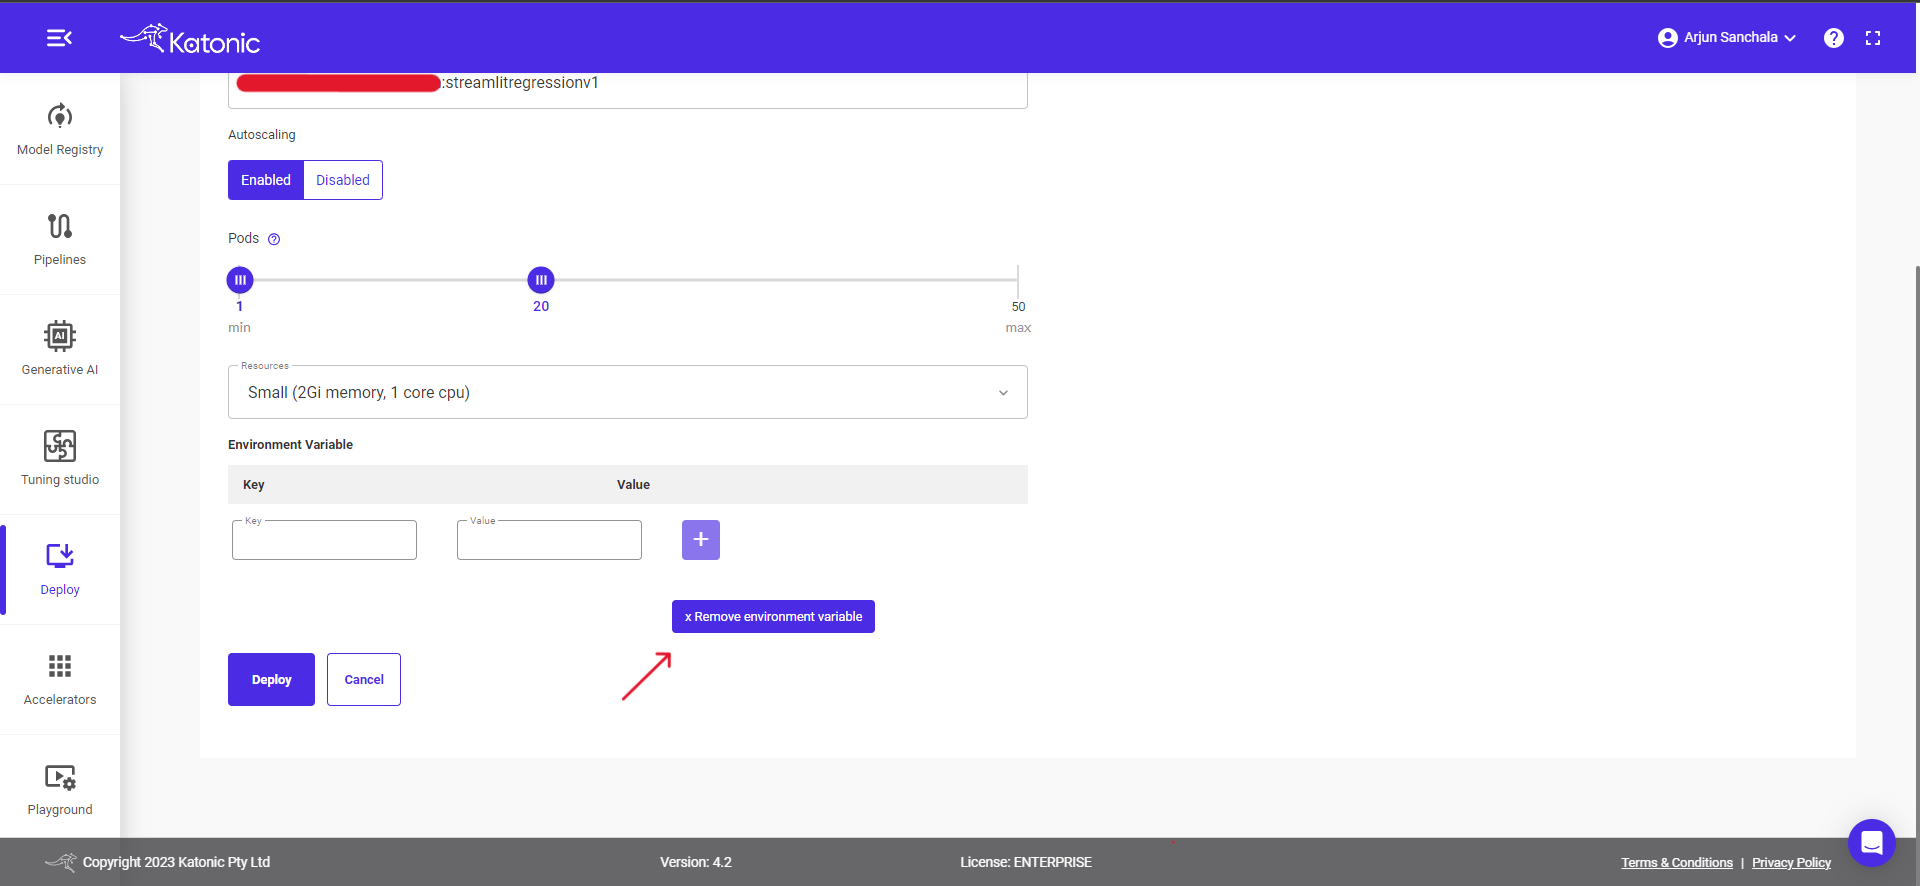
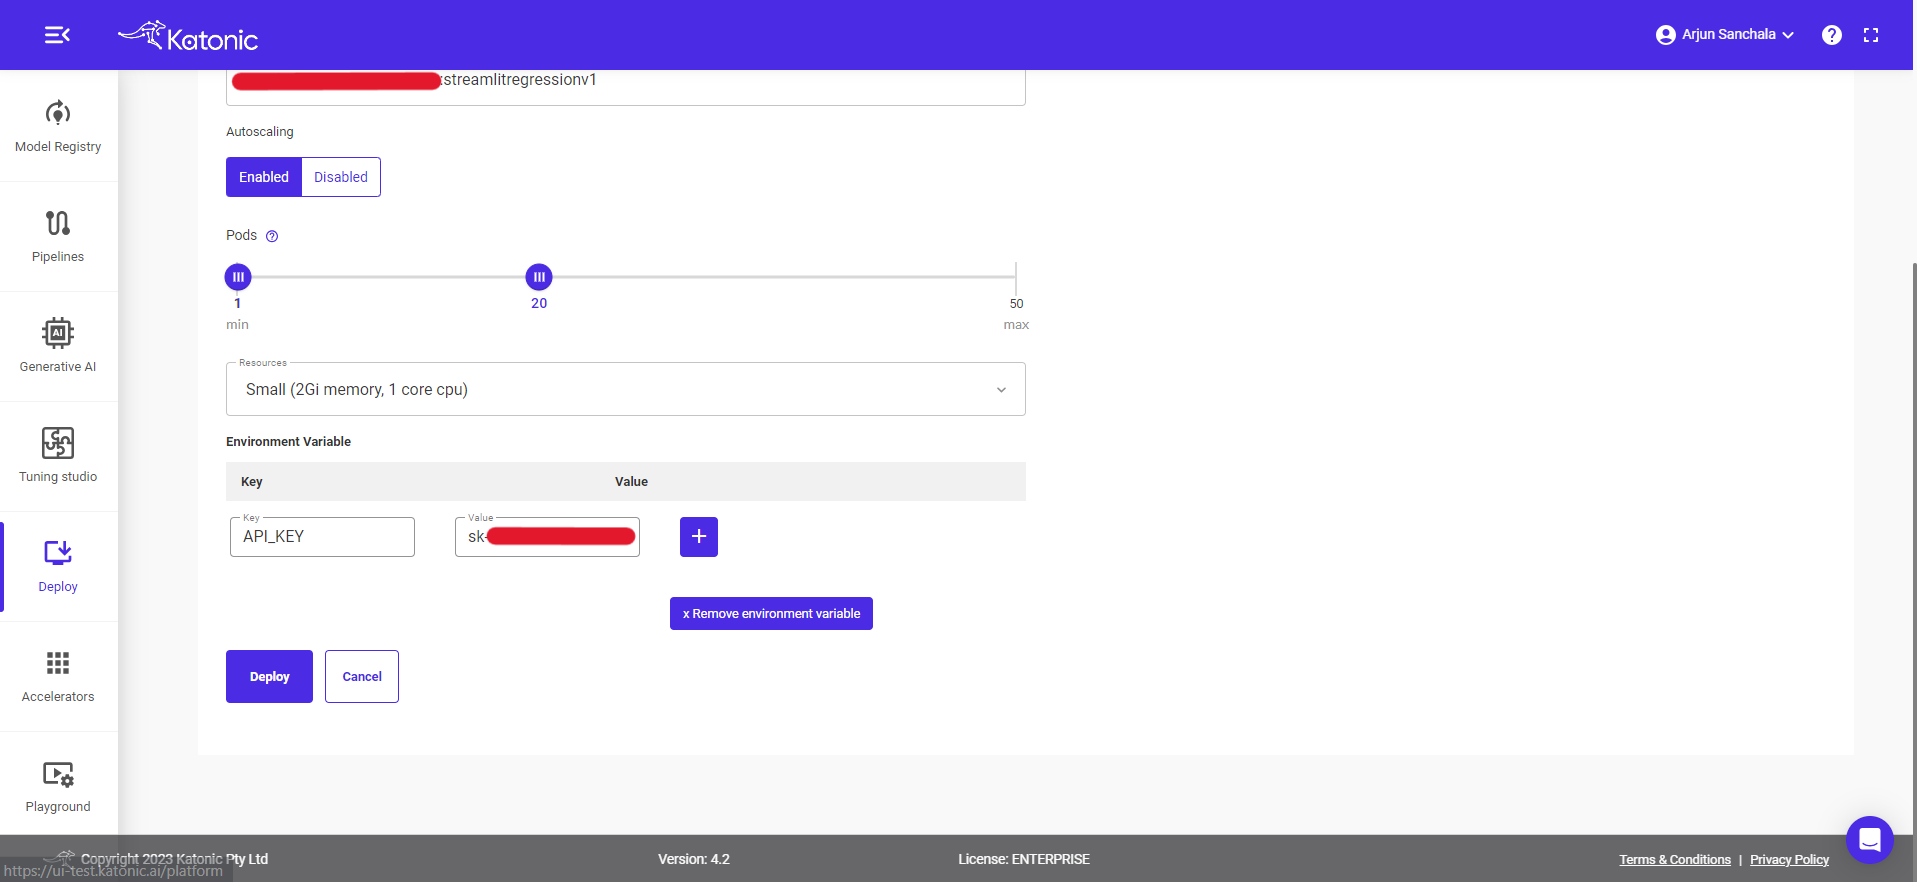
Note: After adding variable name and value, don't forget to click on [+] button beside it; that'll add variables to your deployment.
- Click on
Deploy.
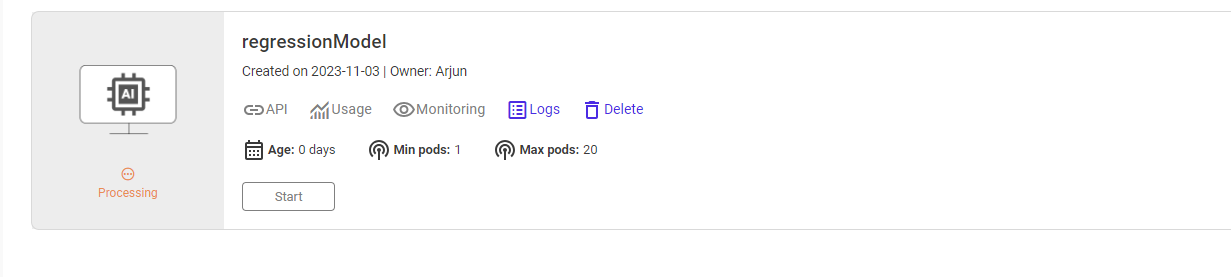
- Once your Docker API is created, you will be able to view it in the Deploy section where it will be in "Processing" state in the beginning. Click on
Refreshto update the status.
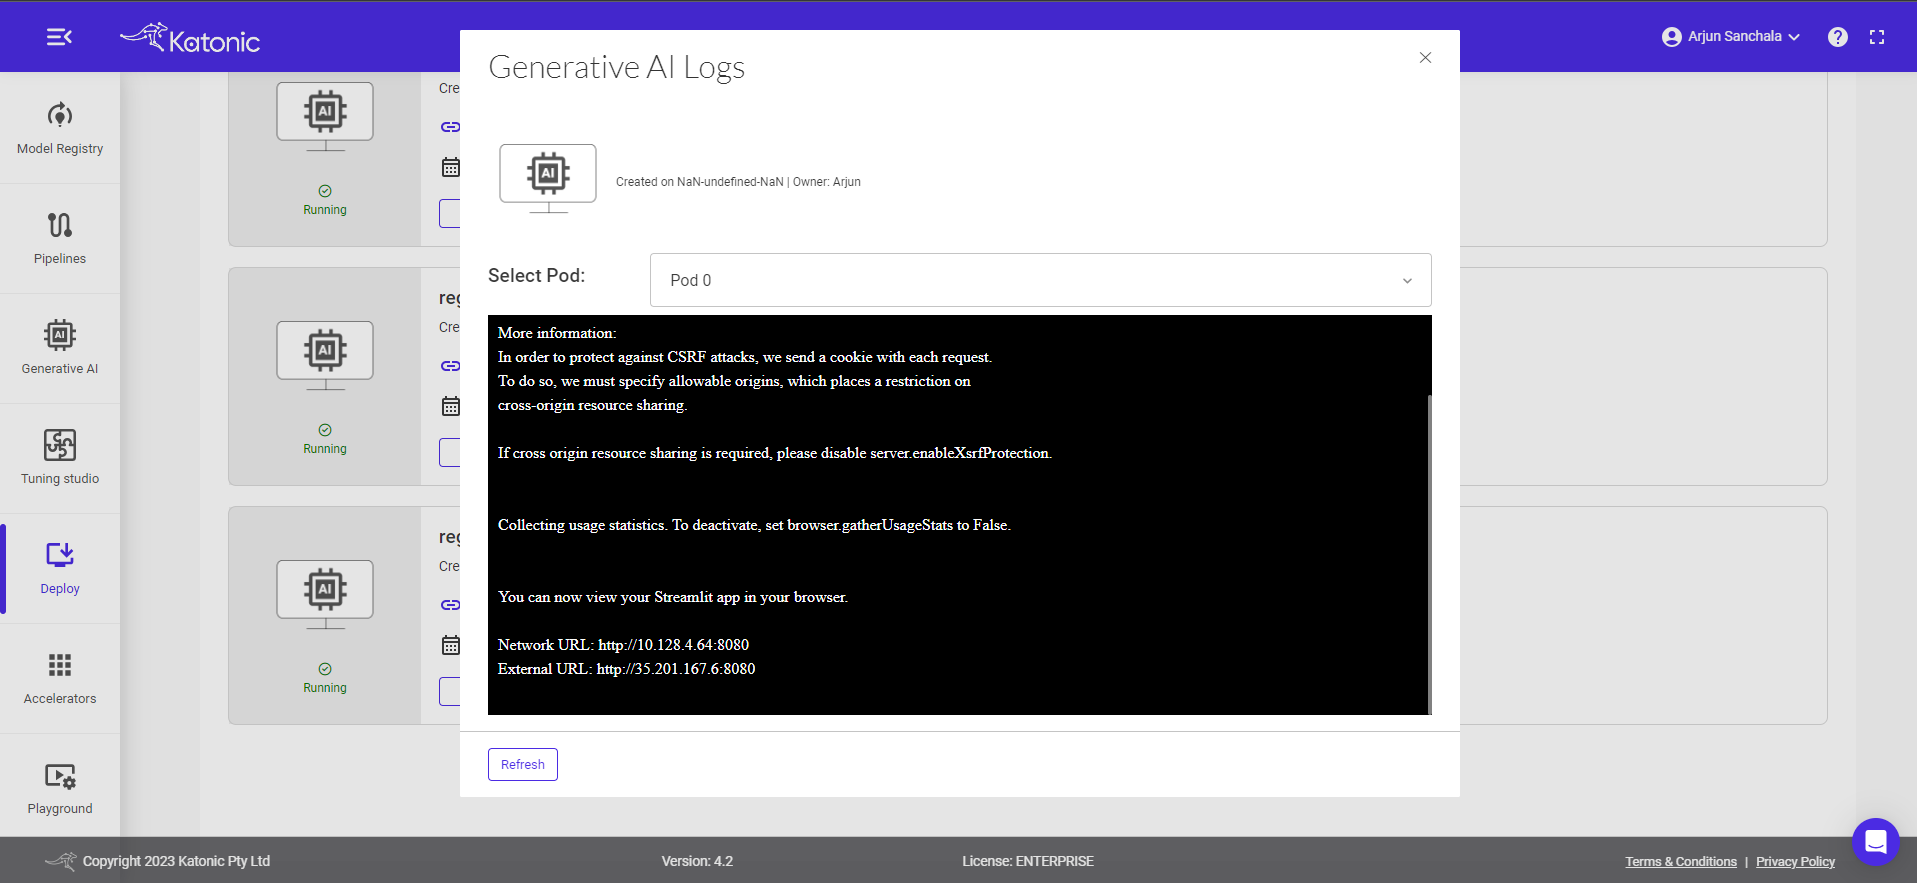
- You can also check out the logs to see the progress of the current deployment using the
Logsoption.
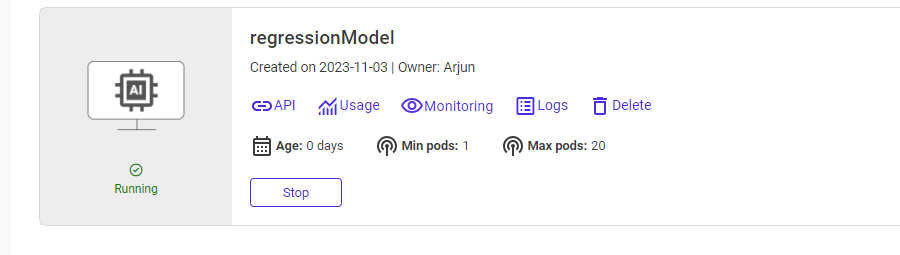
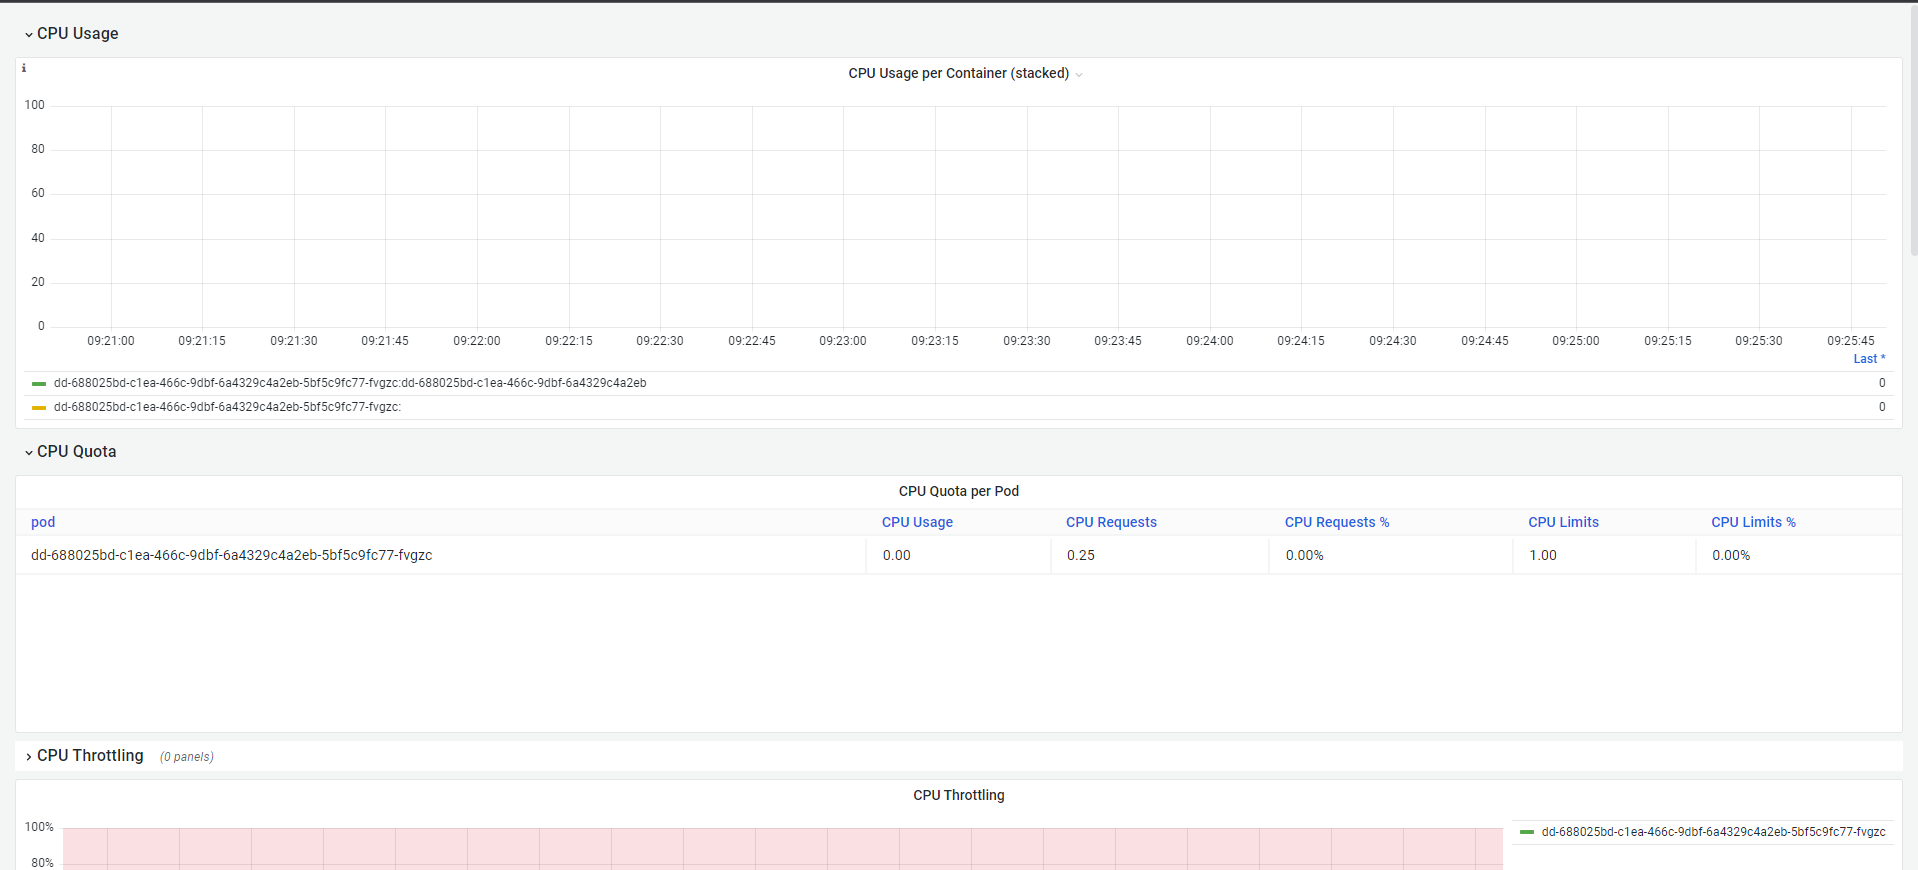
- Once your Docker API is in the "Running" state, you can check the consumption of hardware resources from the
Usageoption.
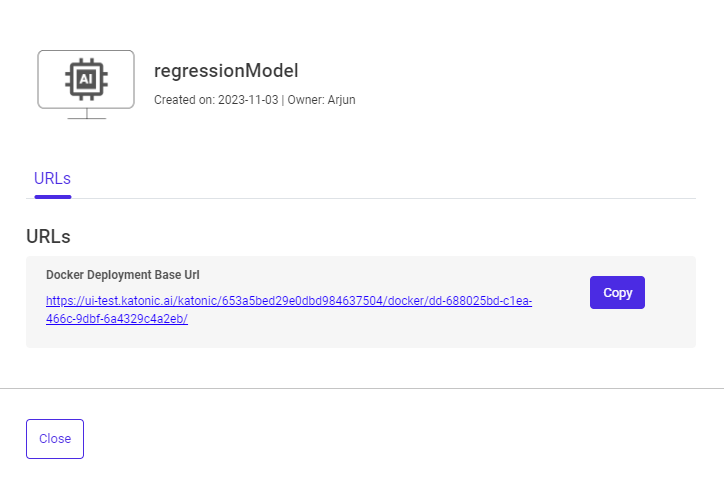
- You can access the API endpoint by clicking on
API. You can copy the URL and access the application by pasting the URL in the browser.
Click on
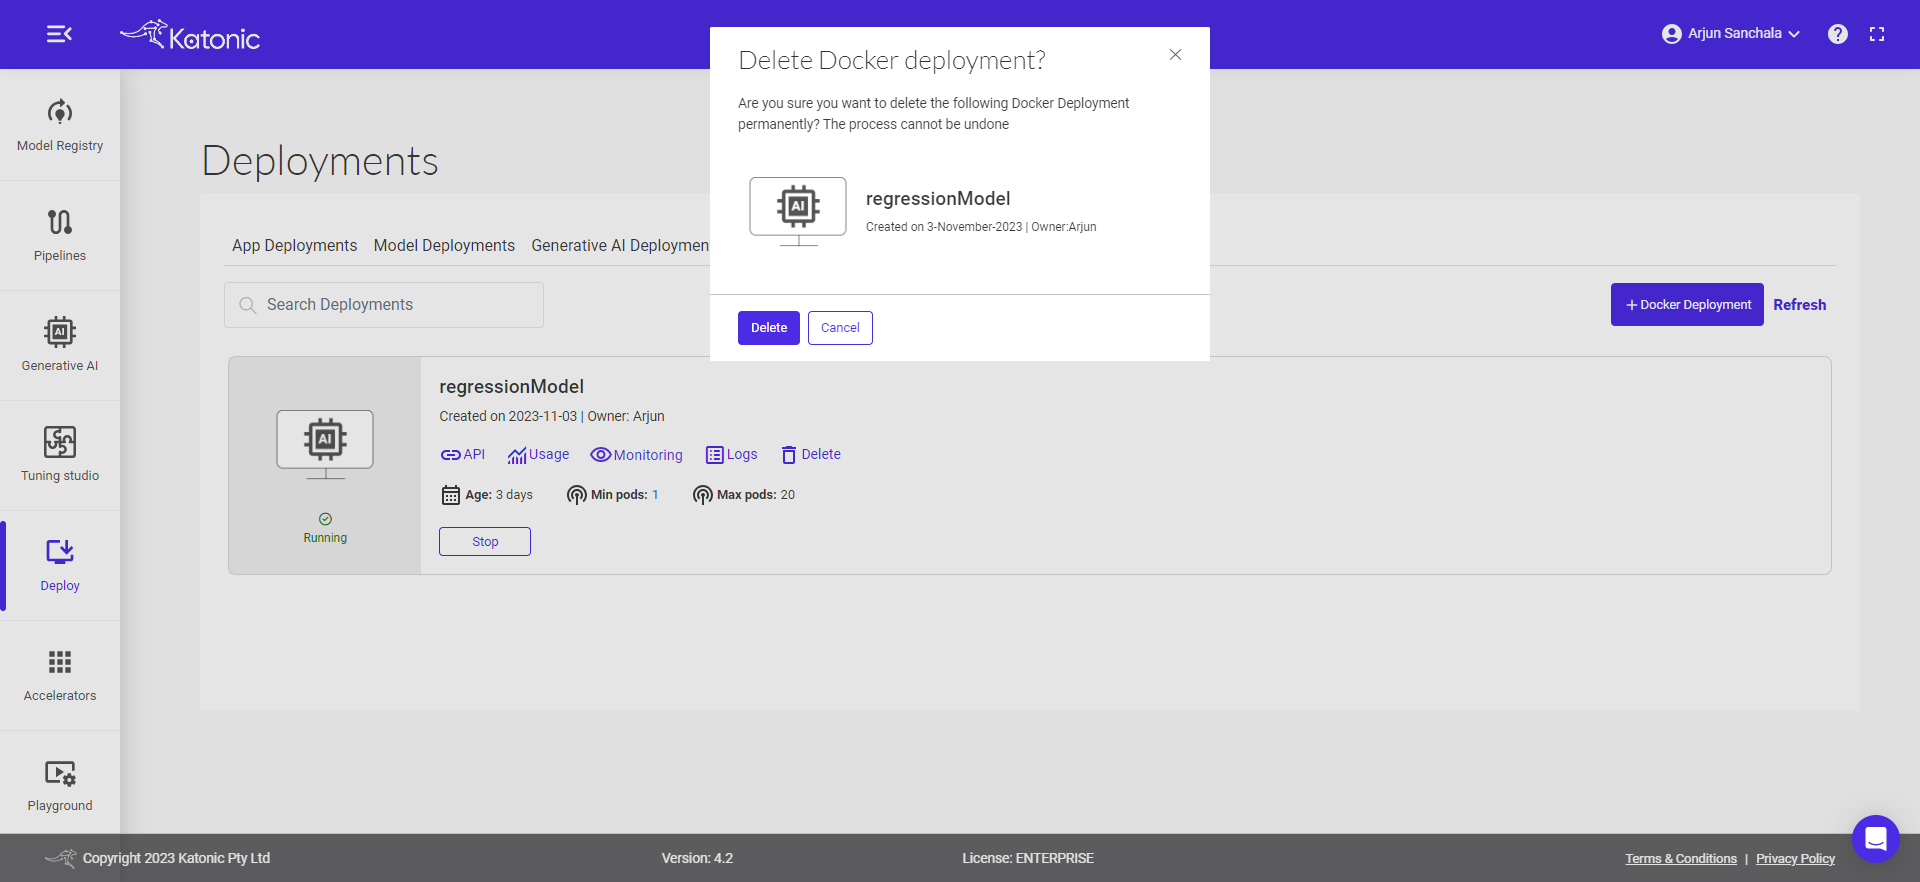
Monitoring, and a dashboard would open up in a new tab. This will help to monitor the effectiveness and efficiency of your deployed Docker.To delete the unused models, use the
Deletebutton.