Distributed Workspace
A distributed workspace enable seamless collaboration, scalable computing, and efficient resource allocation for teams working on complex machine learning projects. Tools like Spark and Dask, this environment enables efficient distributed computing, making it possible to process vast amounts of data and tackle complex tasks. With the distributed workspace environment on the Katonic platform, developers gain access to the powerful capabilities of Spark and Dask, enabling them to tackle large-scale projects and unleash the full potential of distributed computing for their applications.
Katonic has built-in support for Distributed environments on JupyterLab,Jupyter
Supported Workspaces
There are a variety of workspaces that are supported by Katonic Platform:
JupyterLab
JupyterLab is a next-generation web-based user interface for Project Jupyter. JupyterLab enables you to work with documents and activities such as Jupyter notebooks, text editors, terminals, and custom components in a flexible, integrated, Distributed,and extensible manner.
Learn more about JupyterLab.
Jupyter
Jupyter is a project and community whose goal is to "develop open-source software, open-standards, and services for interactive computing across dozens of programming languages".
Learn more about Jupyter.
Distributed tools
The two main Distributed tools that are supported by Katonic Platform:
Spark
Apache Spark is a fast and powerful distributed computing system for big data processing and analytics. Katonic spark image provides the ease of selecting resources for both master and worker node along with number of workers.
Dask
Dask is a flexible parallel computing library for scalable and efficient data processing and analytics. Katonic dask image also provide the resources for both master and worker nodes.
Ray
Ray-distributed environment is a powerful framework that enables you to scale and distribute your applications across multiple machines or clusters effortlessly. It simplifies the process of building parallel and distributed systems, allowing you to achieve faster and more efficient computation with ease. Katonic ray image provides the ease of selecting resources for both master and worker node along with number of workers.
Launch a Distributed workspace
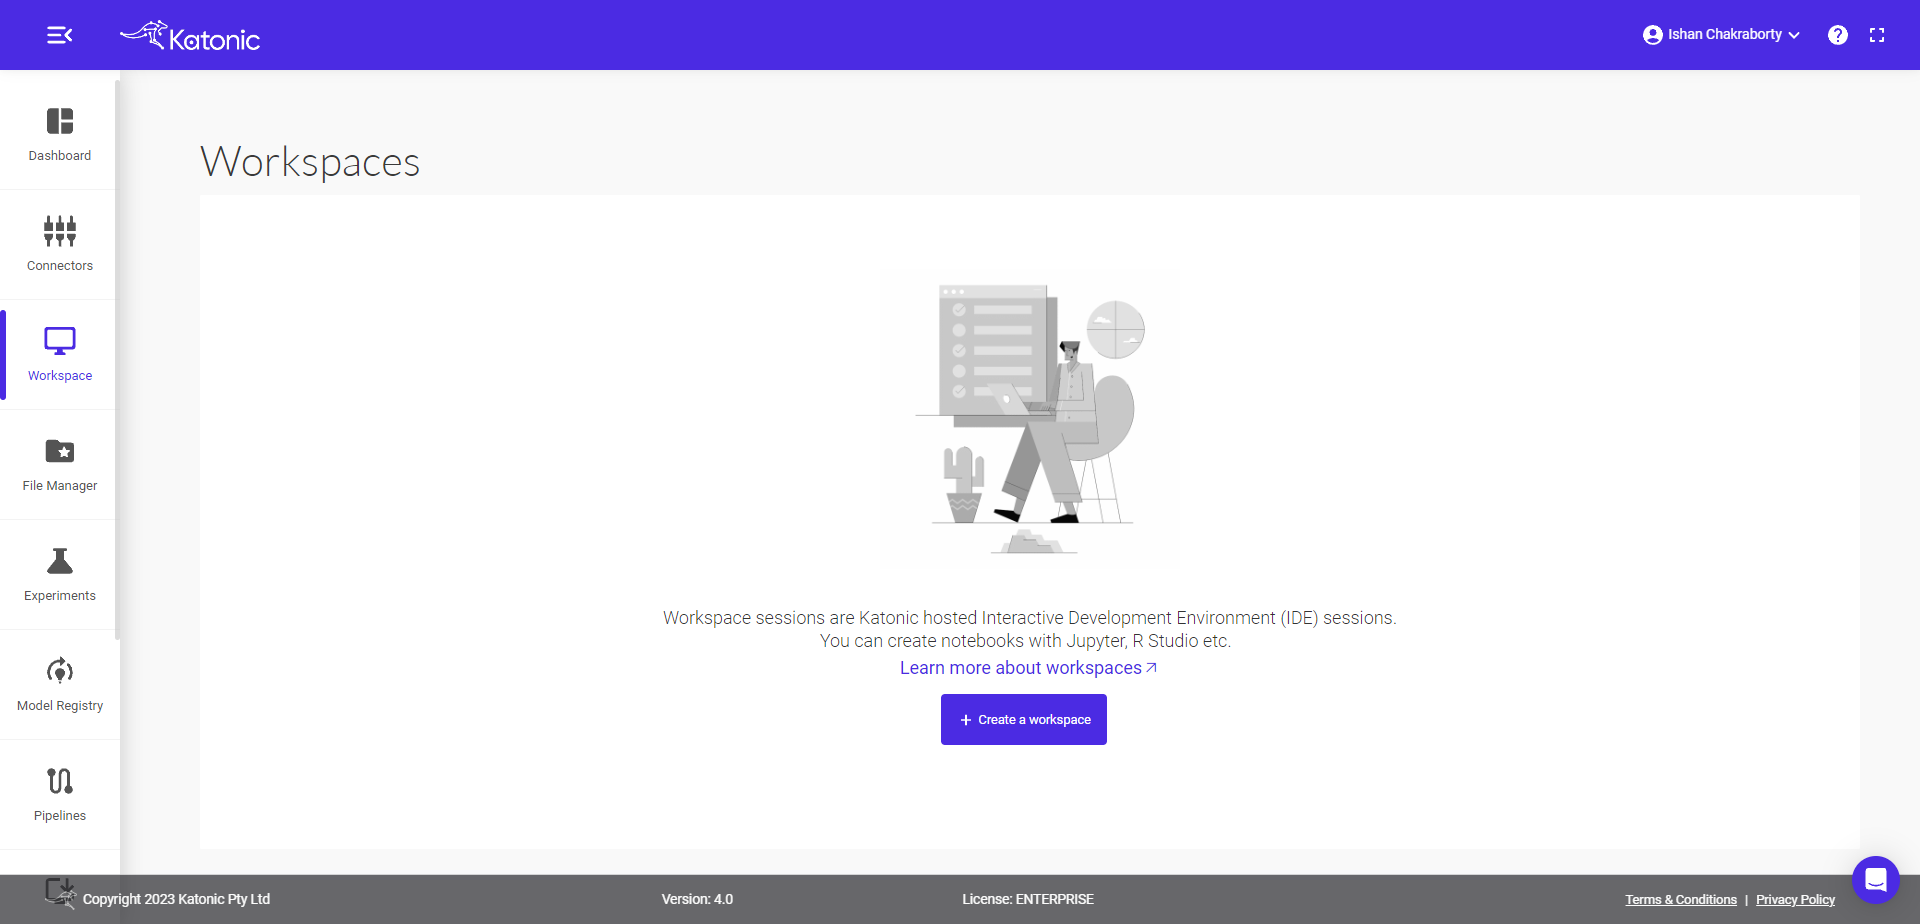
Workspace sessions are interactive sessions hosted by a Katonic executor where you can interact with code notebooks like Jupyter, RStudio and Visual Studio Code. The software tools and associated configurations available in your session are called Workspaces.
1. Launching a Distributed workspace with JupyterLab.
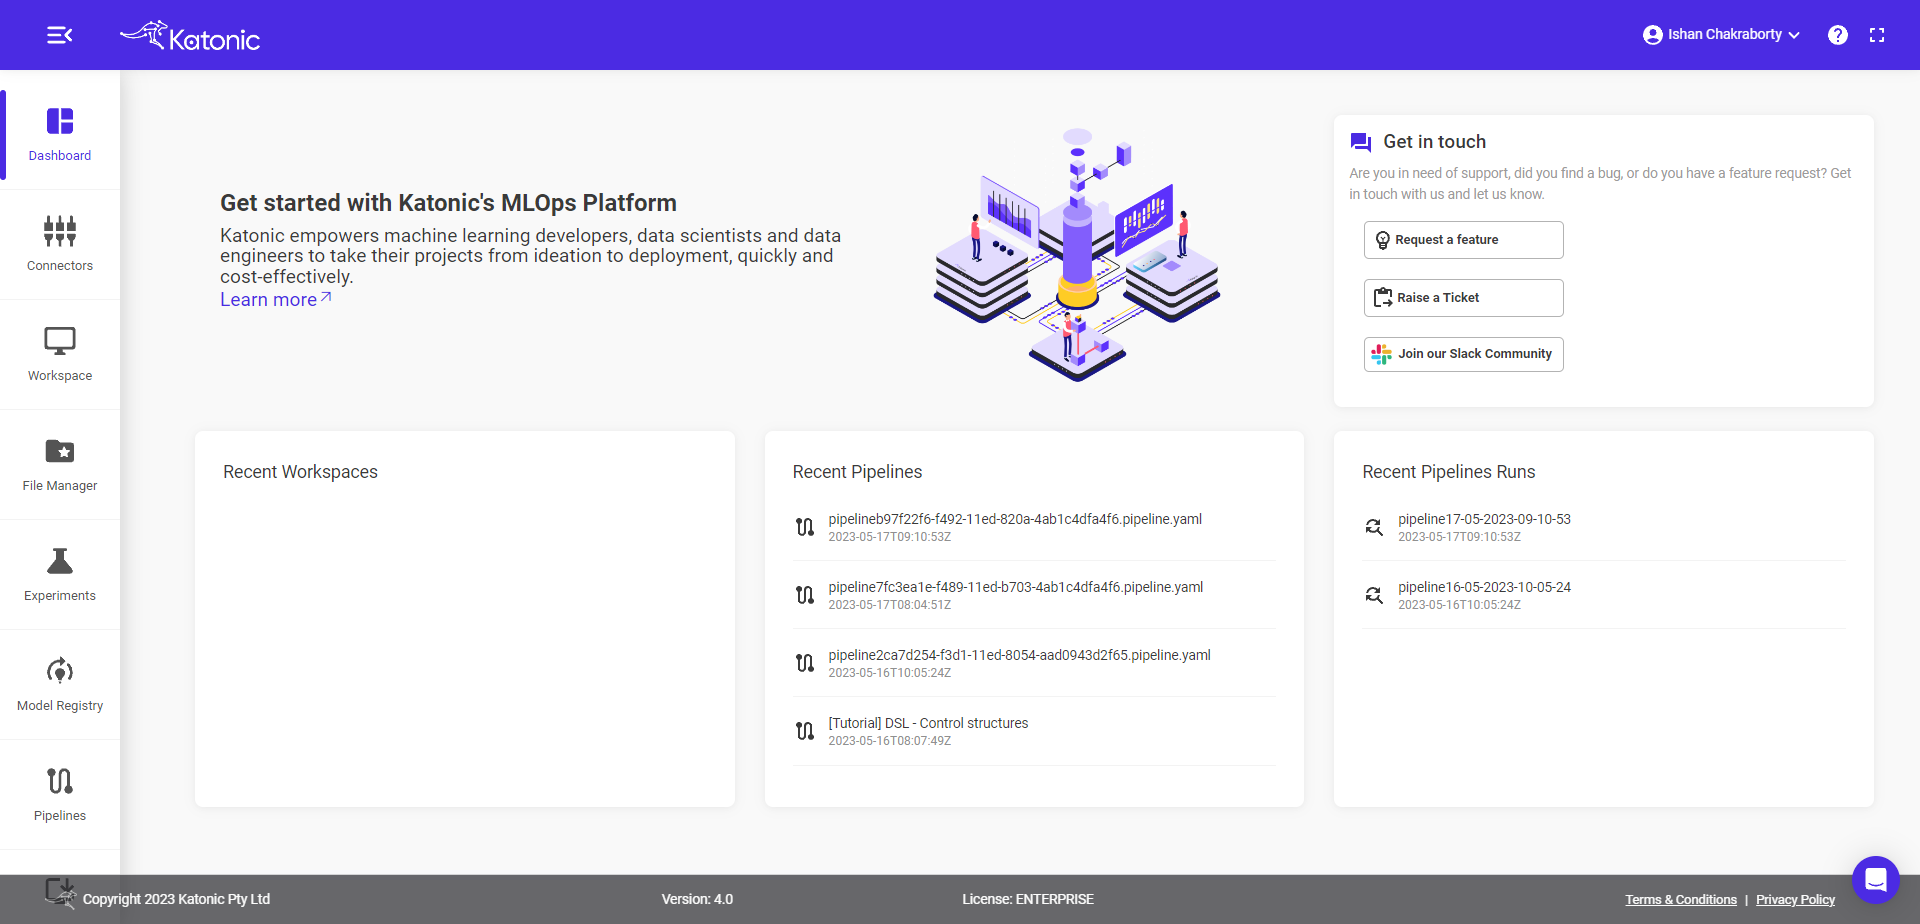
1.1. Click on Workspace from the left sidebar.
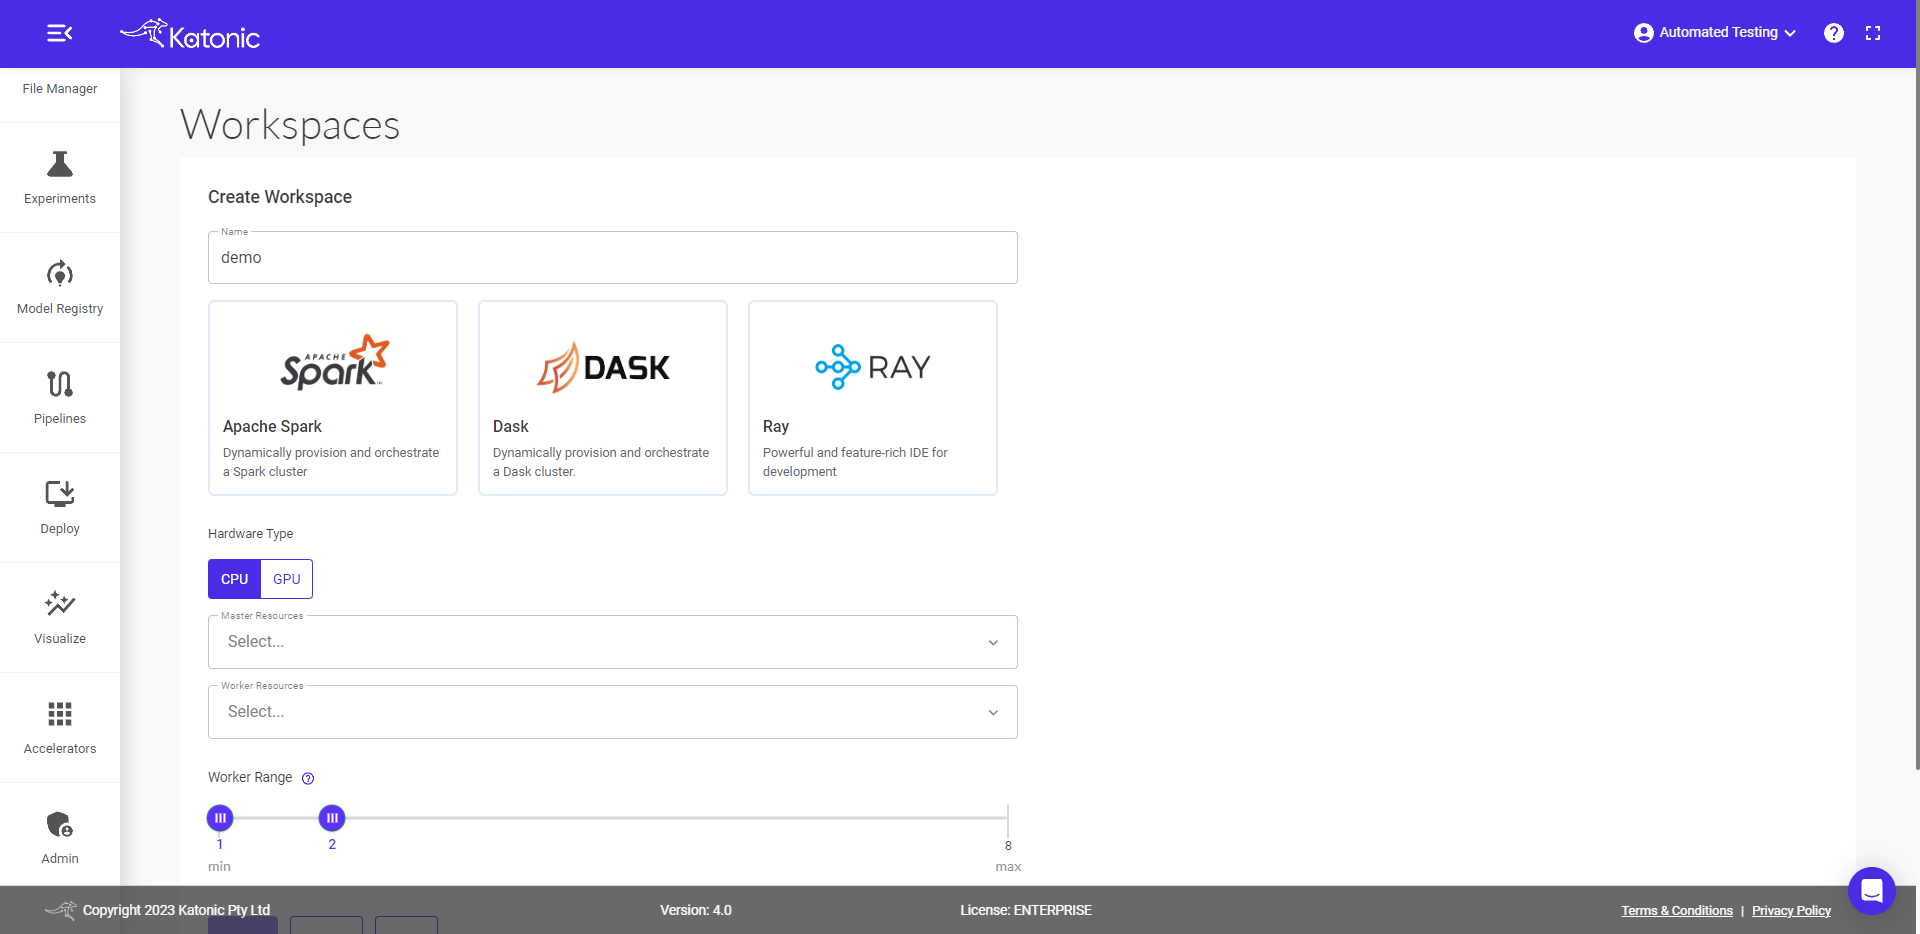
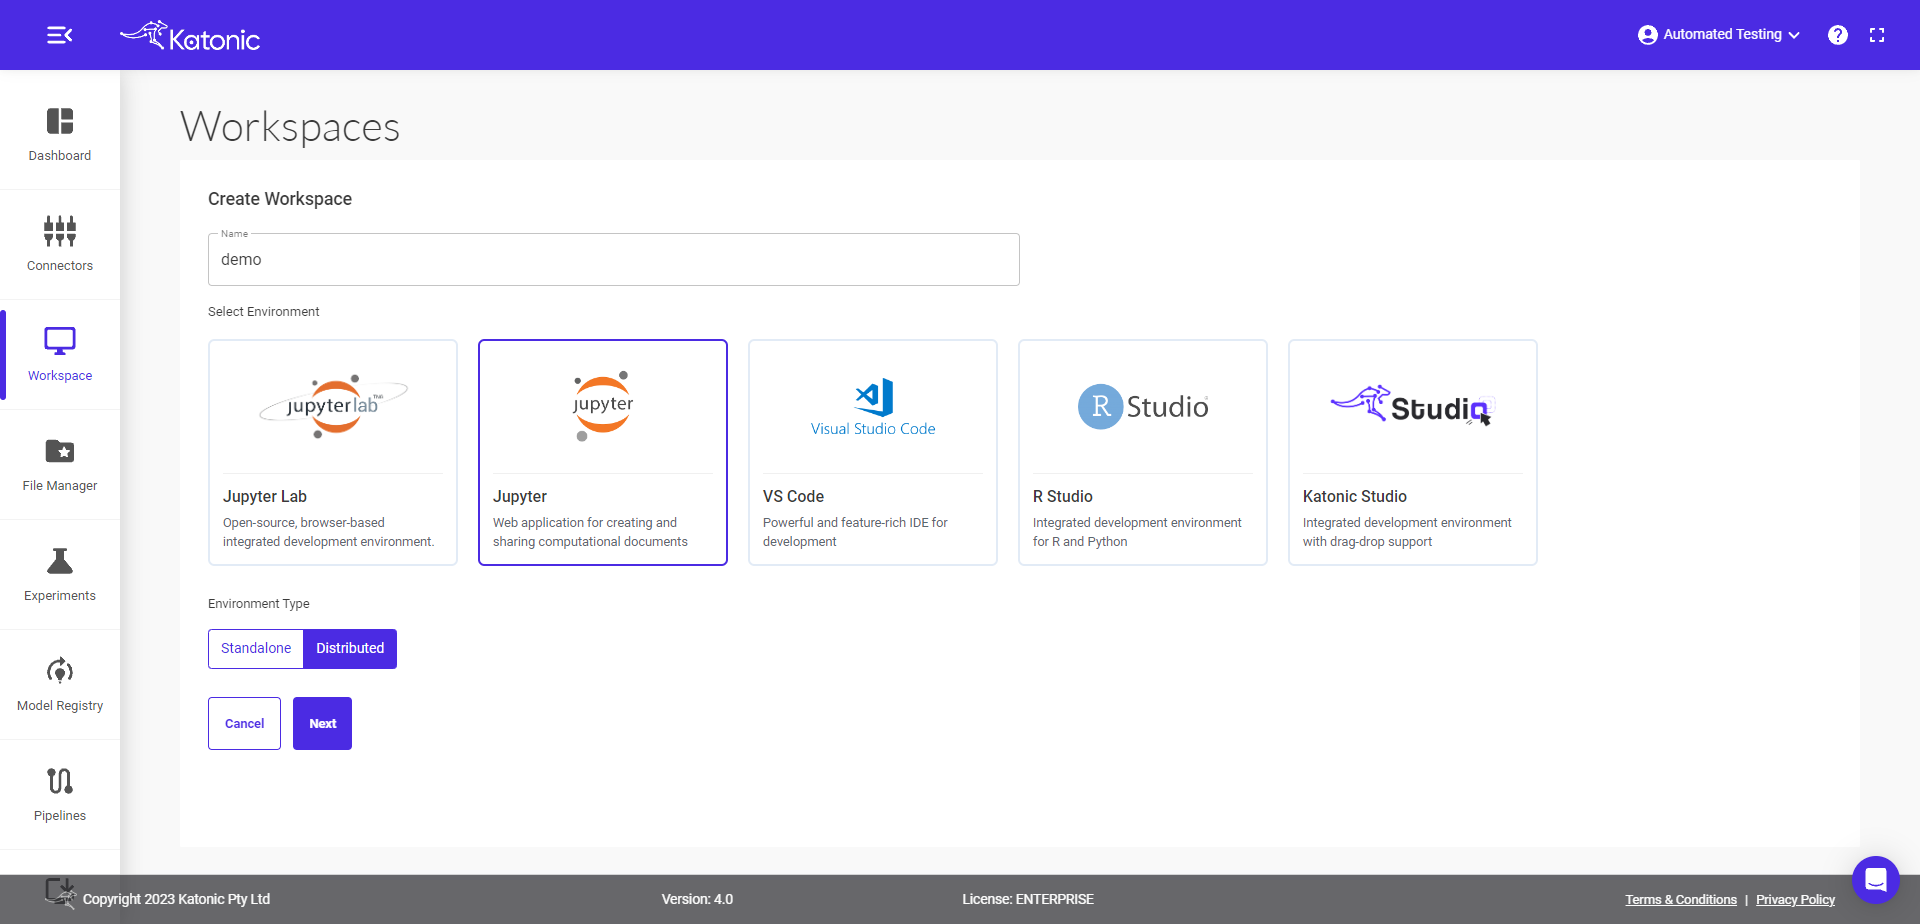
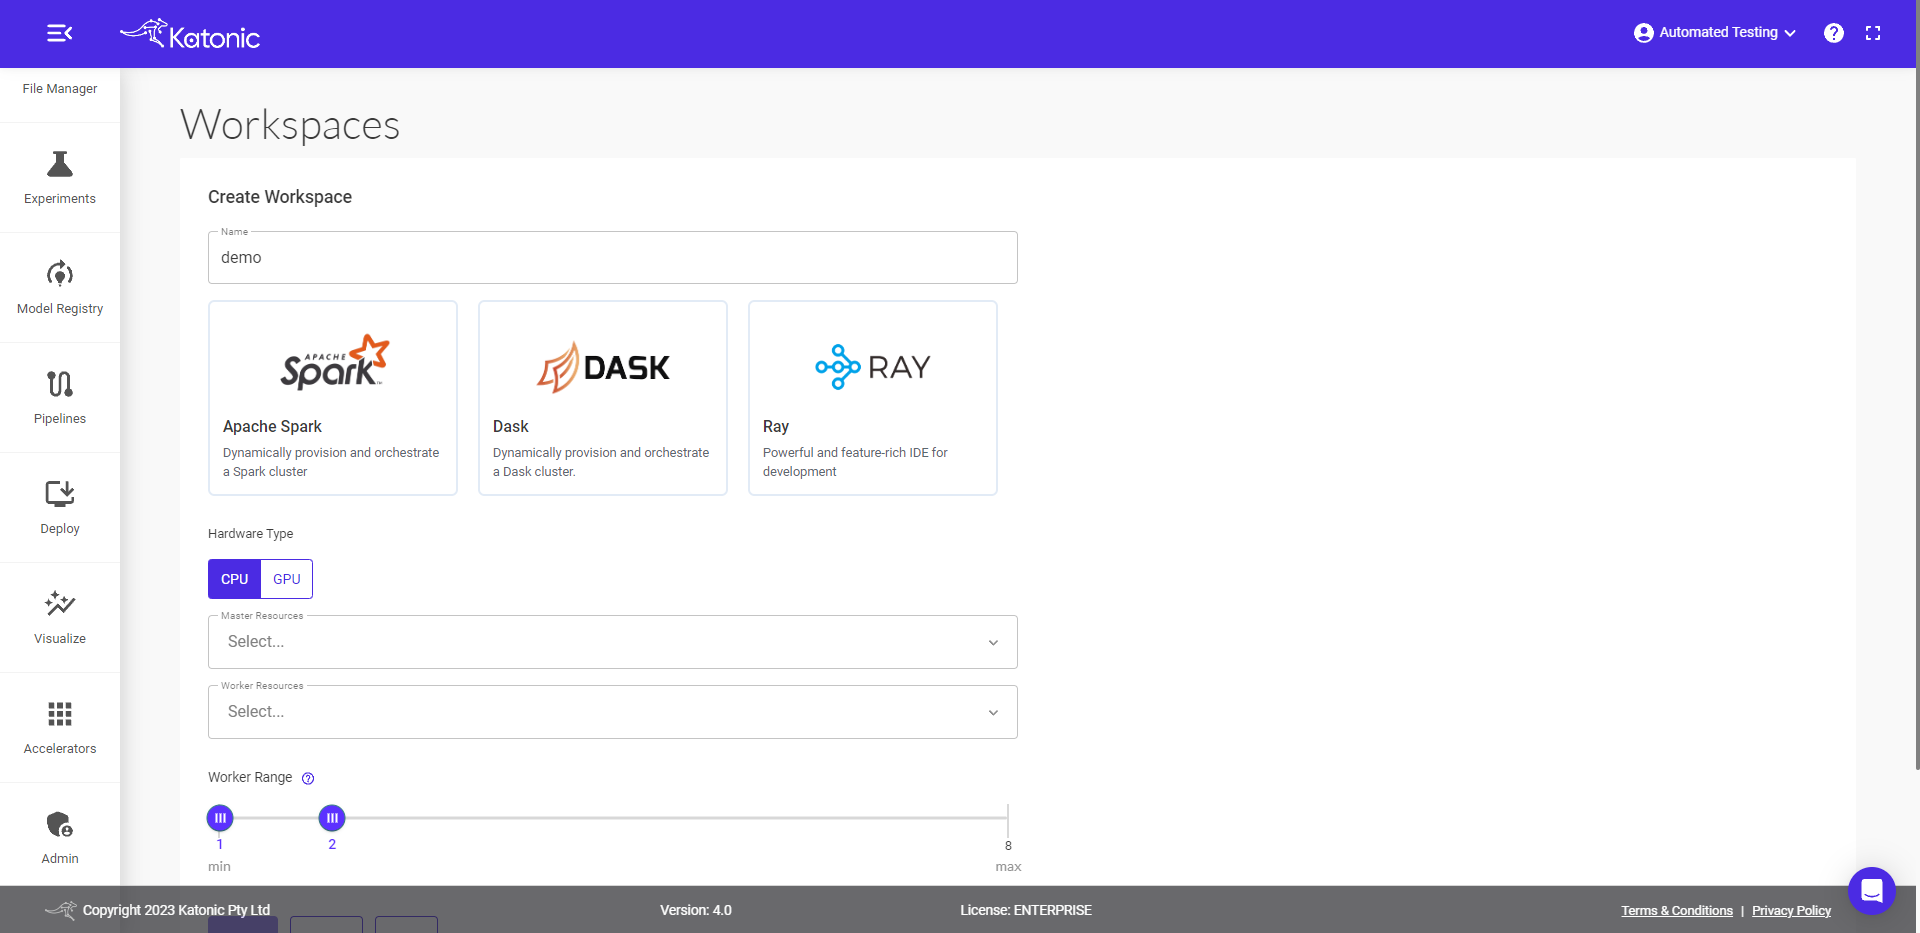
1.2. Click on "Create Workspace".
1.3. Enter a name for your workspace.
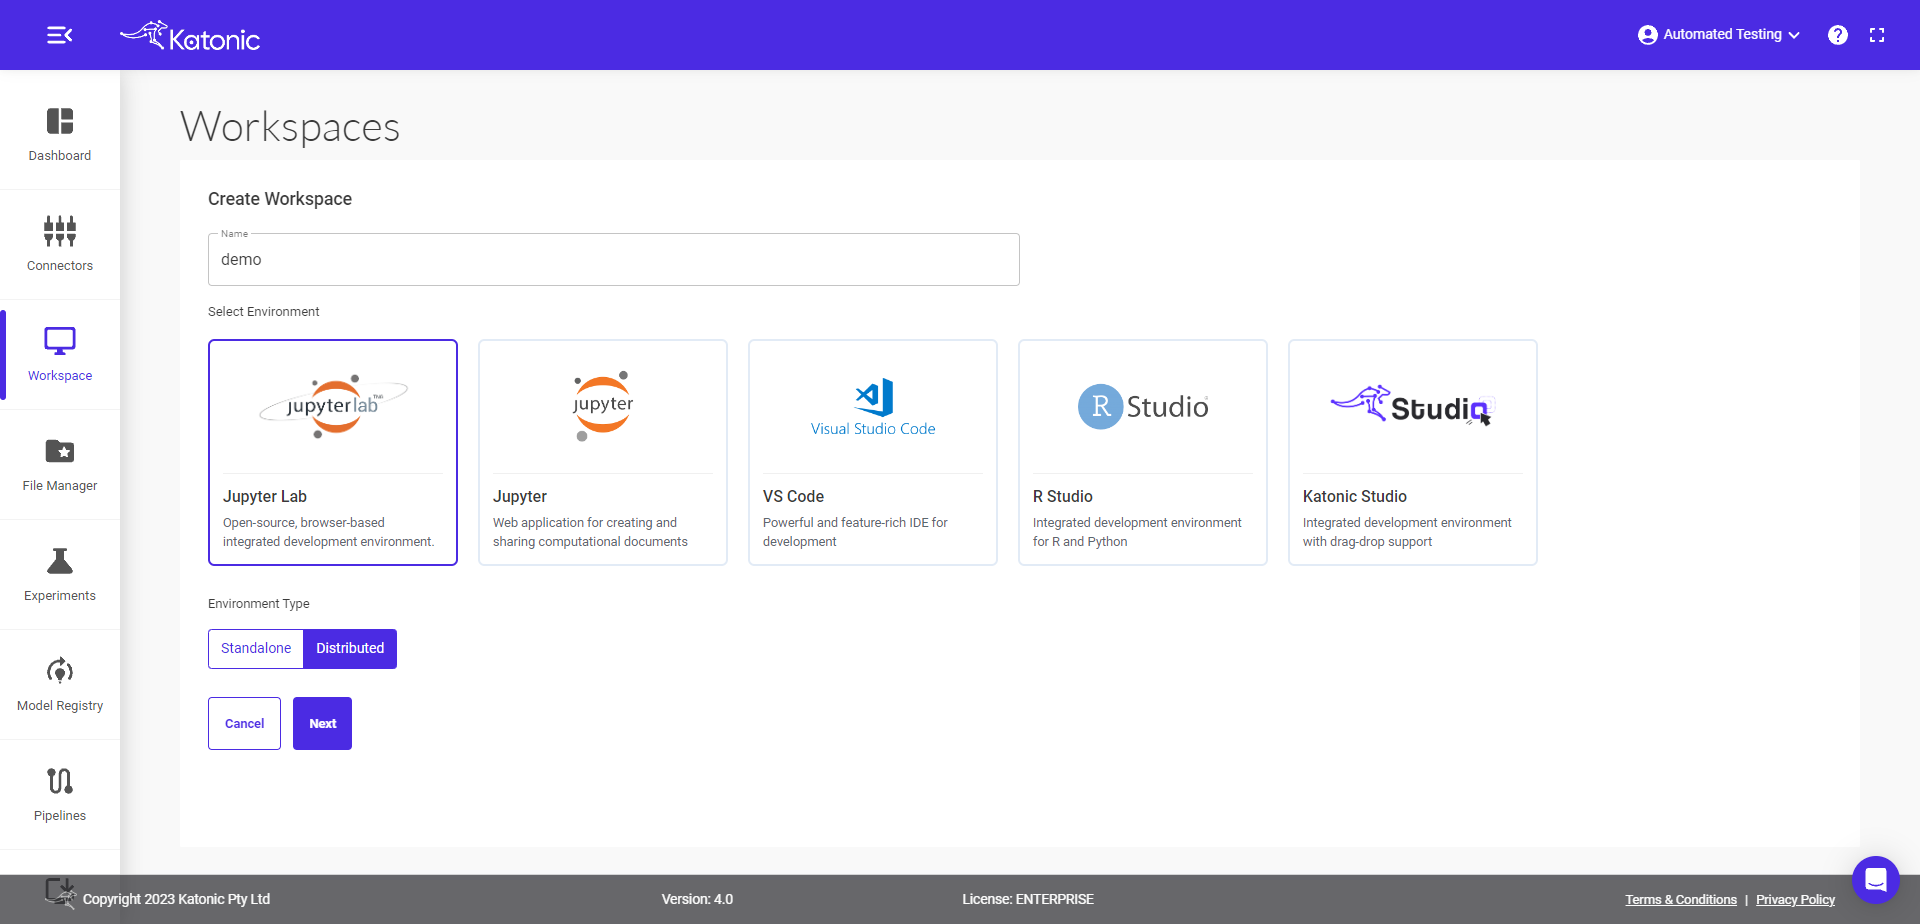
1.4. Select an environment for your workspace. An environment is the software configuration (such as language and packages) that will be used in your workspace. Select Jupyterlab for example.
1.5 select Environment type as a Distributed and click on next.
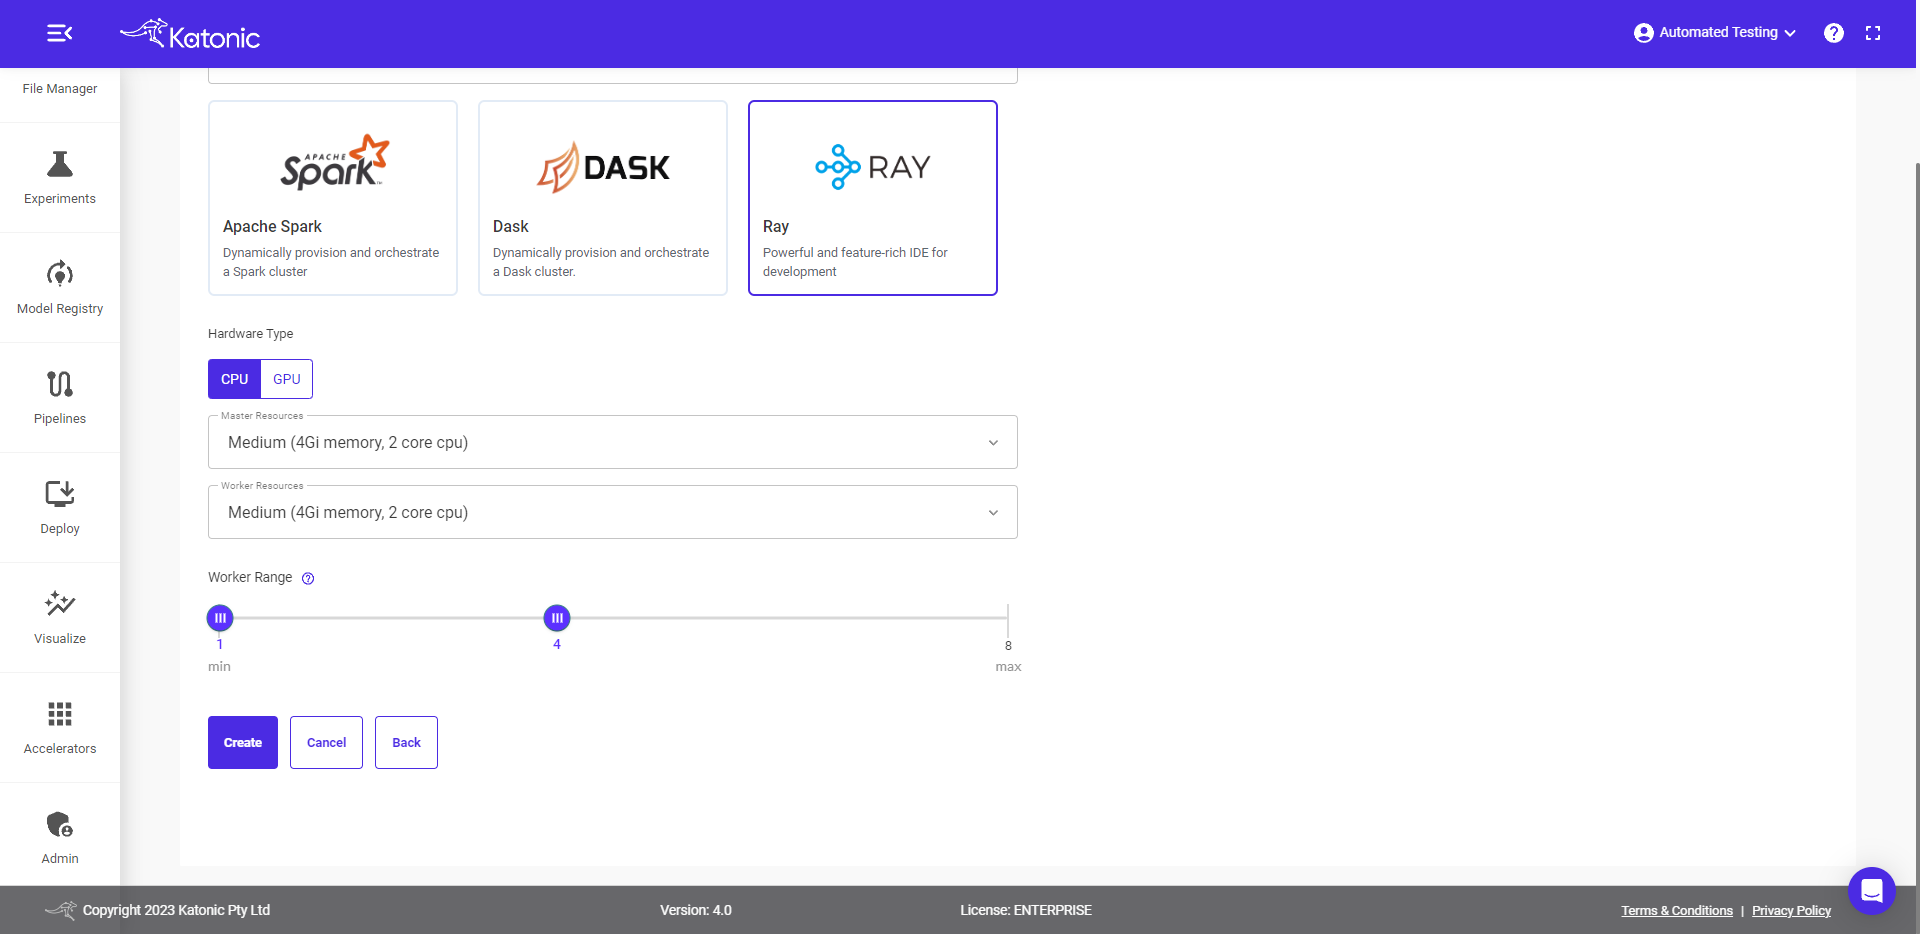
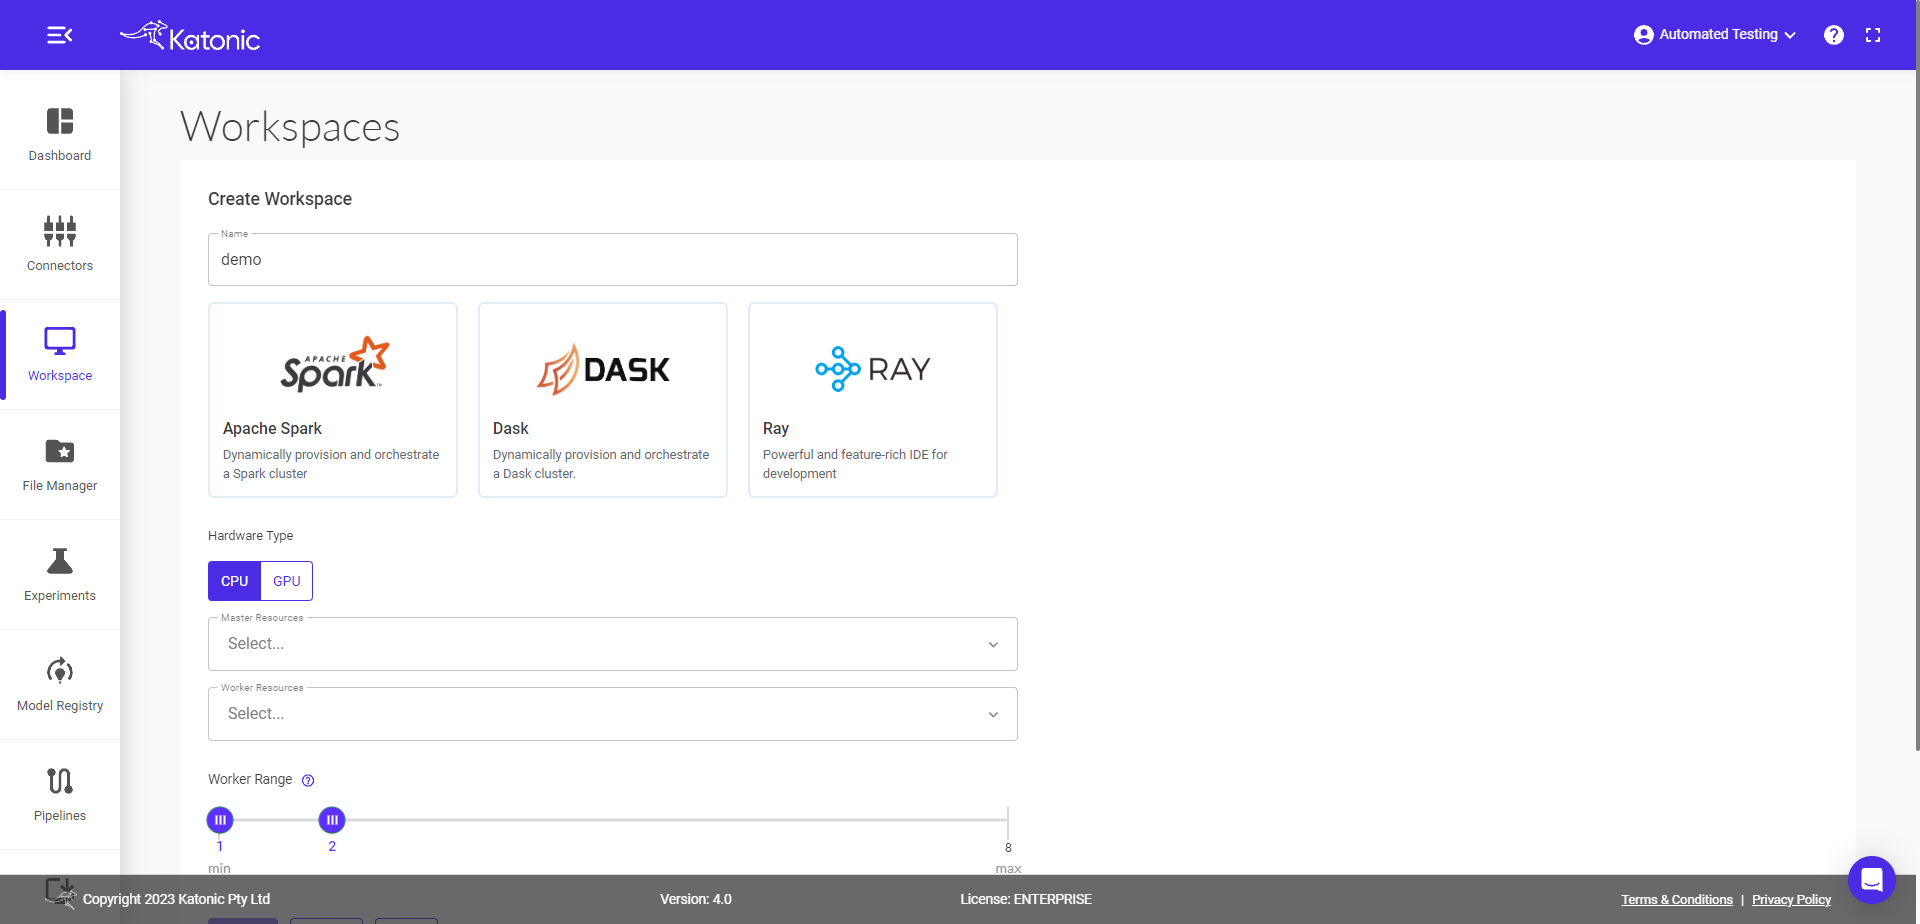
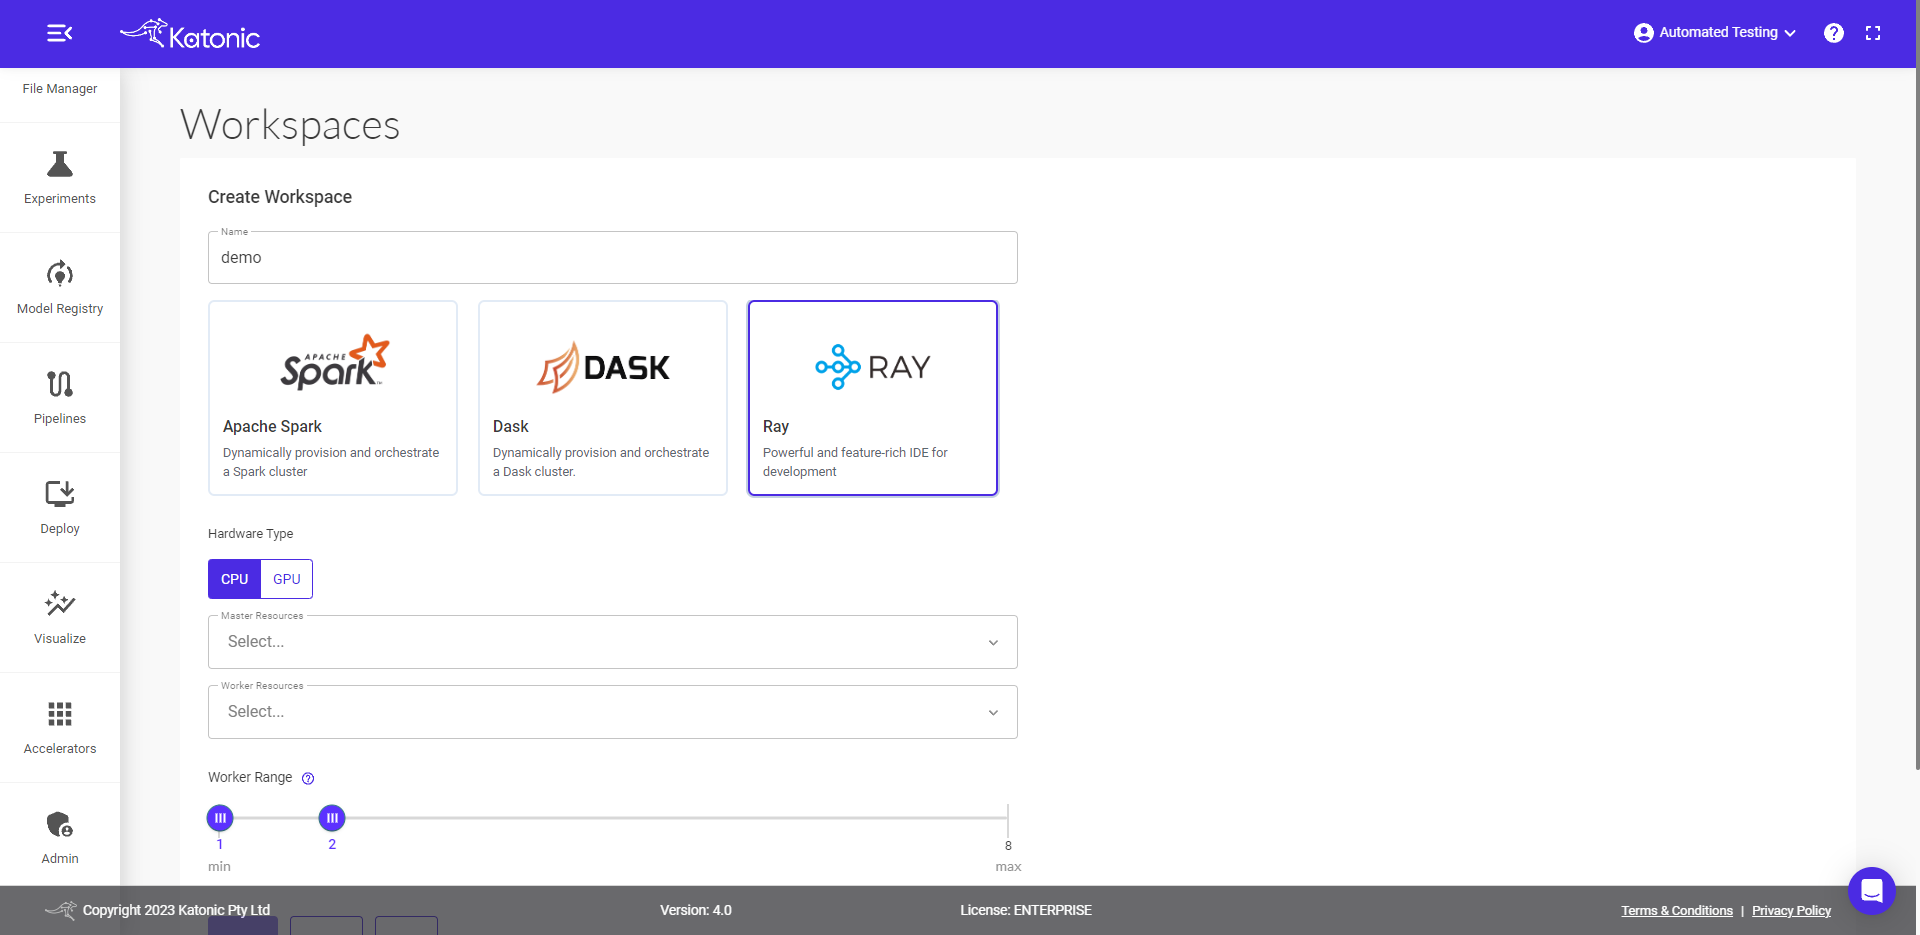
1.6. Select which distibuted tool you wanted to use for your application. Spark, Dask, or Ray
if Spark

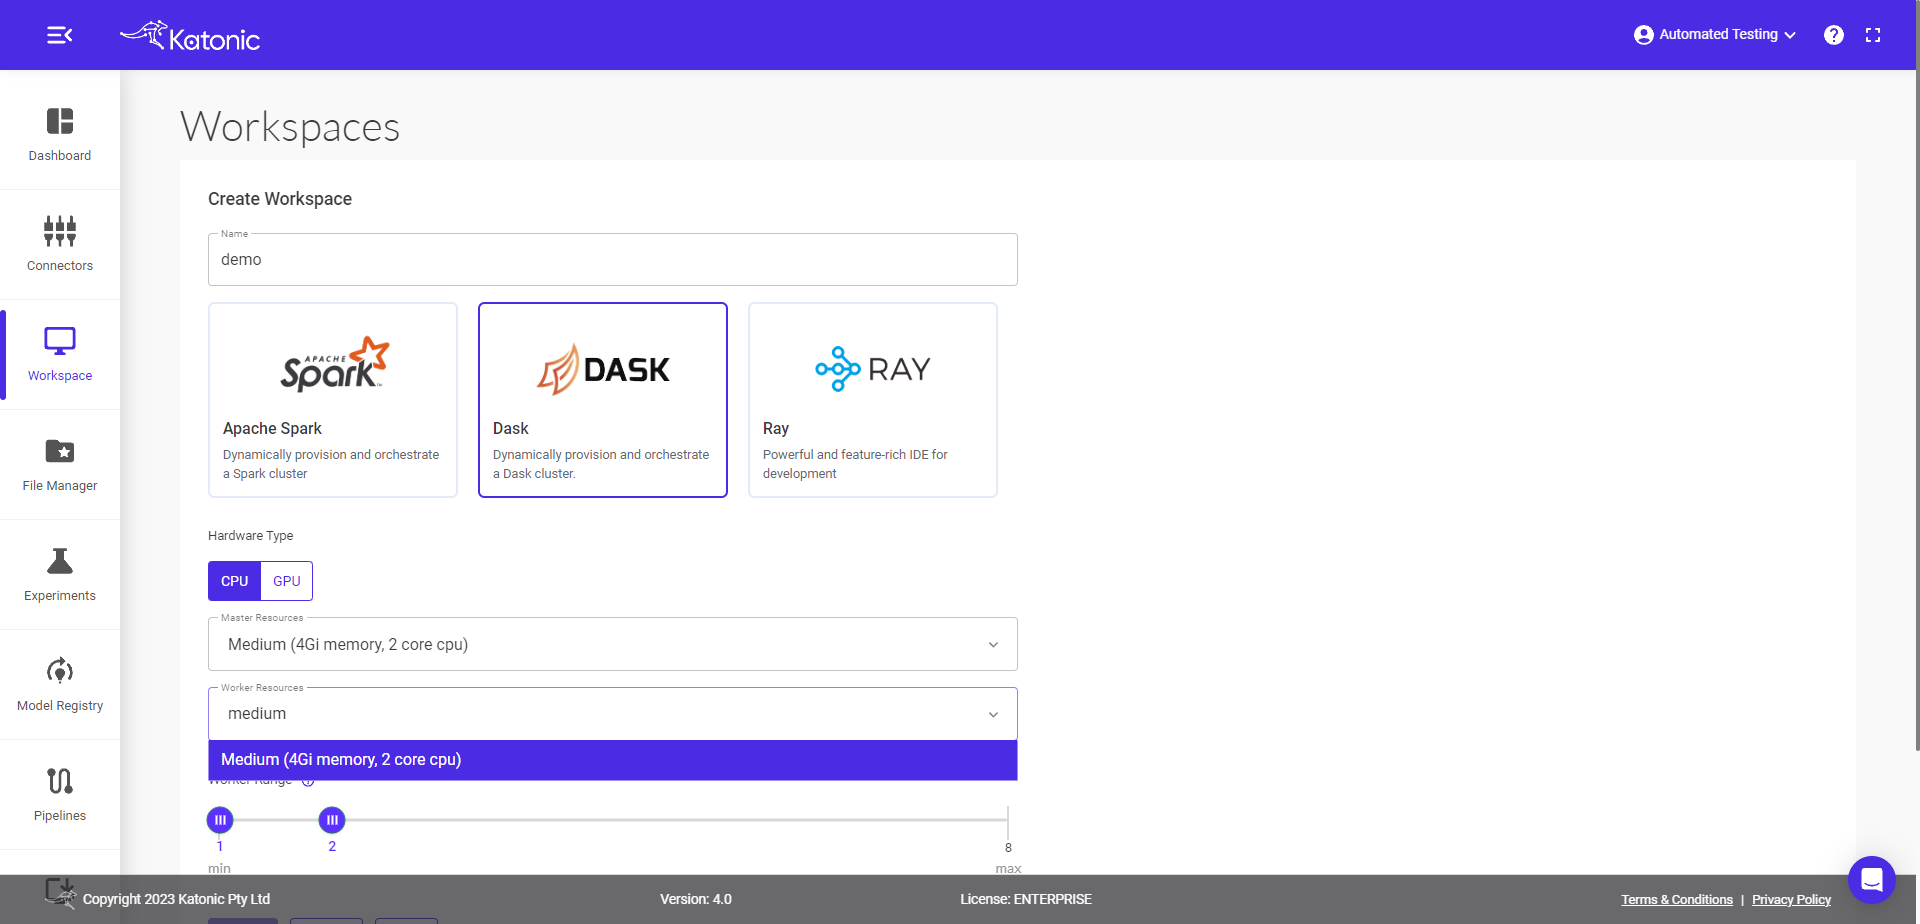
1.6.1. Give name to your workspace and select Spark as the distributed tool.
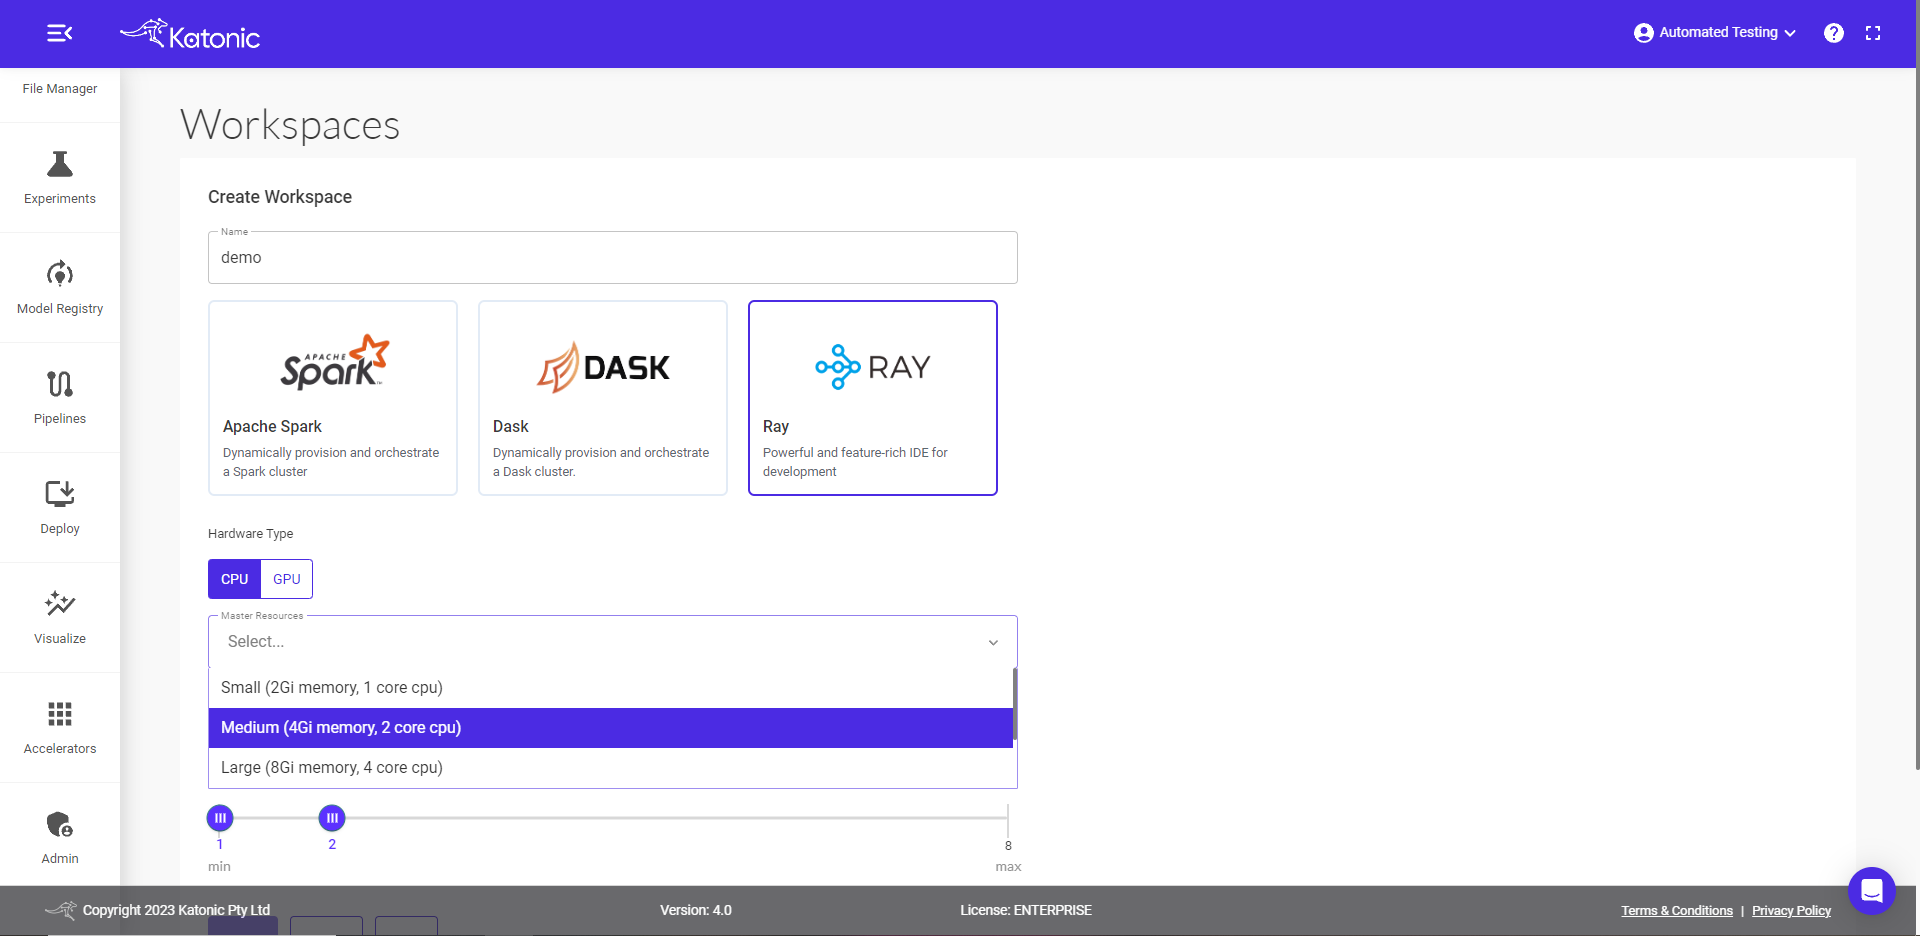
1.6.2. Select the Hardware type as CPU or GPU. for GPU, select schedule as for Example v100(1GPUs, 16vRAMs) it defines GPU with it's global RAM.
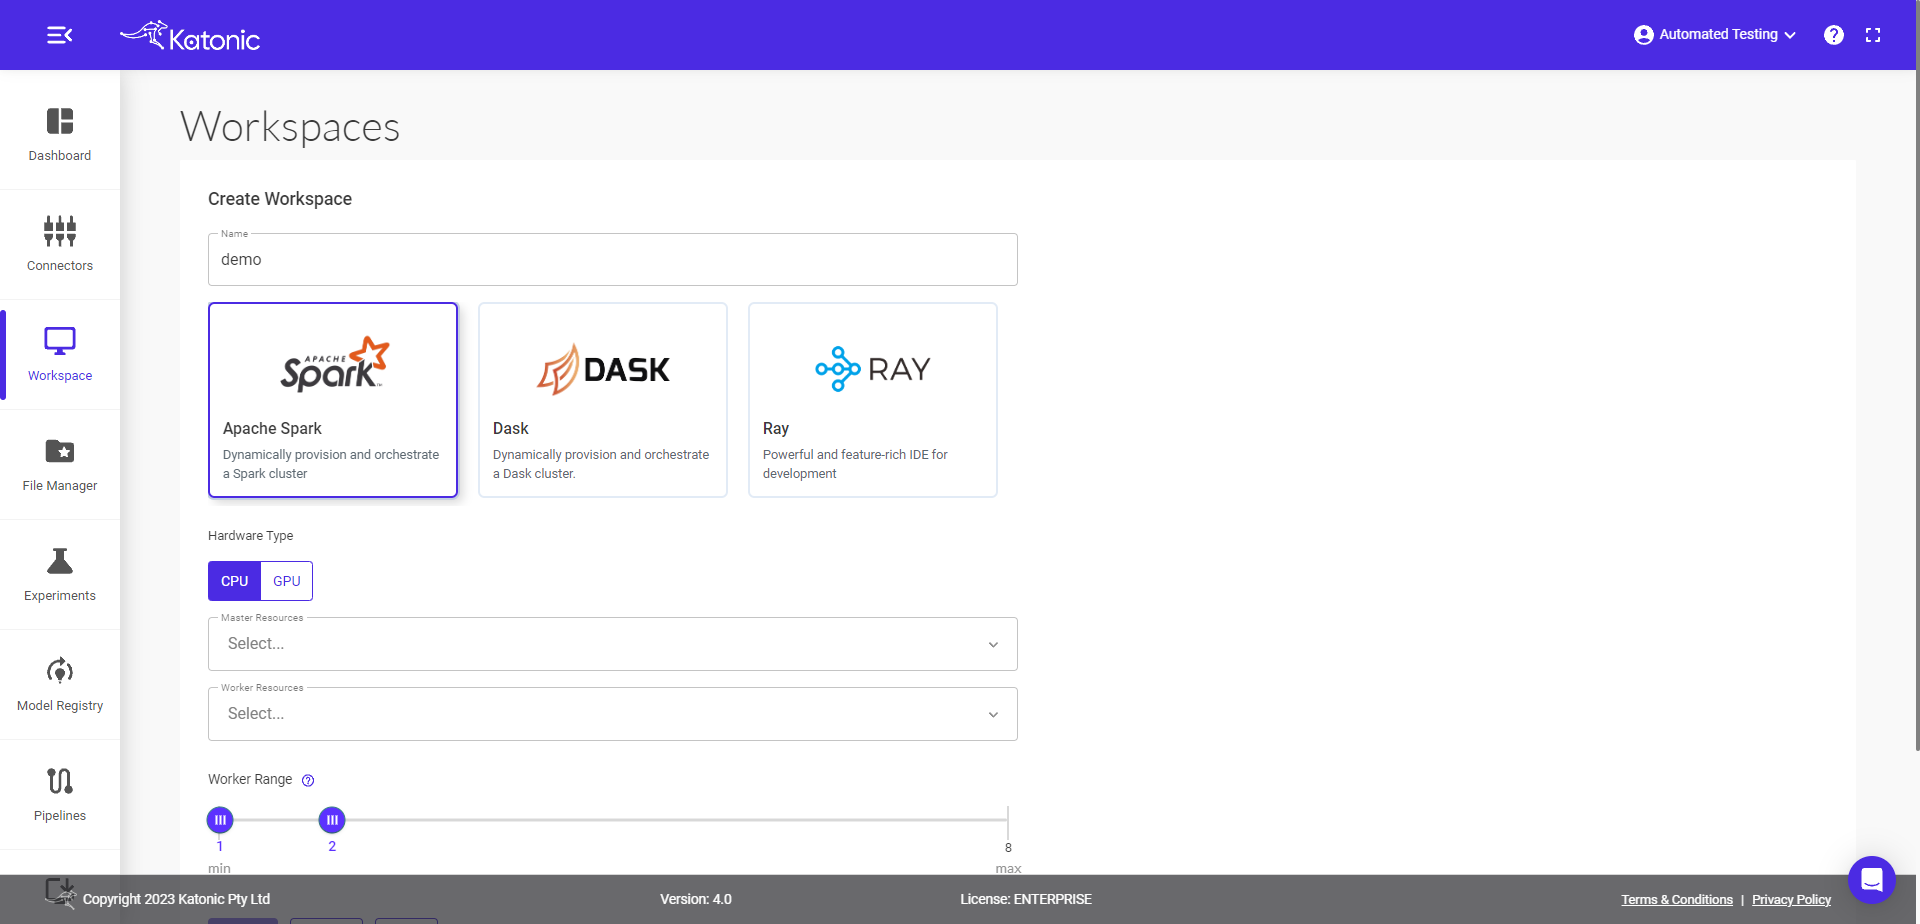
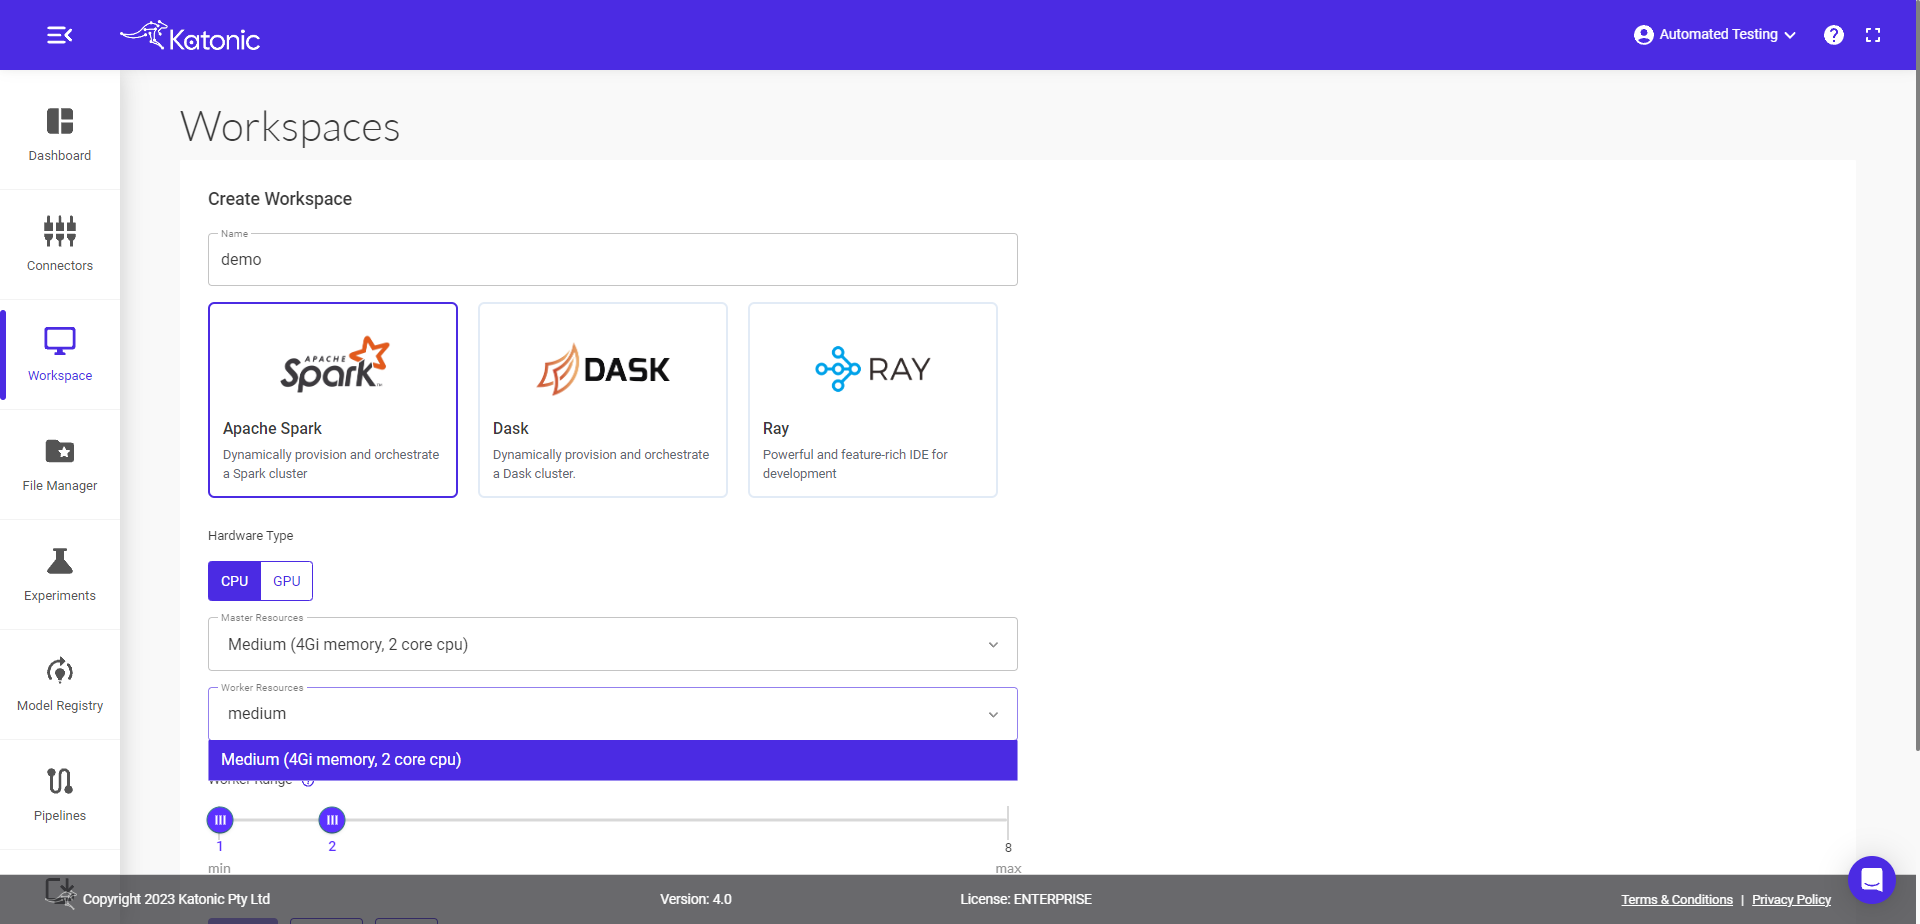
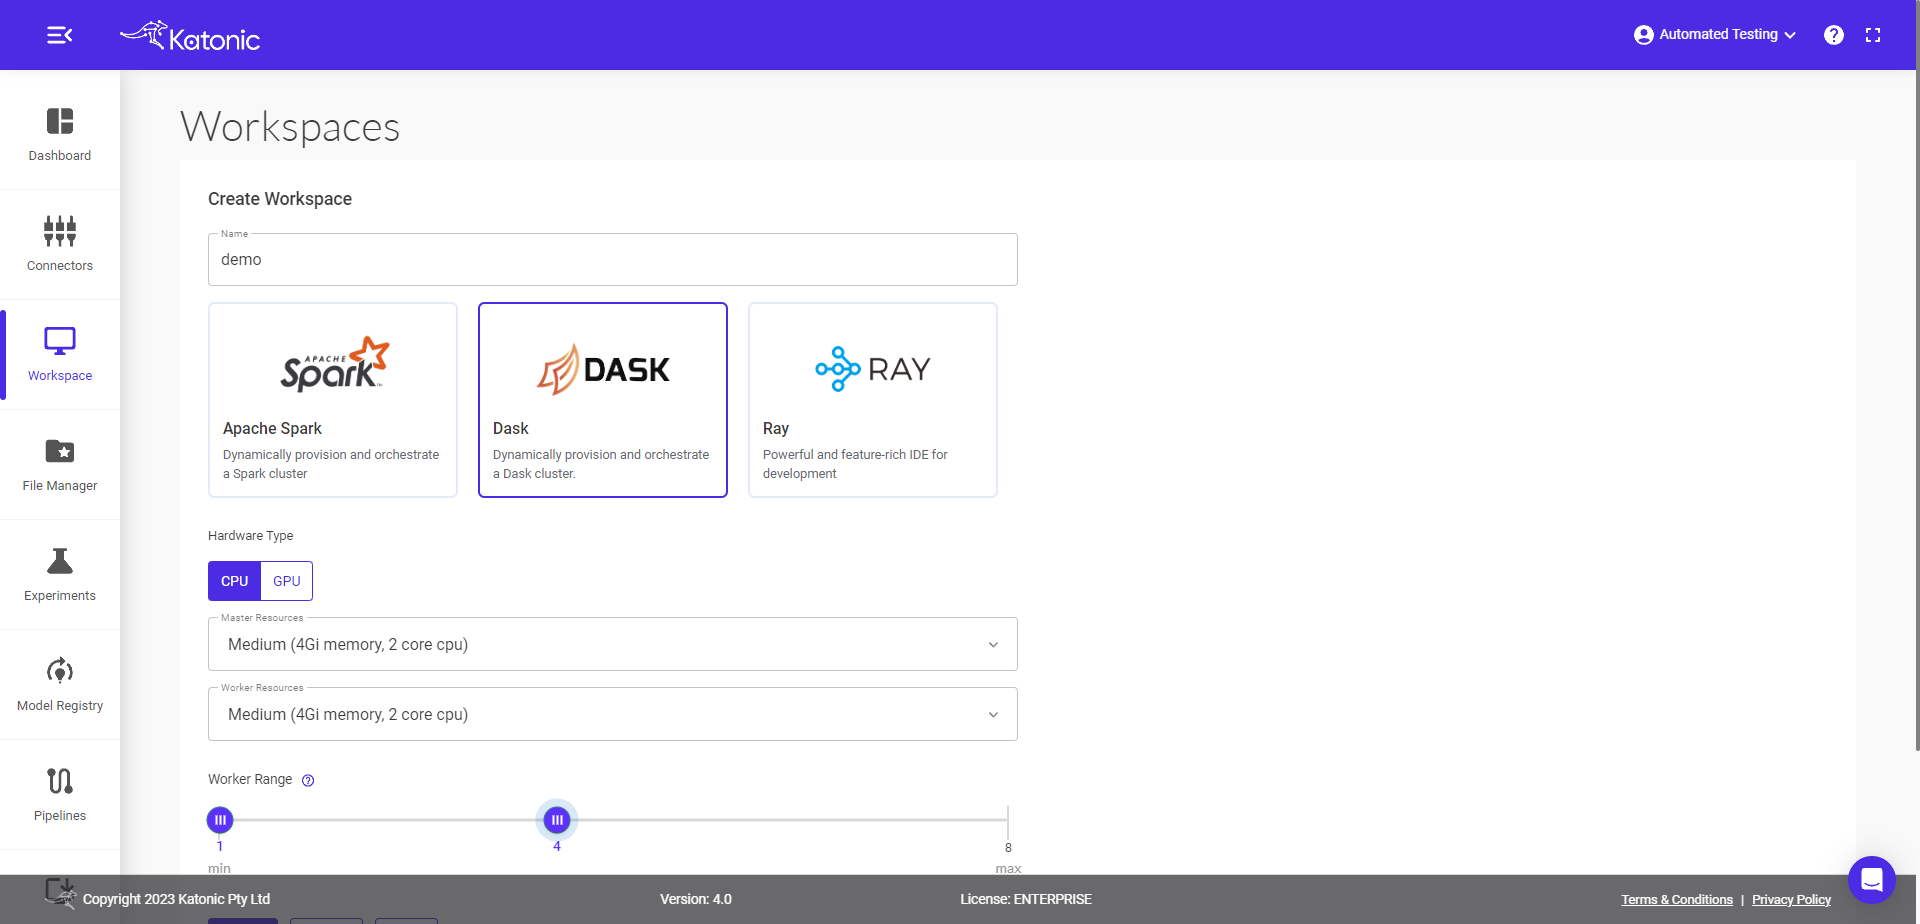
1.6.3 Select the resources for Master Node and worker node.
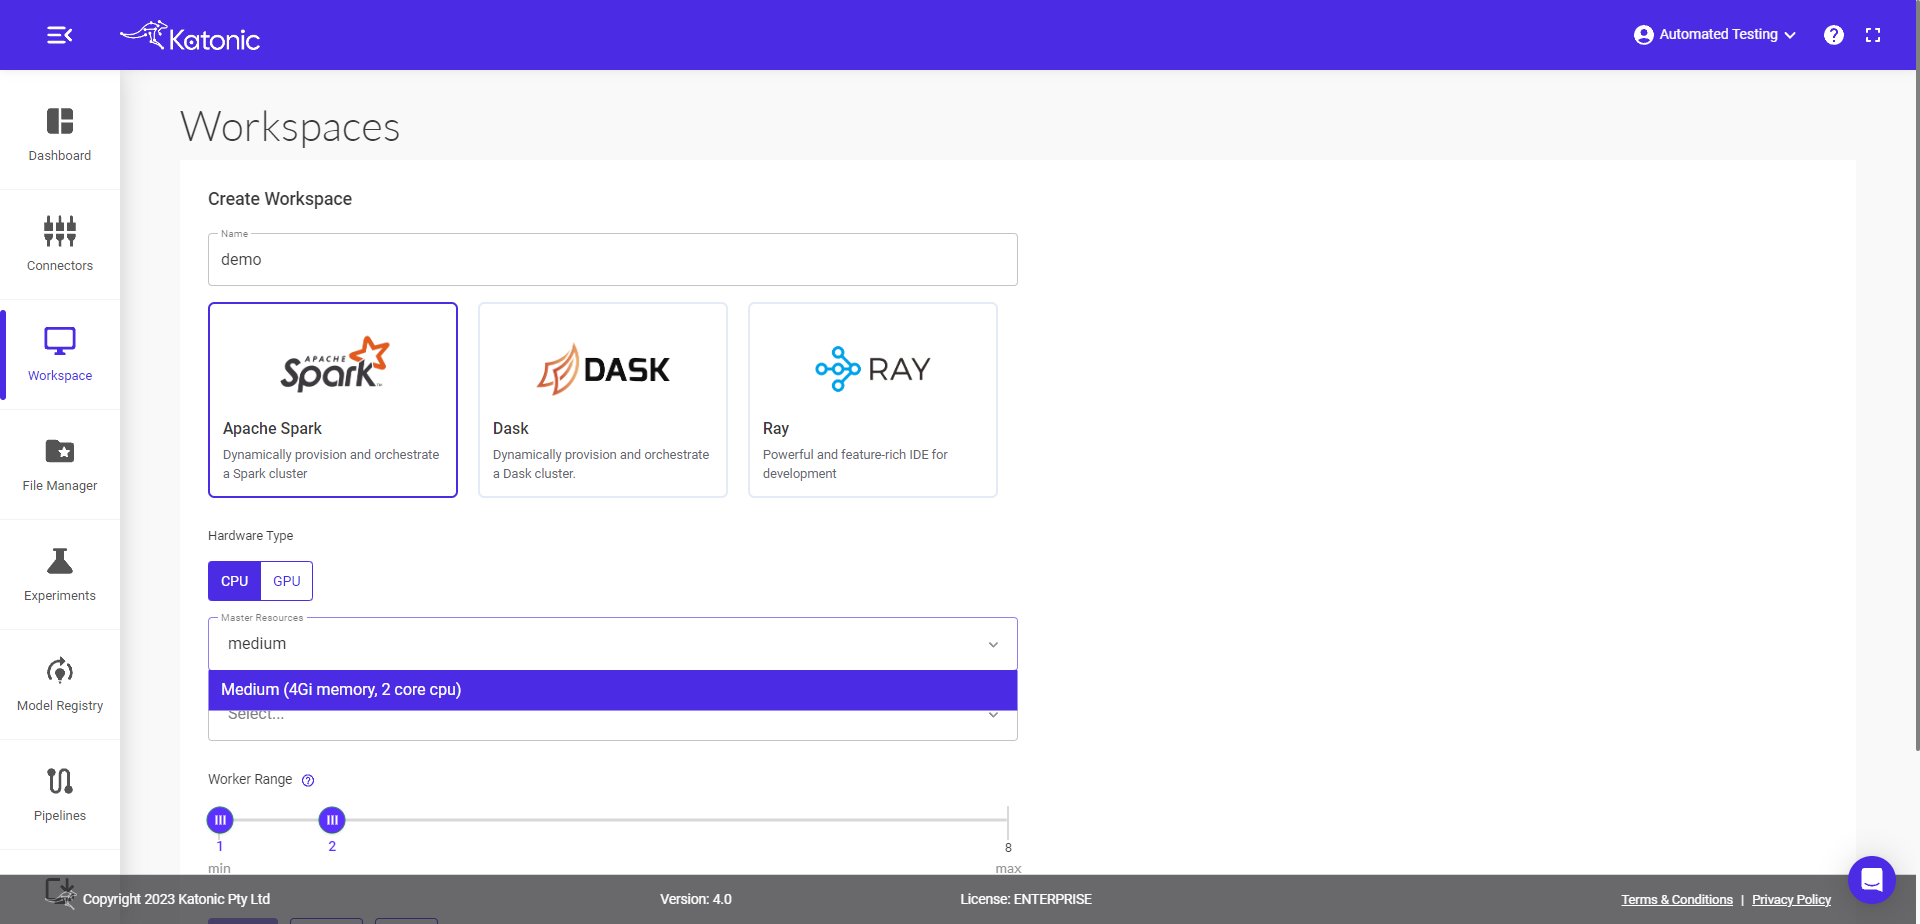

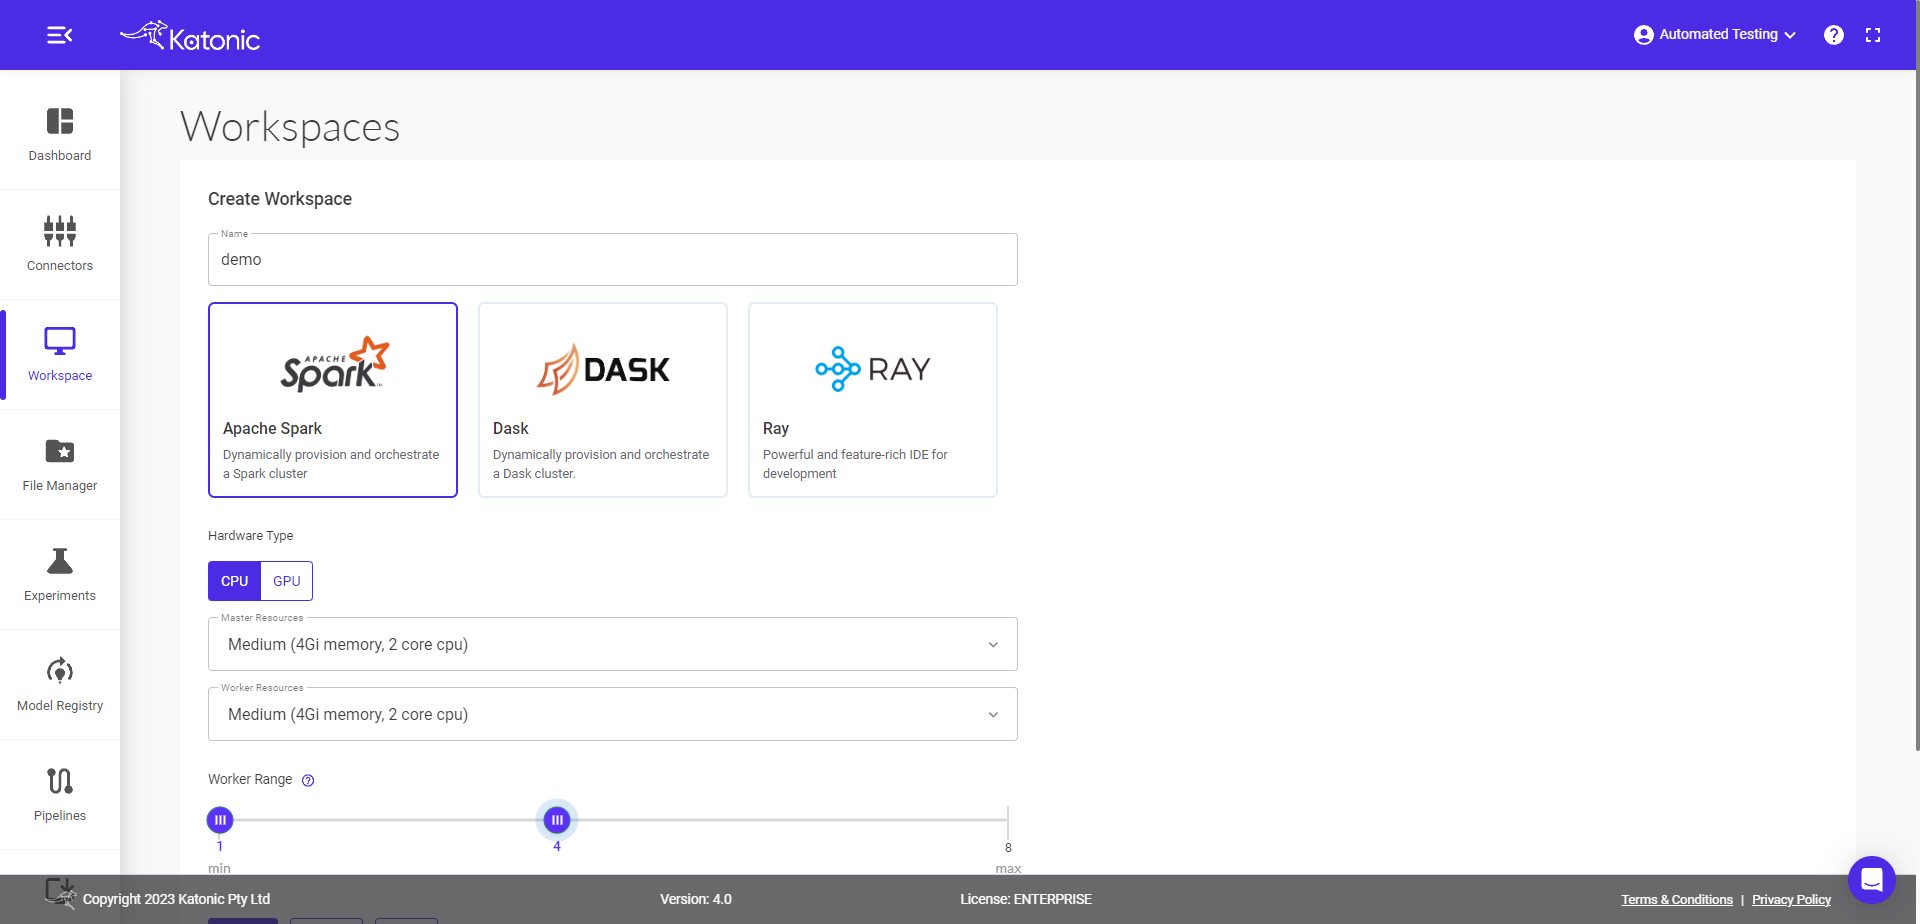
1.6.4 Define the worker range from minimum 1-maximum 8 workers can be created in jupyterlab. then click on Create.

Start Spark Workspace
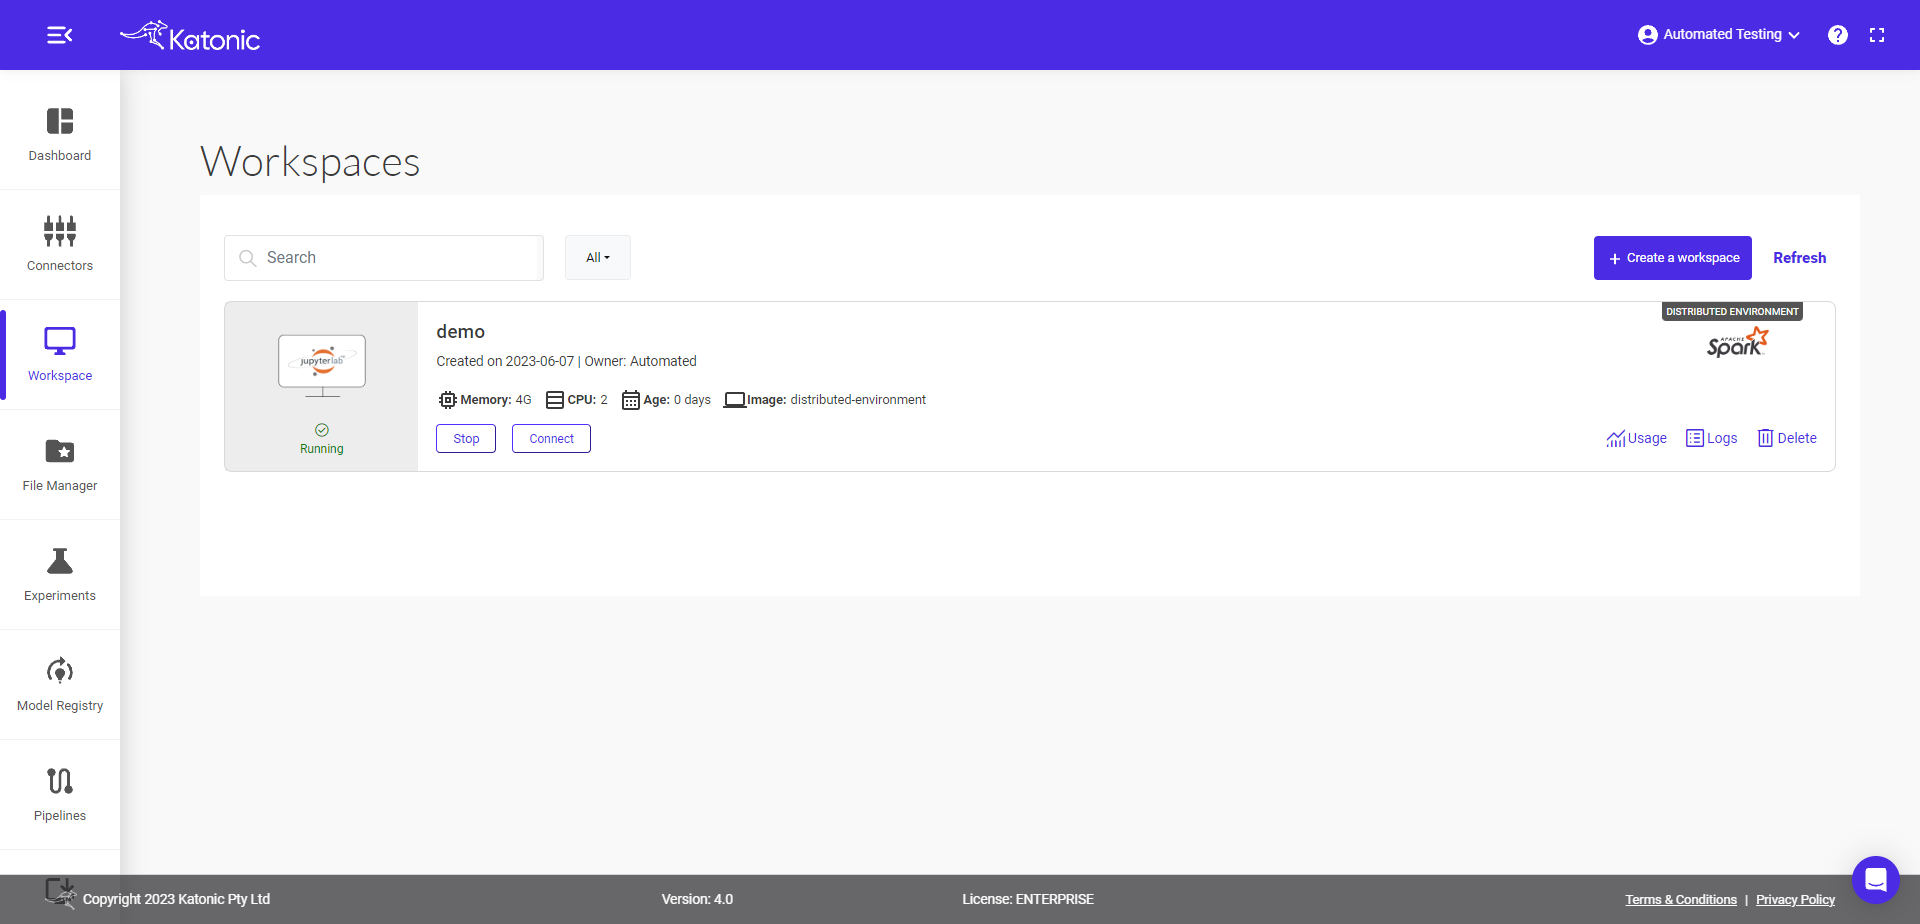
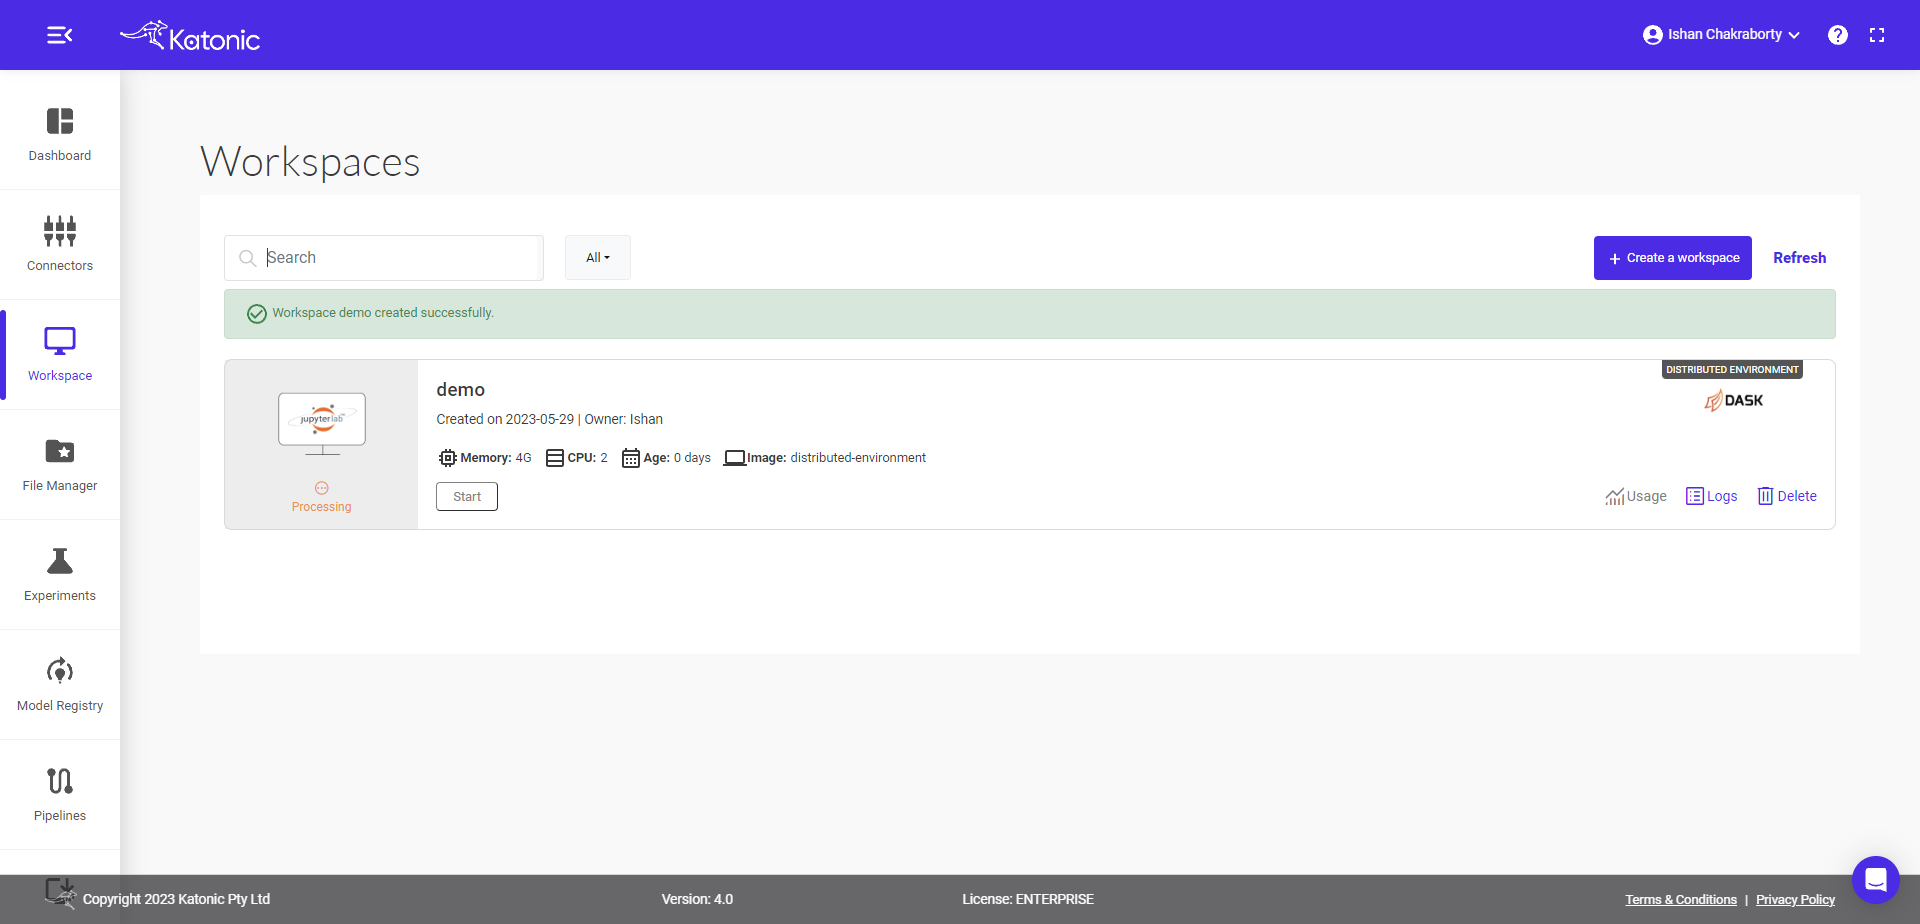
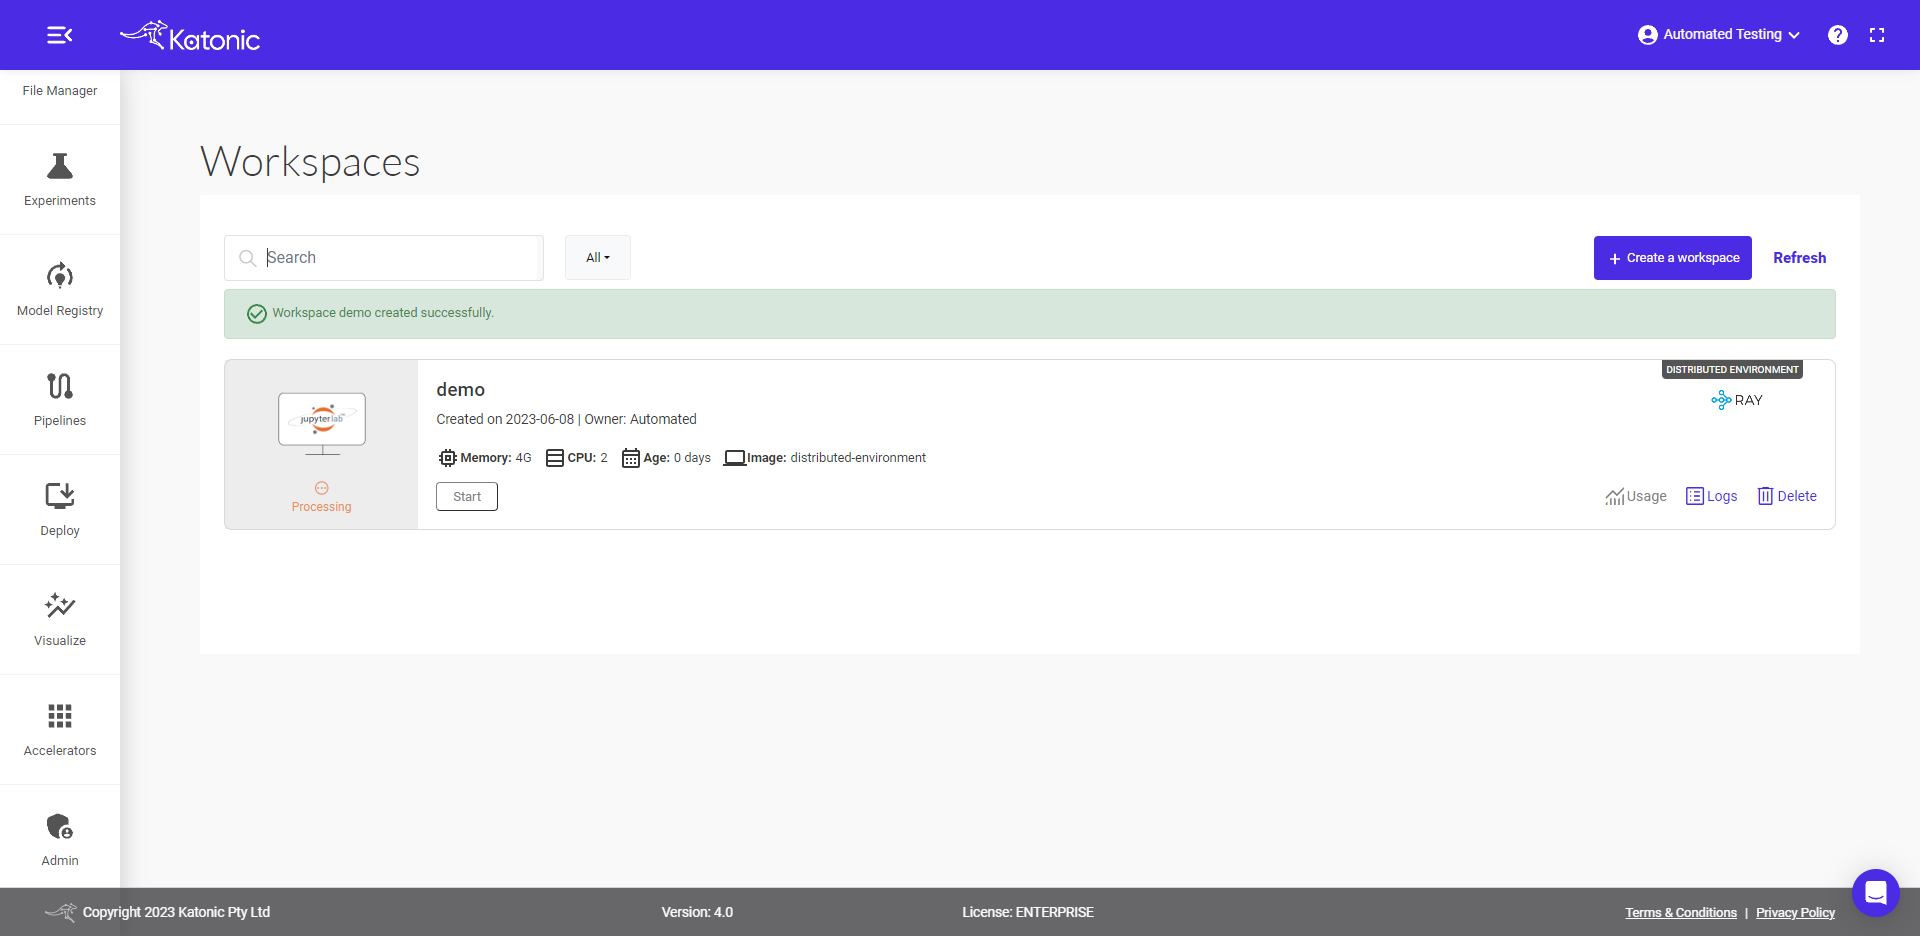
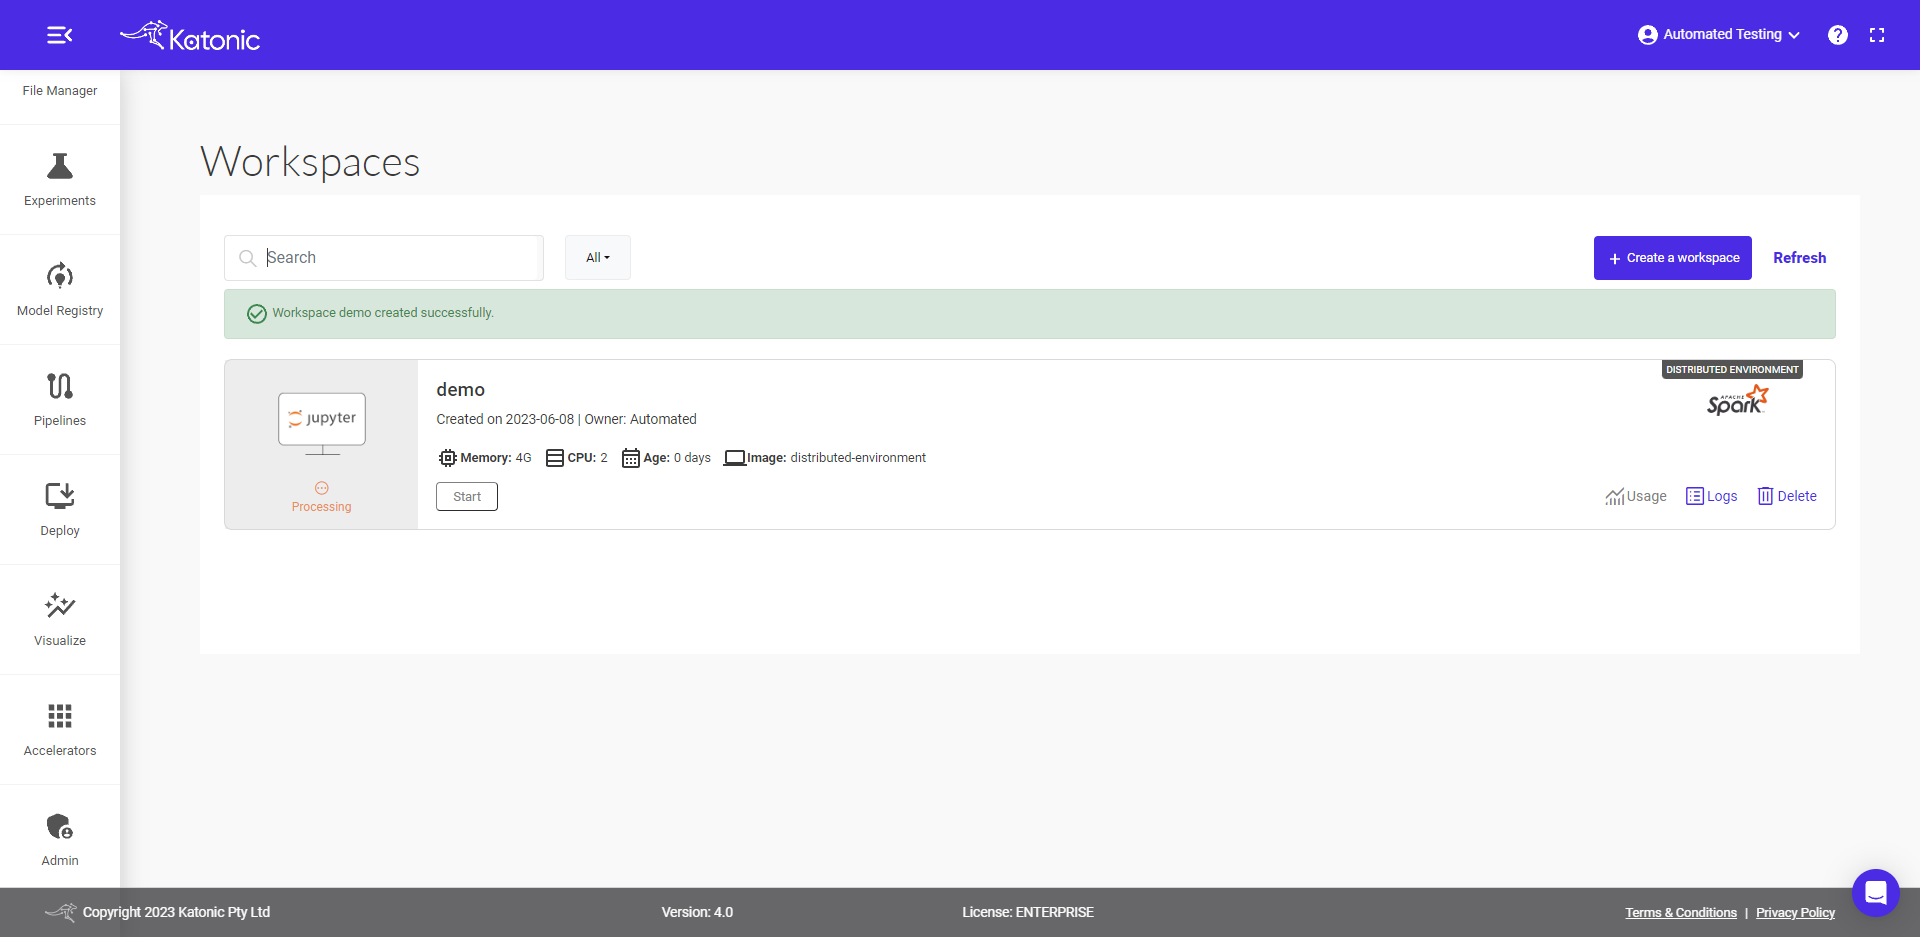
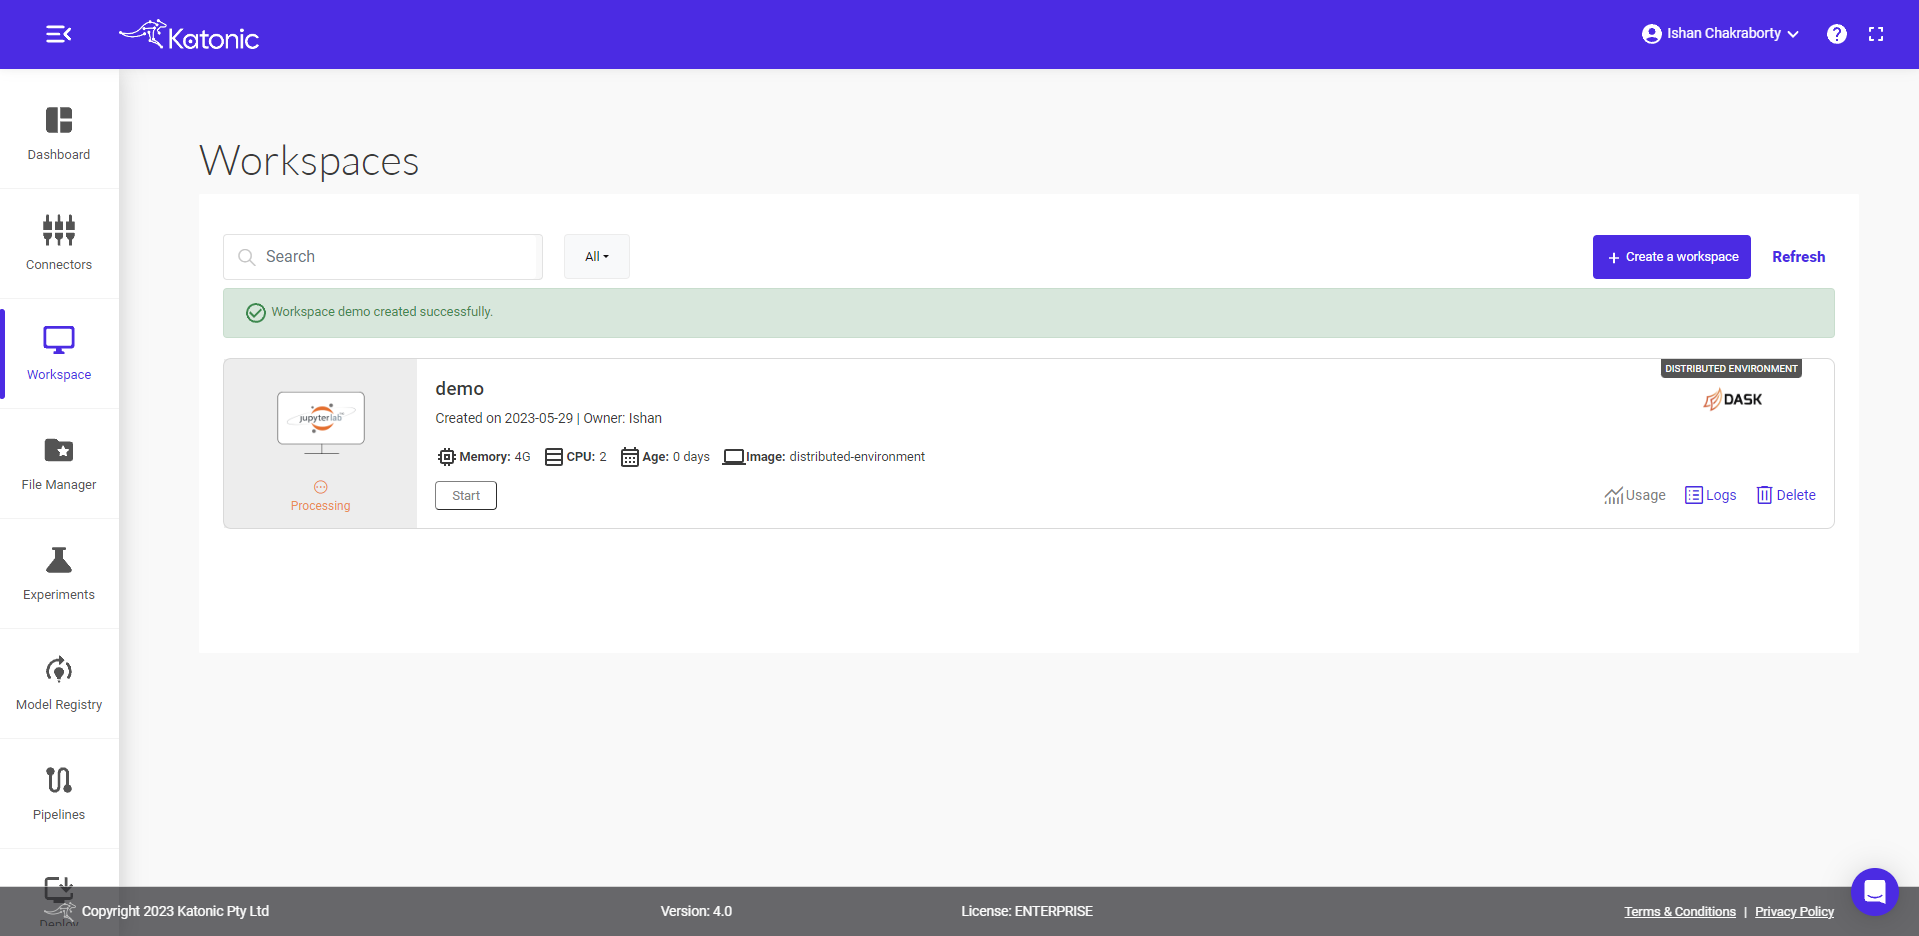
1.6.5 Once you create a workspace you can see it will be in a "processing" state.

1.6.6 the distributed tool you selected i.e. spark, it can be shown at the right upper corner of workspace window.
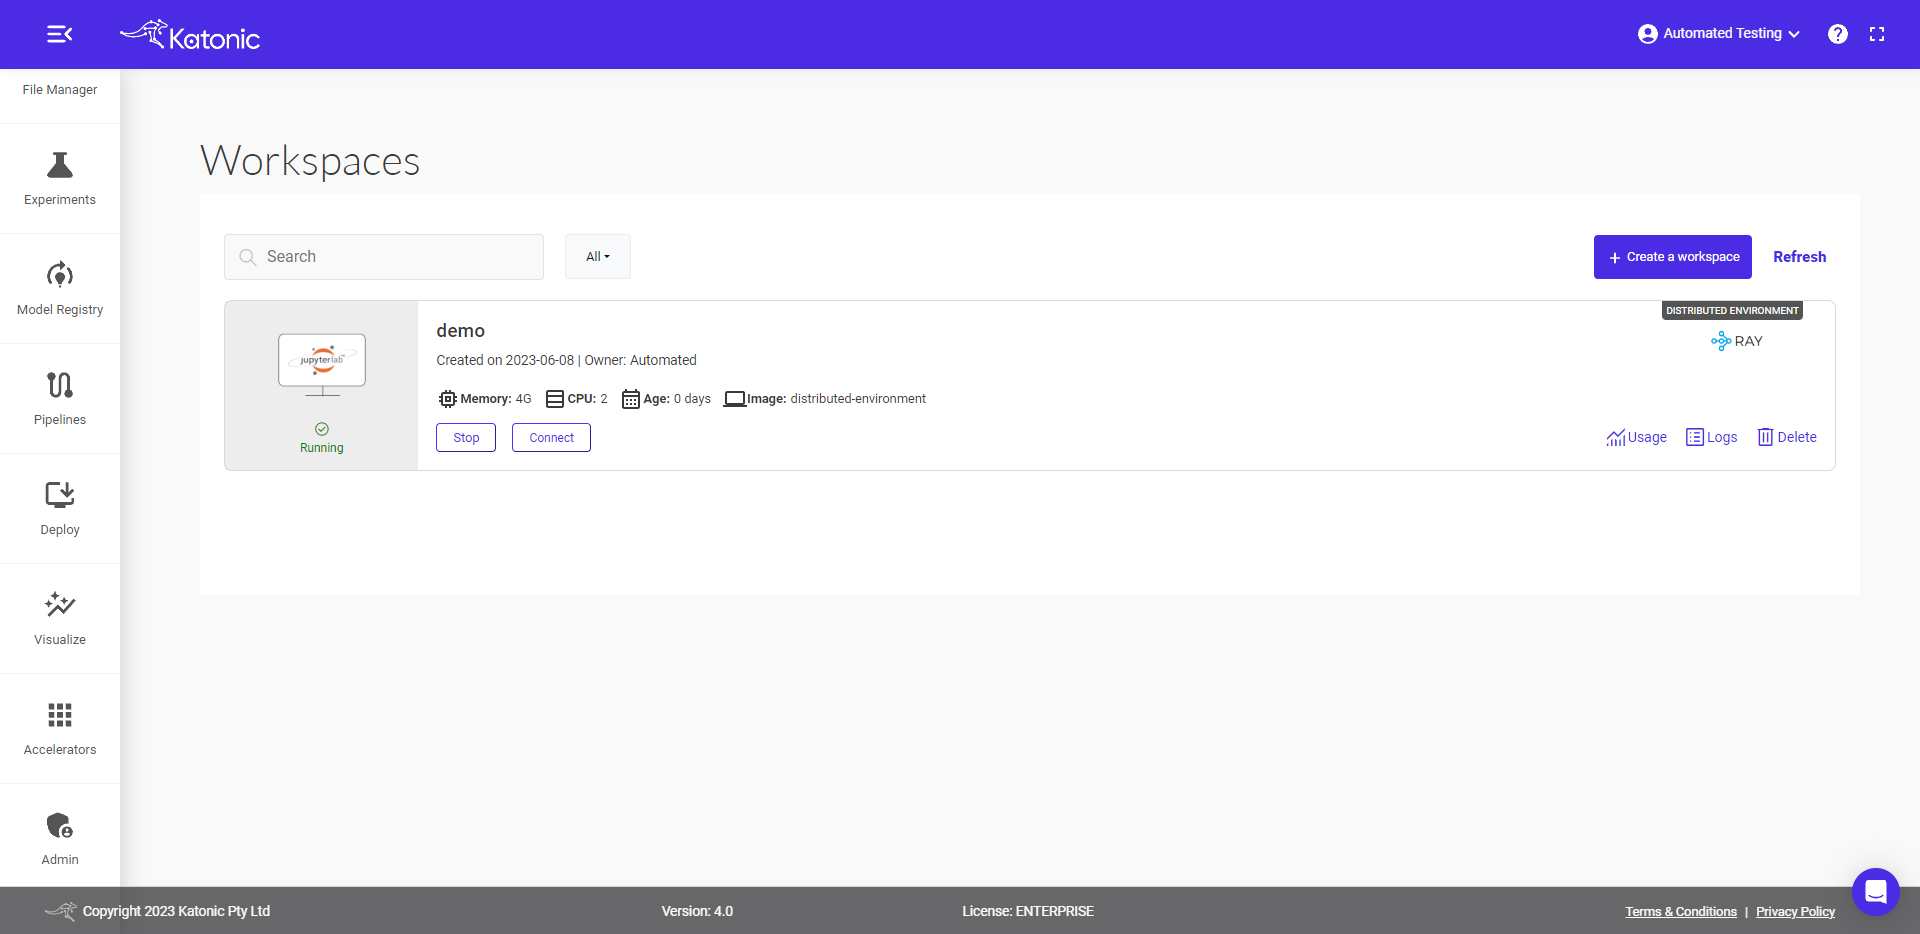
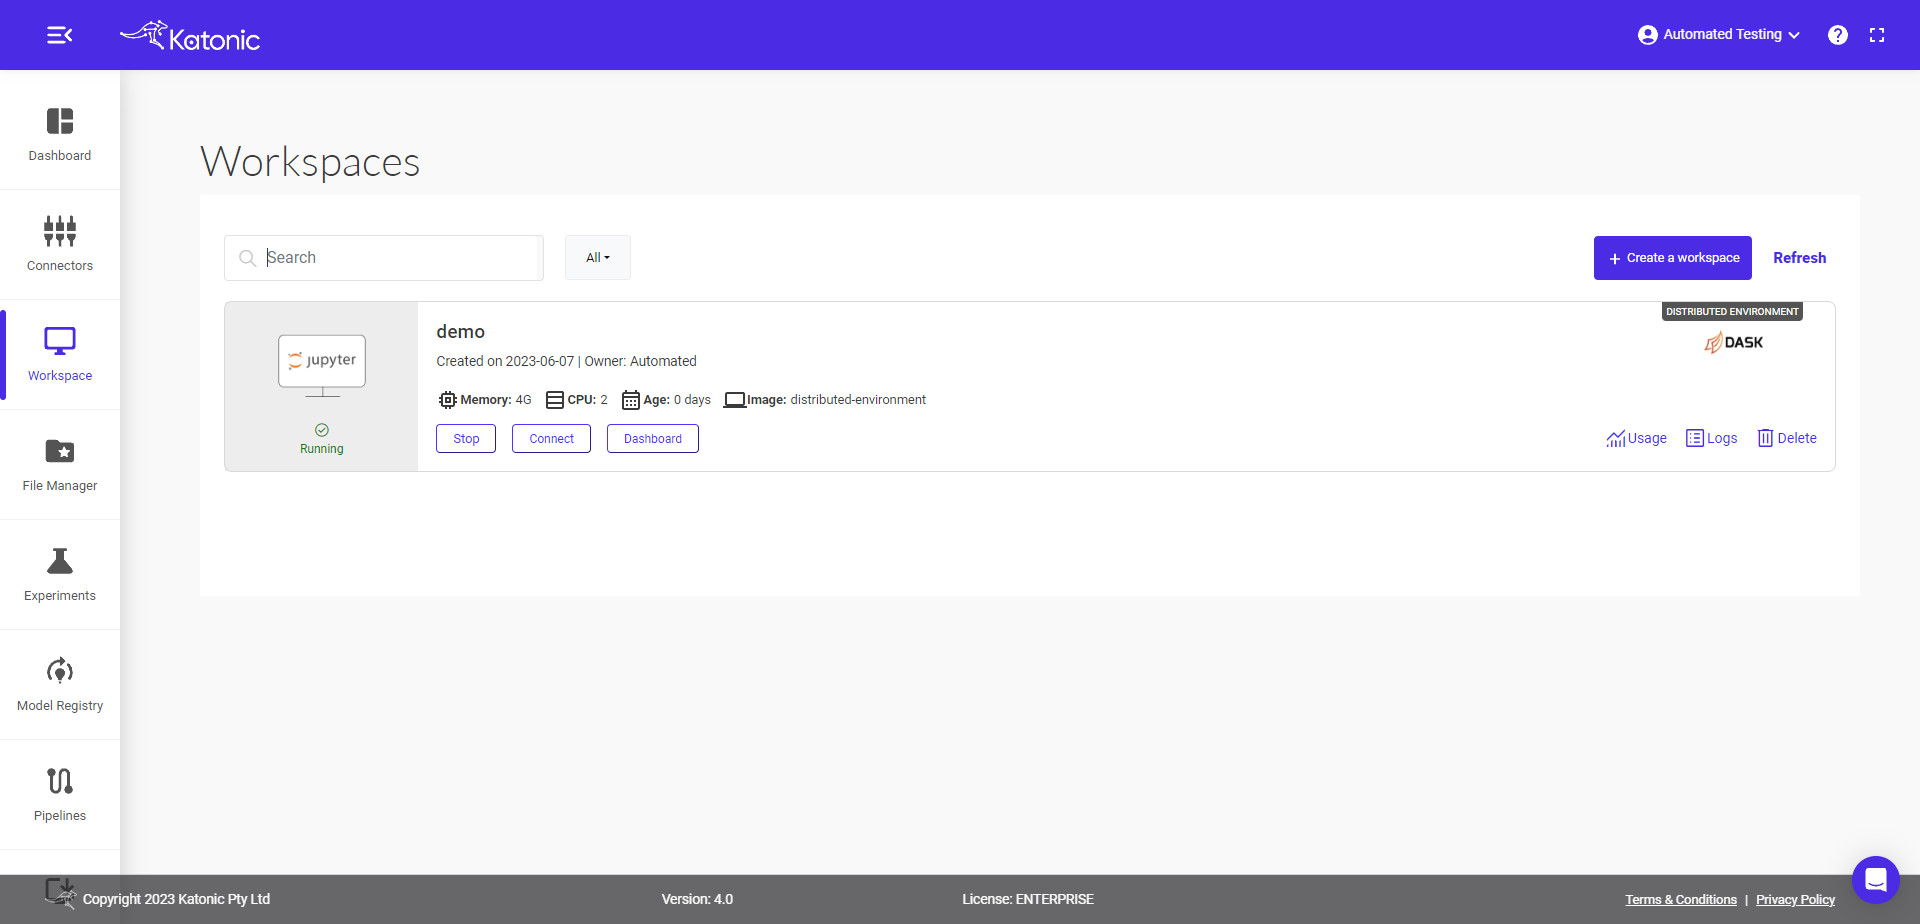
1.6.7. Once the Workspace is in a running state it will show the connect button with which you can connect to the environment server.
1.6.8. When you connect to a Workspace, a new session is created on a machine and your browser is automatically redirected to the selected environment (JupyterLab) UI in a new tab.
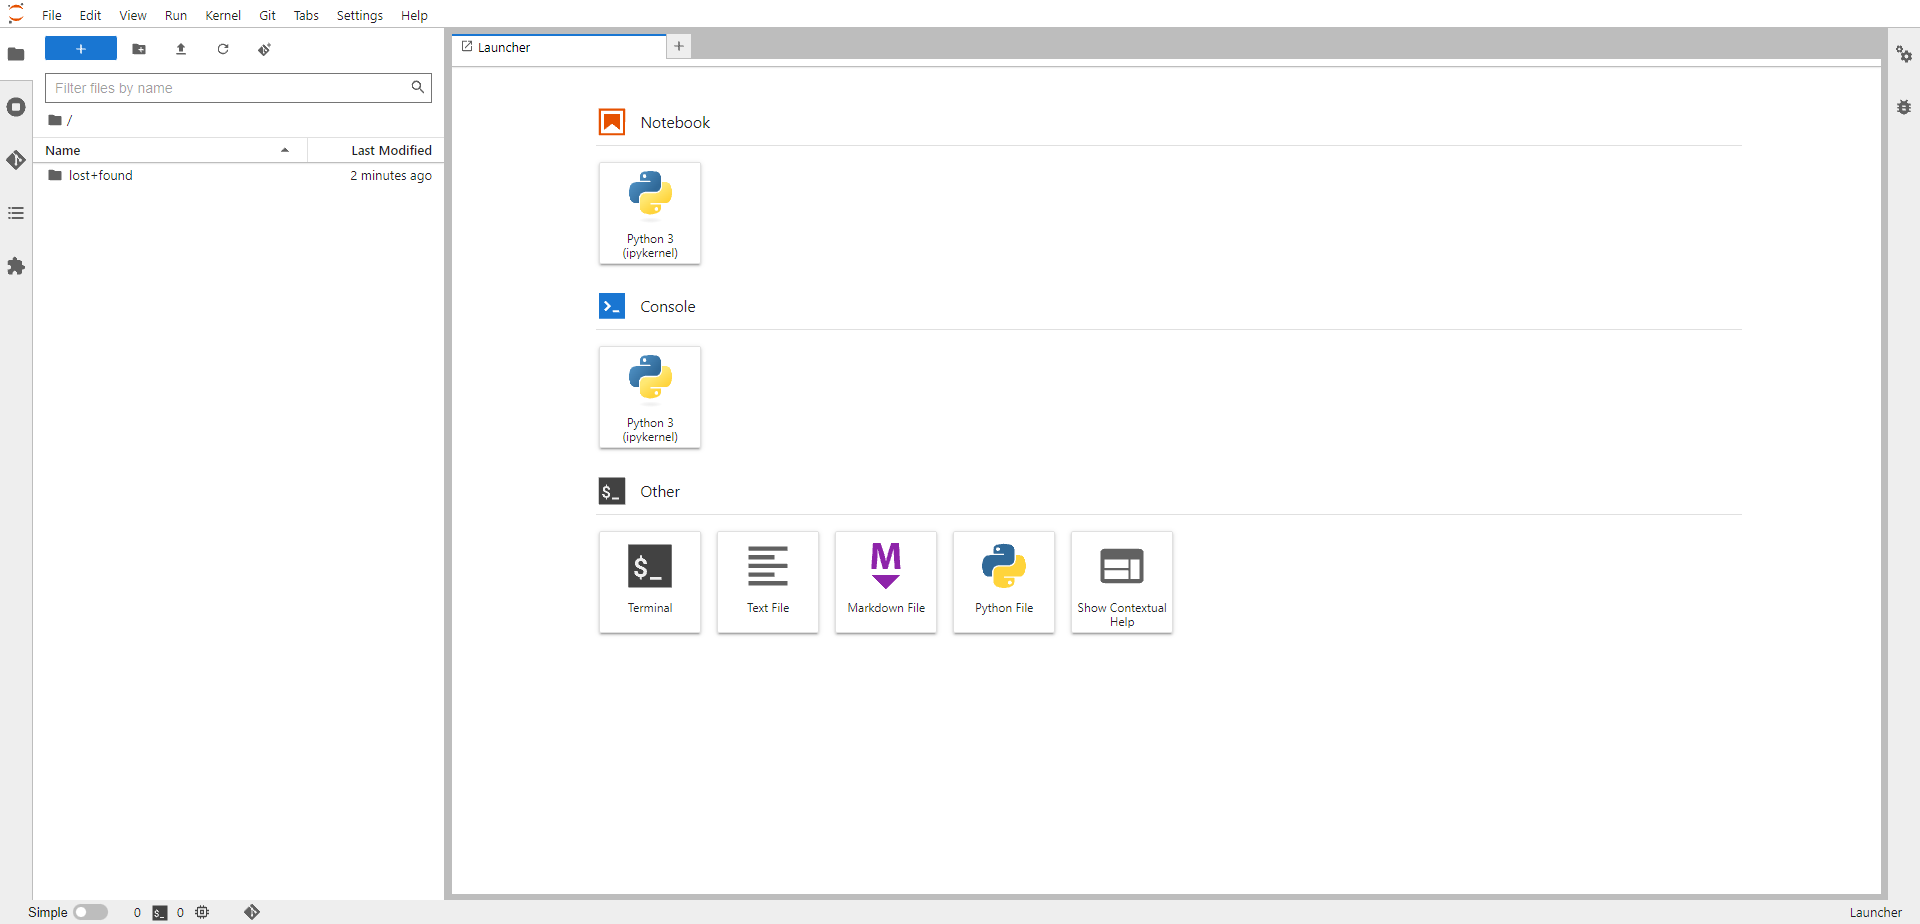
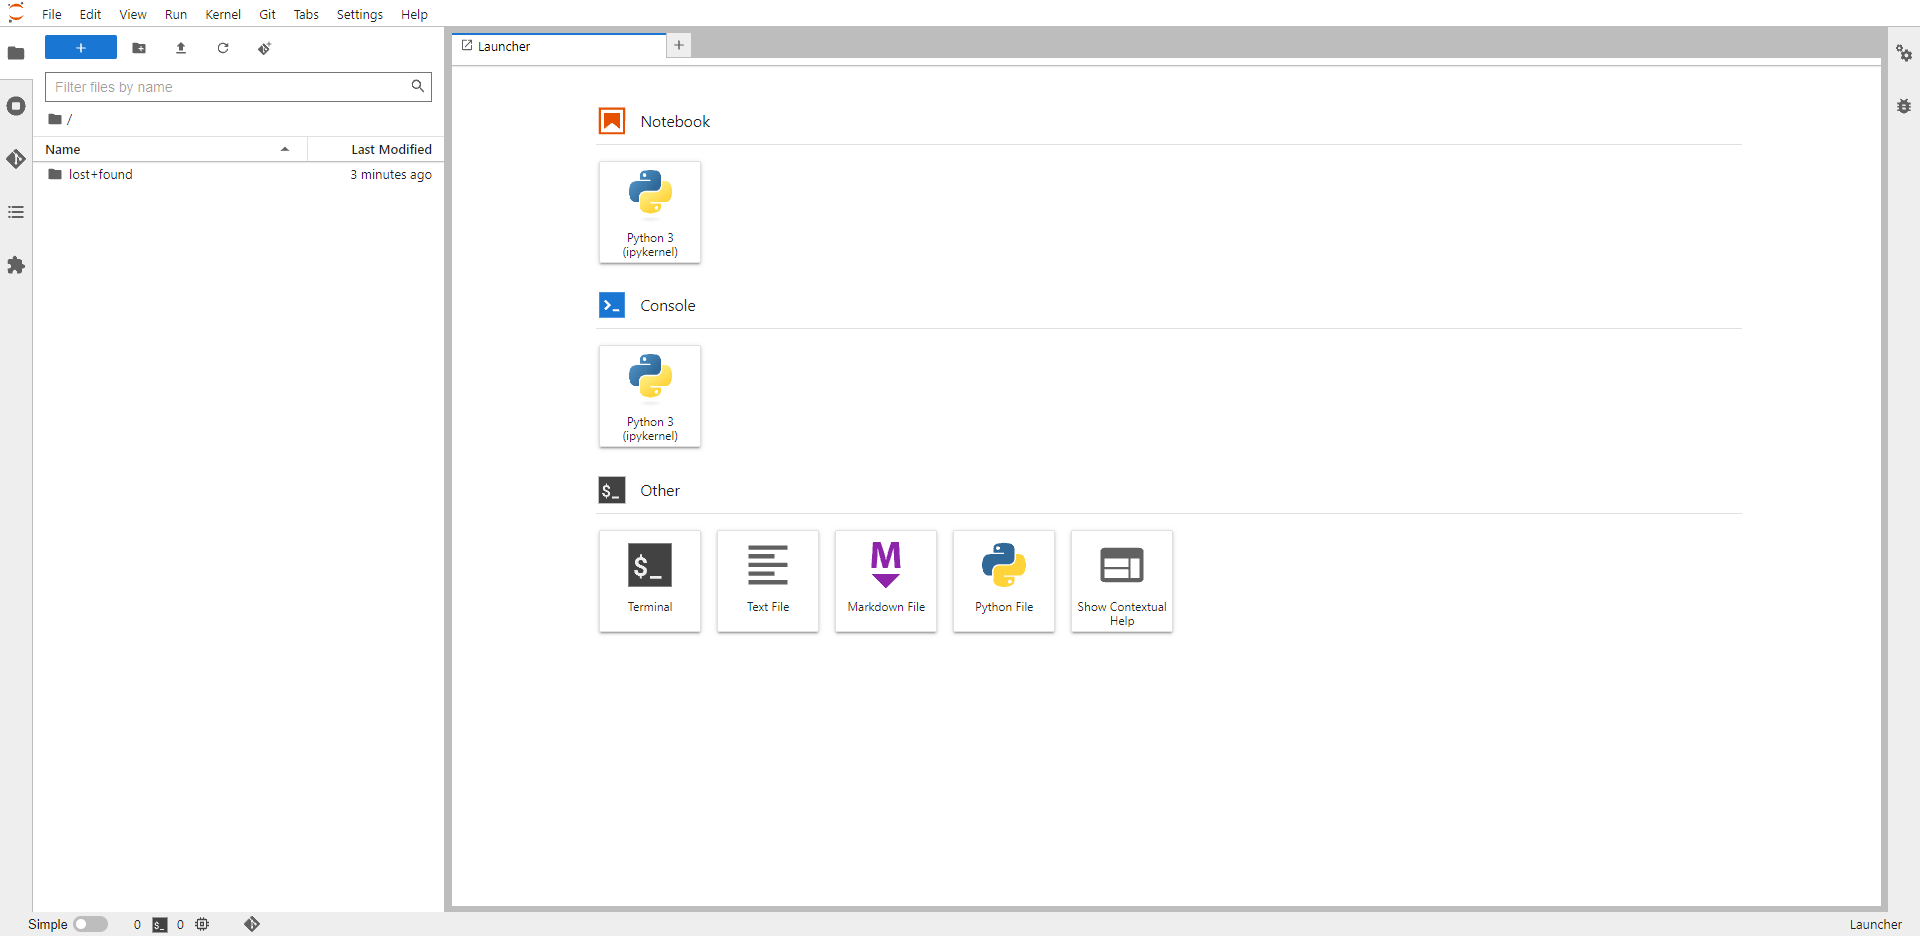
1.6.9. Once your workspace is up and running, you will see a fresh selected interface like JupyterLab interface.
if Dask
1.7.1. Give name to your workspace and select Dask as the distributed tool.

1.7.2 Select the Hardware type as CPU or GPU. for GPU, select schedule as for Example v100(1GPUs, 16vRAMs) it defines GPU with it's global RAM.
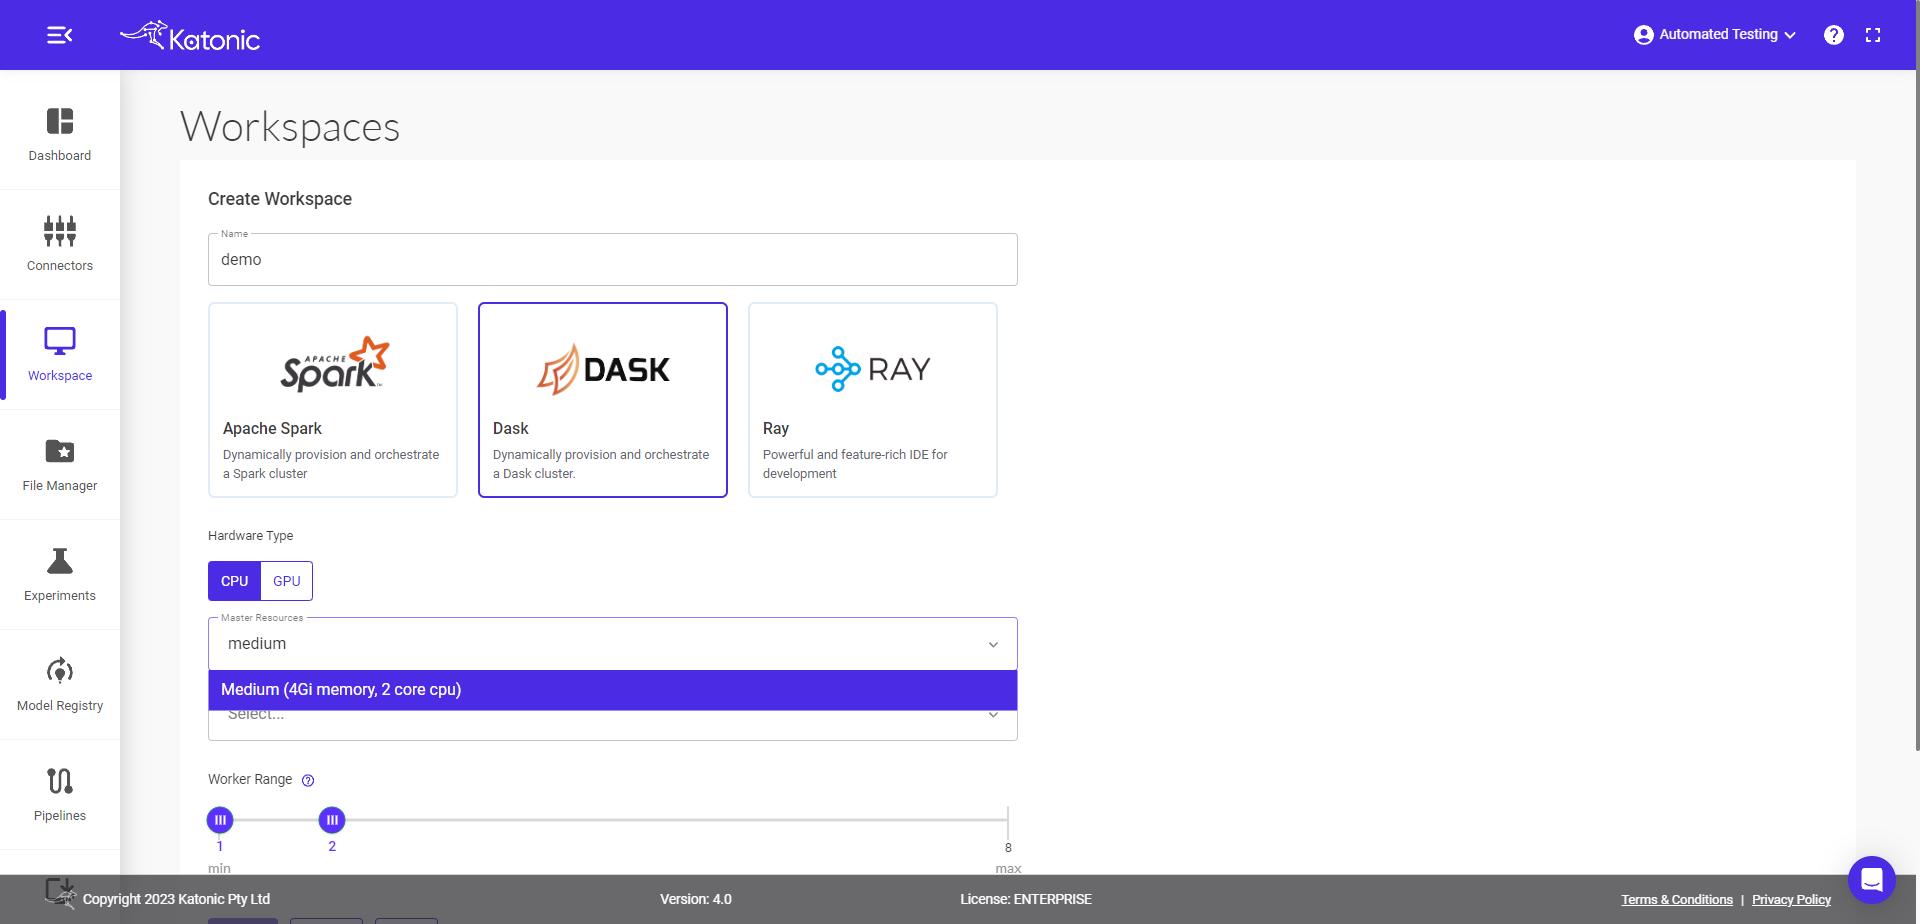
1.7.3 Select the resources for Master Node and worker node.

1.7.4 Define the worker range from minimum 1-maximum 8 workers can be created in jupyterlab. then click on Create.

Start Dask Workspace
1.7.5 Once you create a workspace you can see it will be in a "processing" state.
1.7.6. the distributed tool you selected i.e. Dask, it can be shown at the right upper corner of workspace window.
1.7.7. Once the Workspace is in a running state it will show the connect button with which you can connect to the environment server.

1.7.8. When you connect to a Workspace, a new session is created on a machine and your browser is automatically redirected to the selected environment (JupyterLab) UI in a new tab.
1.7.9. Once your workspace is up and running, you will see a fresh selected interface like JupyterLab interface.
1.8. Along with connect button there is a Dashboard button appear next to connect, where you can see master-worker resources utilisation of dask cluster.

if Ray
1.8.1. Give name to your workspace and select Ray as the distributed tool.
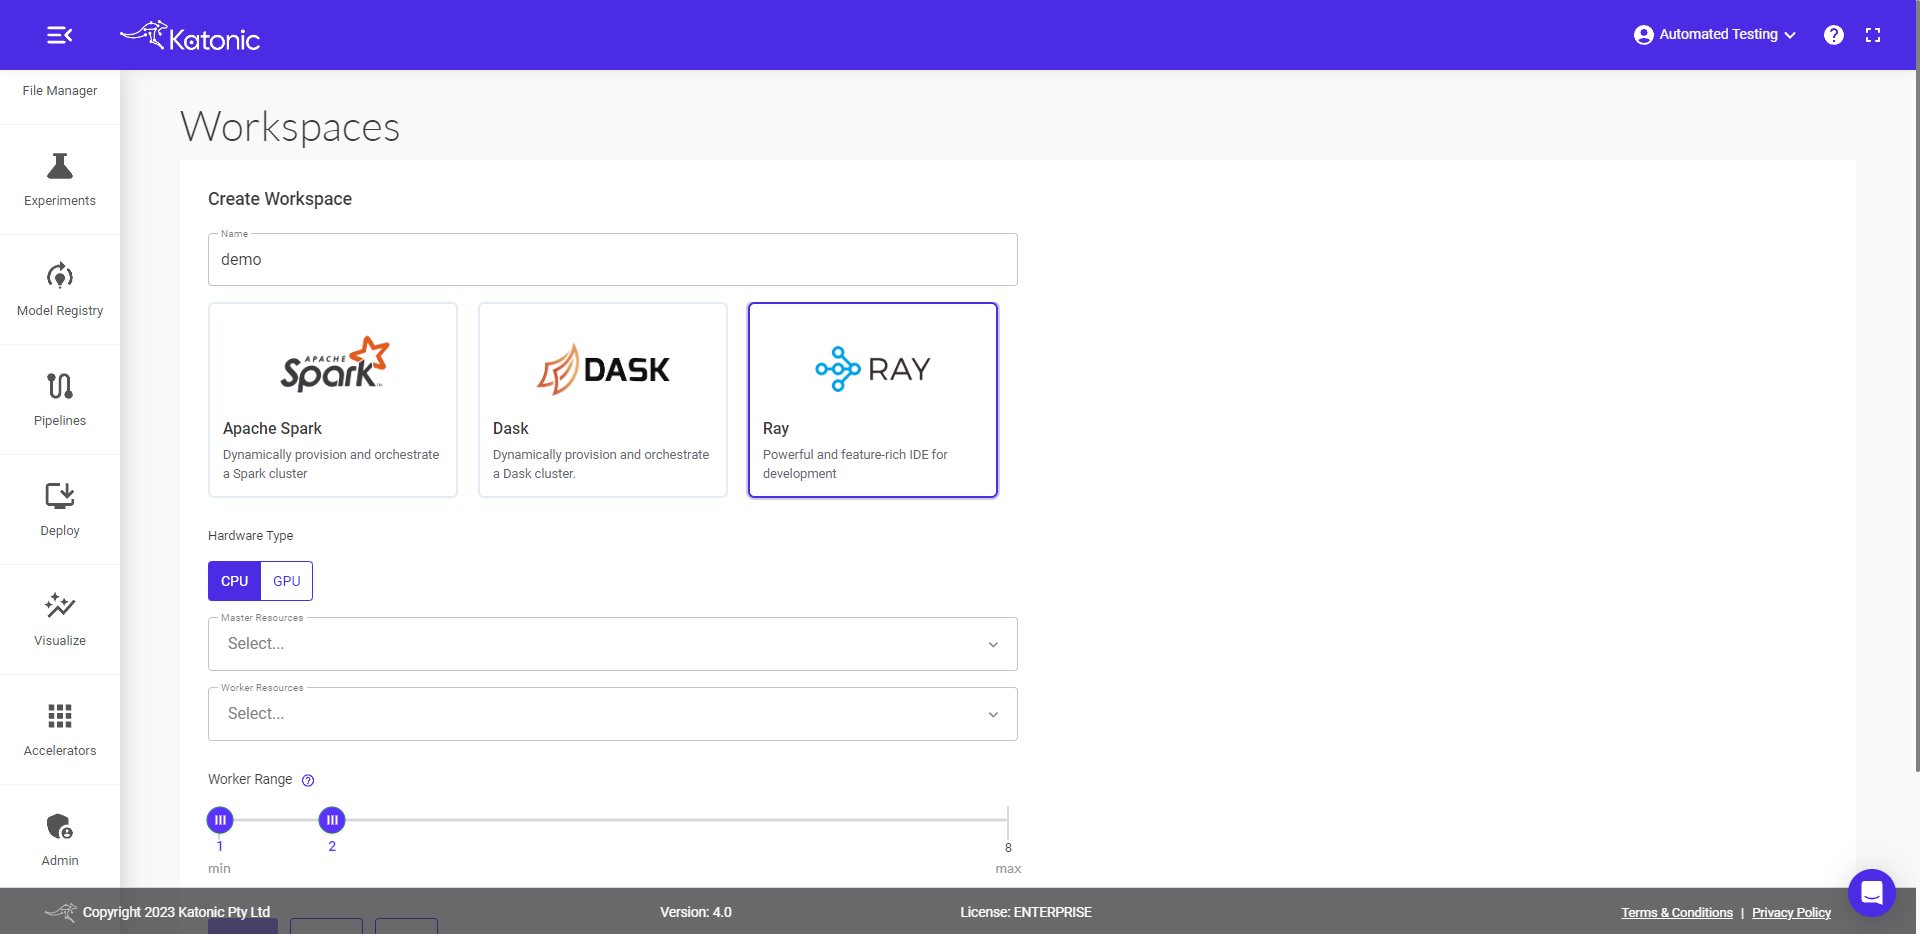
1.8.2. Select the Hardware type as CPU or GPU. for GPU, select schedule as for Example v100(1GPUs, 16vRAMs) it defines GPU with it's global RAM.
1.8.3 Select the resources for Master Node and worker node.

1.8.4 Define the worker range from minimum 1-maximum 8 workers can be created in jupyterlab. then click on Create.
Start Ray Workspace
1.8.5 Once you create a workspace you can see it will be in a "processing" state.
1.8.6 the distributed tool you selected i.e. ray, it can be shown at the right upper corner of workspace window.
1.8.7. Once the Workspace is in a running state it will show the connect button with which you can connect to the environment server.
1.8.8. When you connect to a Workspace, a new session is created on a machine and your browser is automatically redirected to the selected environment (JupyterLab) UI in a new tab.
1.8.9. Once your workspace is up and running, you will see a fresh selected interface like JupyterLab interface.
2. Launching a Distributed workspace with Jupyter
2.1. Click on Workspace from the left sidebar.
2.2. Click on "Create Workspace".
2.3. Enter a name for your workspace.
2.4. Select an environment for your workspace. An environment is the software configuration (such as language and packages) that will be used in your workspace. Select Jupyter for example.
2.5 select Environment type as a Distributed and click on next.
2.6. Select which distibuted tool you wanted to use for your application. Spark , Dask, or Ray
if Spark

2.6.1. Give name to your workspace and select Spark as the distributed tool.
2.6.2. Select the Hardware type as CPU or GPU. for GPU, select schedule as for Example v100(1GPUs, 16vRAMs) it defines GPU with it's global RAM.
2.6.3 Select the resources for Master Node and worker node.

2.6.4 Define the worker range from minimum 1-maximum 8 workers can be created in jupyterlab. then click on Create.
Start Spark Workspace
2.6.5 Once you create a workspace you can see it will be in a "processing" state.
2.6.6 the distributed tool you selected i.e. spark, it can be shown at the right upper corner of workspace window.
2.6.7. Once the Workspace is in a running state it will show the connect button with which you can connect to the environment server.

2.6.8. When you connect to a Workspace, a new session is created on a machine and your browser is automatically redirected to the selected environment (Jupyter) UI in a new tab.
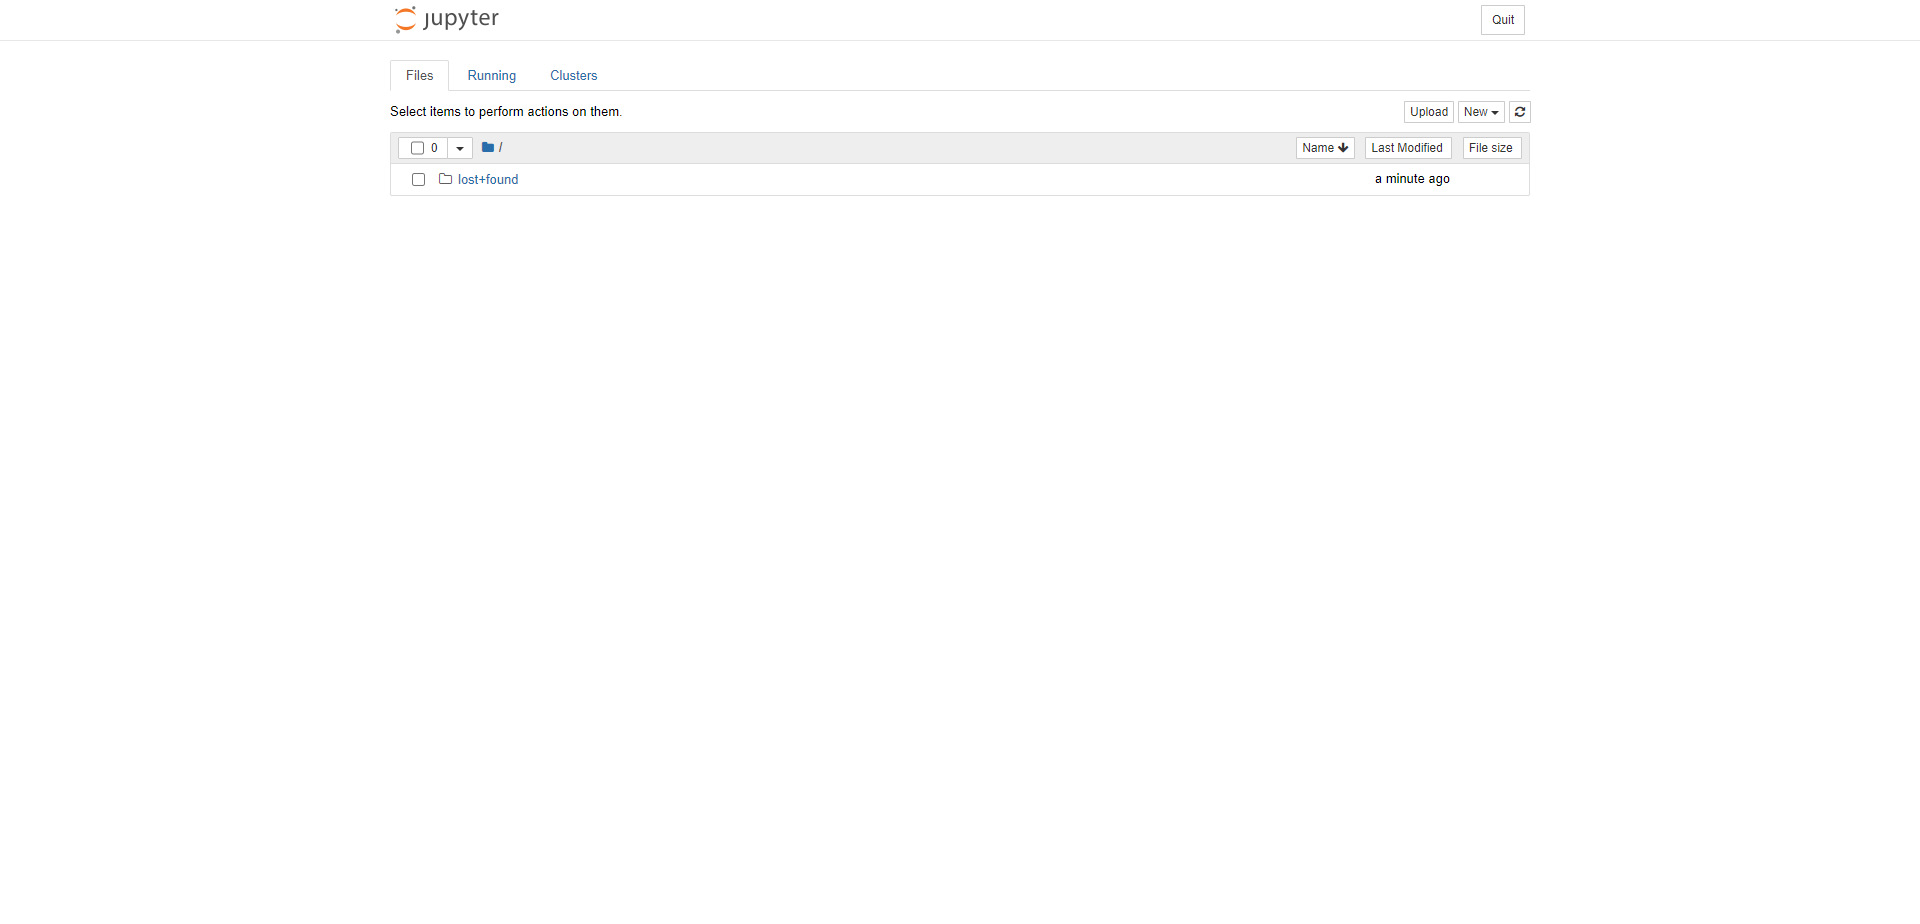
2.6.9. Once your workspace is up and running, you will see a fresh selected interface like Jupyter interface.
if Dask
2.7.1. Give name to your workspace and select Dask as the distributed tool.

2.7.2 Select the Hardware type as CPU or GPU. for GPU, select schedule as for Example v100(1GPUs, 16vRAMs) it defines GPU with it's global RAM.

2.7.3 Select the resources for Master Node and worker node.
2.7.4 Define the worker range from minimum 1-maximum 8 workers can be created in jupyterlab. then click on Create.
Start Dask Workspace
2.7.5 Once you create a workspace you can see it will be in a "processing" state.
2.7.6. the distributed tool you selected i.e. Dask, it can be shown at the right upper corner of workspace window.
2.7.7. Once the Workspace is in a running state it will show the connect button with which you can connect to the environment server.
2.7.8. When you connect to a Workspace, a new session is created on a machine and your browser is automatically redirected to the selected environment (Jupyter) UI in a new tab.
2.7.9. Once your workspace is up and running, you will see a fresh selected interface like Jupyter interface.
2.8. Along with connect button there is a Dashboard button appear next to connect, where you can see master-worker resources utilisation of dask cluster.
if Ray
2.8.1. Give name to your workspace and select Ray as the distributed tool.
2.8.2. Select the Hardware type as CPU or GPU. for GPU, select schedule as for Example v100(1GPUs, 16vRAMs) it defines GPU with it's global RAM.
2.8.3 Select the resources for Master Node and worker node.


2.8.4 Define the worker range from minimum 1-maximum 8 workers can be created in jupyterlab. then click on Create.

Start Ray Workspace
2.8.5 Once you create a workspace you can see it will be in a "processing" state.
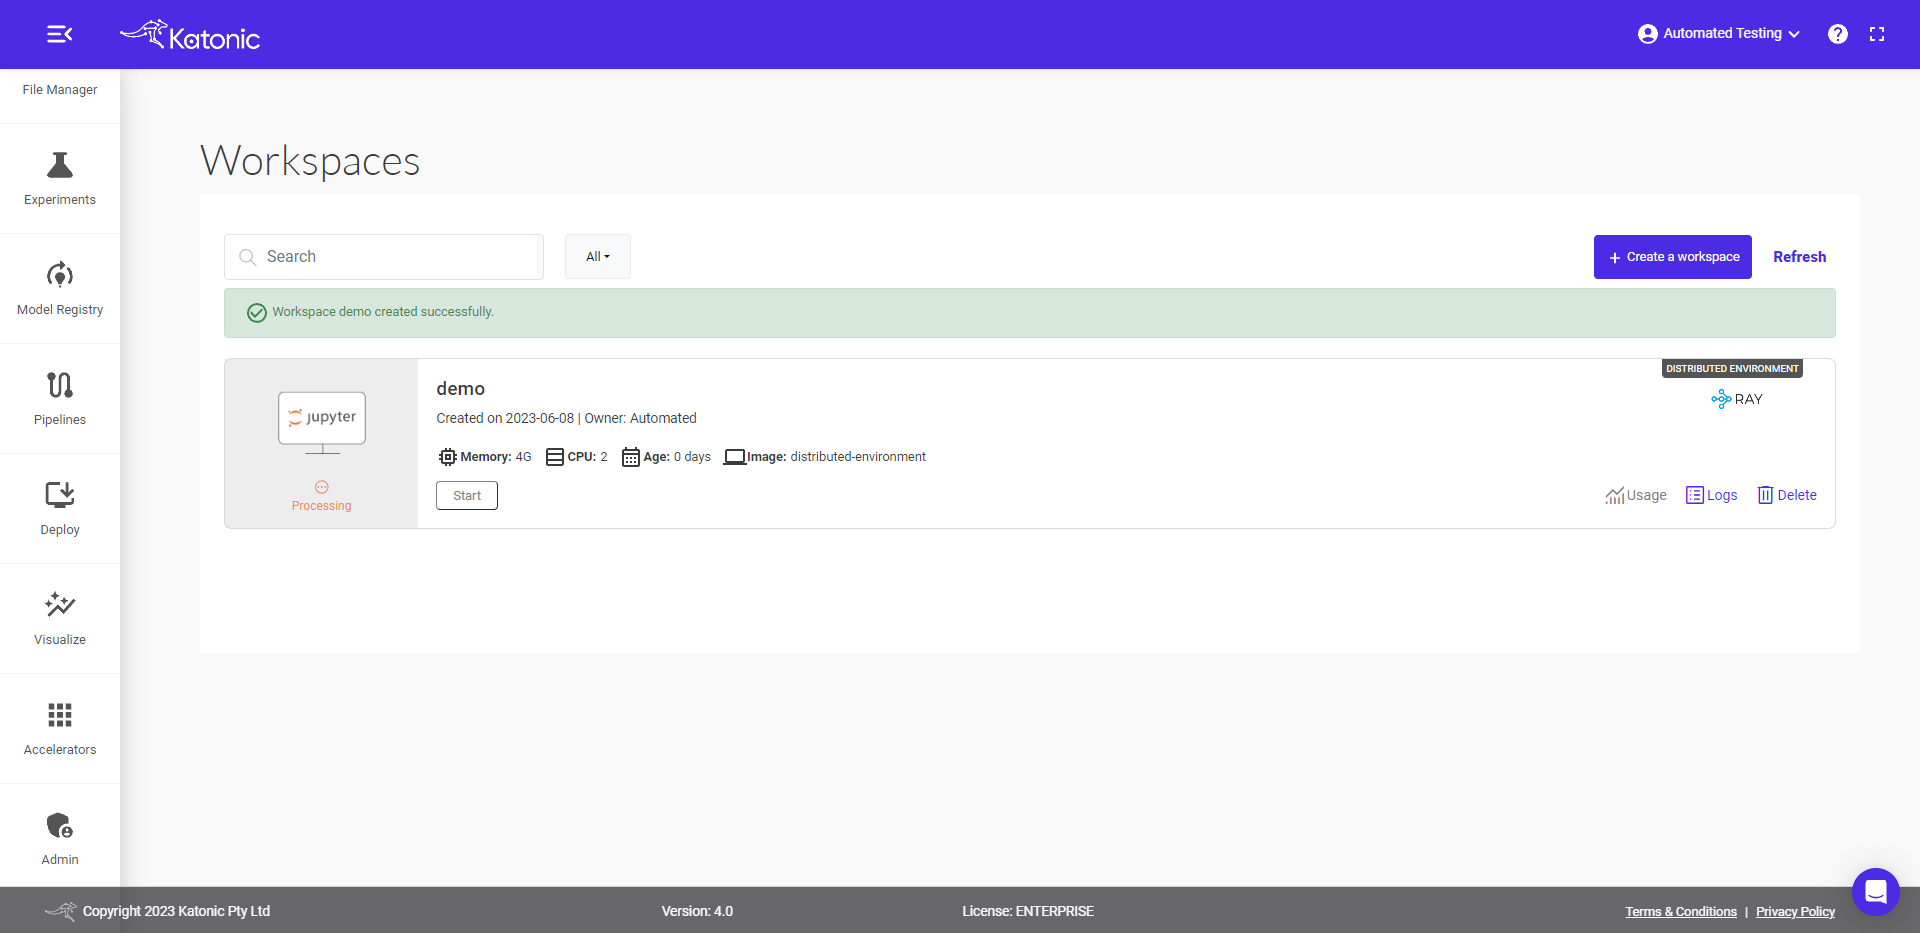
2.8.6 the distributed tool you selected i.e. ray, it can be shown at the right upper corner of workspace window.
2.8.7. Once the Workspace is in a running state it will show the connect button with which you can connect to the environment server.

2.8.8. When you connect to a Workspace, a new session is created on a machine and your browser is automatically redirected to the selected environment (Jupyter) UI in a new tab.
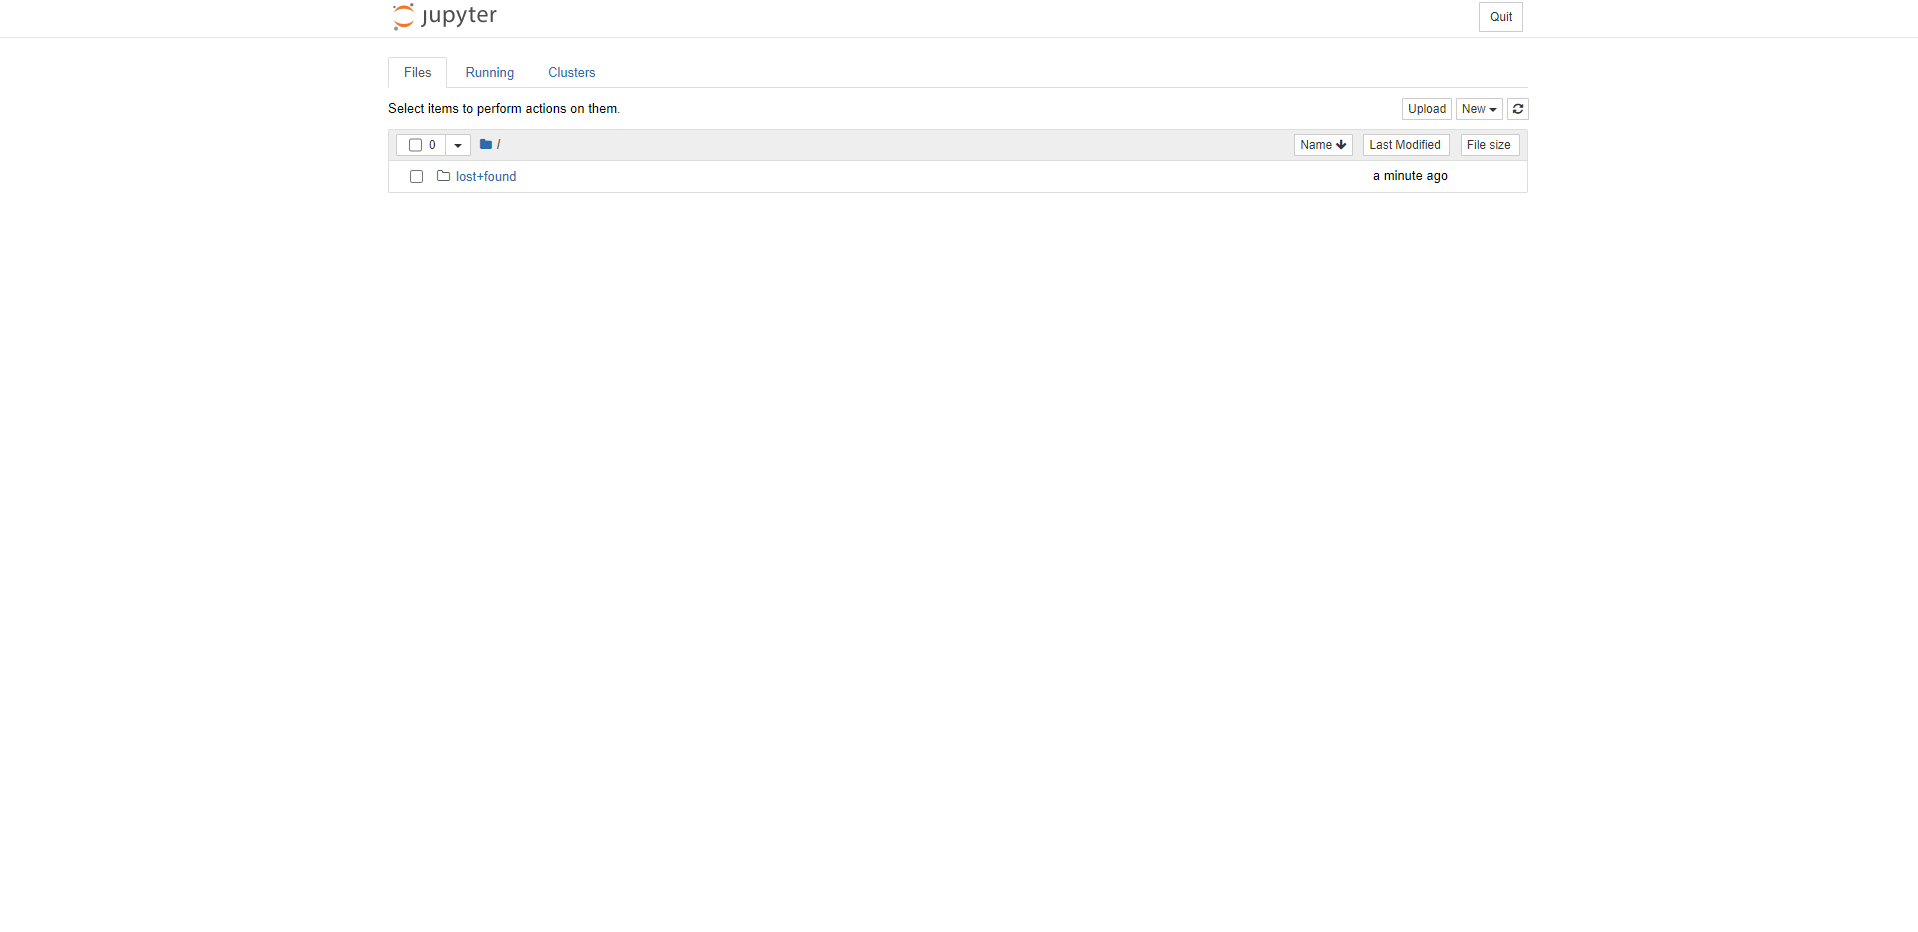
2.8.9. Once your workspace is up and running, you will see a fresh selected interface like Jupyter interface.