Chatbot
Demo Video
Overview
This comprehensive documentation aims to provide users with a detailed, step-by-step guide on effectively utilizing the Generative AI platform to develop custom Chatbots utilizing large language models. By following the instructions outlined in this guide, users will gain a thorough understanding of the processes and techniques involved in harnessing the power of Generative AI for building highly advanced Chatbot systems.
The documentation will cover various aspects of using the Generative AI platform and highlight the essential steps required to create custom Chatbots. It will delve into the intricacies of working with large language models, which are capable of generating human-like responses. Users will learn how to leverage the platform's functionalities to train these models and fine-tune them to suit specific requirements.
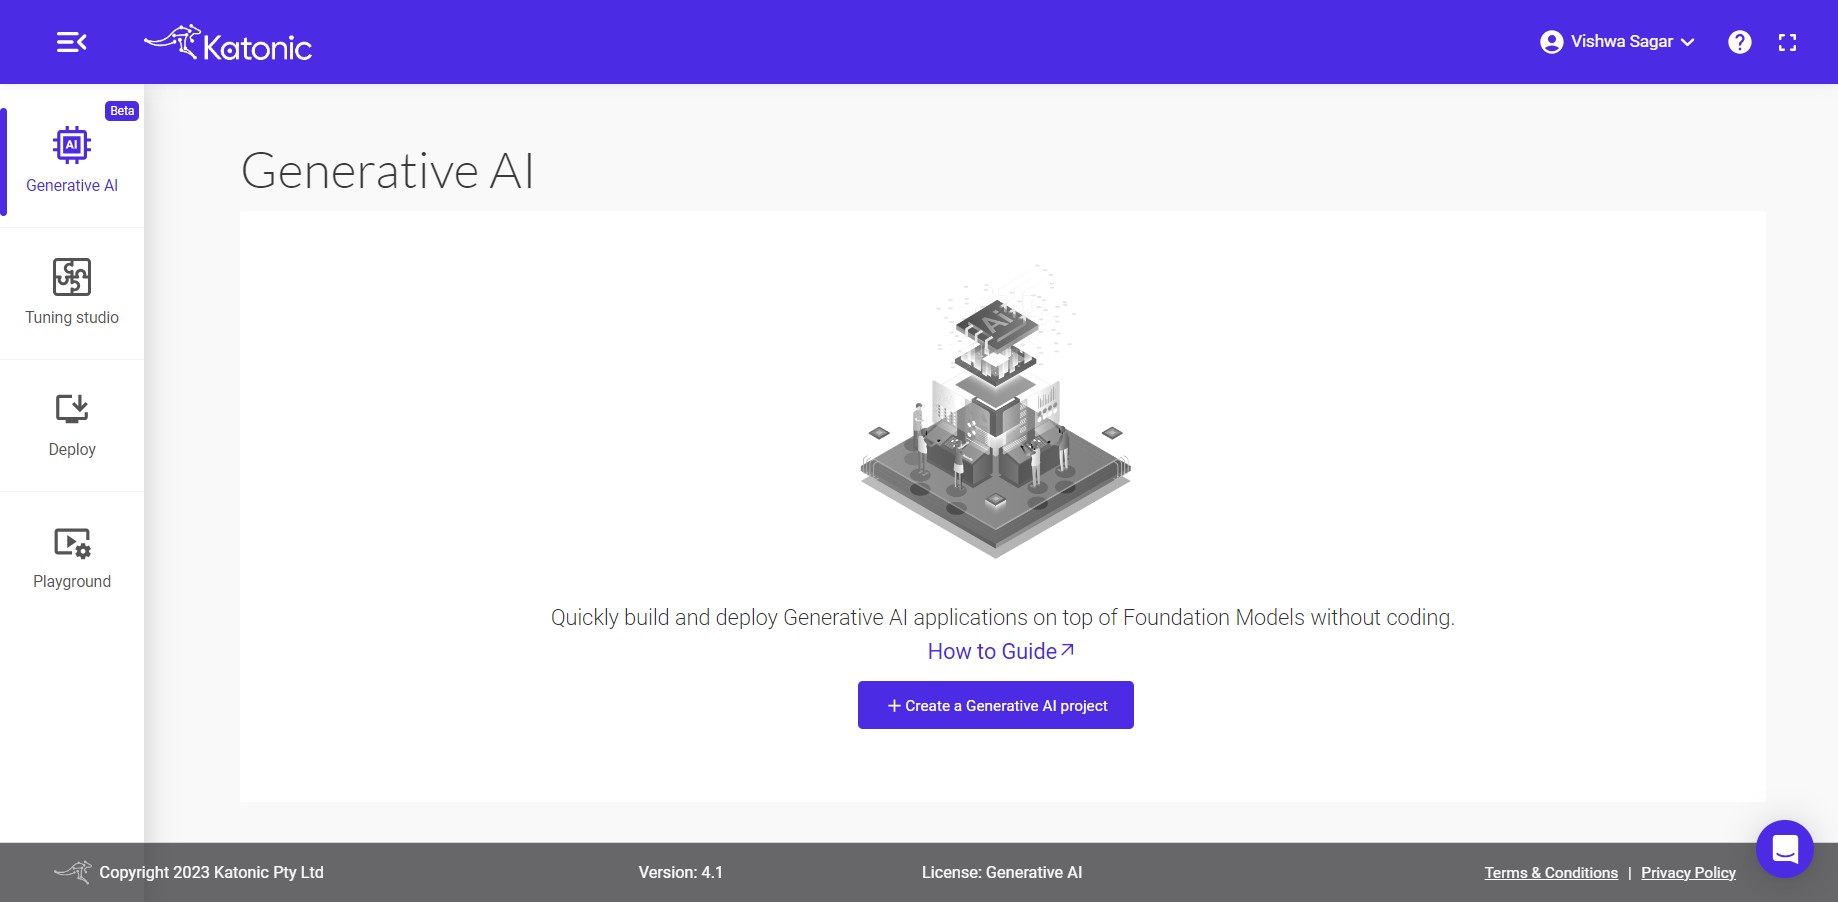
Initial Dashboard
Upon accessing the dashboard, you will find several tabs, including the Generative AI and Deploy tabs.
Creating a New Generative AI Project
Add Foundation (Completion) and Embedding Models
The first thing before creating a chatbot is to Choose from a variety of foundation models and embedding models including closed source, and open source models. These models are reflected only after the user includes them in the model library which is present in the "Foundation model management" section. you can refer the "Foundation model management" documentation under the "Tuning Studio" section on how to manage and include the models in the model library.
Note: Access to foundation models and embedding models can only be granted by administrators.
Project Creation
To create a new project, follow these steps:
Click on the Create a Generative AI project button.
Provide a name for the project.
For demonstration purposes, let's name the project "demo-chatbot." Or “custom-chatbot”, By default, the project type will be selected as chat.
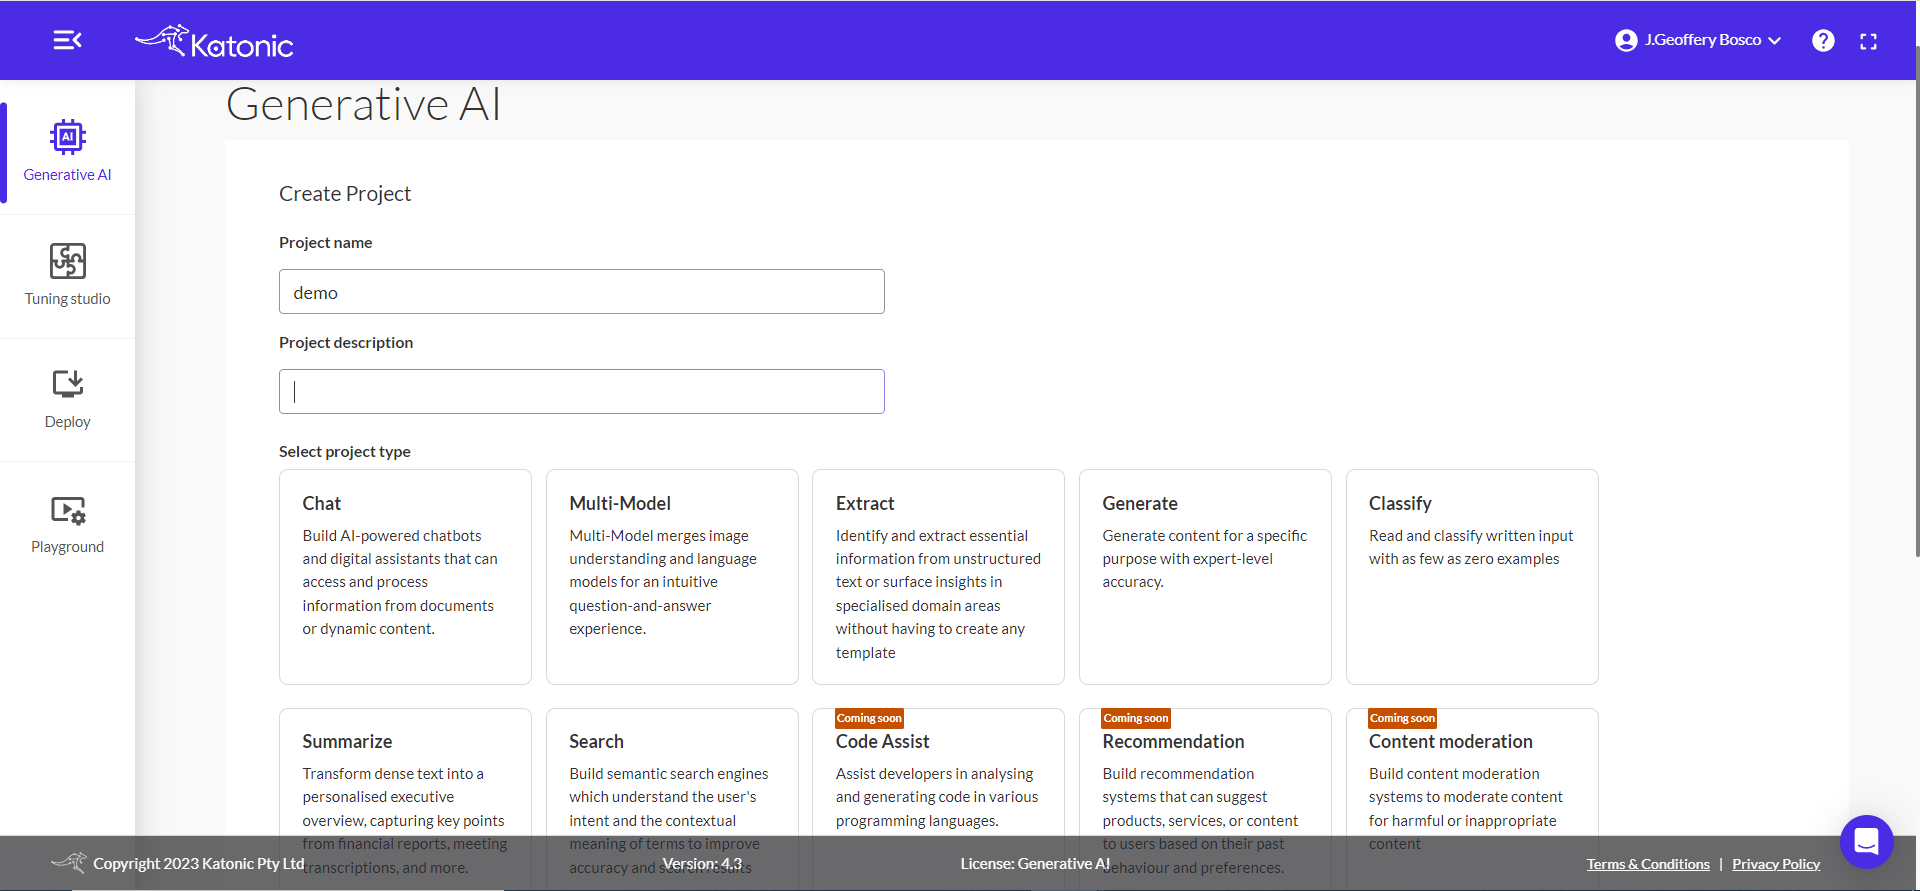
Click on create for the further process.
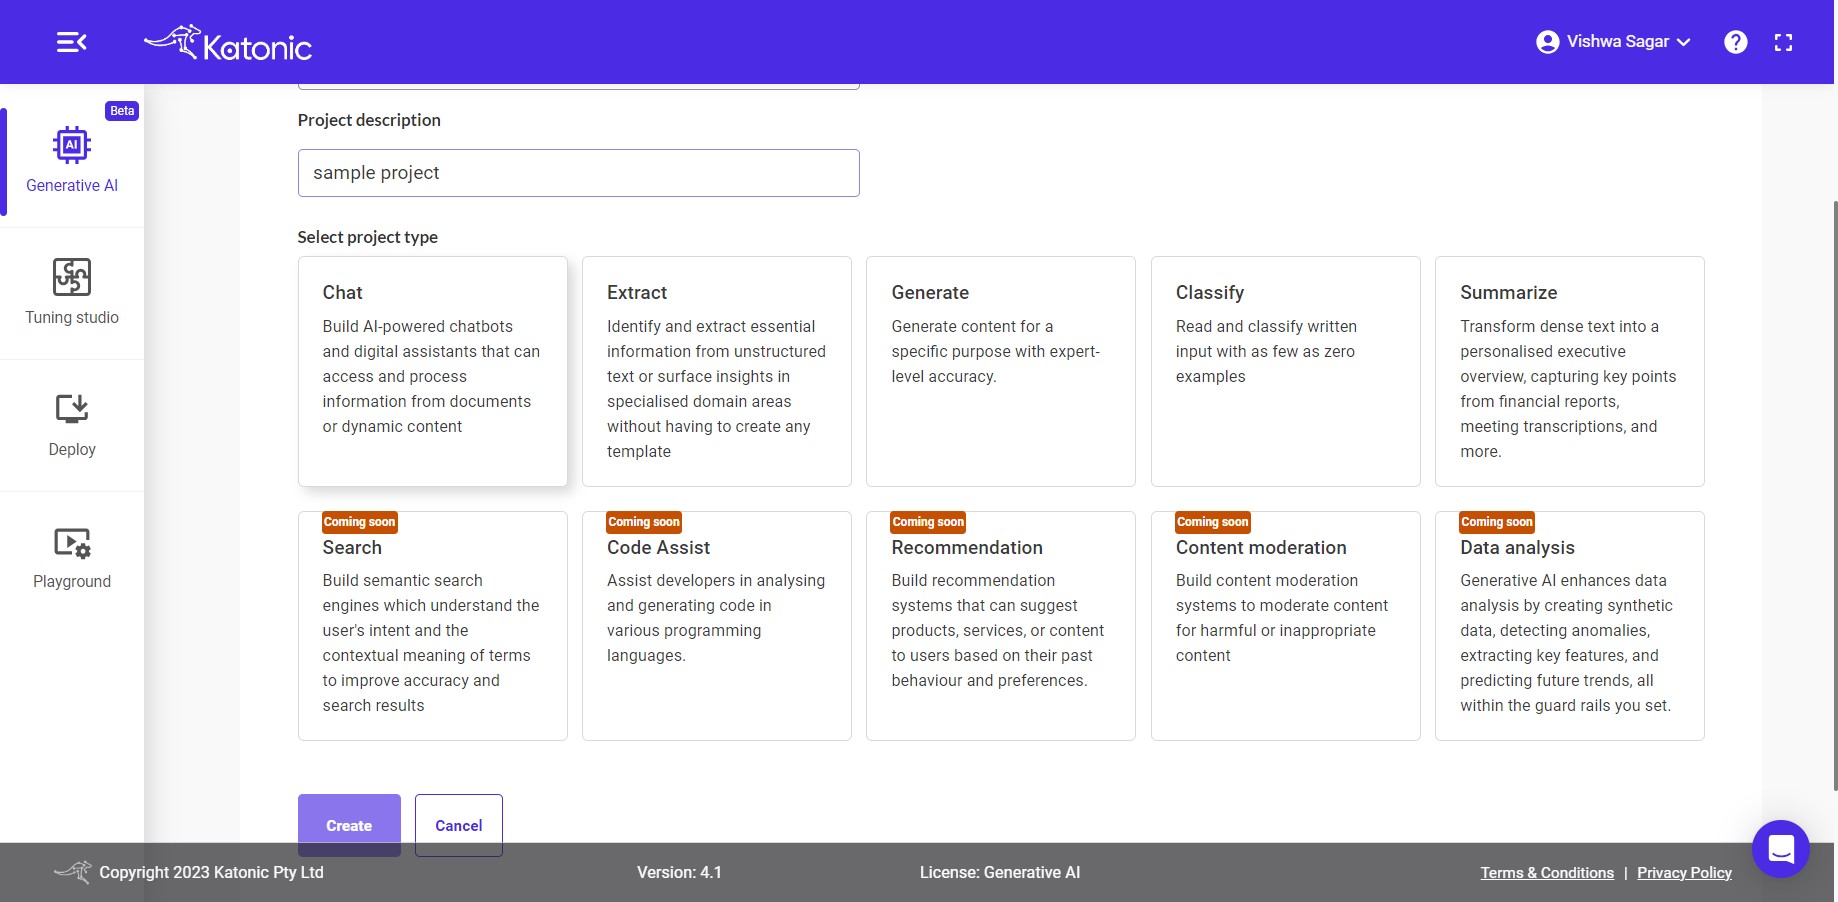
Note: In future releases, you will have the option to choose from various project types, including
Fine tune a modelfor retraining a large language model with custom data. These additional project types will provide more flexibility and customization options for your projects.
For this example, we will proceed with the Chat option. Click on the Create button to continue.
Adding Data Sources
Within the project, you have the option to utilize public websites or files as data sources for your chatbot. This allows you to gather information and content from various sources to enhance the capabilities of your chatbot.
Public Websites as source:
To add public websites as data sources:
Warning : Please make sure that the Public URL is scrapable, because that data will get integrated with the chatbot.
- Select the public website option.
- Copy and paste the URLs of the websites you want to use.
- Press "Enter" button to add each website.
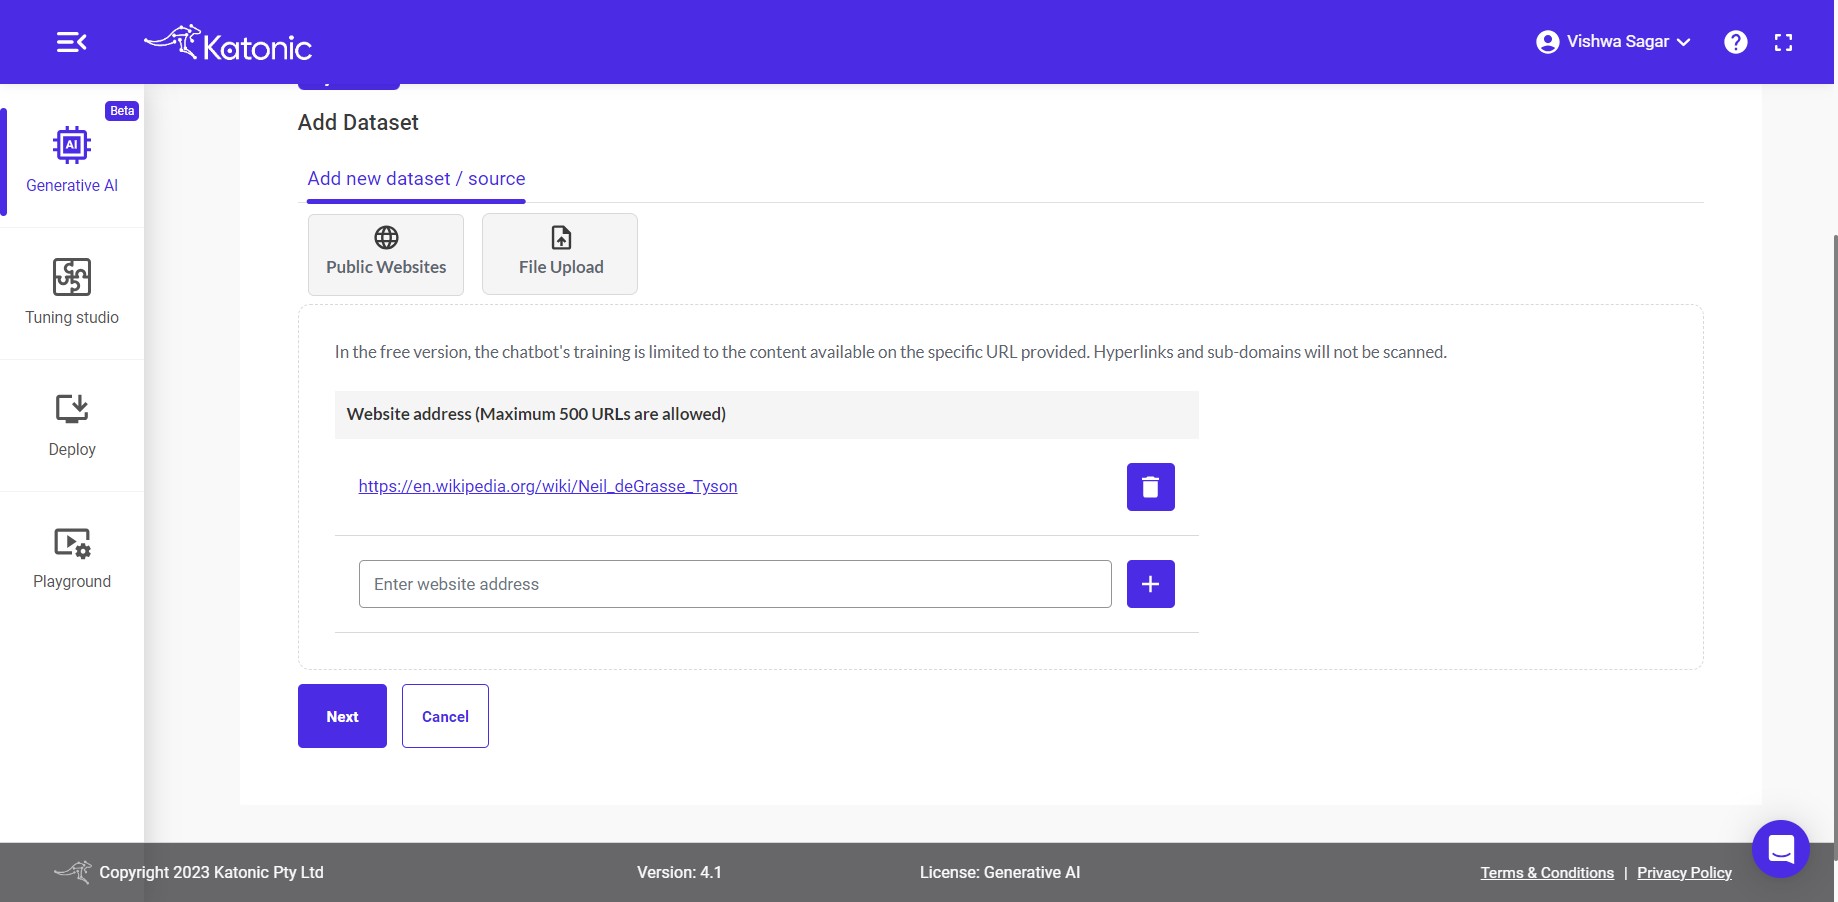
Note: You have the flexibility to add up to 5 different websites.
File as source:
Alternatively, you can upload PDF, PPT, Microsoft Word, JSON, HTML and TXT files to incorporate their content into the chatbot.
- Choose the "Files" option.
- Select the desired files.
- The files will uploaded automatically.
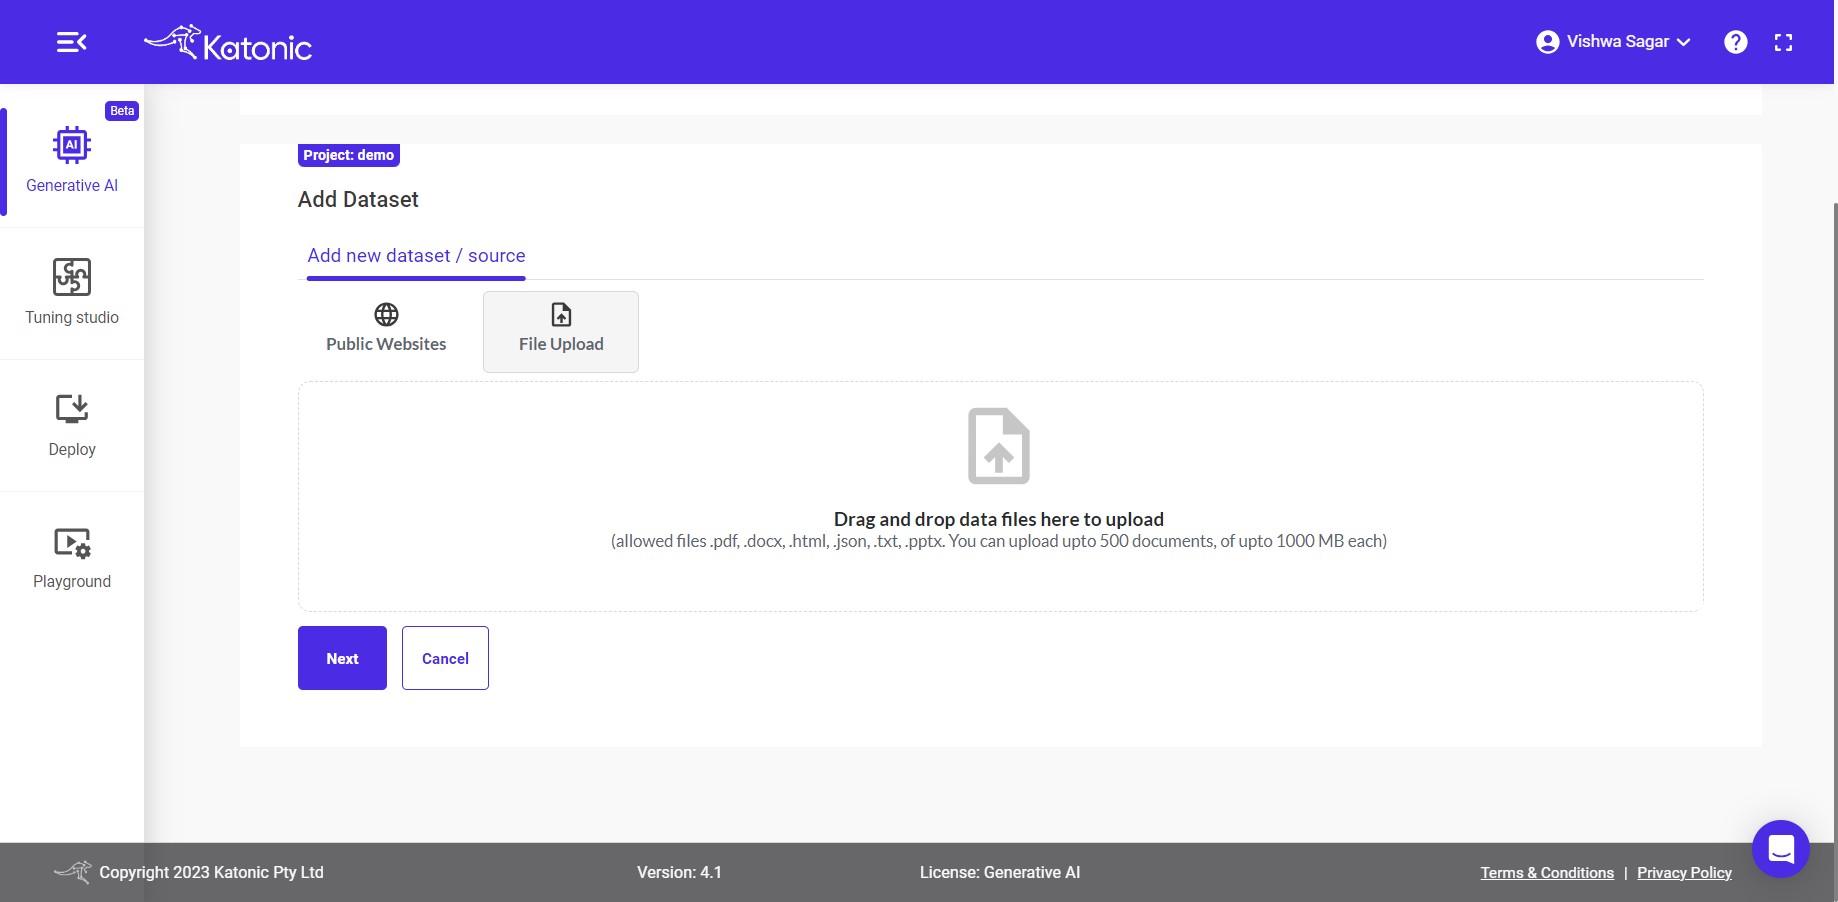
Note: Please ensure that the file sizes do not exceed the maximum size limit of 20 MB.
After that, you'll reach the Customization section, where you can provide additional instructions on how your chatbot should be created. This section allows you to customize and fine-tune the behaviour, responses, and overall functionality of your chatbot according to your specific requirements and preferences.
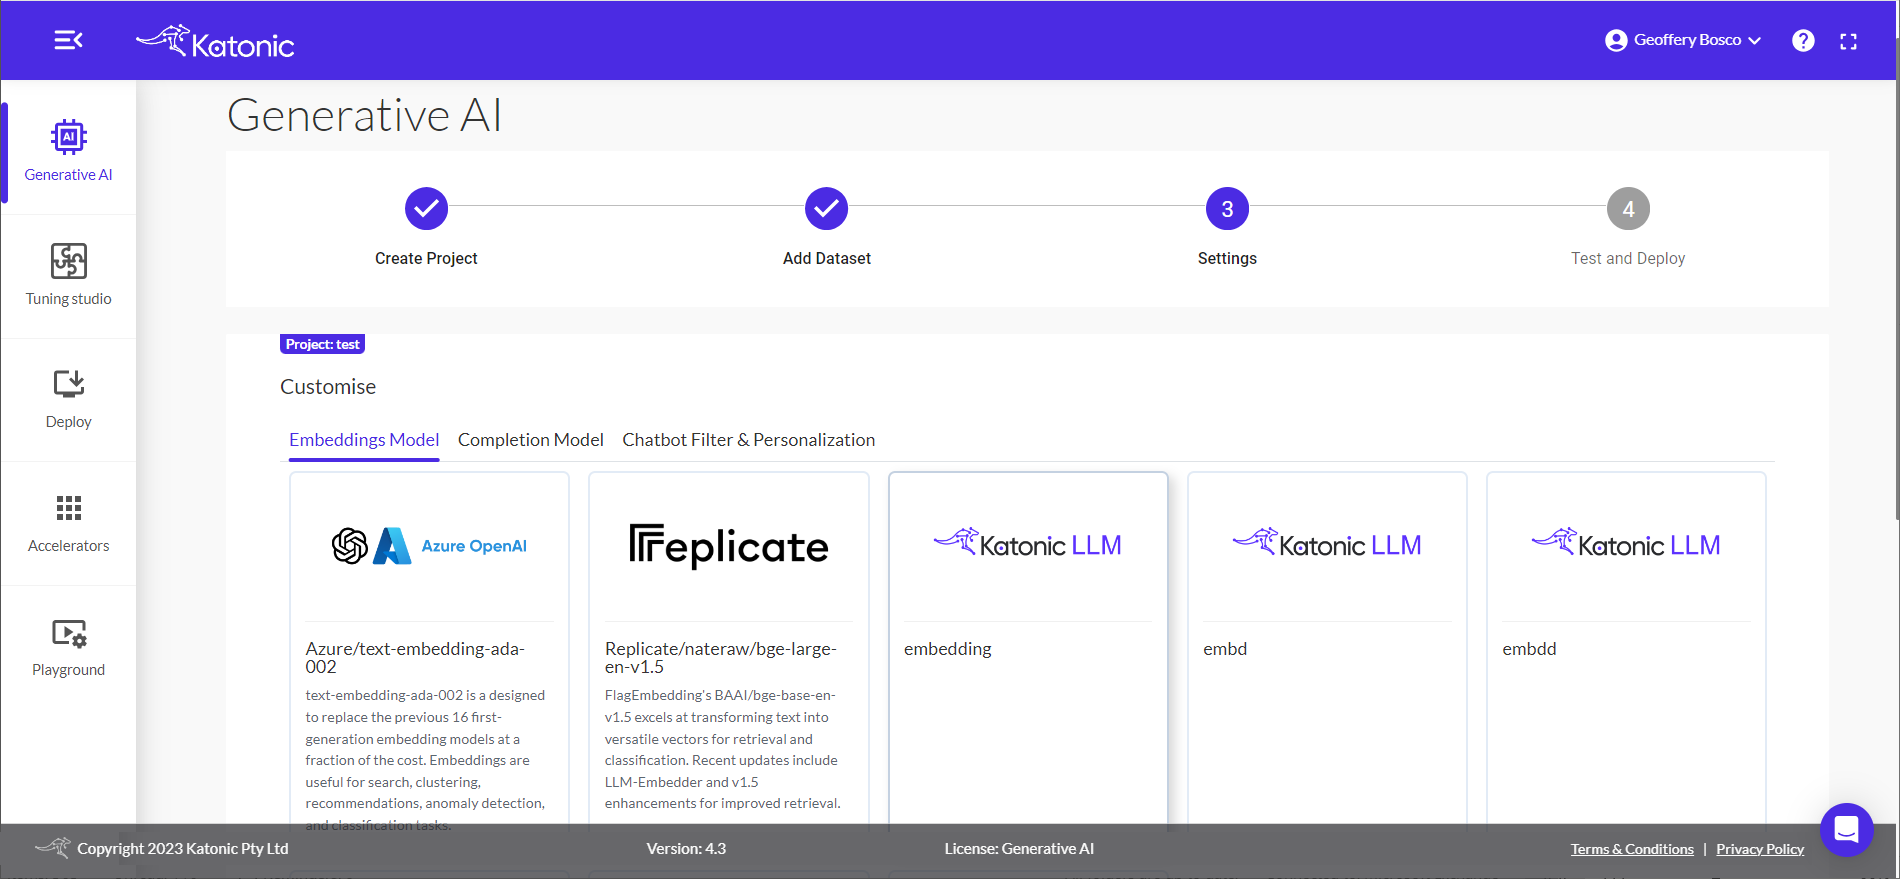
Selecting the Embedding Model
Note: Access to emdedding models can only be granted by administrators.
Now user can select the best Embedding Model from below according to the need for chatbot.
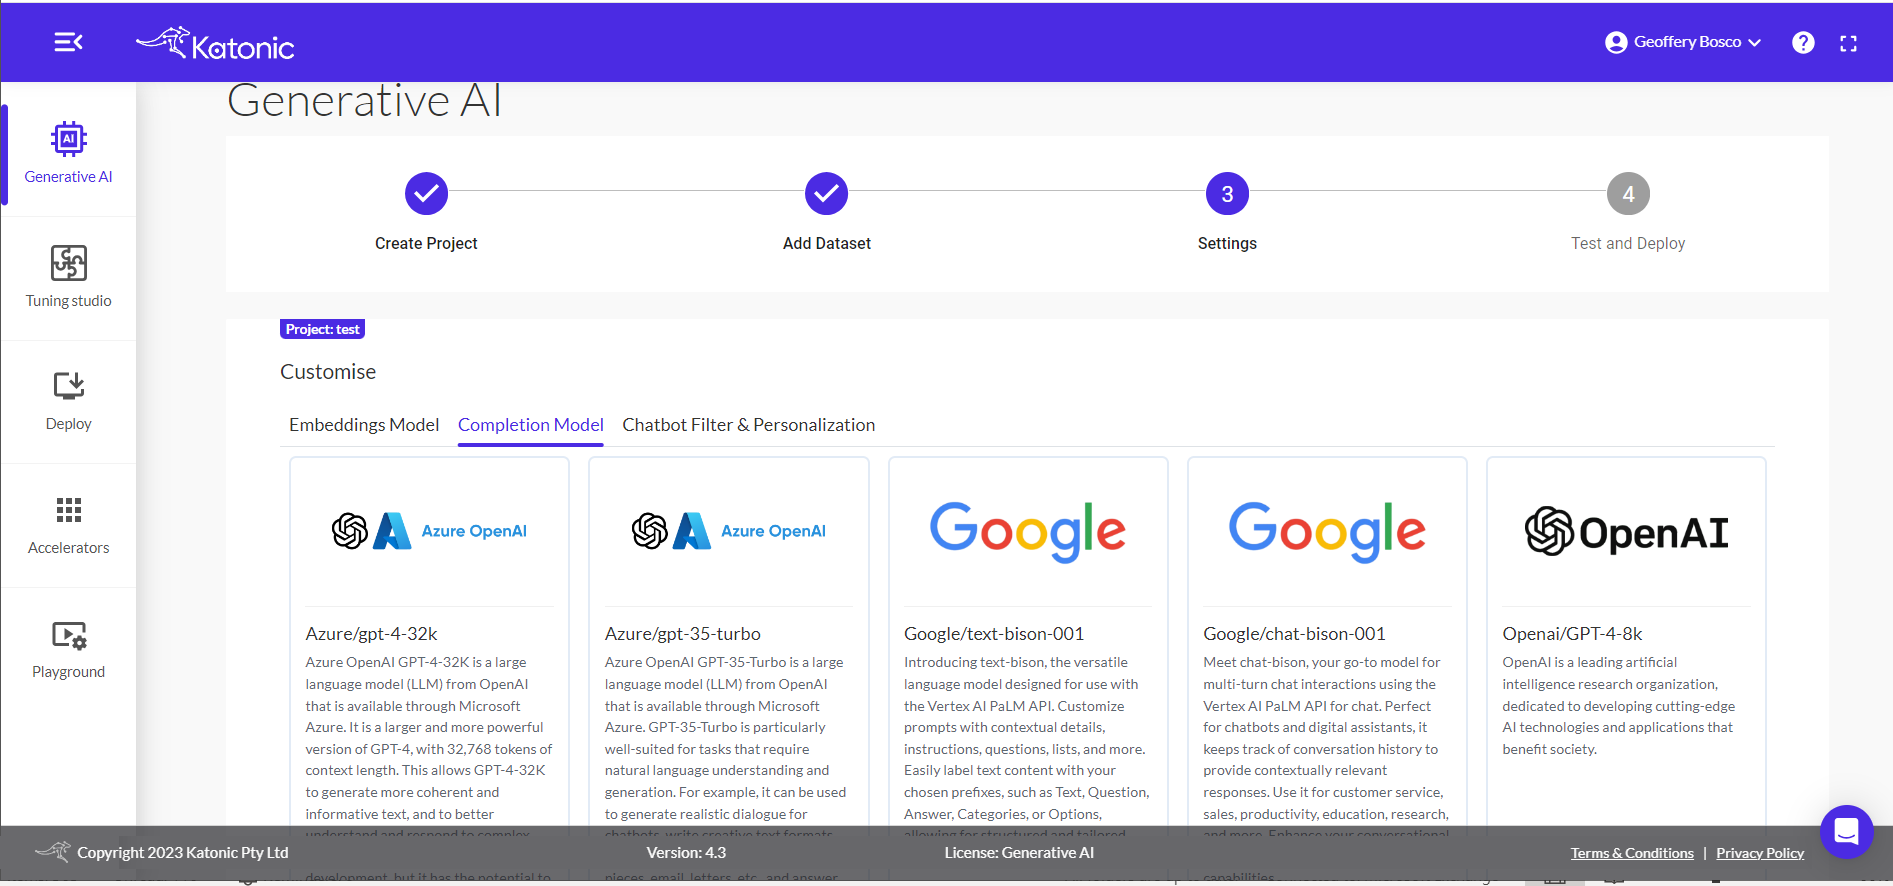
Selecting the Completion Model (Foundation Model)
Note: Access to foundation models can only be granted by administrators.
Now user can select the best LLM Model from below which are added before creating the chatbot.
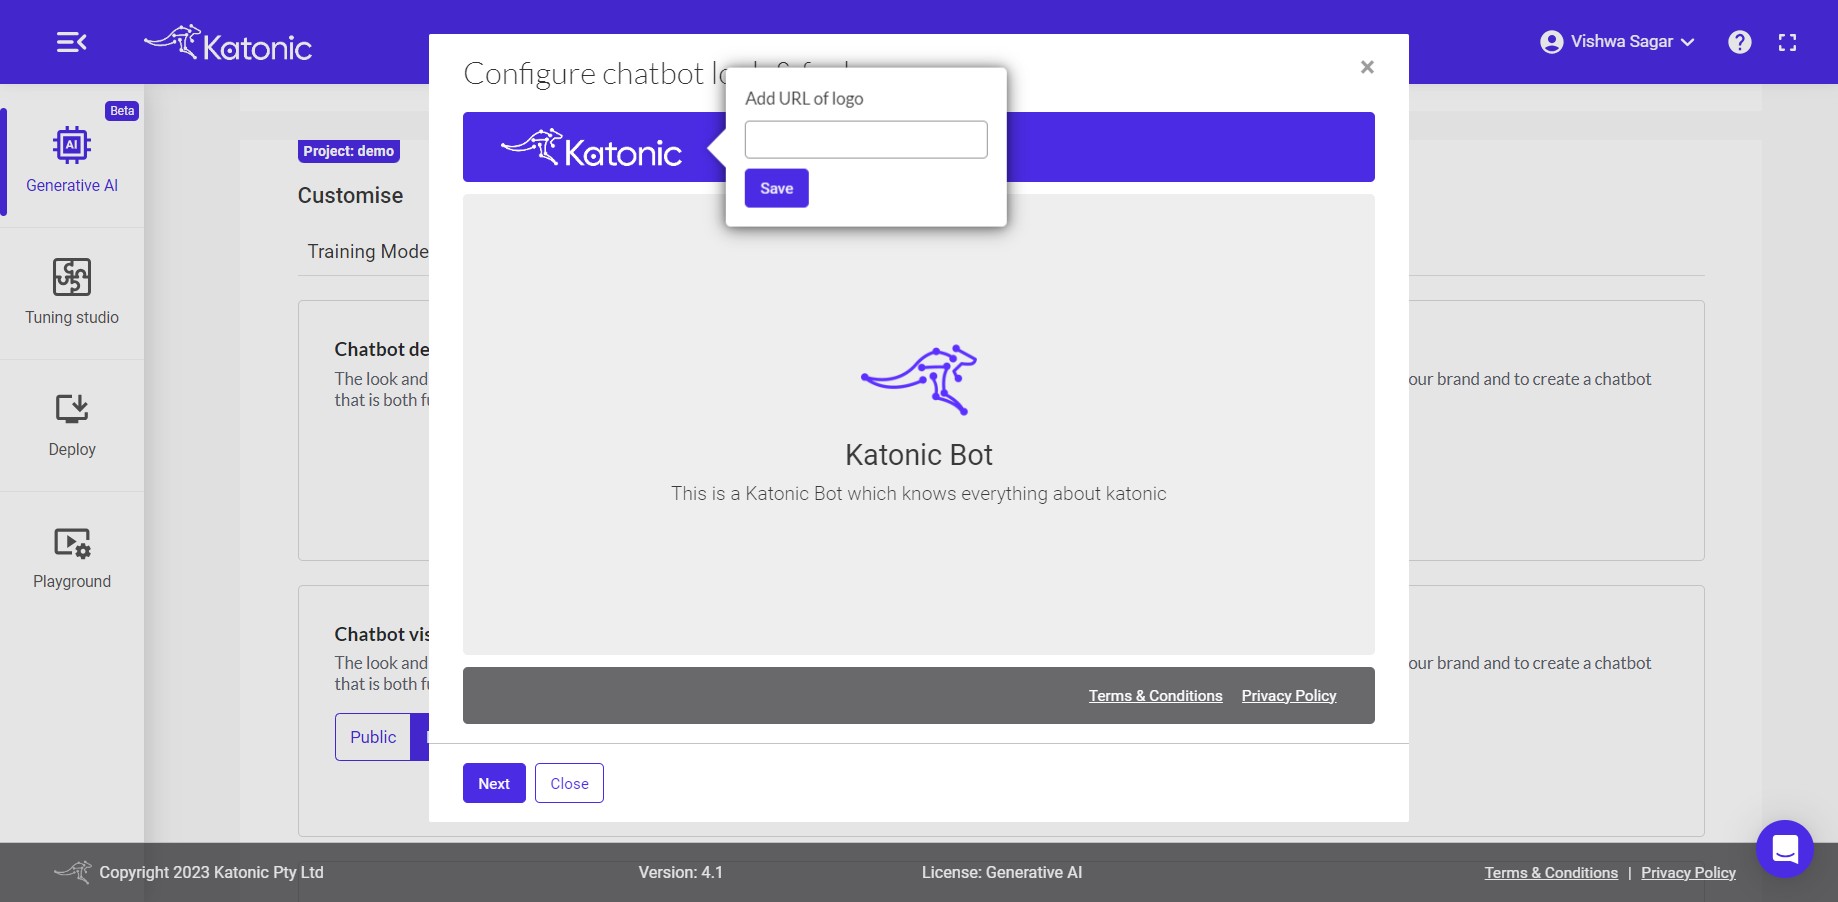
Chatbot filter & Personality.
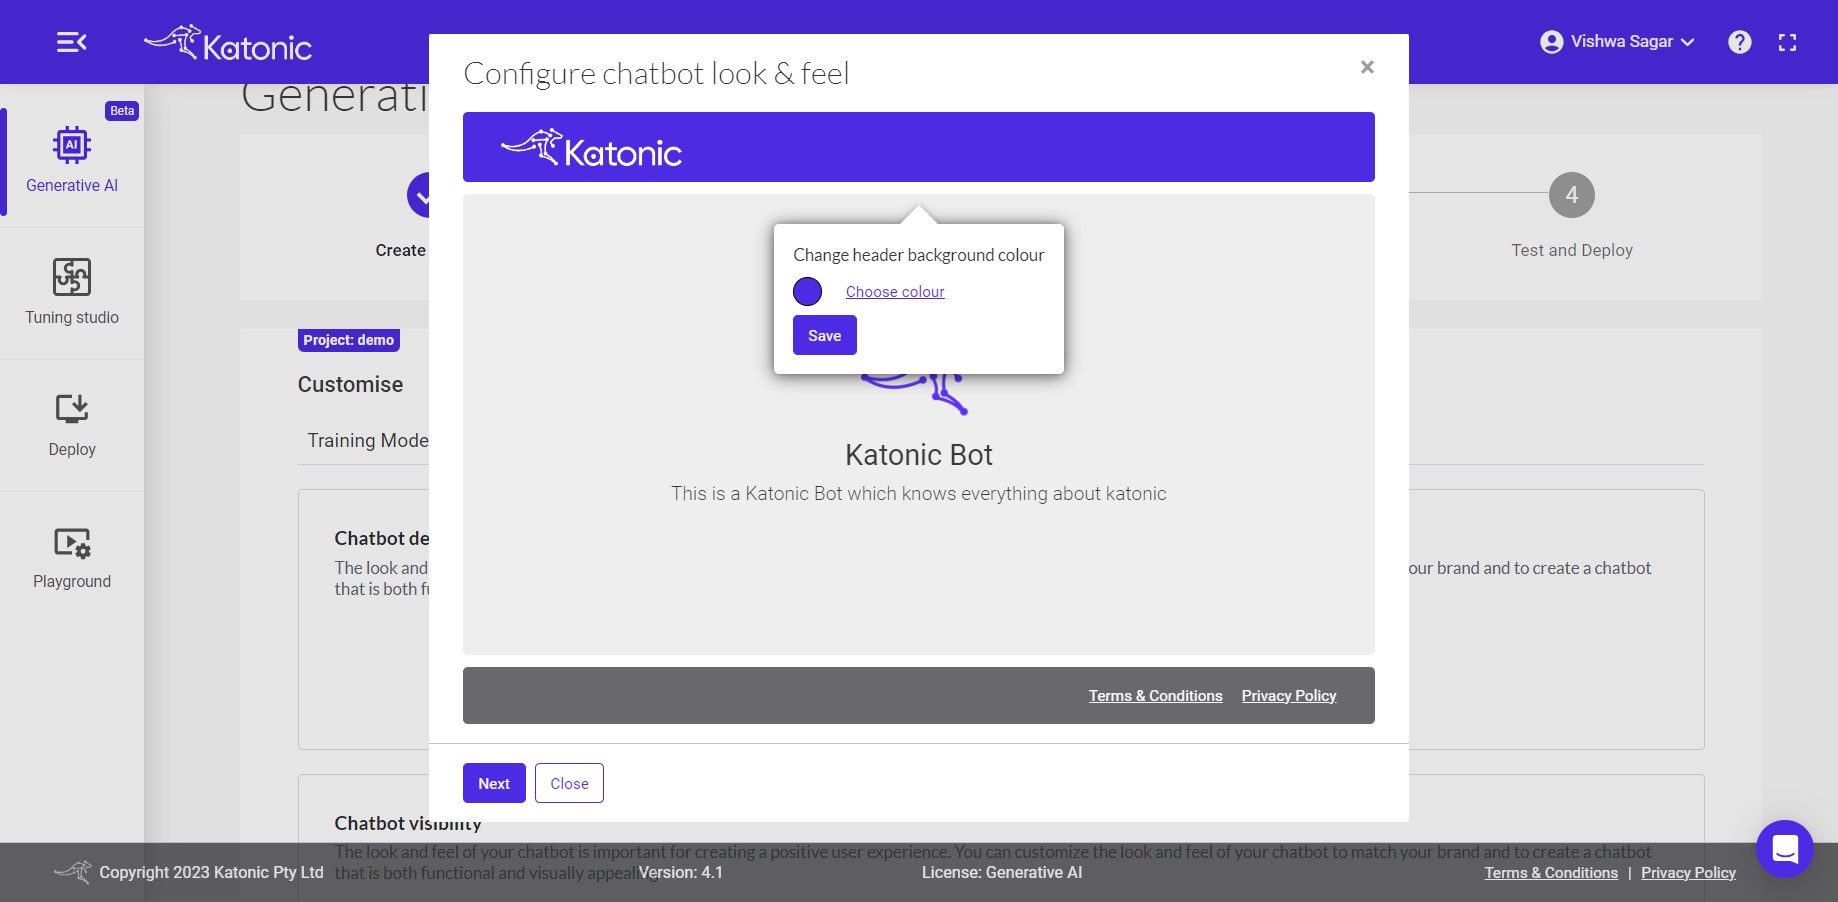
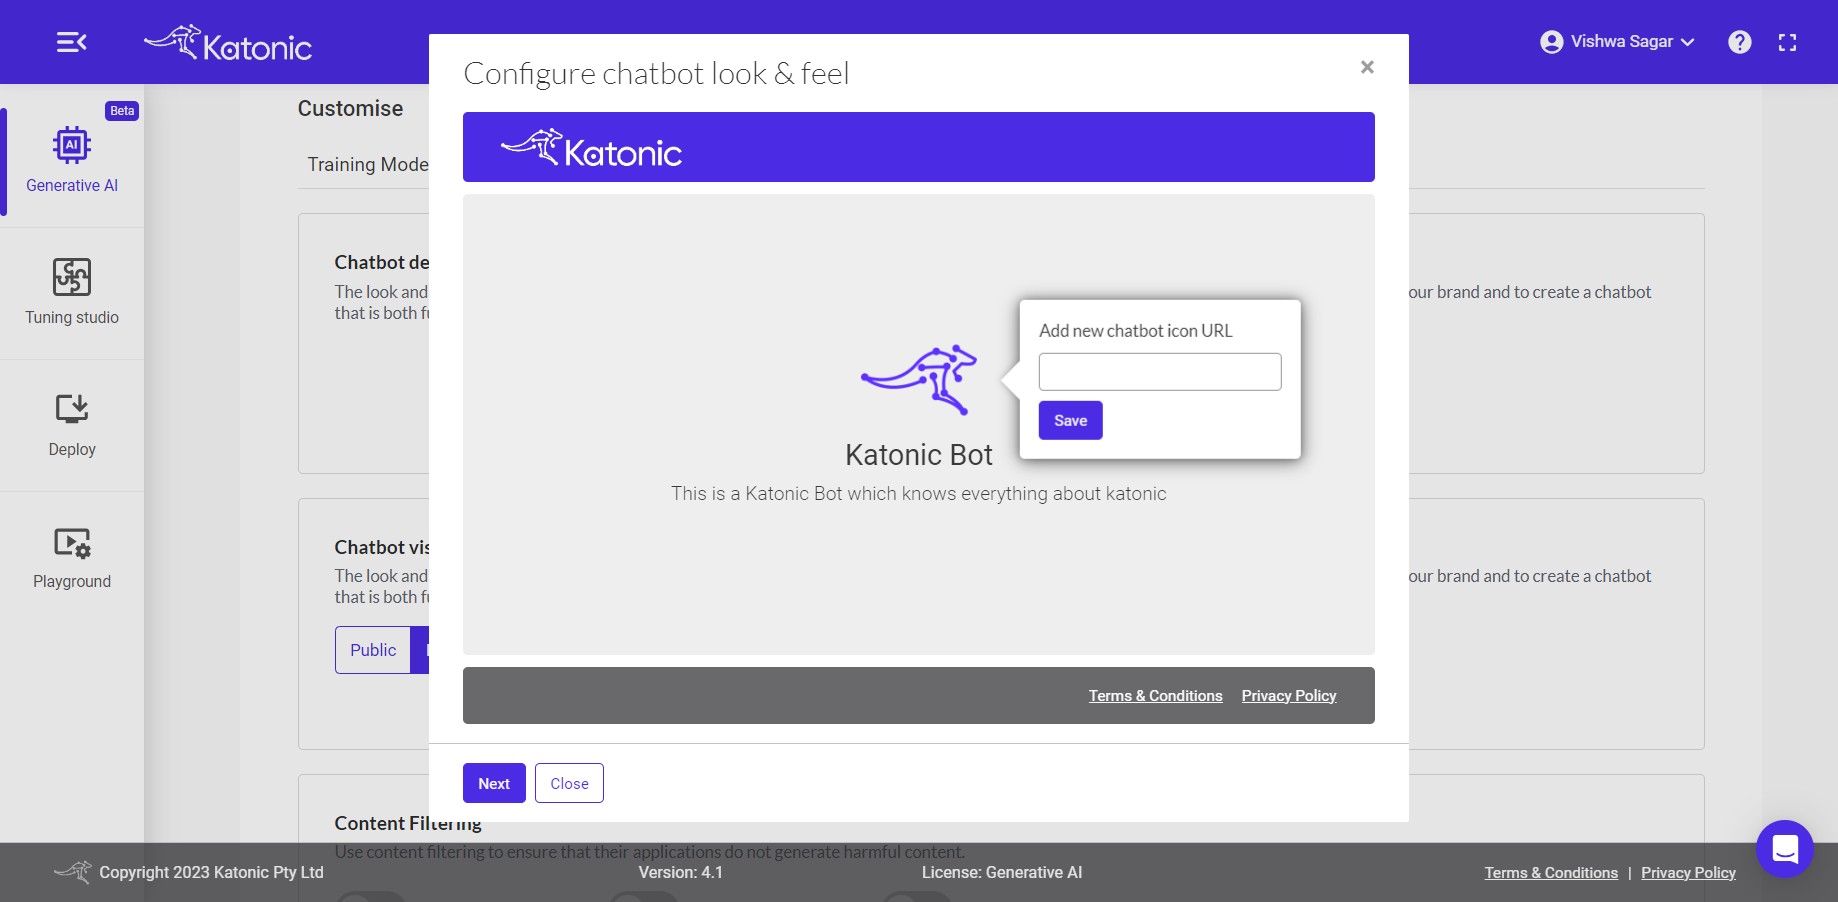
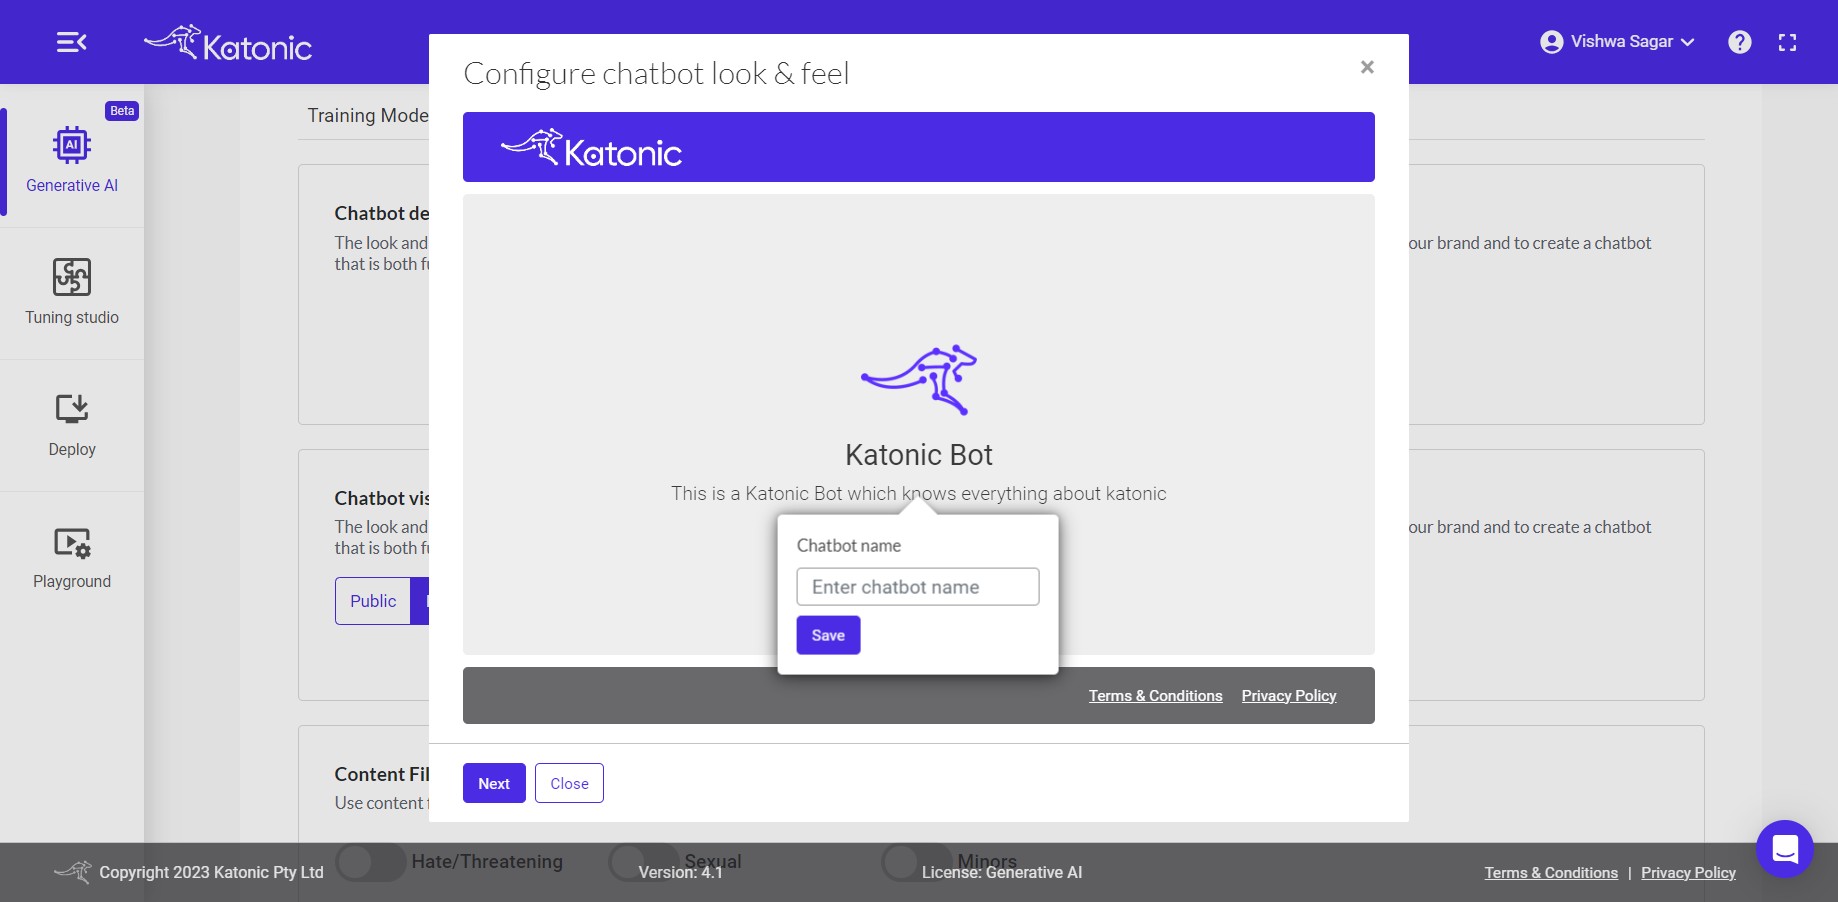
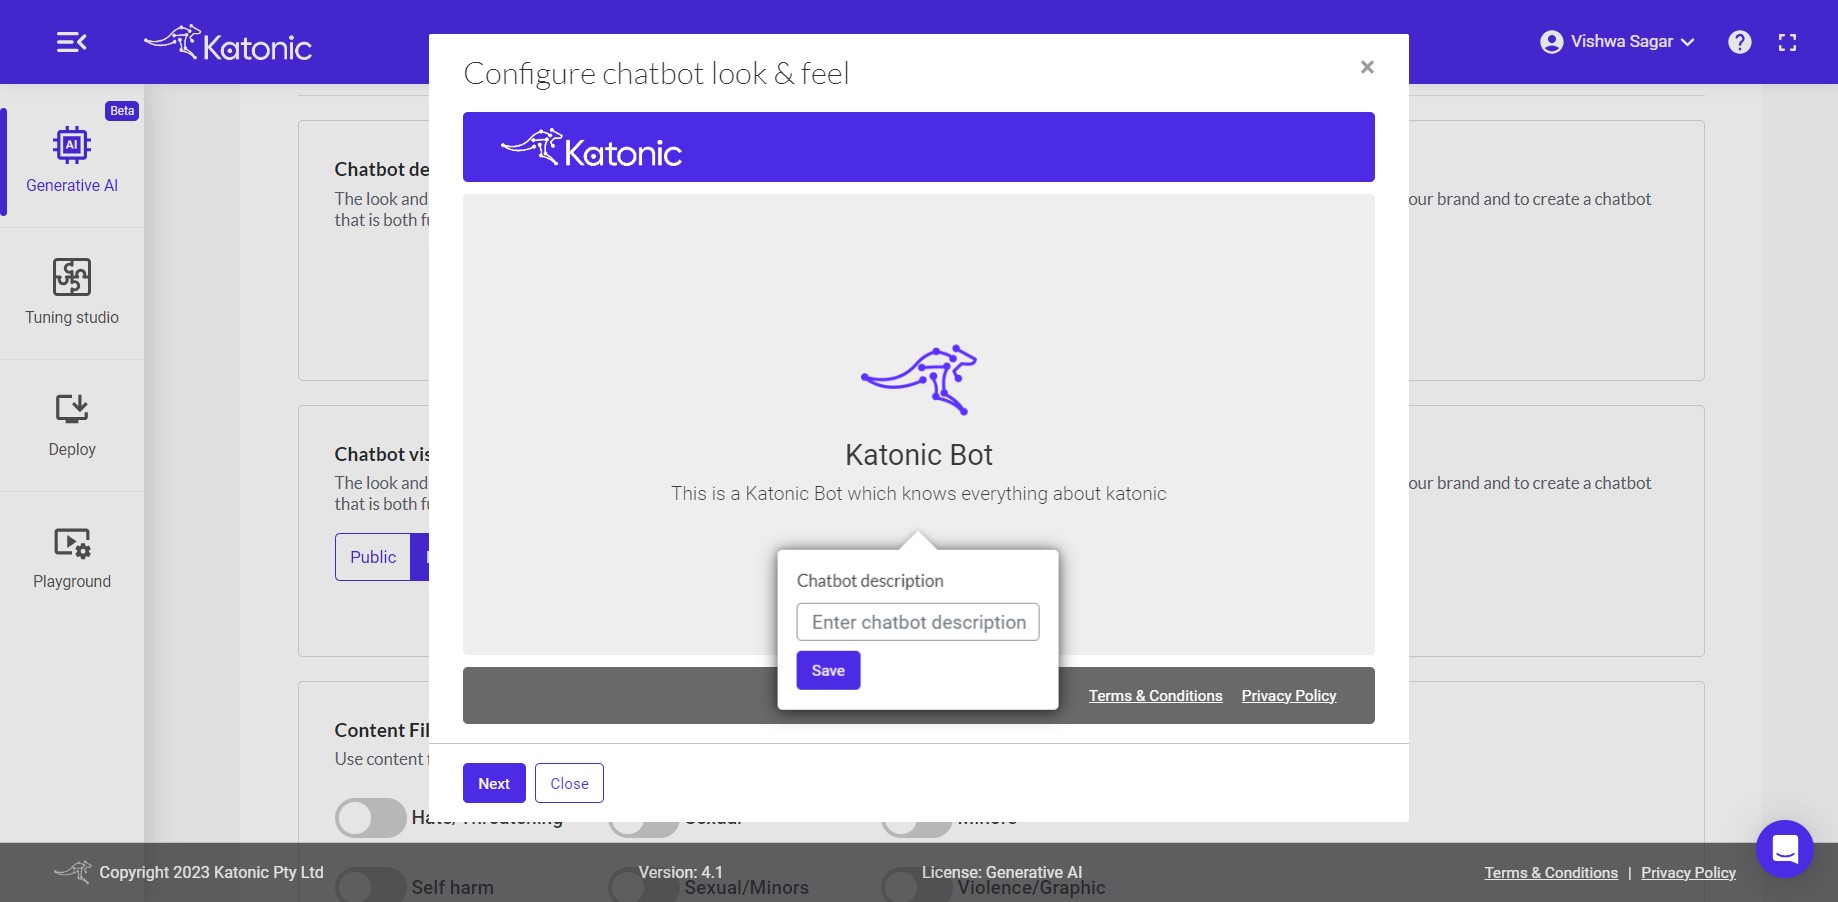
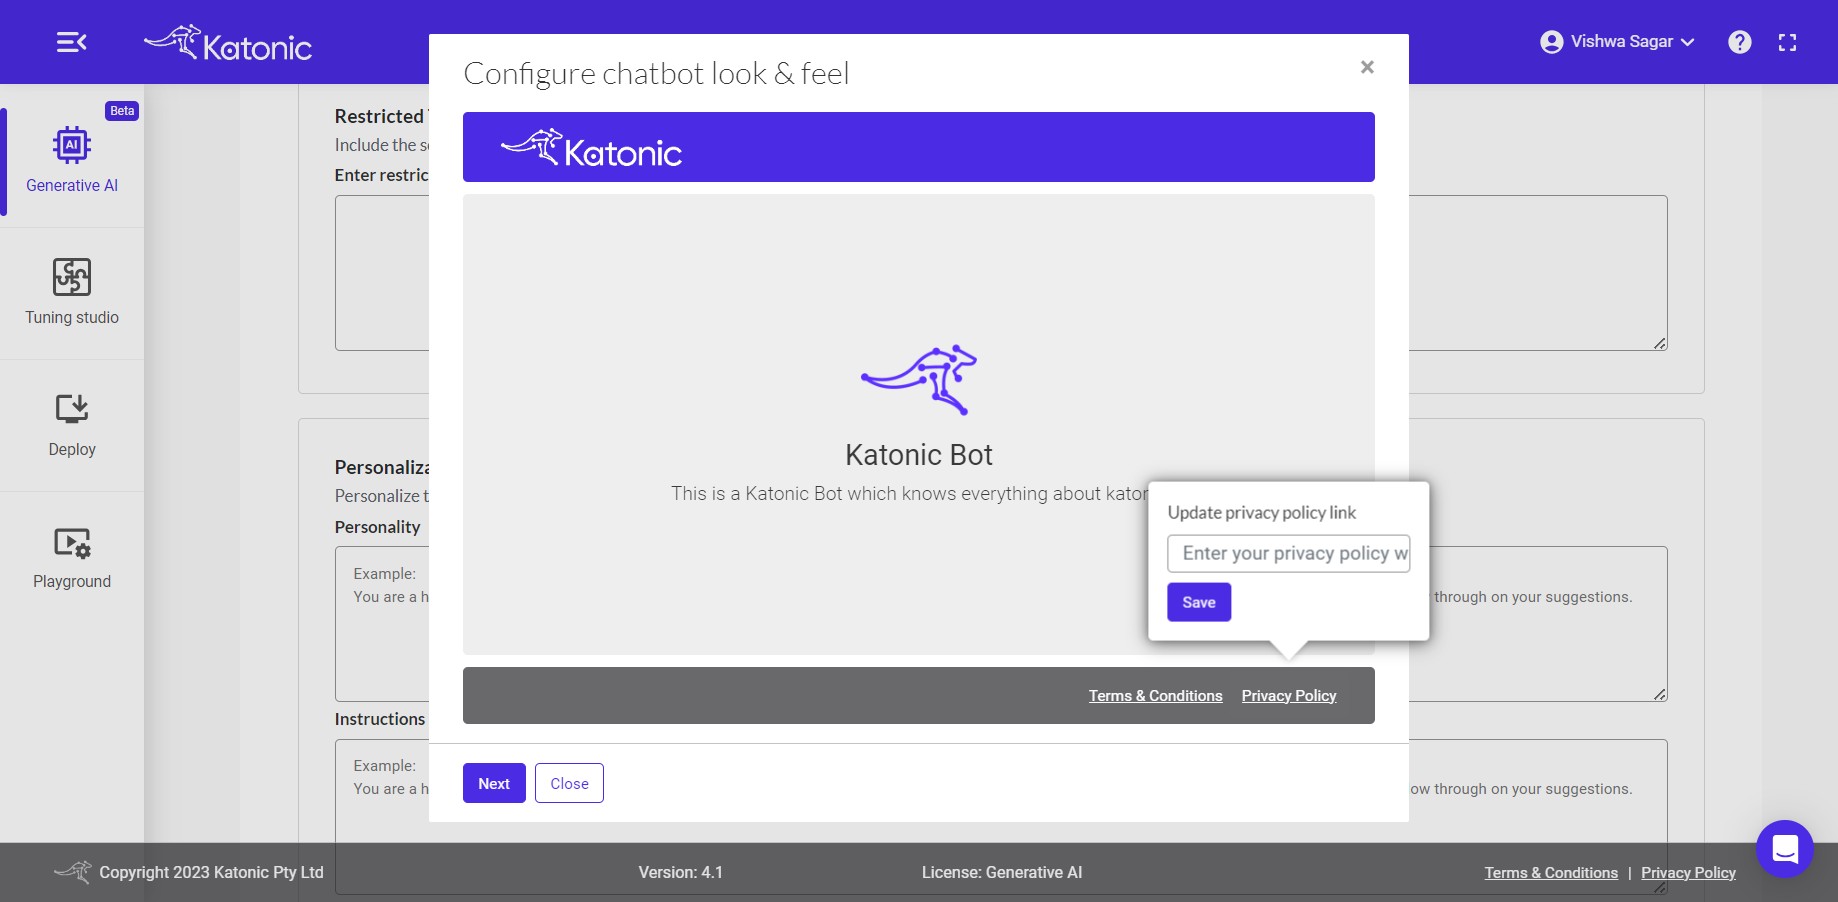
To personalize your chatbot, select the Configure Chatbot look and feel button under the Chatbot Details option. This will allow you to customize the appearance and behavior of your chatbot by providing the following details:
Logo URL: The URL of the logo that you want to use for your chatbot.
Color: The primary color of your chatbot.
Icon URL: The URL of the icon that you want to use for your chatbot.
Name: The name of your chatbot.
Description: A brief description of your chatbot.
Terms and Condtions URL: The URL of the Terms and Conditions for your chatbot.
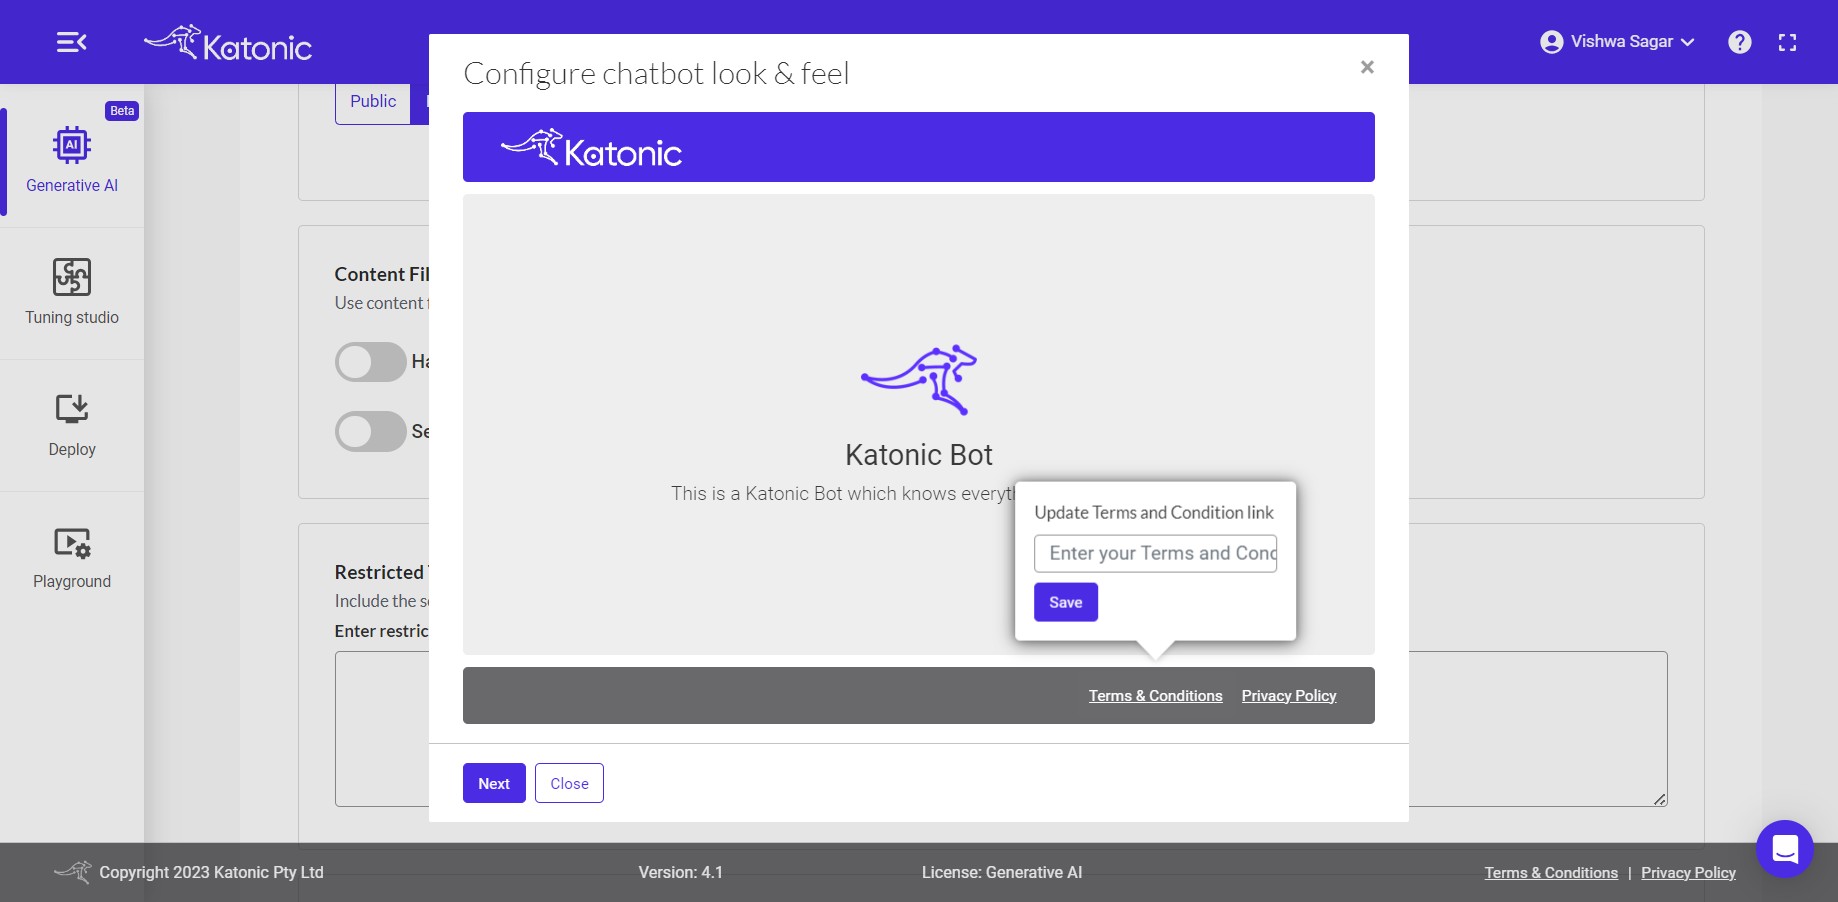
Privacy Policy URL: The URL of the Privacy Policy for your chatbot.
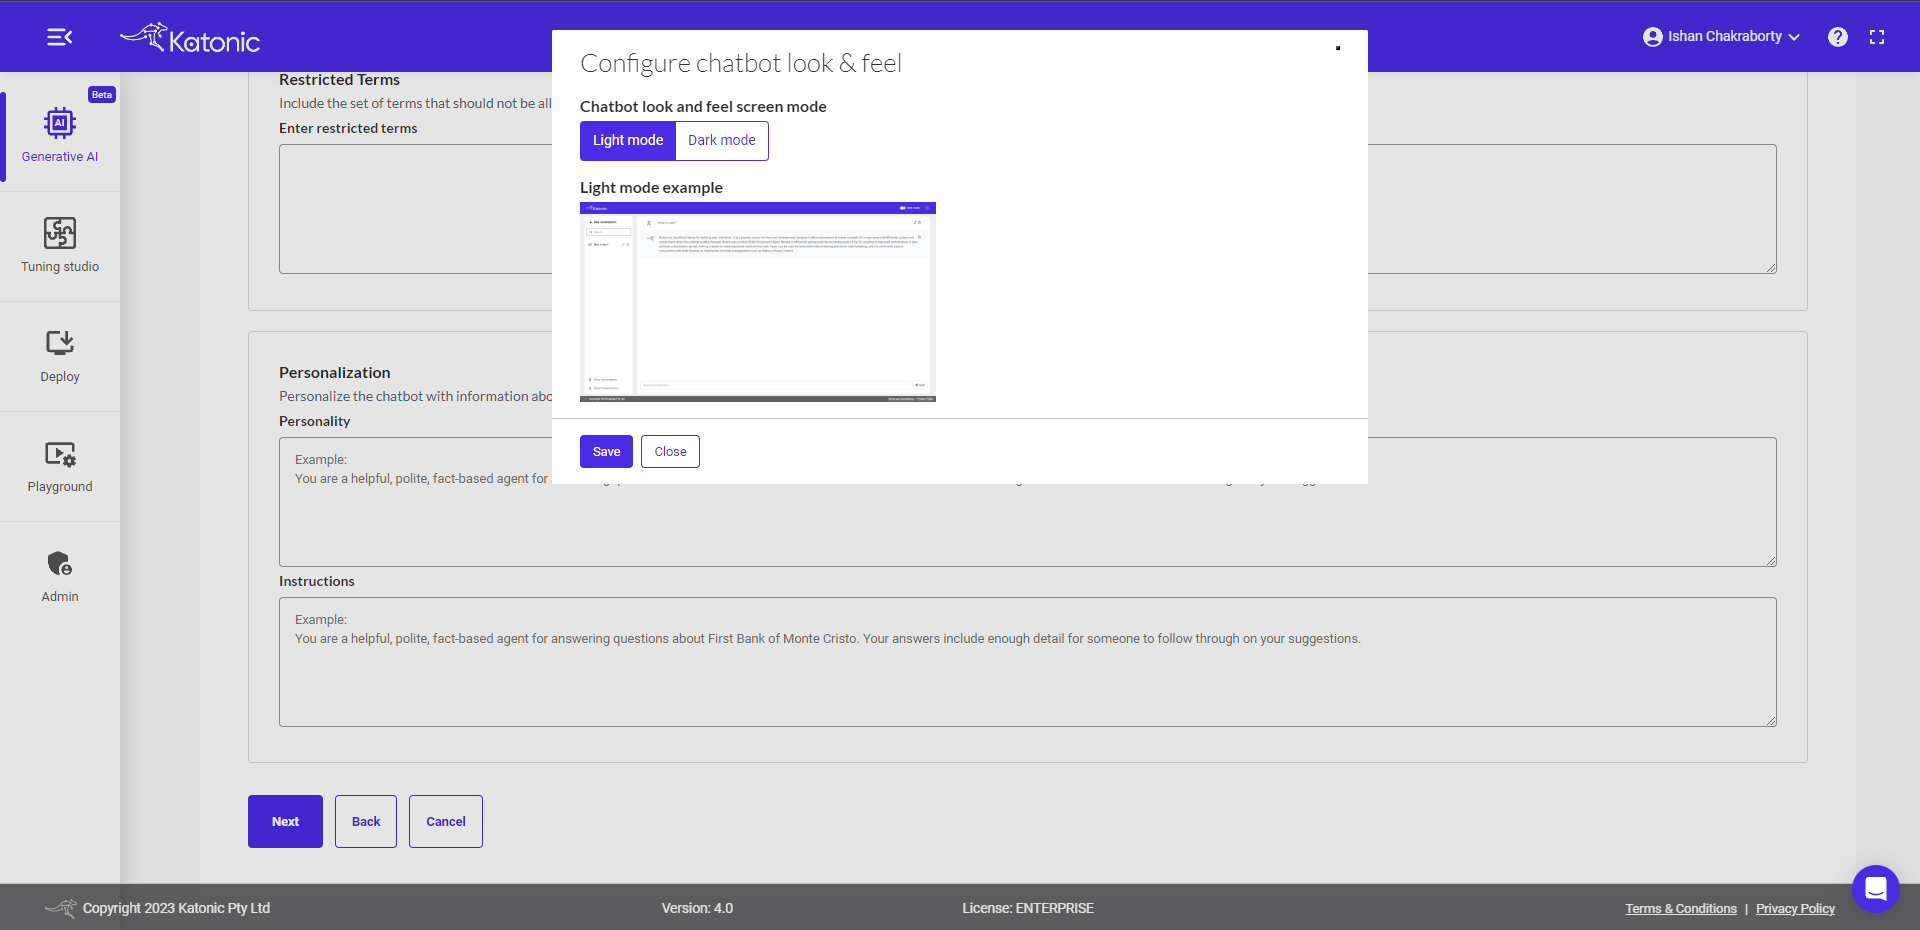
Chatbot look and feel screen mode: The theme you want to use for your chatbot, User can selectLight modeorDark mode.
Additionally, you can set your Chatbot Visibility to Public or Private. By selecting Public you can make your chatbot visible to everyone who has the chatbot link.
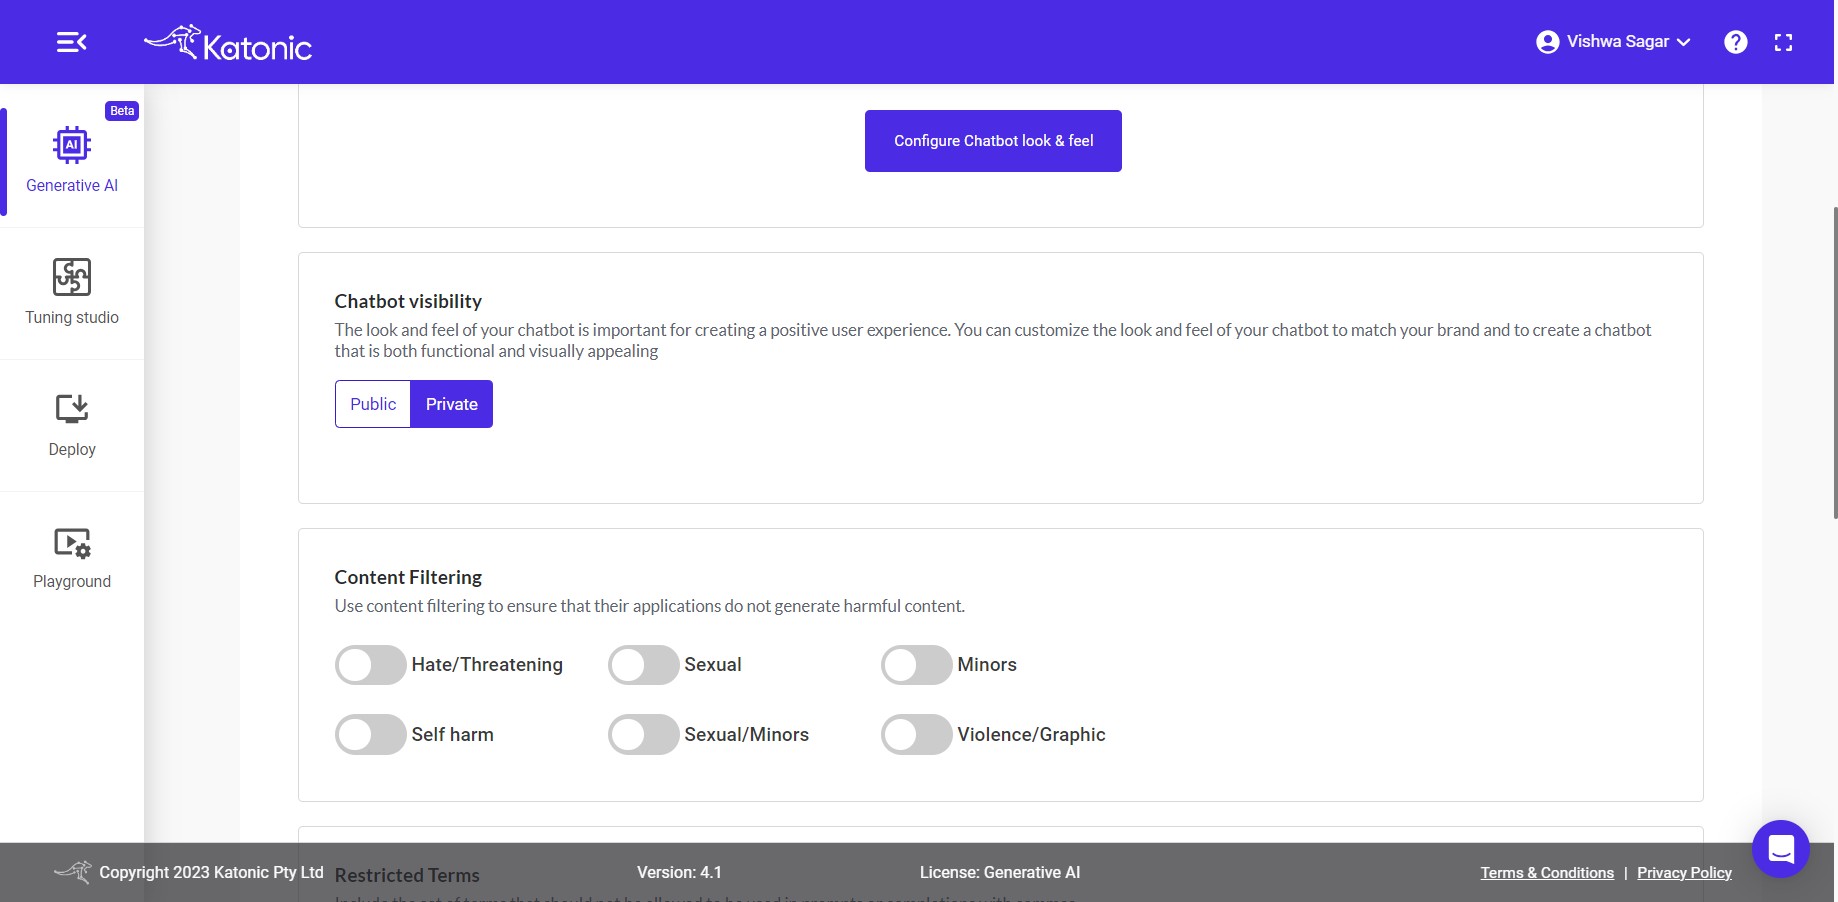
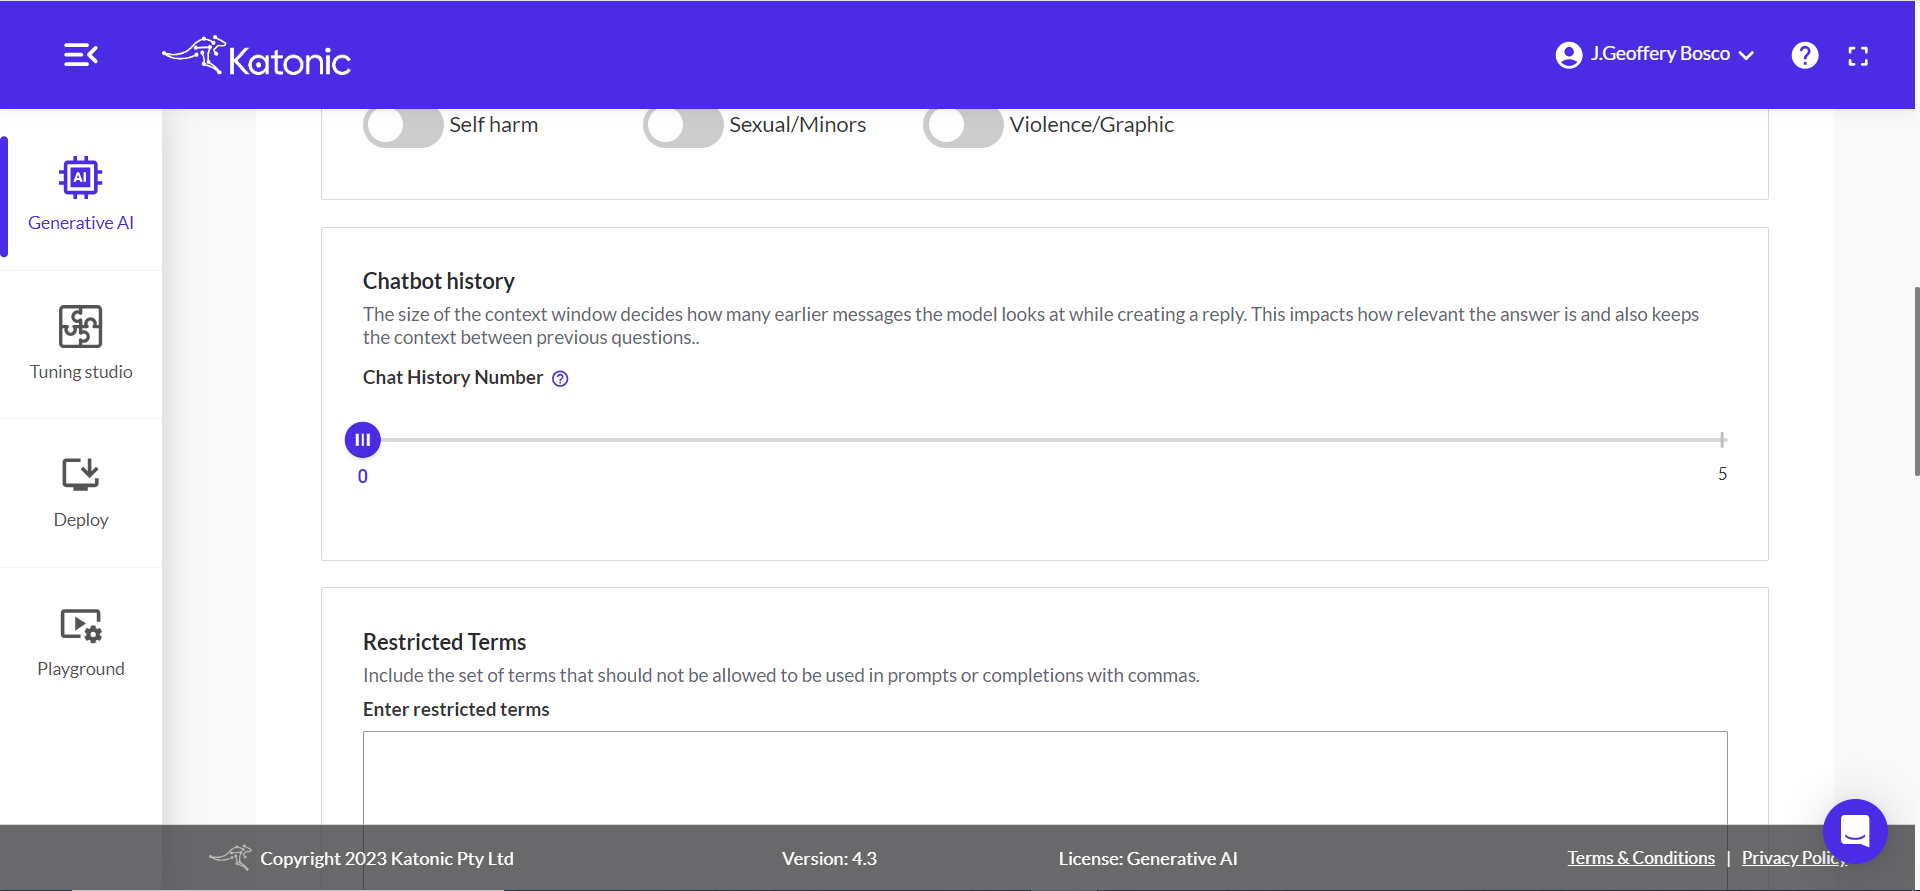
You have the option to enable content filters to moderate the responses generated by the model. The following are the available options for moderating the model's responses:
hate/threatening: This filter will ensure that responses do not contain any hate speech or threatening content.sexual: This filter will moderate responses to exclude any sexually explicit or inappropriate content.minors: Responses will be filtered to ensure they are suitable for a younger audience and do not contain any content inappropriate for minors.self-harm: This filter will prevent responses that include content related to self-harm or encouragement of such behaviour.sexual/minors: This option combines the sexual and minors filters, moderating responses for both sexually explicit content and content inappropriate for minors.violence/graphics: This filter will exclude responses that contain violent or graphic content.
By selecting one or more of these options, you can control the content moderation of the model's responses to align with your desired level of filtering and ensure a safe and appropriate chatbot experience.
Setting the level of the "Chat history number" is crucial in aiding the model as the size of the context window decides how many earlier messages the model looks at while creating a reply. This impacts how relevant the answer is and also keeps the context between previous questions, below we mentioned the benefits of adding history to the chatbot:
Context Retention: Storing past conversations allows the AI to retain context. This enables the system to understand the conversation's flow, recall previous interactions, and provide more relevant and personalized responses.Continuity: Chat history facilitates ongoing conversations, ensuring that users can resume discussions seamlessly. Users can pick up where they left off without having to repeat information already provided in earlier interactions.User Support and Insights: . When users encounter problems or have queries, the history allows the system to track issues, provide solutions, and offer a better overall support experience and the Aggregated chat history data can be analyzed to derive insights into user behaviors, preferences, frequently asked questions, and areas for improvement in the AI system.
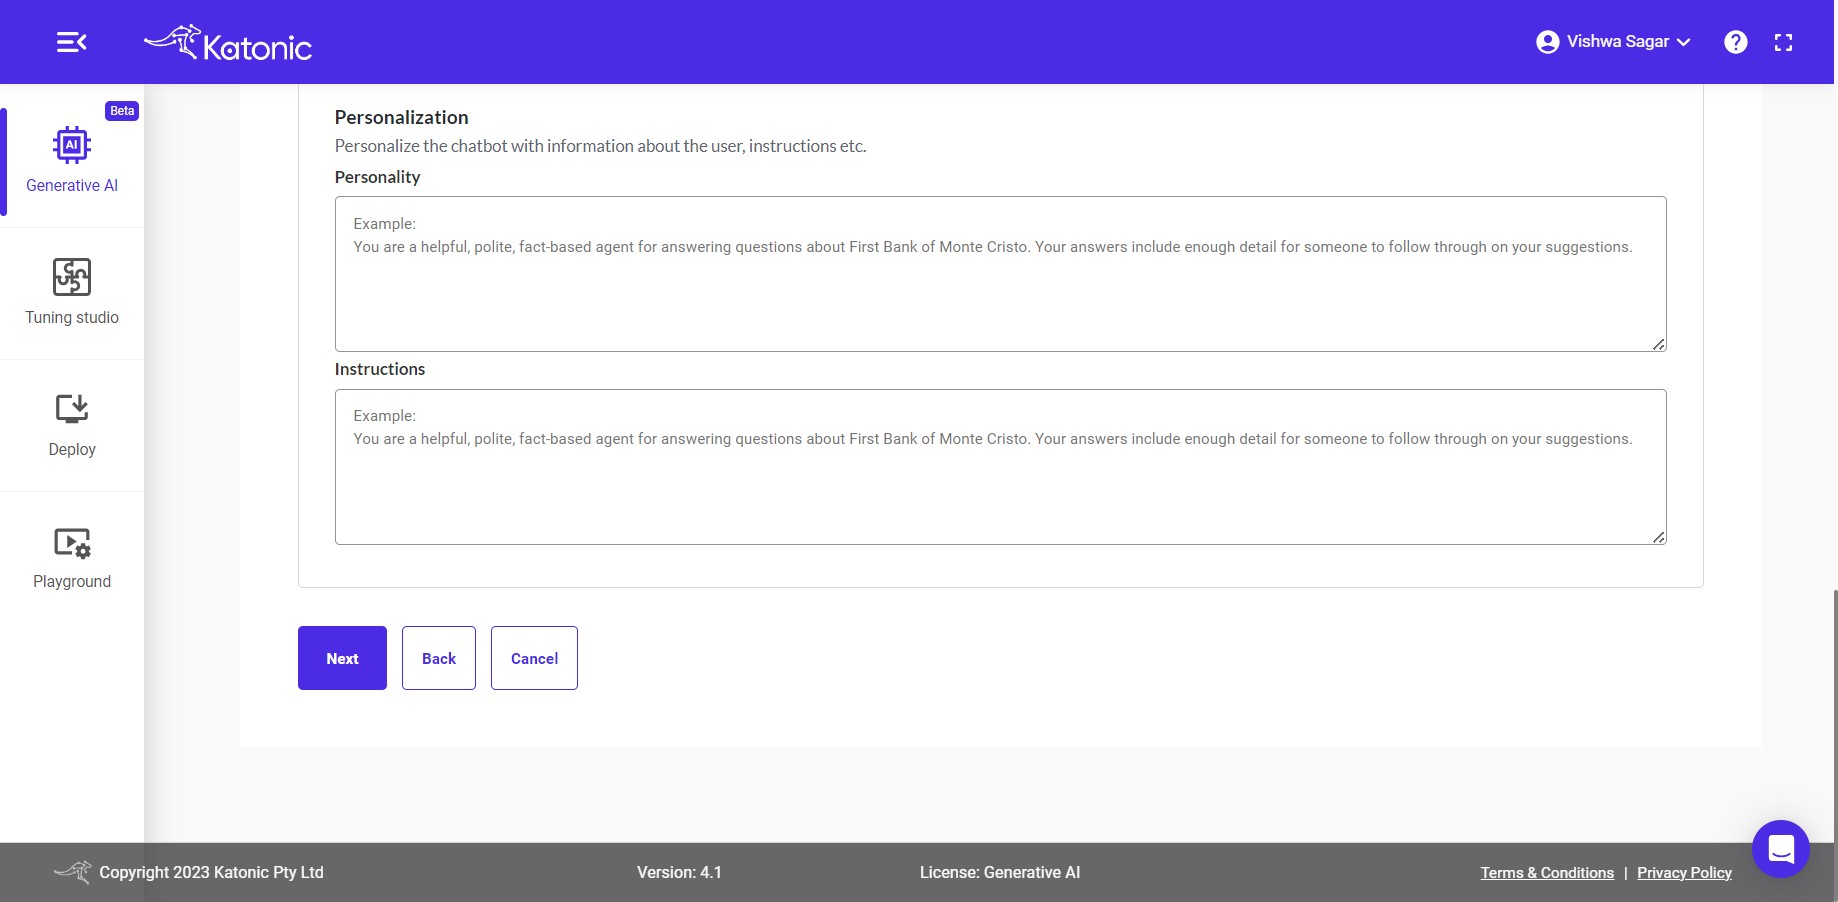
In the further options, you can add restricted terms, define a specific personality, or provide specific instructions to further customize your chatbot. Here's a breakdown of each option:
Restricted terms: You can specify a list of terms that you want the chatbot to avoid or not generate in its responses. This helps ensure that the chatbot does not provide any content that includes those restricted terms.Personality: You have the ability to define a specific personality for your chatbot. This can include traits, preferences, or characteristics that you want the chatbot to embody. By defining a personality, you can make the chatbot's responses more consistent and aligned with the desired persona.Specific instructions: In this section, you can provide explicit instructions or guidance to the chatbot. These instructions can be used to guide the chatbot's behaviour, responses, or decision-making process. By giving specific instructions, you can shape the chatbot's output to better meet your requirements.
The subsequent stage involves the selection of "Vector Store Service Types", enabling users to opt between a Standalone type or a Scalable type, each tailored to distinct methods of structuring data storage for systems reliant on vector-based or similarity searches.
Faiss: Choose this option for independent, self-contained data storage. Ideal for smaller-scale applications.Milvus: Opt for dynamic and adaptable data storage needs. Designed to scale seamlessly with growing demands, it offers flexibility for expanding systems
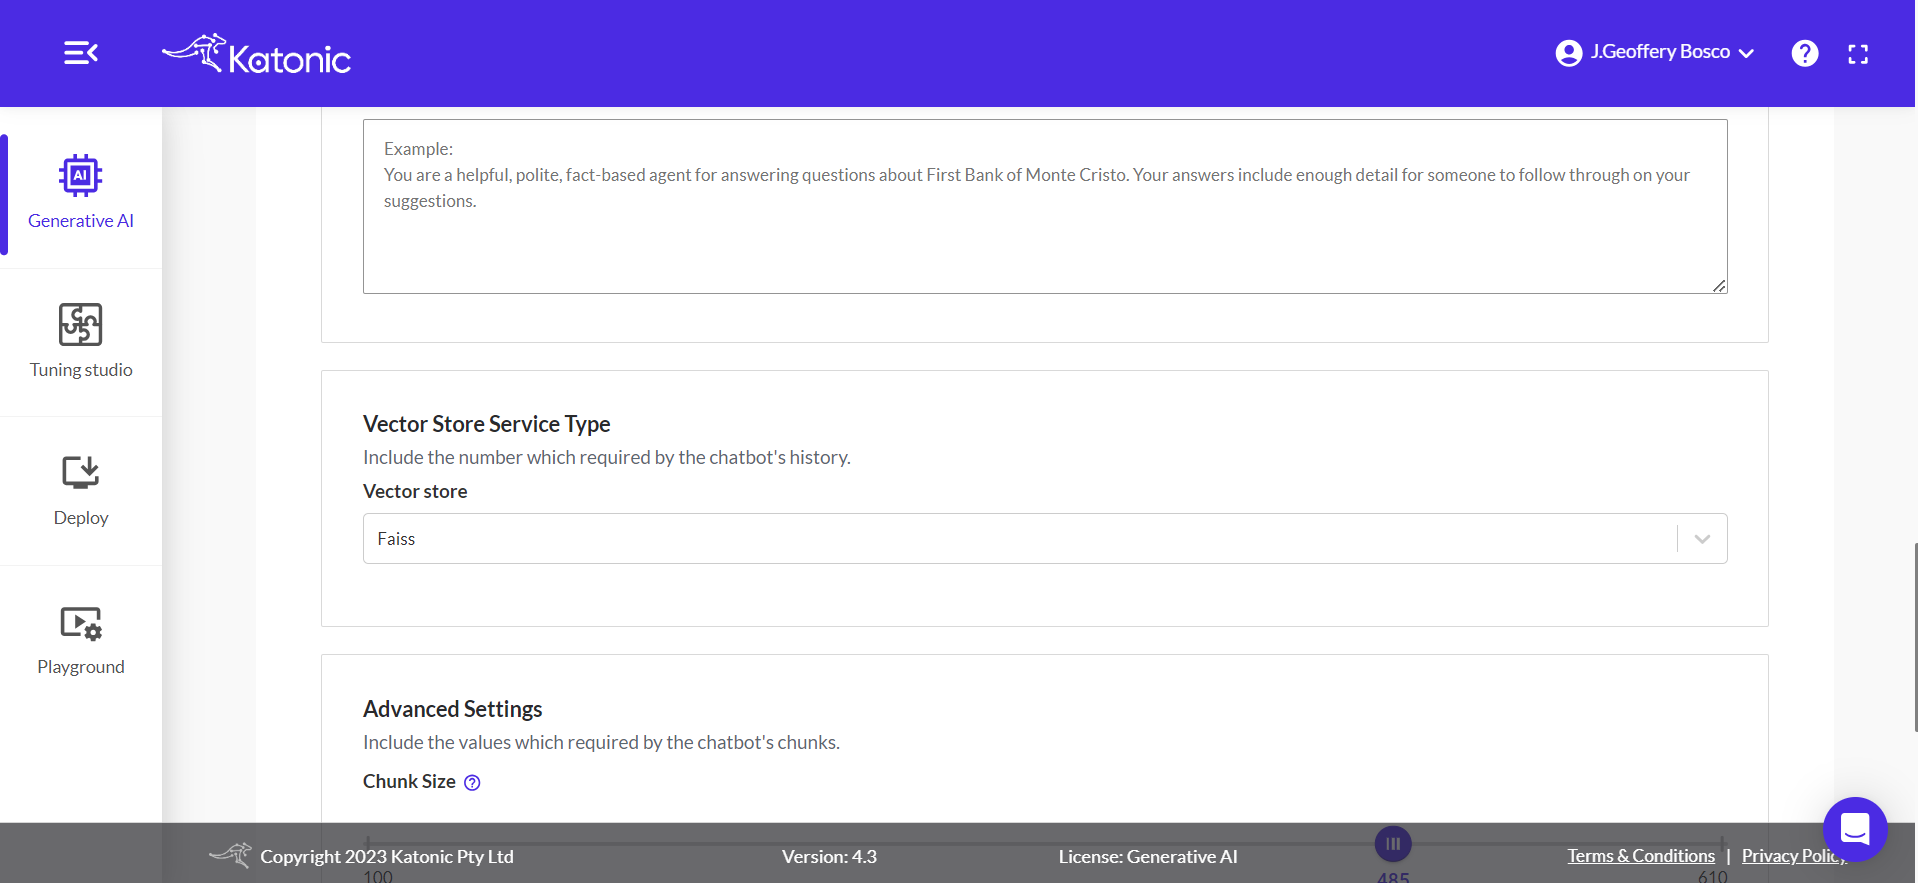
The "Advanced Settings" area allows users to tailor chunk parameters, enhancing the model's efficiency and accuracy. This is achieved by modifying the following fields:
Chunk Size: This dictates the maximum length of text processed at once by LLMs and chatbots, impacting both response accuracy and speed.Chunk Overlap: Chunk overlap in language models and chatbots ensures comprehensive information capture when dividing text. It prevents abrupt division and maintains coherence between text segments.Number of Chunks: This defines the quantity of documents retrieved from the entire data using similarity search to formulate the most suitable response.
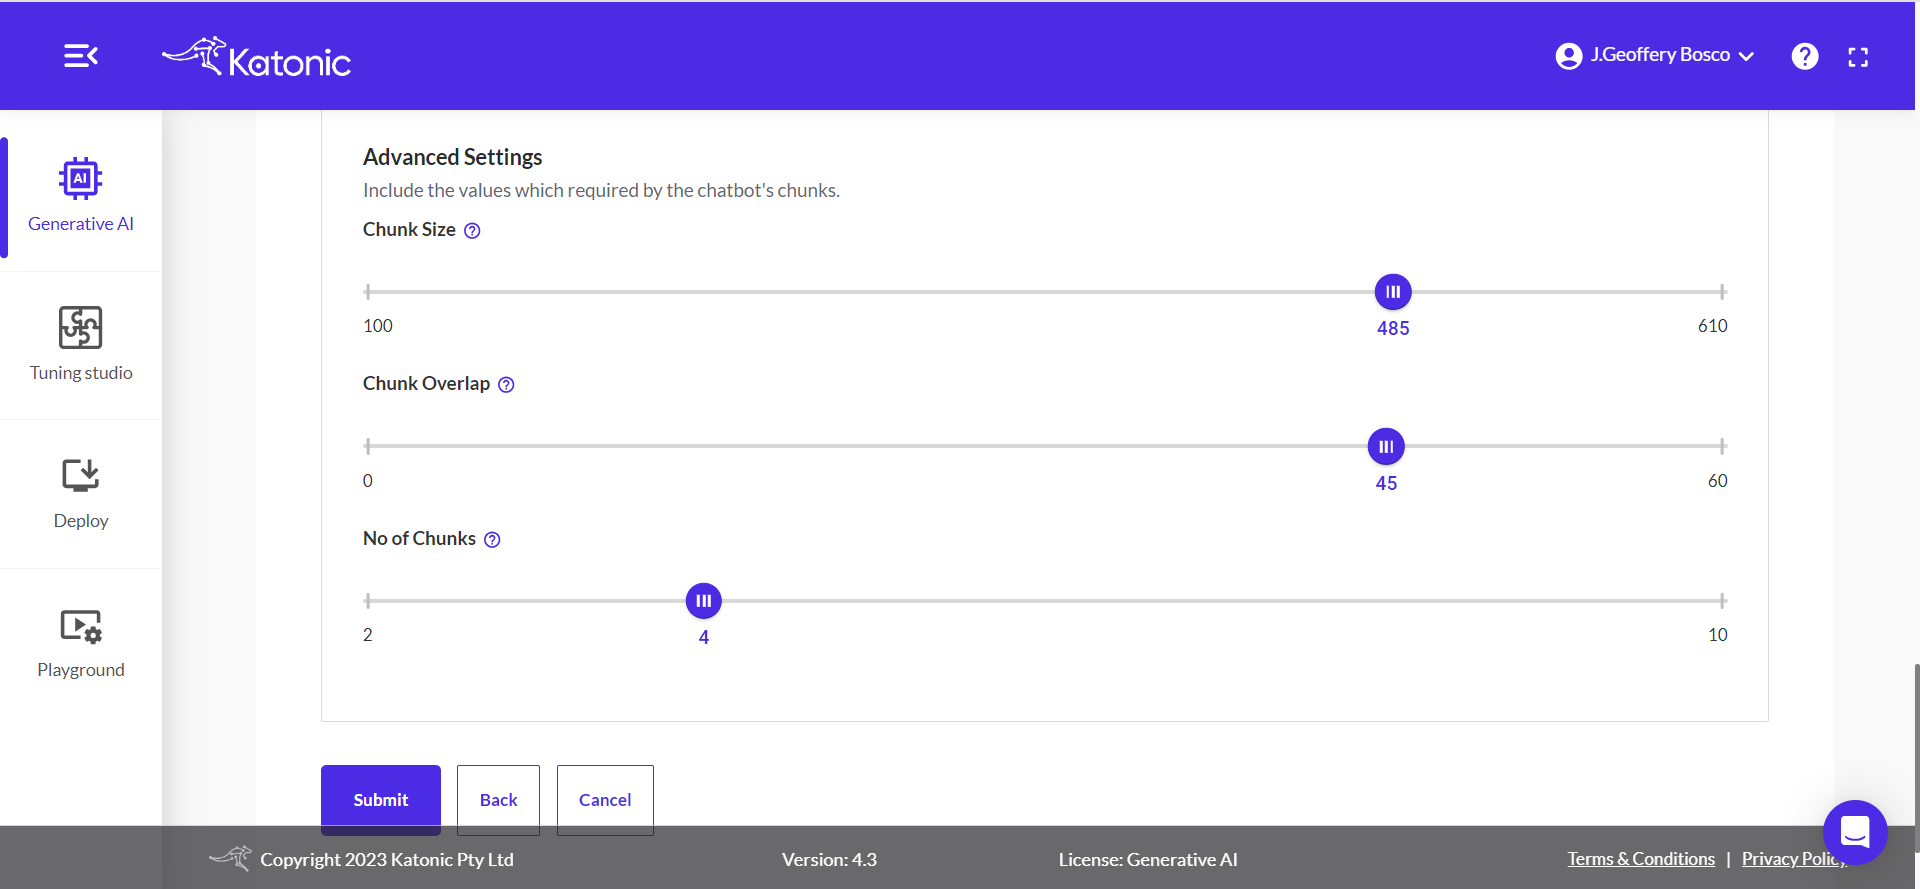
These options allow you to further fine-tune and personalize your chatbot to ensure it aligns with your desired goals, values, and style of communication.
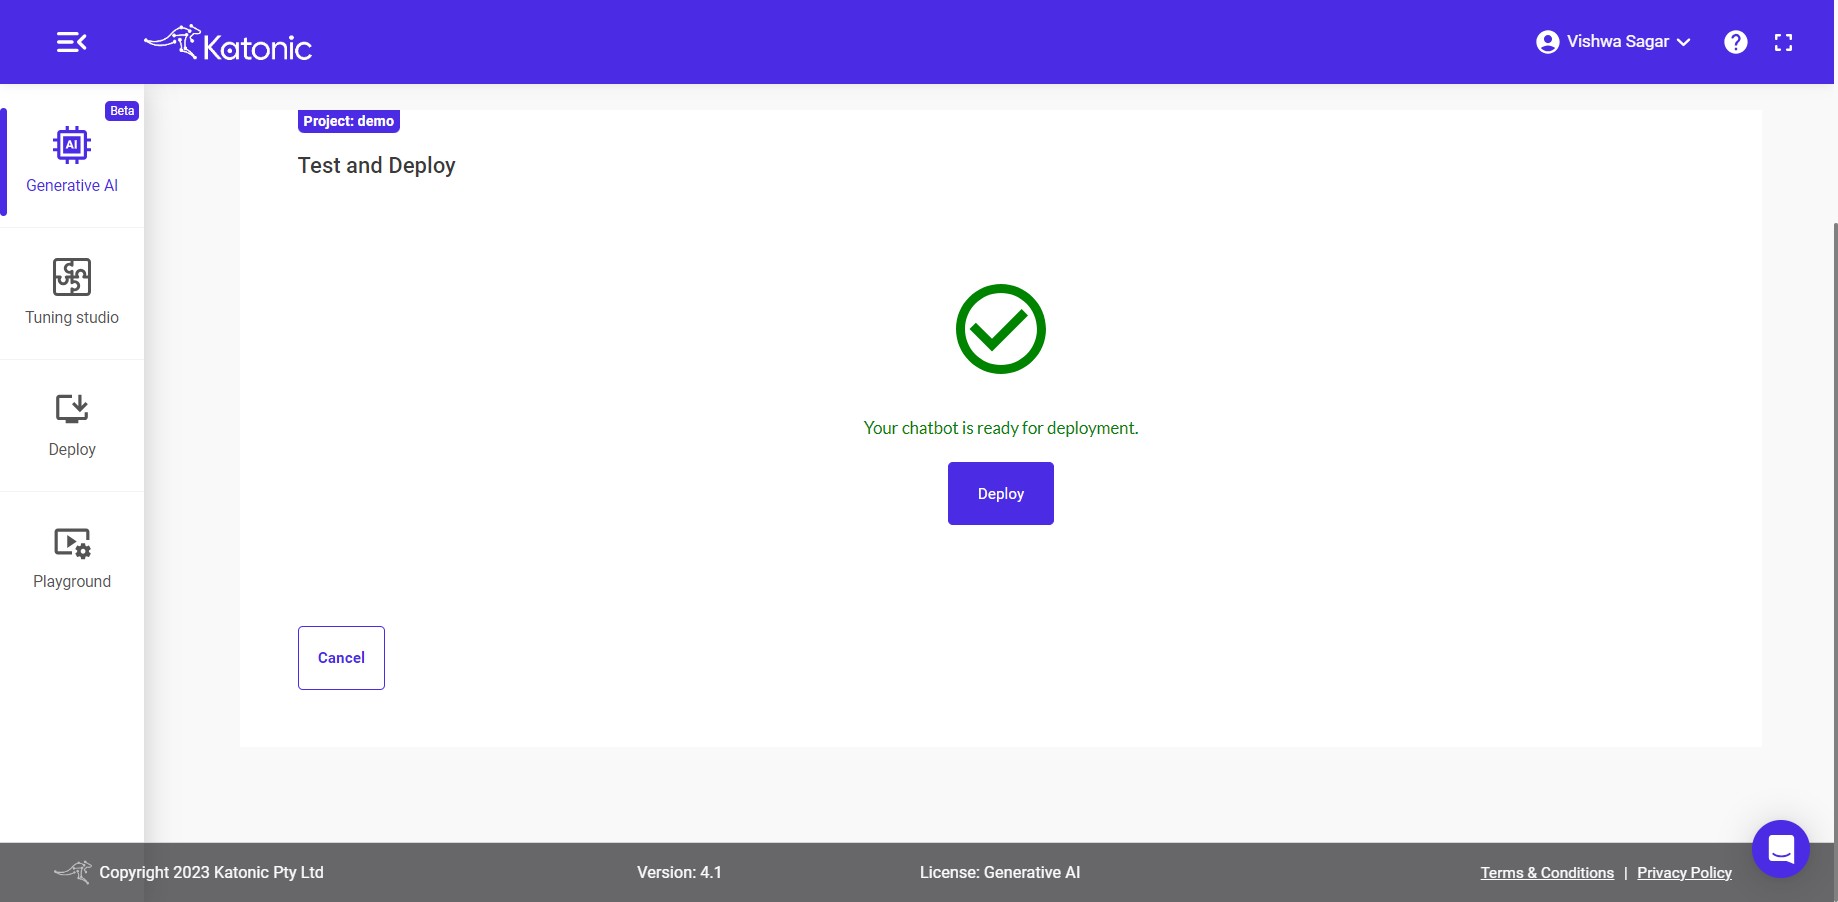
After completing the configuration, click on the "Submit" button to proceed. This will initialize the model training process.
This process may take a few minutes to complete. Once finished, you will receive a notification indicating that your chatbot is ready for deployment. Please be patient during the training process, and once it's completed, you can proceed with deploying and using your chatbot.
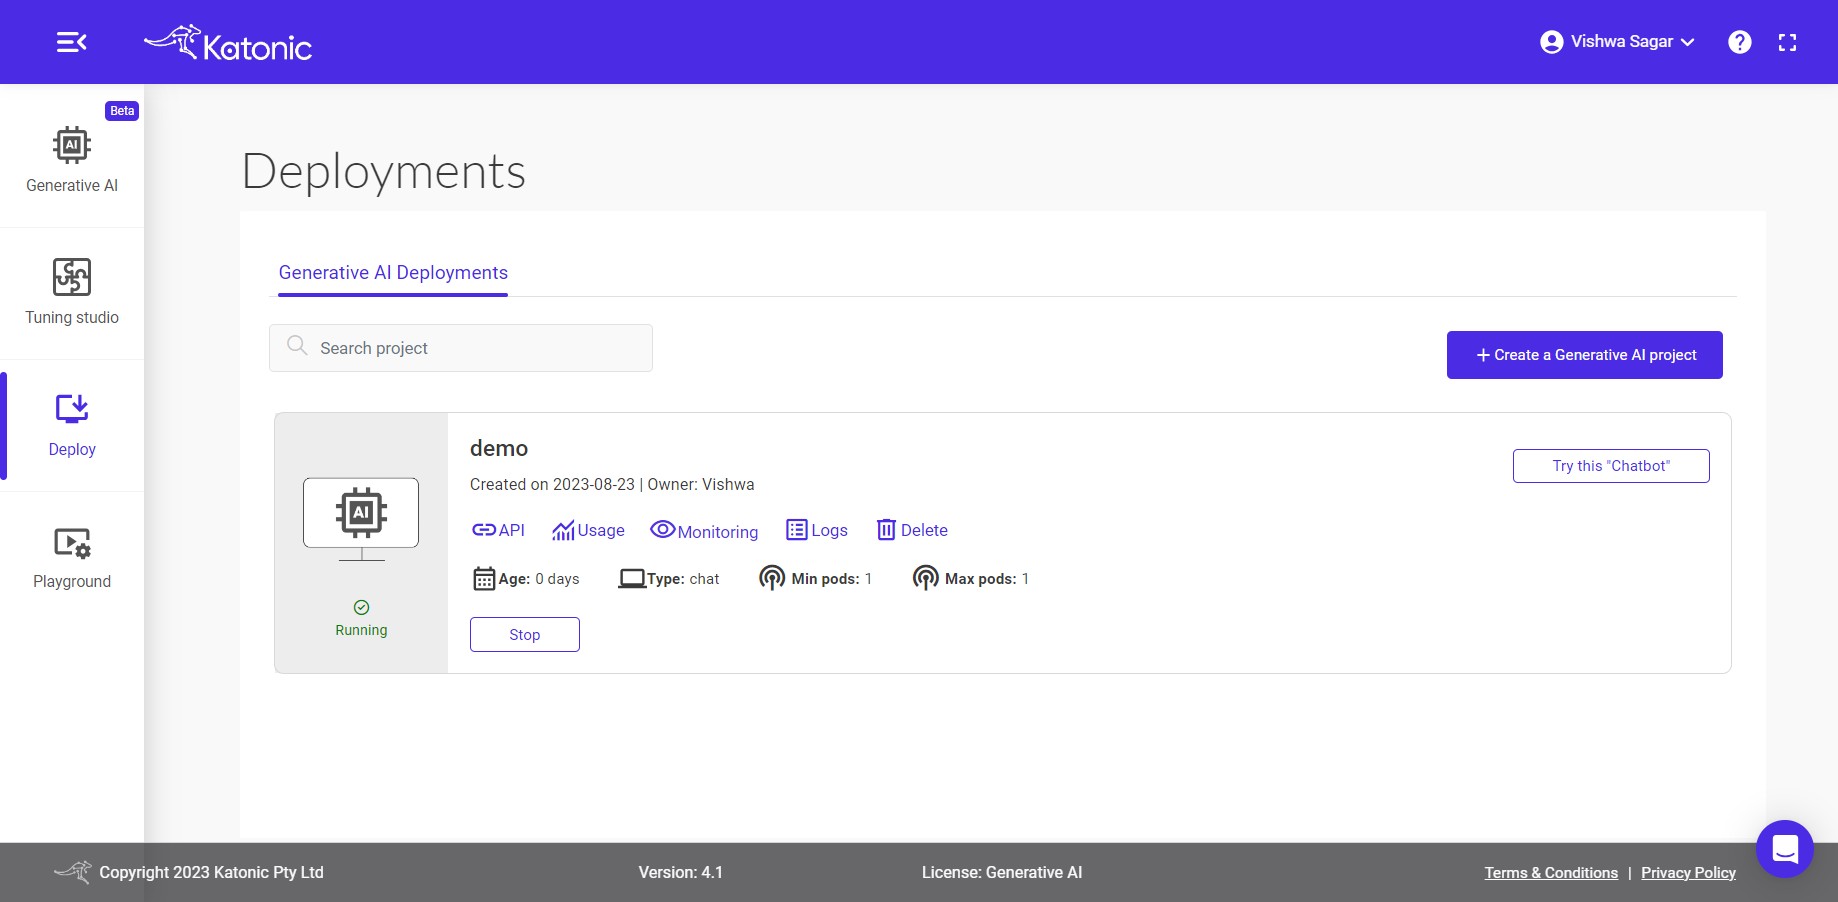
After receiving the notification that your chatbot is ready for deployment, you will be redirected to the deployment section. In this section, you will be able to view and access the chatbot you have created. You can interact with the chatbot, test its responses, and explore its functionality. The deployment section provides a convenient interface to use and manage your chatbot effectively.
In the deployment section, you will have access to various features and settings related to your chatbot. These include:
Logs: You can view the logs generated by your chatbot, which can provide insights into its behaviour, interactions, and any errors or issues encountered during usage.Resource information: This section provides information about the resources utilized by your chatbot, such as memory usage, CPU usage, and other performance metrics. It helps you monitor and optimize the resource utilization of your chatbot.Minimum and maximum number of pods: You can set the minimum and maximum number of concurrent connections or pods that your chatbot can handle. This allows you to control the scalability and capacity of your chatbot based on your requirements and the expected traffic.
These features and settings enable you to monitor, manage, and optimize the performance and scalability of your deployed chatbot.
Chatbot
To start a conversation with the chatbot, click on the Try this Chatbot button in the deployment section. This will redirect you to a new chatbot UI page where you can interact with the model. On the chatbot UI page, you will see a text input field where you can enter your messages or questions. The chatbot will generate responses based on the input you provide. You can have a back-and-forth conversation with the chatbot by entering messages and receiving responses in real-time on the UI page.

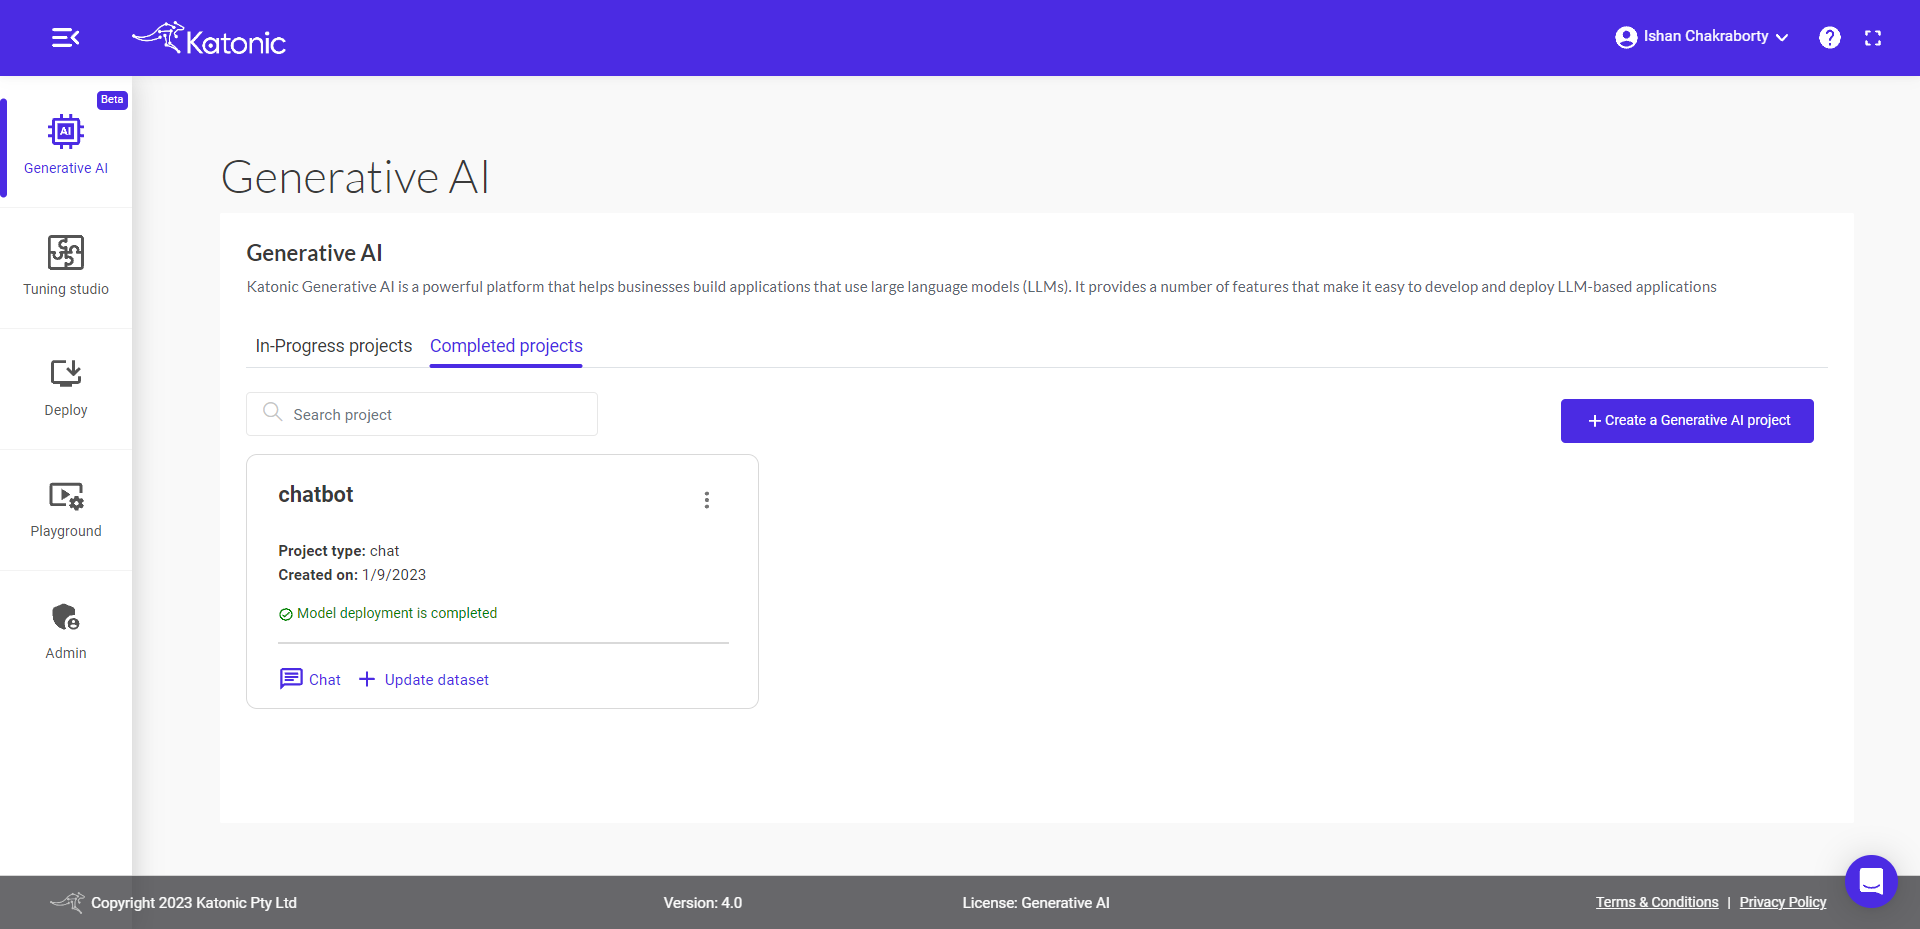
Update Dataset
Within the Completed Projects, you have the option to Update Datasets to utilize public websites or files as data sources for your chatbot. This allows you to update the gather information and content from various sources to enhance the capabilities of your created chatbot.
To Update the dataset for the chatbot, Go to the Completed Projects in the Generative AI Section and click on the +Update Dataset button. This will Redirect you to an Update the dataset section, where you can update the existing data or add new data for your chatbot.
Update or Add Public Websites as source:
To update or add public websites as data sources:
Warning : Please make sure that the Public URL is scrapable, because that data will get integrated with the chatbot.
- Select the
Public Websiteoption. - Copy and paste the URLs of the websites you want to use.
- Press the "Enter" button to update or add each website.
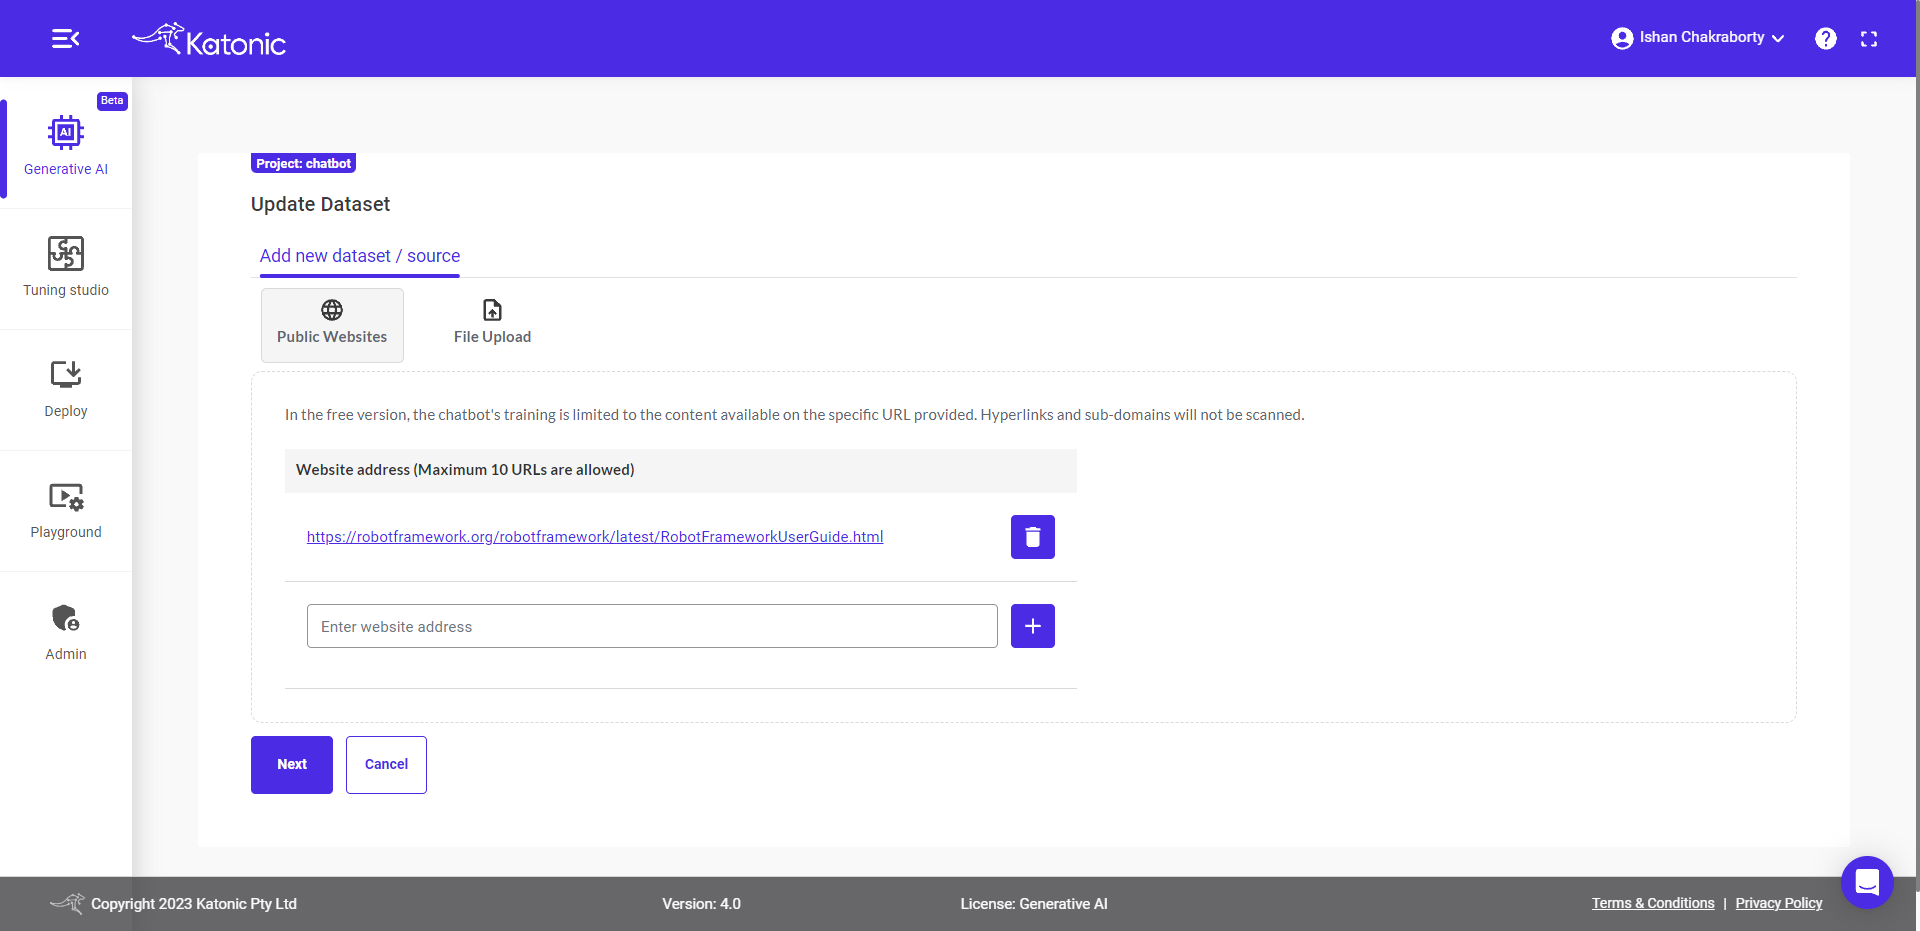
Note: You have the flexibility to add up to 5 different websites.
File as source:
Alternatively, you can upload PDF, CSV, PPT, Microsoft Word, JSON, HTML and TXT files to incorporate their content into the chatbot.
- Choose the
File Uploadoption. - Select the desired files.
- The files will be uploaded automatically.
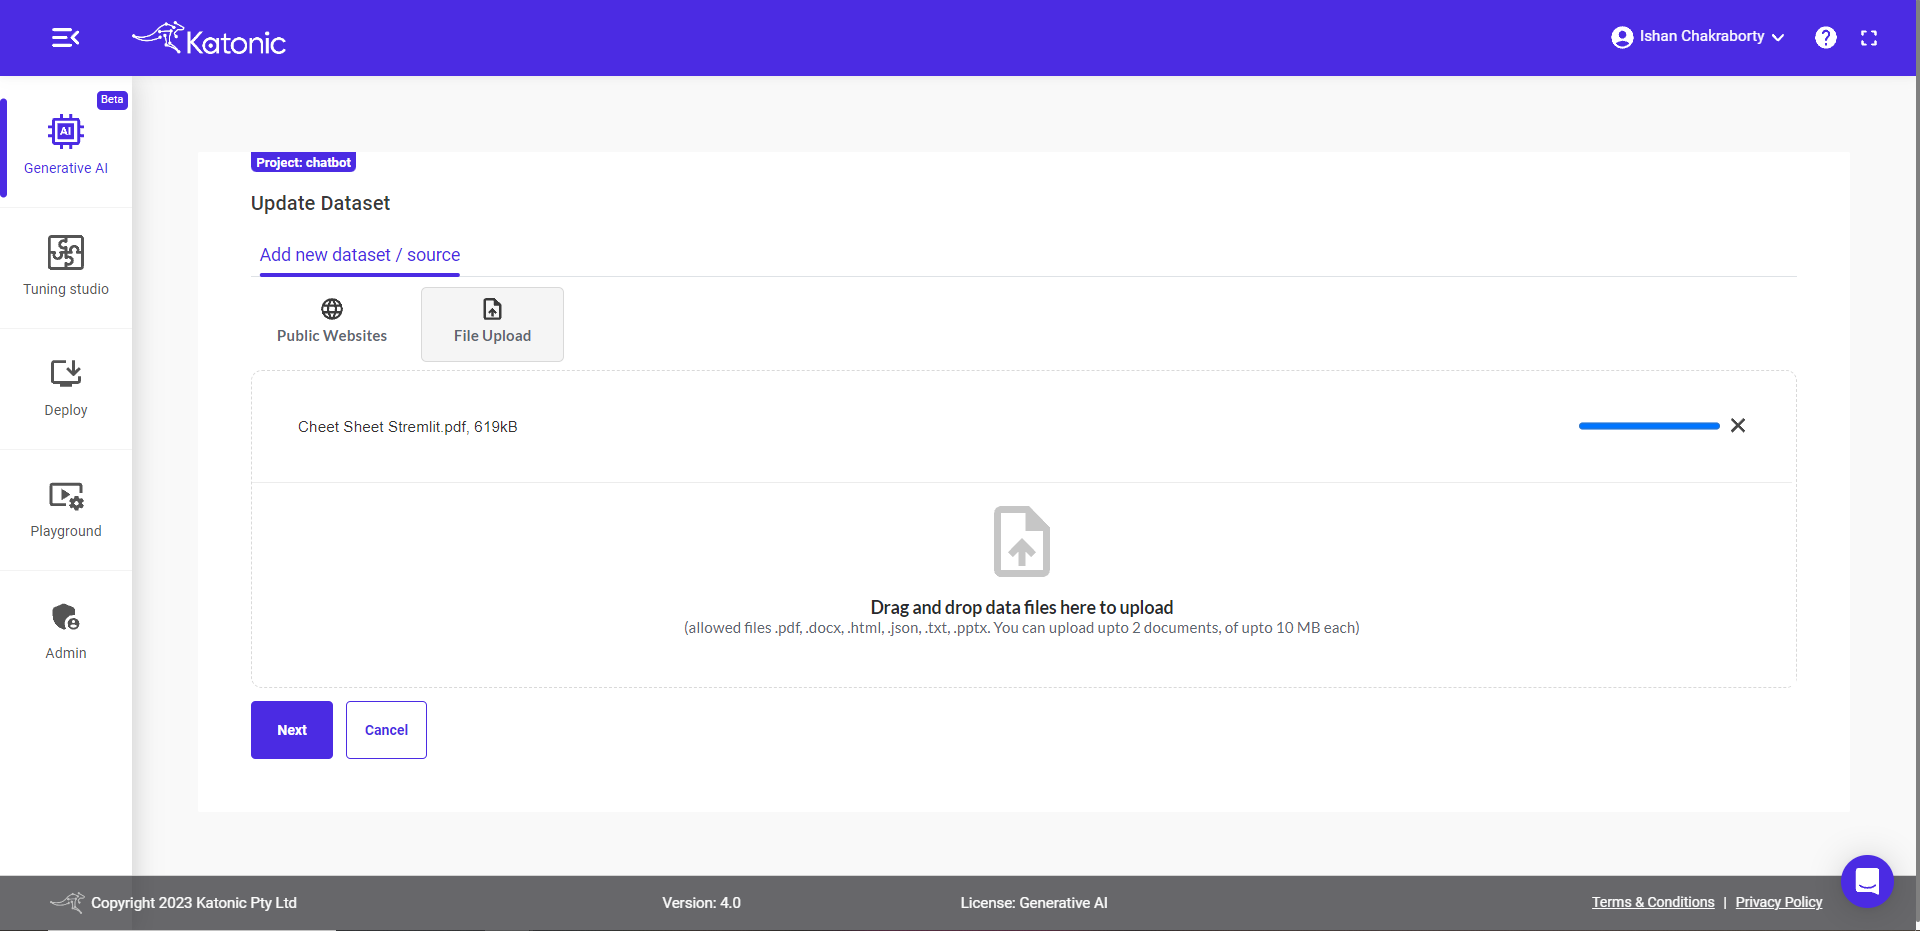
Note: Please ensure that the file sizes do not exceed the maximum size limit of 20 MB.
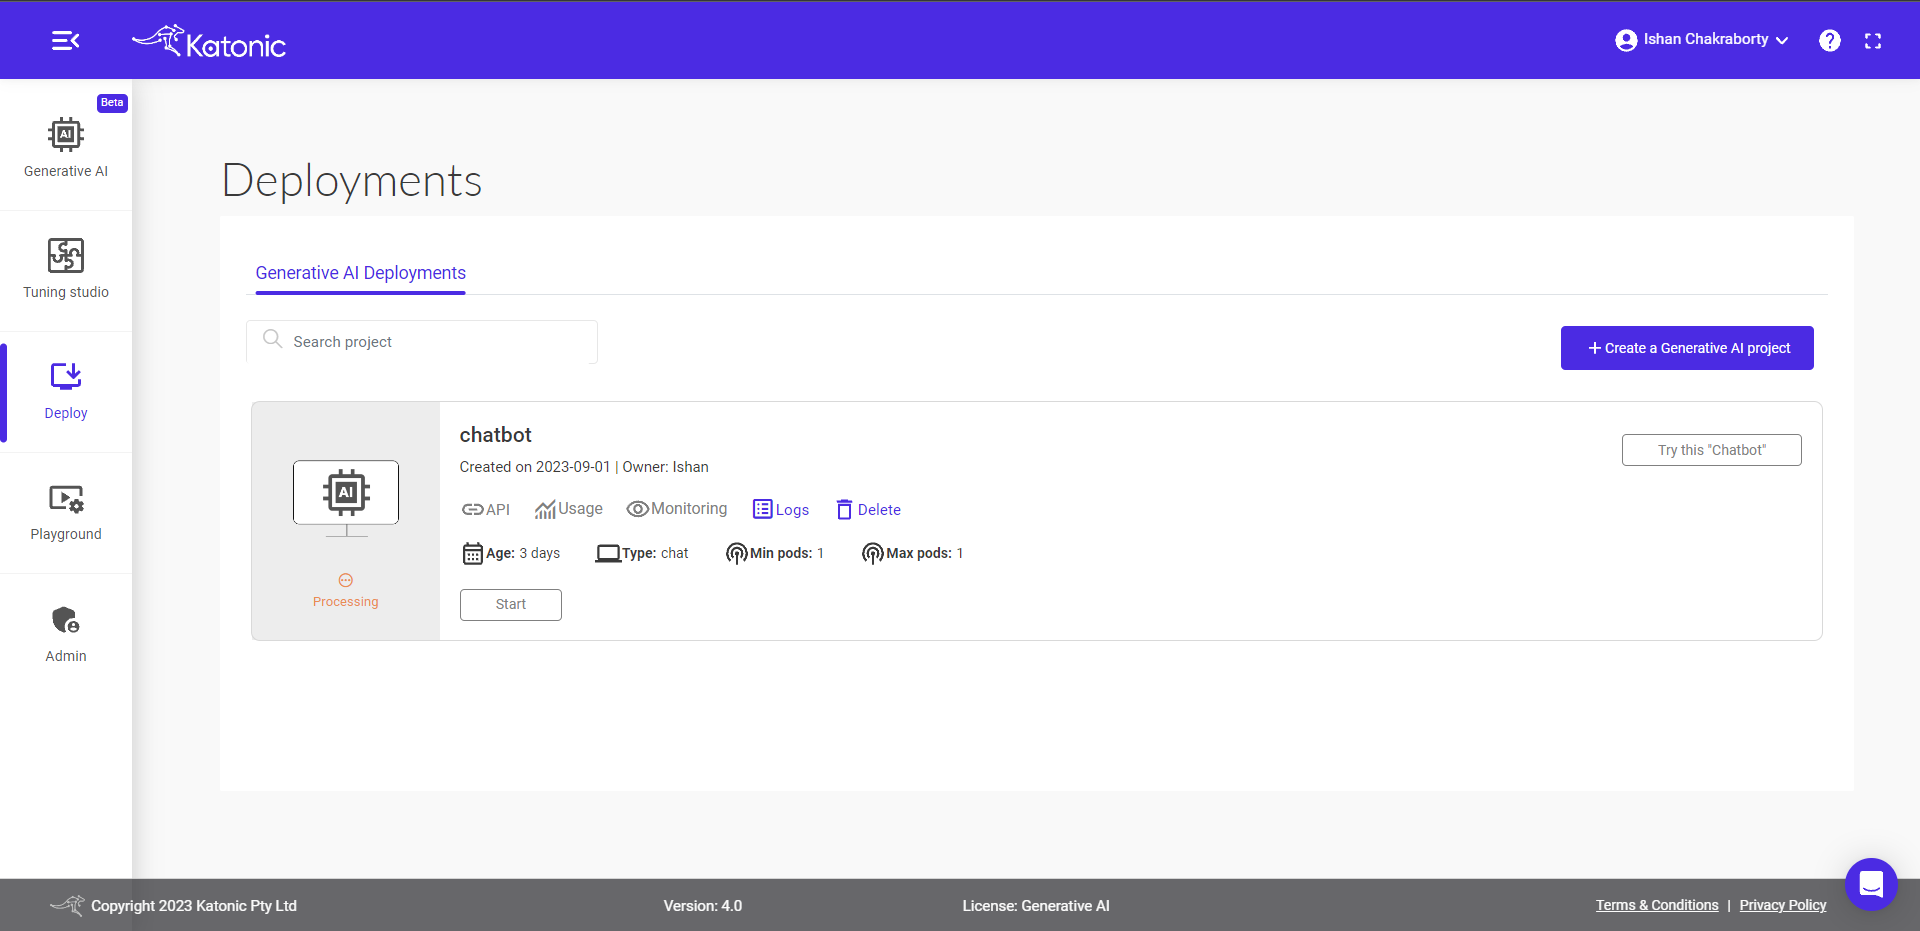
Once you have finalized your updated datasets, click on the Next Button to update your chatbot.
Once you click on Next Button you will be redirected to the deployment section. In this section, you will find your chatbot is in Processing State.
Once your chatbot is in Running State, you can access your updated chatbot.
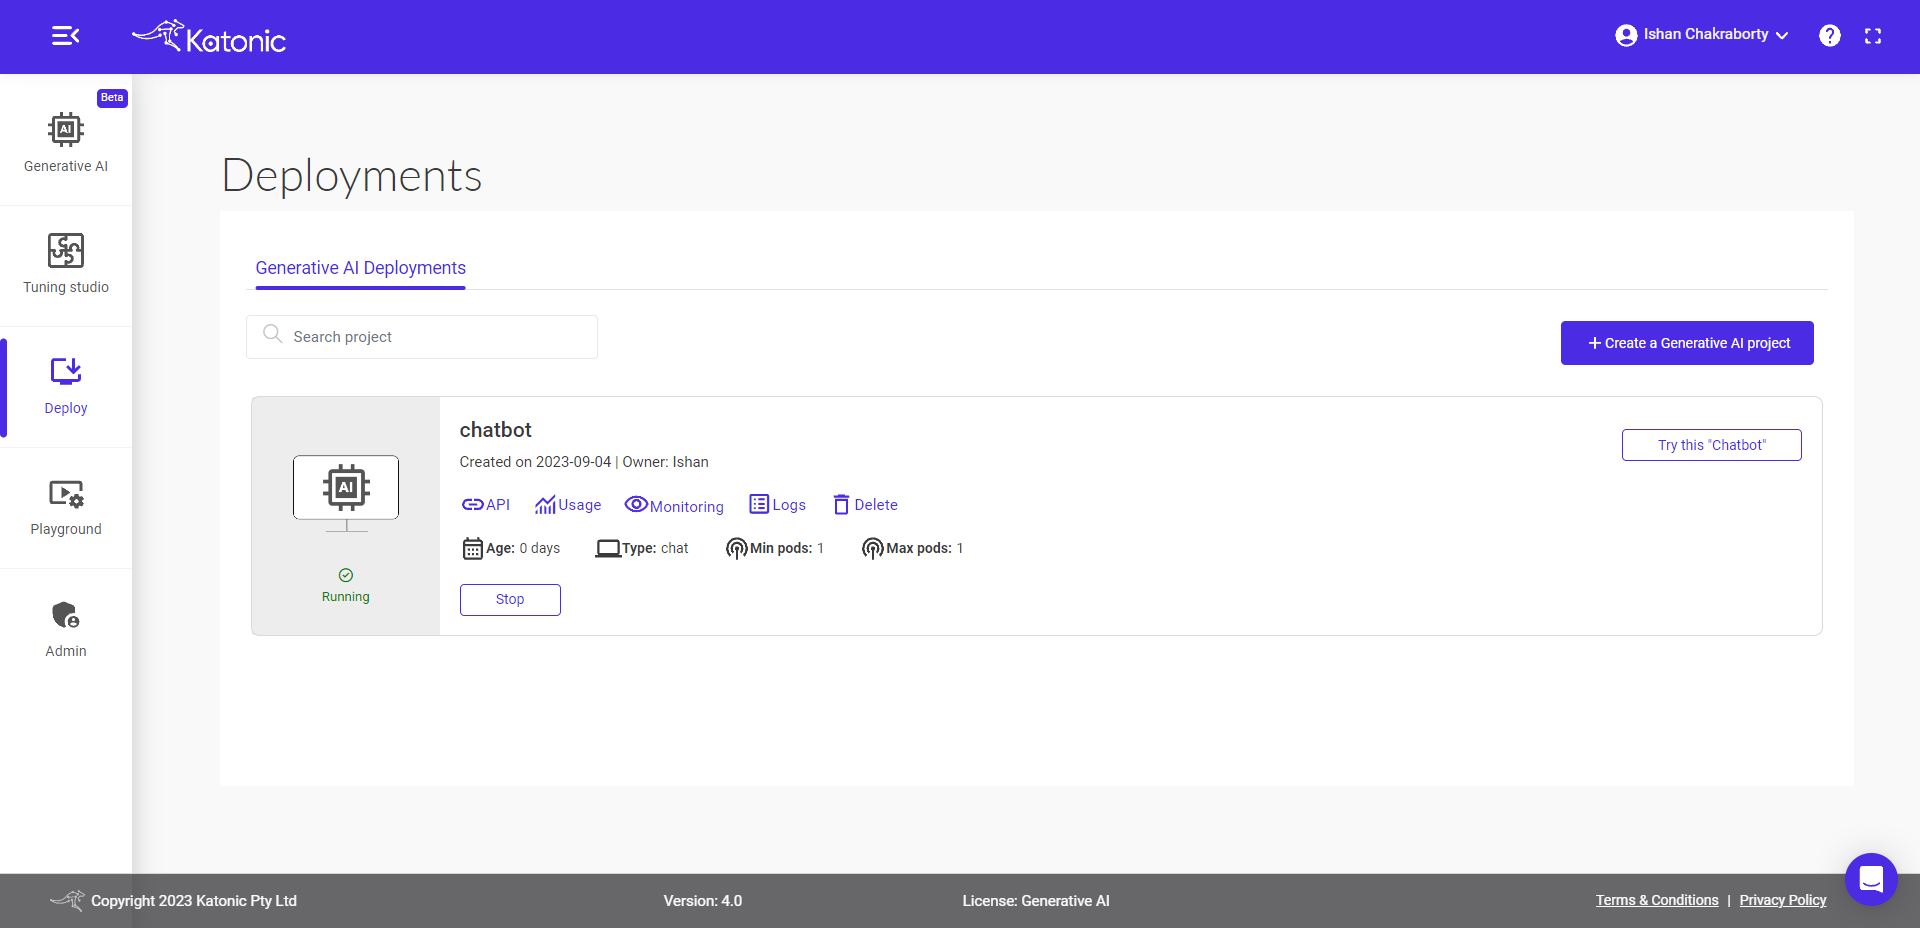
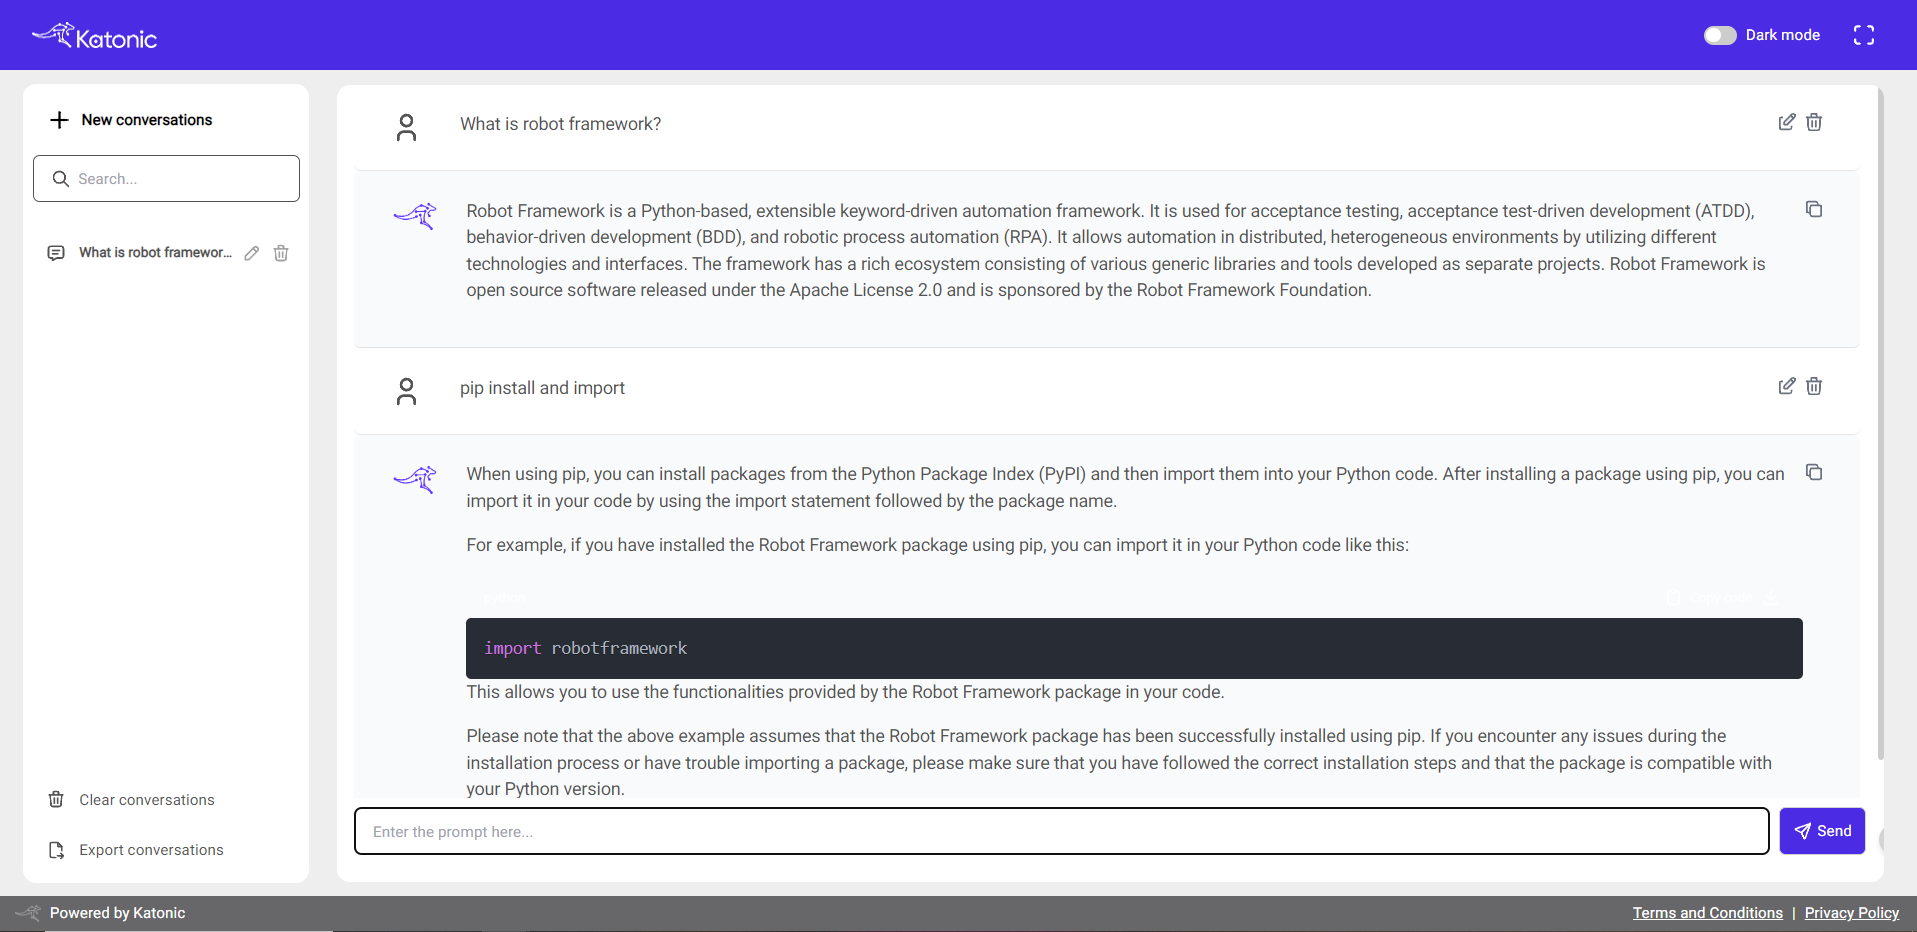
To start a conversation with the updated chatbot, click on the Try this Chatbot button in the deployment section. This will redirect you to a new chatbot UI page where you can interact with the updated dataset model. On the chatbot UI page, you will see a text input field where you can enter your messages or questions. The chatbot will generate responses based on the input you provide. You can have a back-and-forth conversation with the chatbot by entering messages and receiving responses in real-time on the UI page.
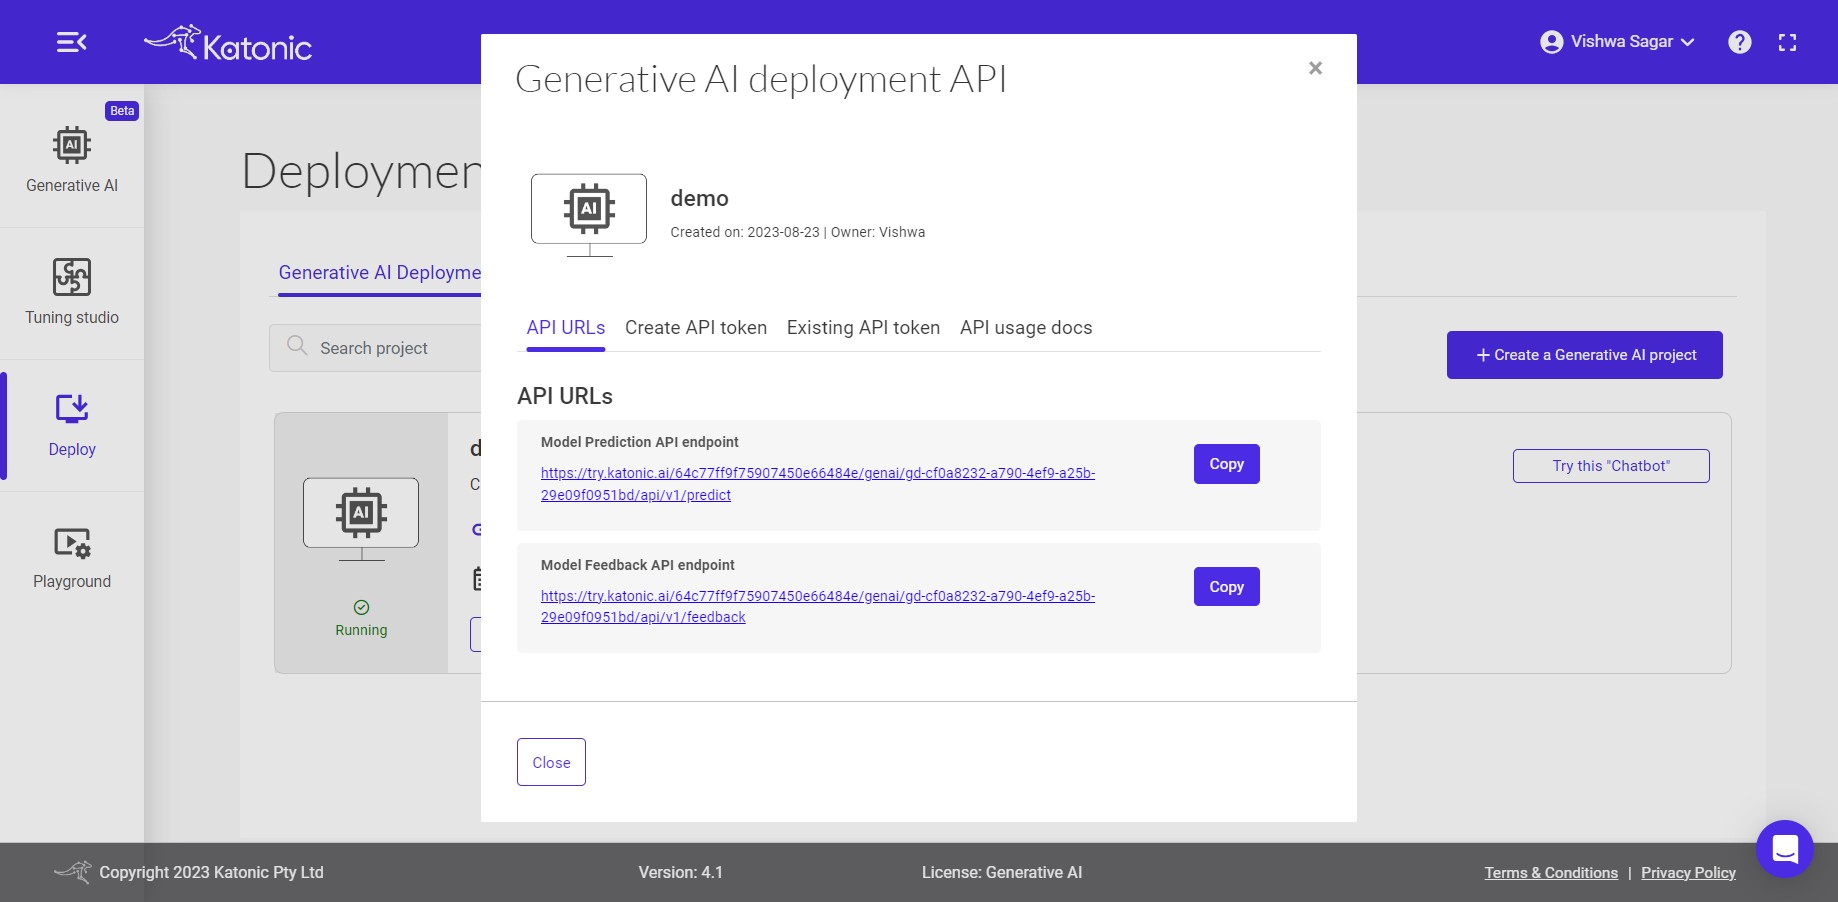
Accessing Model API endpoints.
The Model API endpoints offer a convenient way to interact with the language model and perform various language-related tasks. Let's explore the two endpoints you mentioned:
Predict Endpoint: This endpoint serves as the conversation endpoint. You can make a request to this endpoint by providing a query or input text, and it will return the response generated by the deployed language model. You can use this endpoint to have a conversation with the chatbot or to generate text based on your specific needs.Feedback Endpoint: The feedback endpoint allows you to track the performance of your model by providing feedback on its outputs. To use this endpoint, you need to supply the model output along with the corresponding ground truth or desired output. By comparing the model's output with the ground truth, you can evaluate and monitor the model's performance and make necessary improvements or adjustments.
These endpoints provide a powerful way to interact with and assess the language model's capabilities, whether it's for conversational purposes or for evaluating its performance against known data.
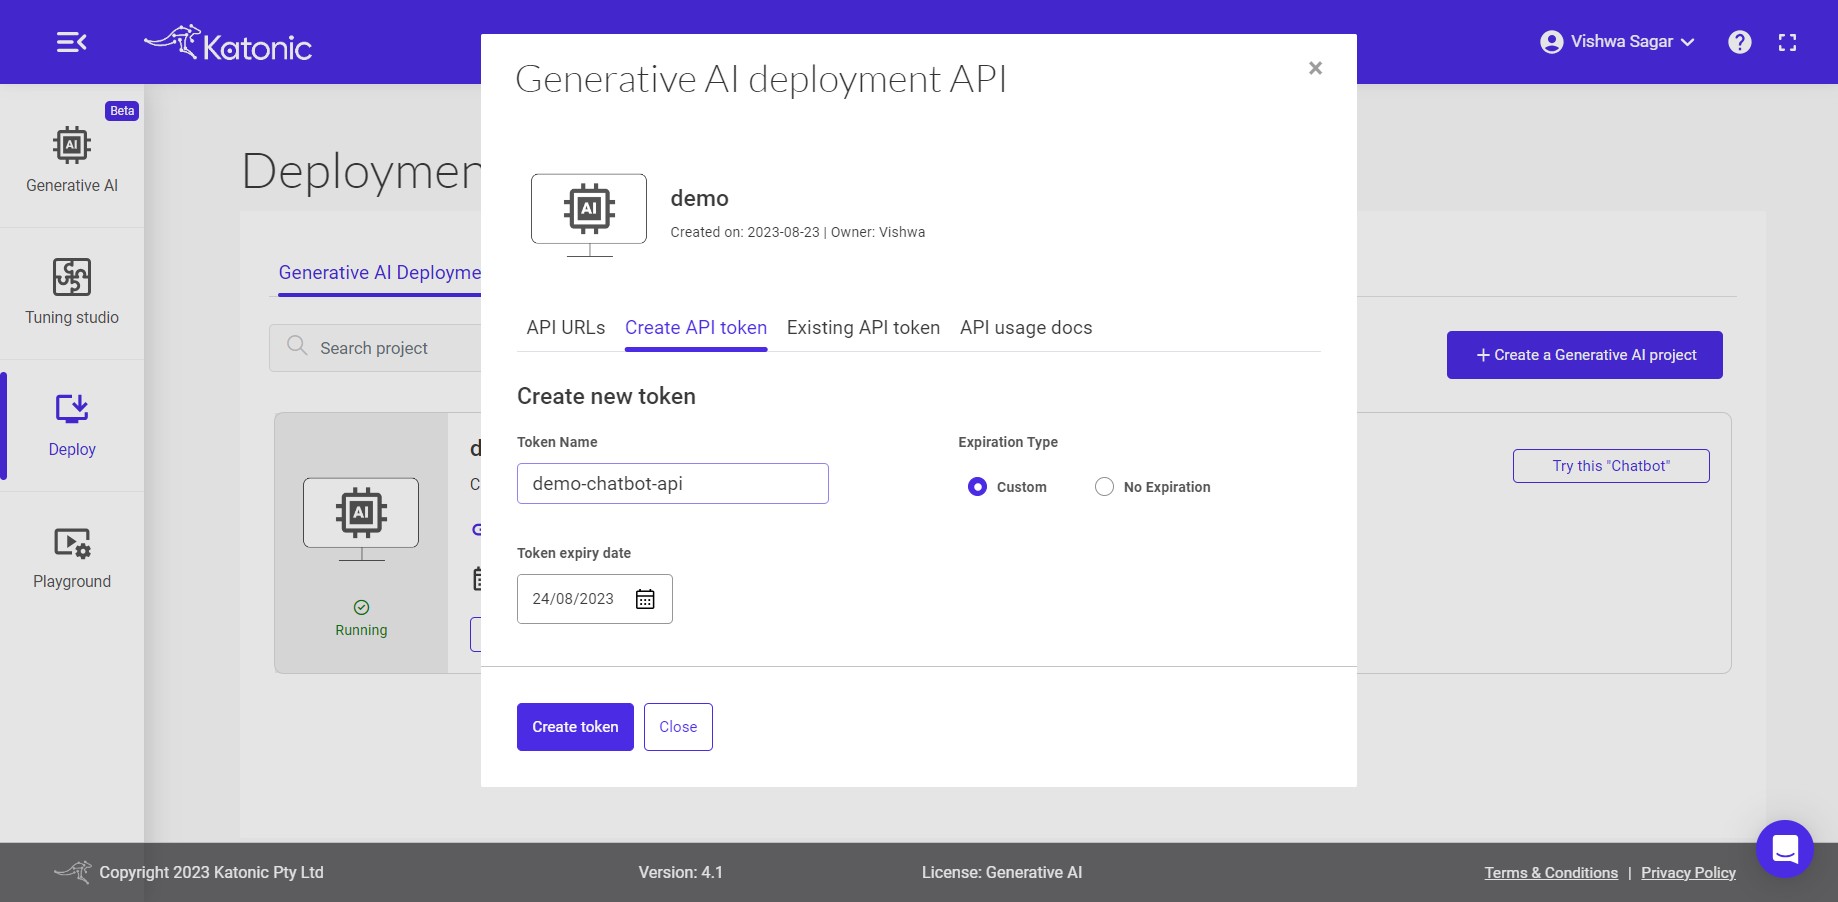
Secret Token
A secured API token, also known as an authentication token or API key, is a unique string of characters that serves as a credential used to authenticate and authorize access to an API (Application Programming Interface). It acts as a form of identification and permission for API users.
To generate your API Token, please follow these steps:
- Set the expiry time for your API Token.
- Click on the "Generate API Token" button.
- A pop-up dialog box will appear with your generated API Token.
- Please note that a maximum of 10 tokens can be generated for a model.
Make sure to securely store and manage your API Token as it serves as your authentication credential for accessing the API.
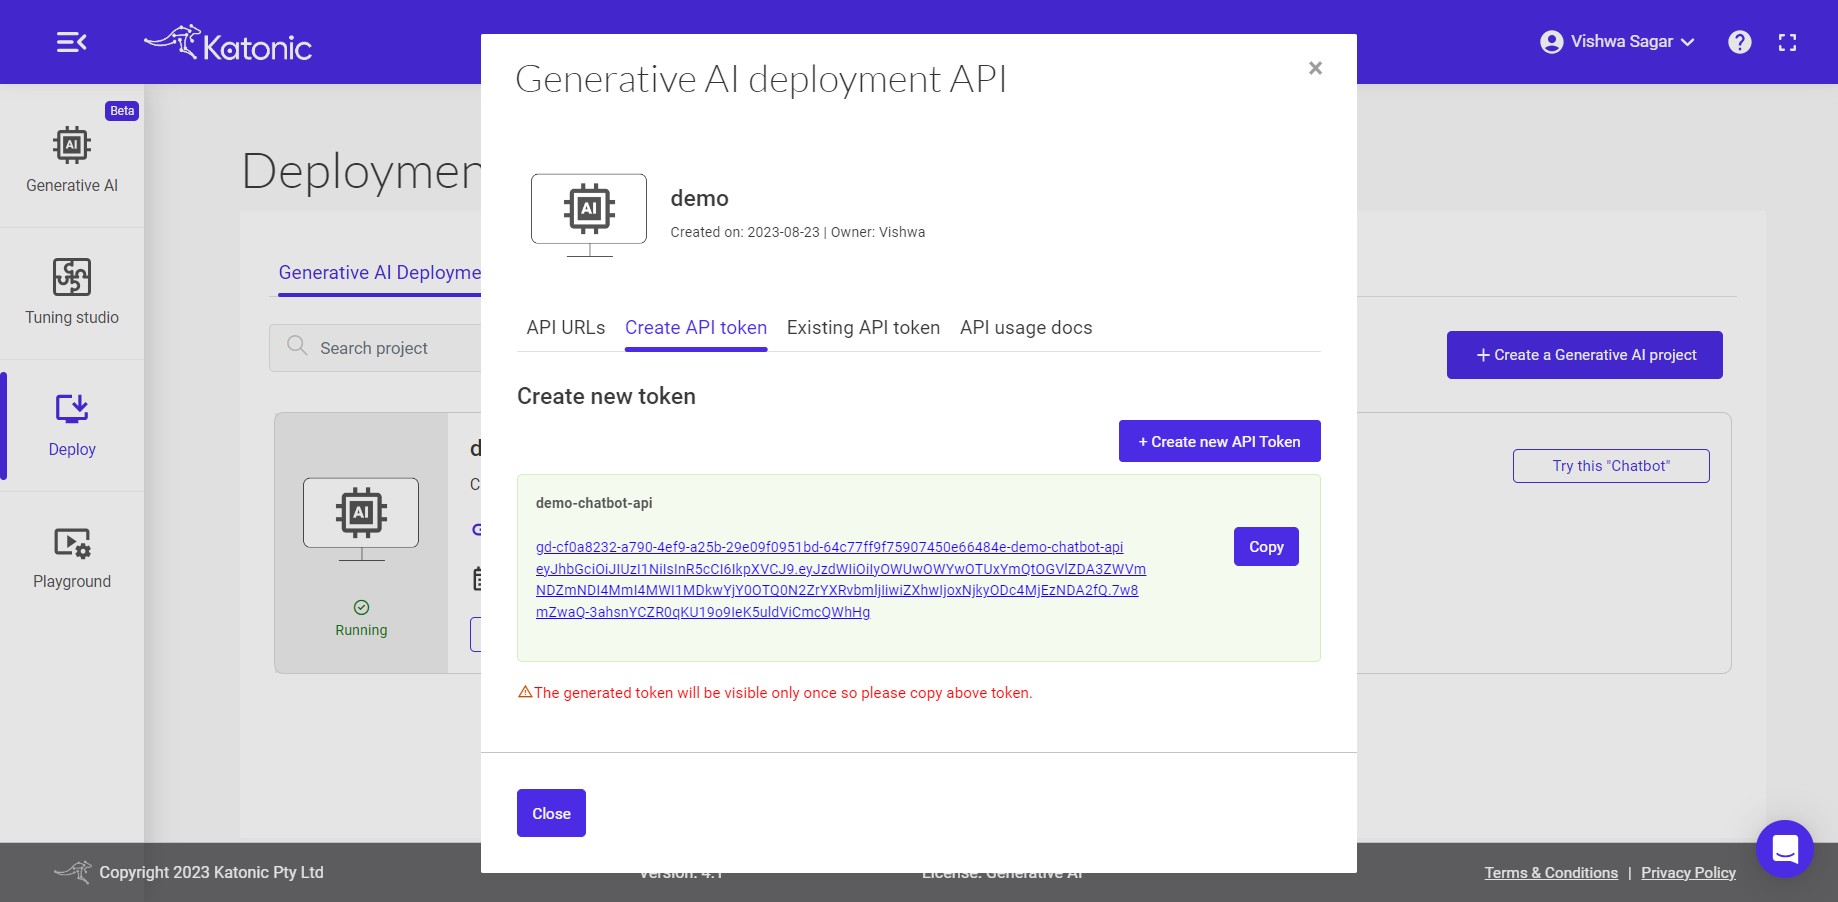
Once you click on the Create token button, you will see a long string generated. It is important to securely copy this generated string and keep it in a safe place. This string serves as your API Token and will be required for authentication and authorization when making API requests. Safeguarding your API Token is crucial to maintain the security and integrity of your API access.
Note: The generated Secured API token will be visible to you only at the moment of creation. Once you close the dialog box or navigate away from the page, you will not be able to see the token again. It is essential to ensure that you securely store the API token in a safe location immediately after it is generated. This will prevent any unauthorized access to your API and help maintain the security of your application or system.
For more detailed information on API usage and how to use it in different programming languages, you can follow these steps:
- Go to the "API" section of the platform.
- Look for the link or button labelled "api-usage-docs" and click on it.
- This will redirect you to the API usage documentation page.
- On the documentation page, locate and click on the "View documentation" link.
- You will be taken to the comprehensive documentation that provides instructions, examples, and guidelines on how to use the API in various programming languages.
By accessing the API usage documentation, you will have a valuable resource that can assist you in understanding and implementing the API functionalities in your preferred programming language.
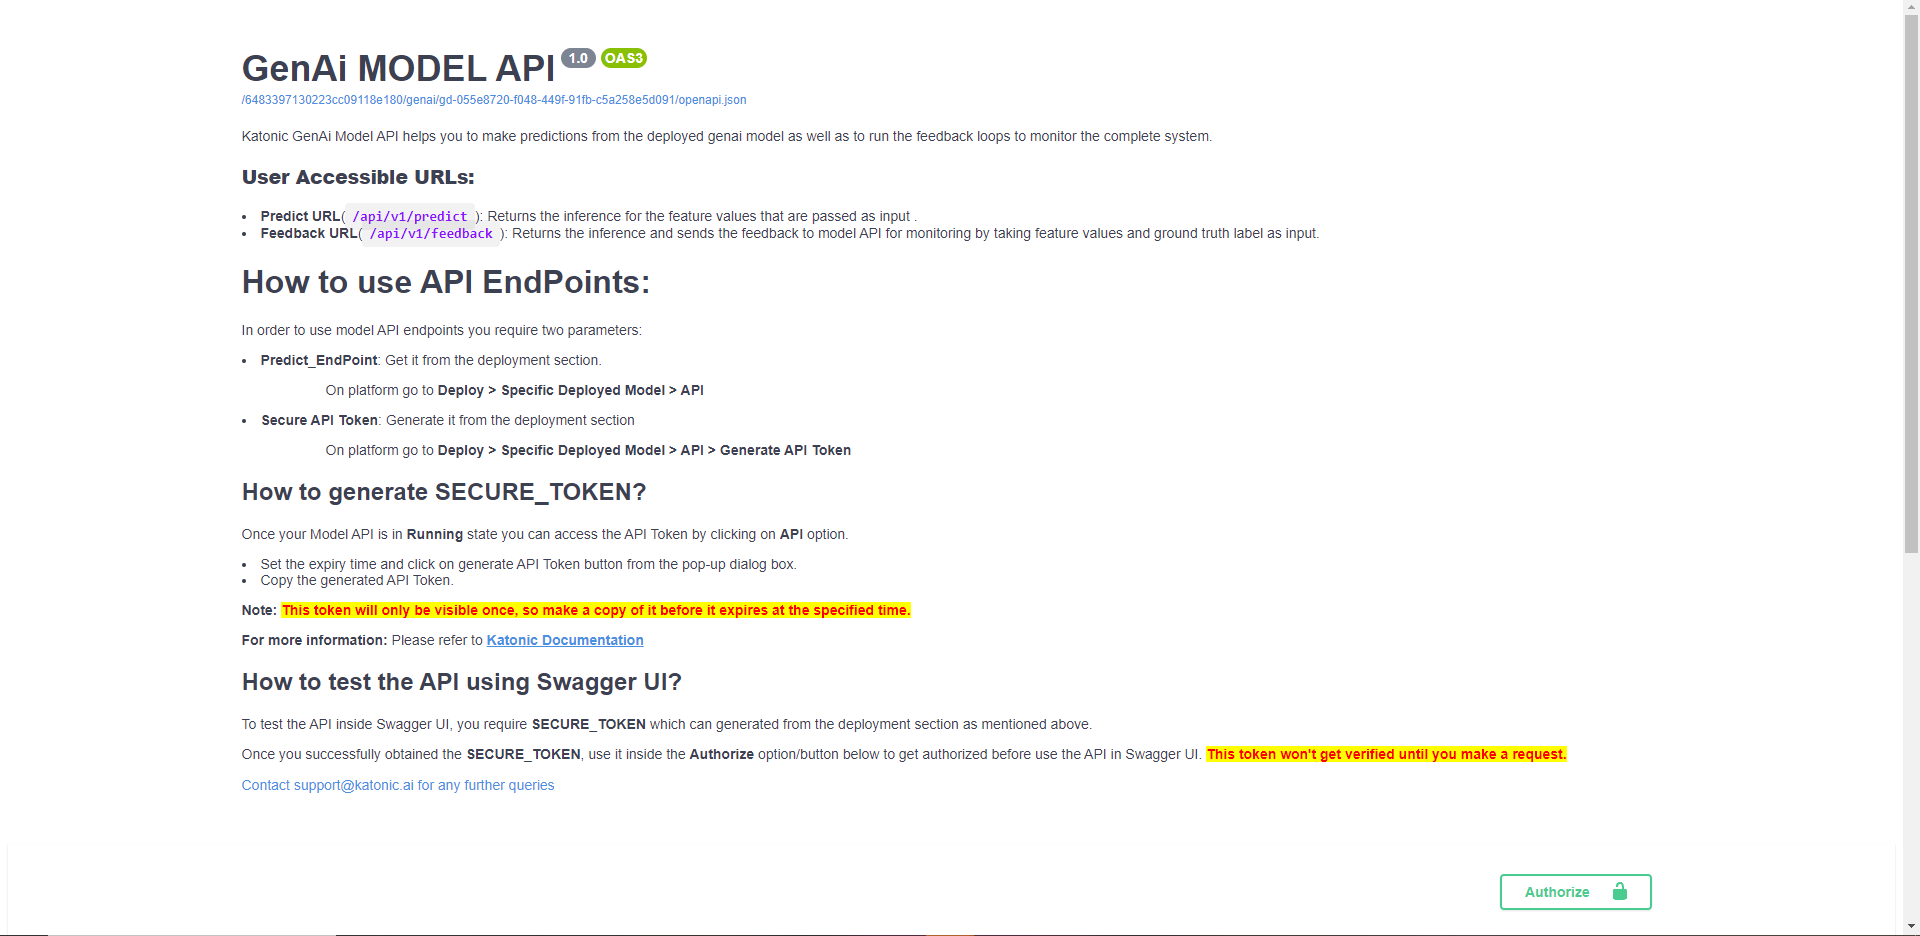
for more details on how to use model api endpoints, click here