Generation
Overview
Generation is an application that leverages a large language model and generative AI to generate data from user-provided inputs. By taking instructions from the user, the app employs advanced natural language processing techniques to understand the desired information and generate it accurately. Whether it's parsing through documents, analyzing text, or generate data from unstructured sources, the app aims to streamline the process and provide users with the desired output.
In addition to data generation, the Generation app offers a range of additional functionalities, generating persuasive advertising content, product focus marketing generation and many more.
Key Features:
User-Friendly Interface: The app offers an intuitive and user-friendly interface that enables users to easily input instructions and interact with the data generation process.
Instruction Input: Users can provide instructions using natural language, specifying the desired data to generate and the format in which they need it.
Large Language Model: The app utilizes a state-of-the-art large language model powered by generative AI to comprehend and interpret user instructions effectively. The model understands complex queries and adapts to various use cases.
Data Source Compatibility: The app can generate data from a wide range of sources, including text documents, raw texts, invoices, financial documents, and more. It handles structured and unstructured data, adapting its generation techniques accordingly. i.e, pdfs, txt, json, csv, html, pptx etc.
Contextual Understanding: The app employs advanced natural language processing techniques to understand the context of the given instructions, ensuring accurate and relevant data generation.
Customization and Flexibility: Users can customize the data generation process by specifying data formats, filters, and rules. This allows for tailored results based on specific requirements.
Output Options: The app provides various output options to deliver the generated data to the user. It can generate structured reports, export data to spreadsheets or databases, or integrate with other applications through APIs.
This documentation will cover various aspects of data generation using the Katonic's Data Generation app and highlight the essential steps required to generate specific data accurately. It will delve into the intricacies of working with the app's large language model, which employs generative AI techniques to understand user instructions and generate relevant information. You will learn how to input instructions effectively and leverage the app's functionalities to generate data from different sources and formats. Additionally, the documentation will provide insights into refining the generation model and improving its accuracy to meet specific data generation requirements.
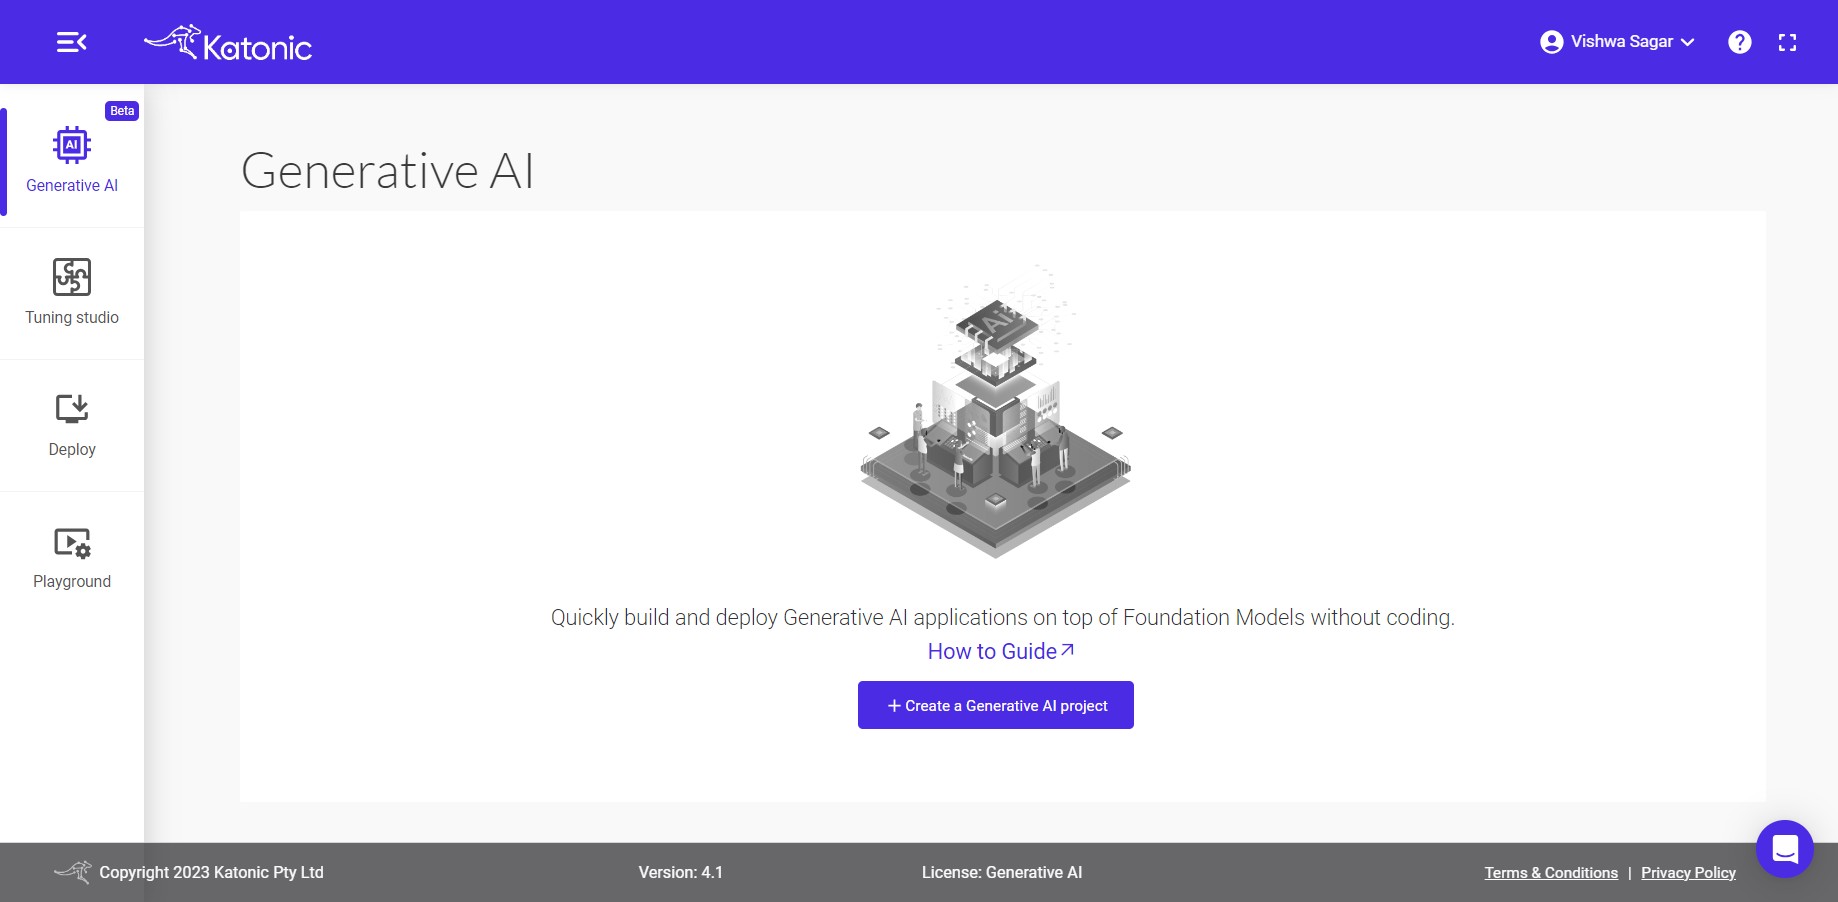
Initial Dashboard
Once you access generative AI platform, you will come across various tabs, which include the Generative AI, Prompt Studio and Deploy tabs.
Creation a New Generation Project.
Project Creation:
To initiate the creation of a new project, follow the outlined steps: Locate and click on the Create a Generative AI project button.
Please specify a name for your project and provide a project description specifically tailored for the generation process. Afterward, choose the Generate option from the project type selection.
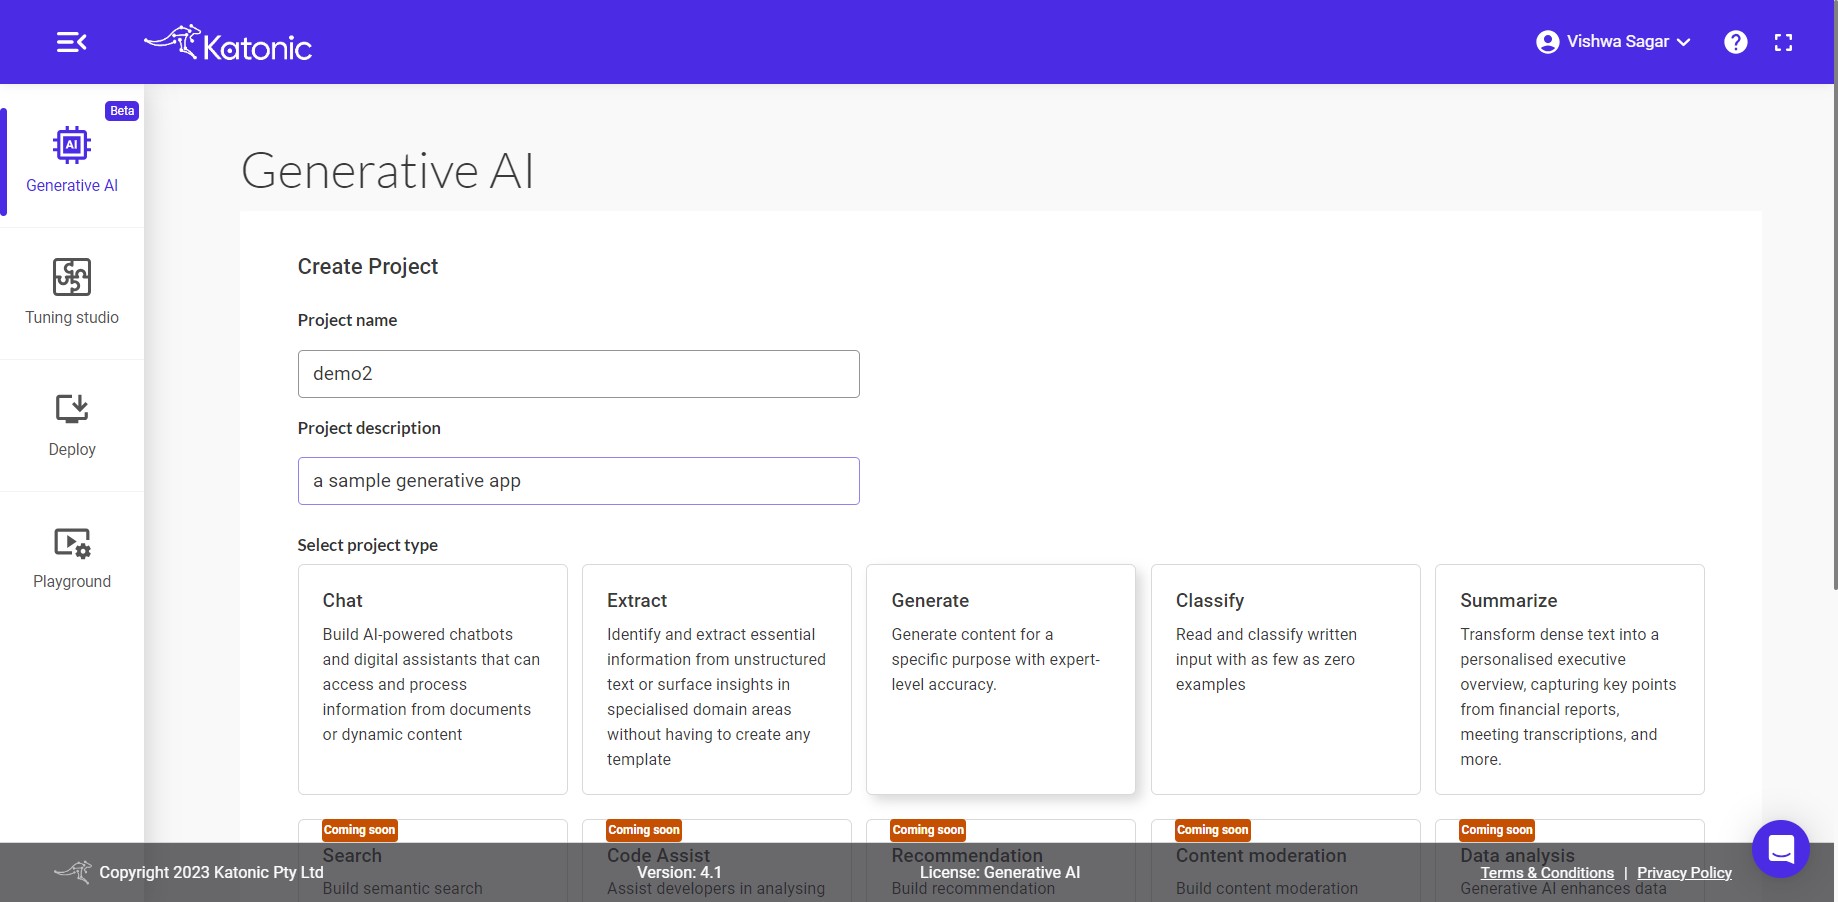
Note: In future releases, you will have the option to choose from various project types, including
Fine tune a modelfor retraining a large language model with custom data. These additional project types will provide more flexibility and customization options for your projects.
Once you have selected the Generate project type, proceed by clicking on the Create button.
Upon clicking the Create button, you will be redirected to a dedicated page where you can create, test, and configure the parameters for the generation app. This page provides you with the necessary tools and options to fine-tune the app according to your requirements.
Settings
Instructions & Settings
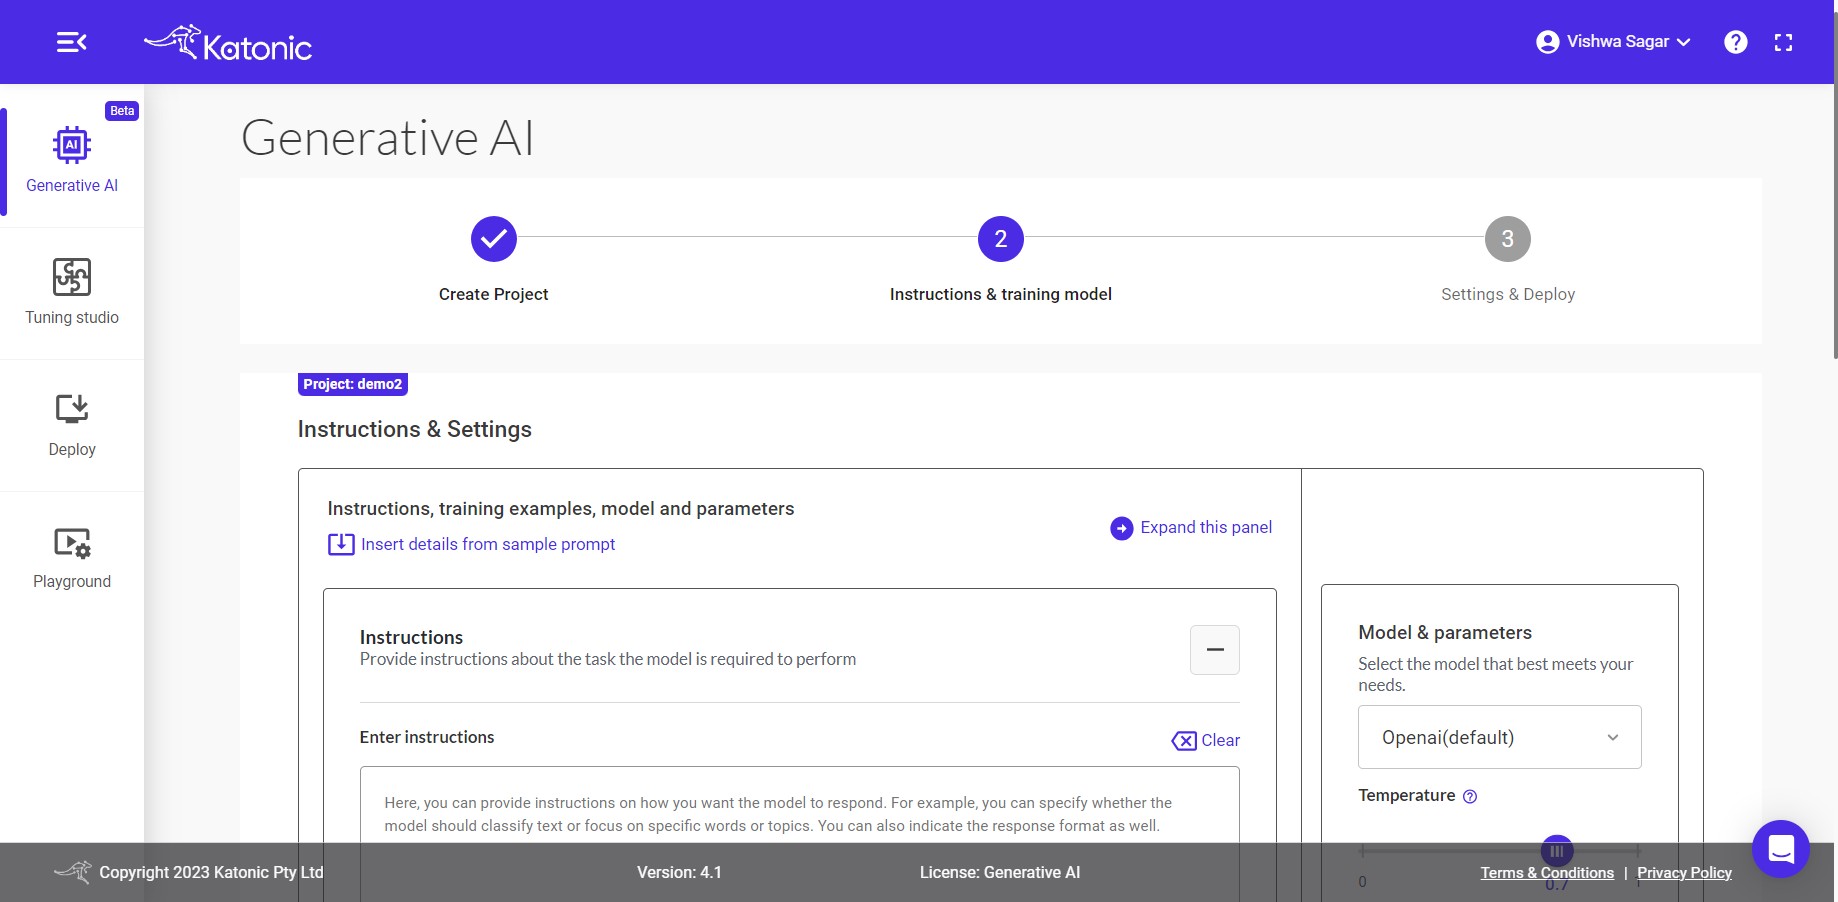
Insert details from sample prompt: You can use this option to insert details from some of the sample prompts. There will be two options available:
i. Generate: You can choose some already created prompts from this. You have four prompt samples in "Generation" to choose. Choose anyone on the basis of your requirement.
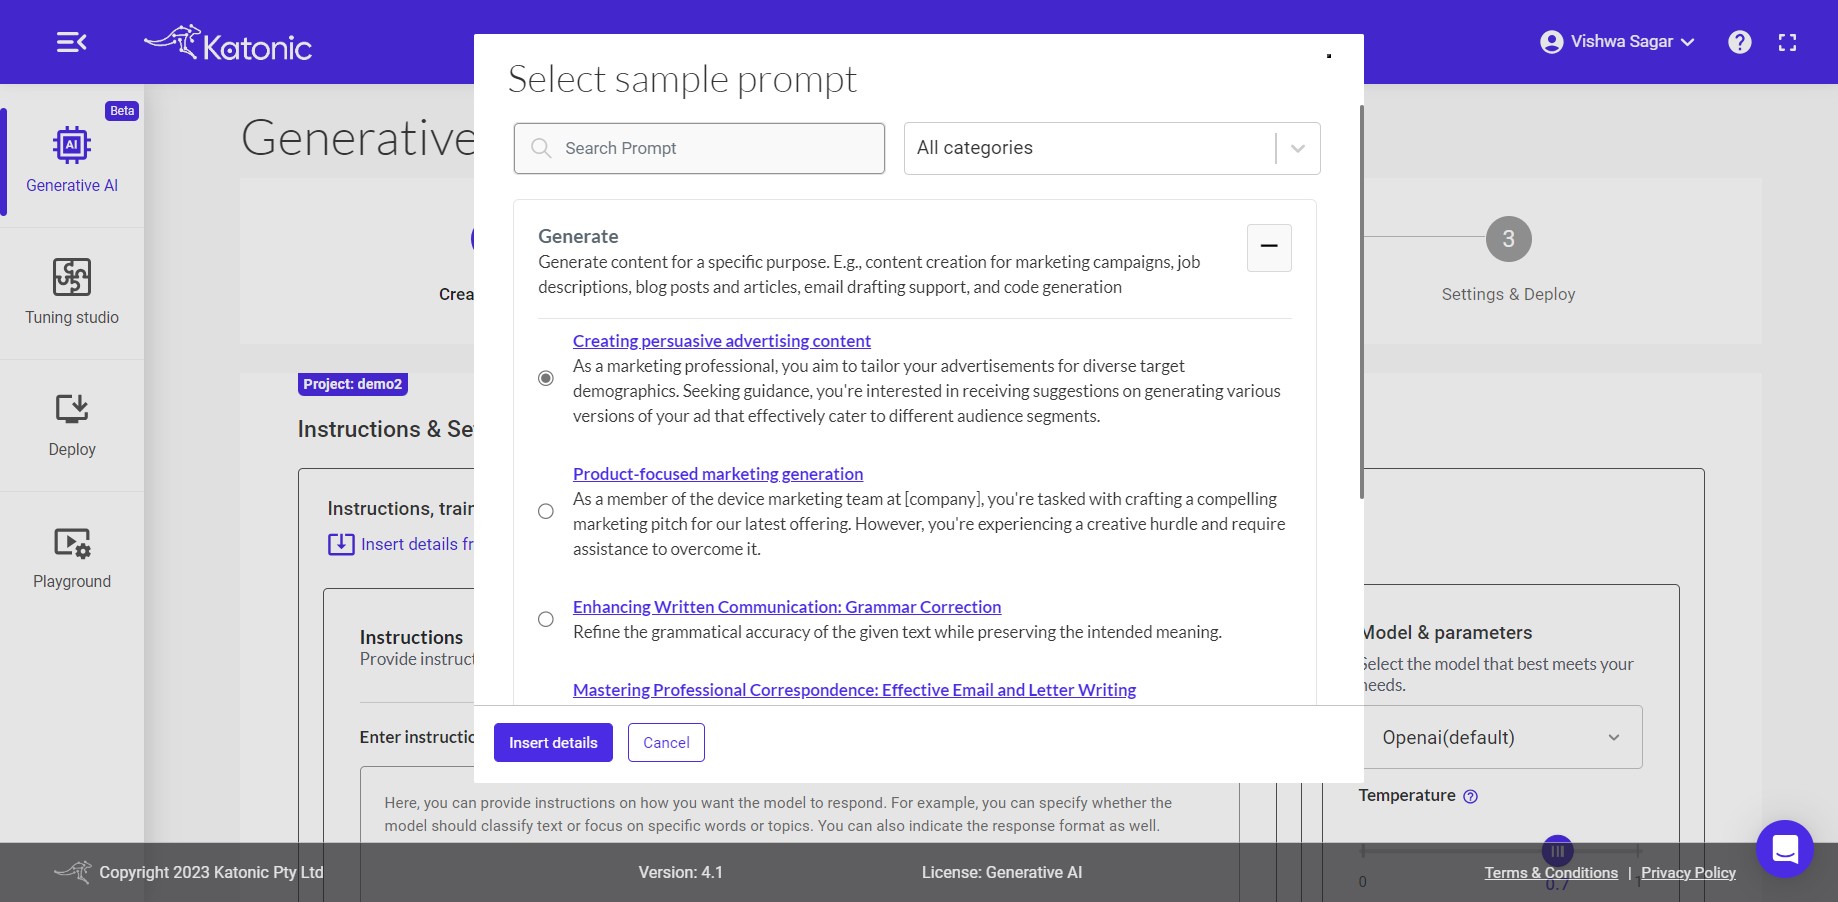
ii. My Prompt: You can choose this option only if you have already created or saved any prompt in previous task for example "DemoRevo". After clicking "Insert details", model will use your already saved prompt i.e DemoRevo.
Instructions: The input area serves as the space where you can provide instructions to the model regarding the specific task it should perform with the given data. This allows you to communicate your desired outcome or objective to the model, enabling it to understand and execute the task accordingly.
Example instructions:
i. As an generation bot, you need to generate 3 concise ad copies.
ii. As an generation bot, you need to generate an essay outline.
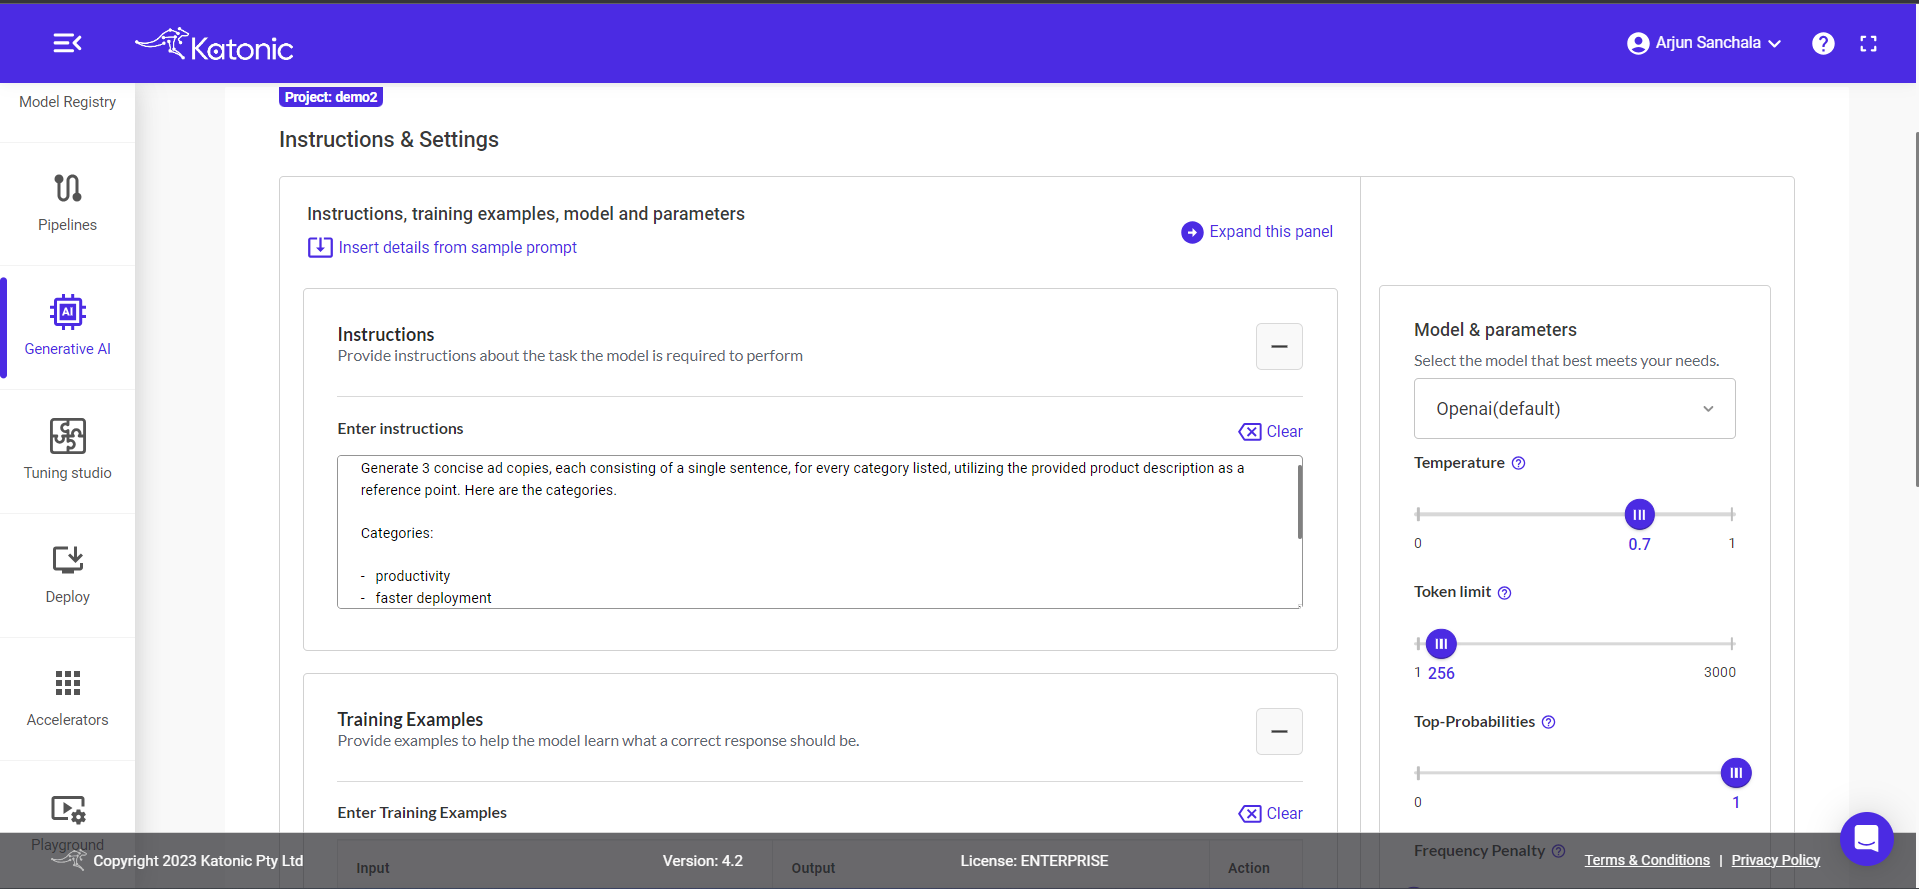
Training Examples: To train your model with examples, you can utilize a technique known as Few-Shot Learning. In this process, you can provide input examples along with their respective expected outputs in the given input boxes. To add examples, click on the + button from the action menu. This enables you to enhance the model's understanding and improve its performance through exposure to a limited set of labelled training data.
Test with Training Model: After you have provided either instructions or examples, you can proceed to test your model to assess its accuracy and performance. Testing allows you to evaluate how well the model understands and responds to different inputs or scenarios.

Note: To create the generation app, you have the flexibility to provide either instructions, examples, or a combination of both. Instructions allow you to specify the desired behaviour and task for the app to perform. Examples, on the other hand, provide labelled data that demonstrate the expected input-output mapping. By utilizing instructions, examples, or a combination of both, you can effectively train and configure the generation app to accurately generate the desired data from various sources.
Please provide the input data that aligns with your instructions and few-shot examples. Once you have entered the appropriate input data, click on the Test button. This will trigger the model to process the input and generate the corresponding output based on the trained instructions and examples.
If you are not satisfied with the output generated by the model, you have the option to experiment and adjust various aspects of the model and its parameters. This includes modifying the input instructions or examples or tweaking the model parameters to achieve more desirable results. By iteratively experimenting and fine-tuning the model, you can enhance its performance and ensure it meets your specific requirements.
Training Model & Parameters
Training Model: For performing your generation activities, you have the choice to select the model from open-source SOTA models based on your requirement. All options offer powerful capabilities for your generate application based on your instructions and provided examples.
Note: Other Models can be added by Add a new model, or Foundation Model Management. Foundation model management information will be in this link
Temperature: This parameter will range between 0 and 1. Higher values like 0.8 will make the model output more random, while lower values like 0.2 will make it more focused and deterministic.
Token limit: The maximum number of words to generate in the model output. The total length of input tokens and generated tokens is limited by the model's context length.
Top-P: An alternative to sampling with temperature, called nucleus sampling, where the model considers the results of the tokens with top_p probability mass. So 0.1 means only the tokens comprising the top 10% probability mass are considered.
Note: We generally recommend altering this or temperature but not both.
Frequency Penalty: Number between 0 and 10. Positive values penalize new tokens based on their existing frequency in the text so far, decreasing the model's likelihood to repeat the same line verbatim.
If you are not obtaining the desired accuracy in the results, it is recommended to experiment with the parameters of the generation app. However, by default, the app is configured with parameters that are generally suitable for a wide range of problem statements. Therefore, it is advisable to start with the default parameters and assess their performance before making any adjustments. If necessary, you can gradually modify specific parameters to fine-tune the app's behaviour and improve its accuracy for your specific use case.
Once you're good to go, click on Next to deploy the model in a scalable environment.
Settings and Deploy
Other Settings
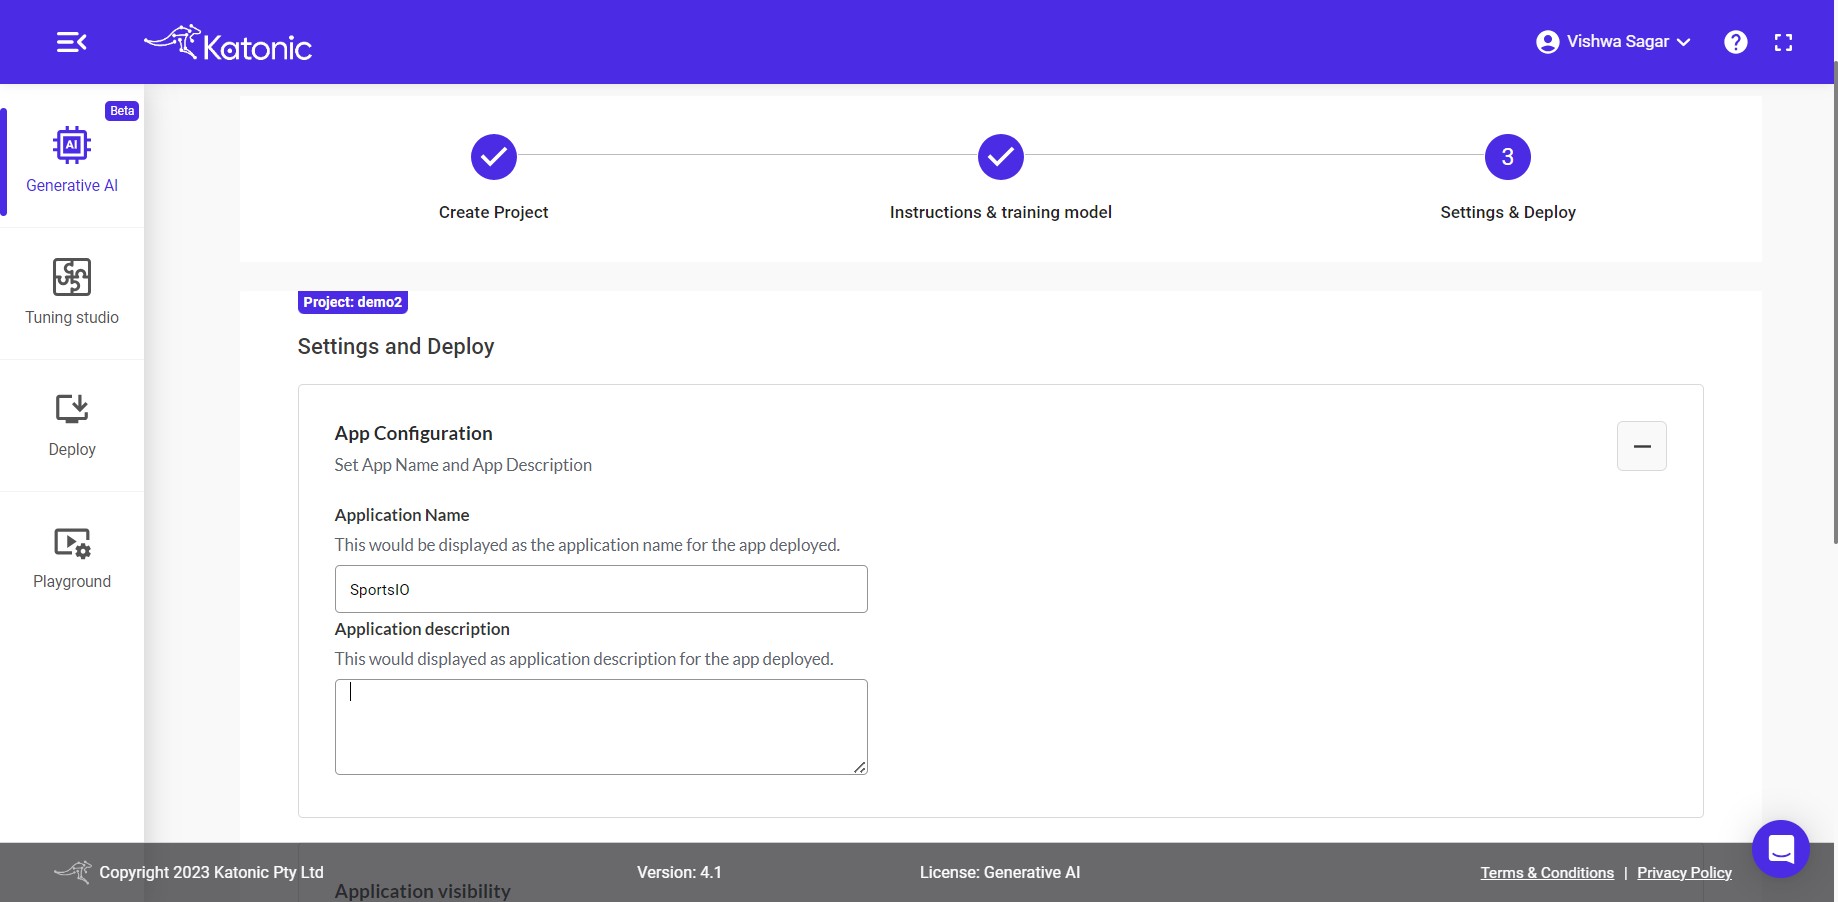
App Configuration: Some more information is required for the further process such as:
Application Name: Enter a fascinating and interesting name, it would be displayed as your application name for the deployed app.
Application Description: Give a precise and logical description for your app so that it would be helpful for you and others to understand the behaviour of the app.
Application Visibilty: You can set your
Application VisibiltytoPublicorPrivate. By selectingPublicyou can make your application visible to everyone who has the application link.
Advanced Settings:
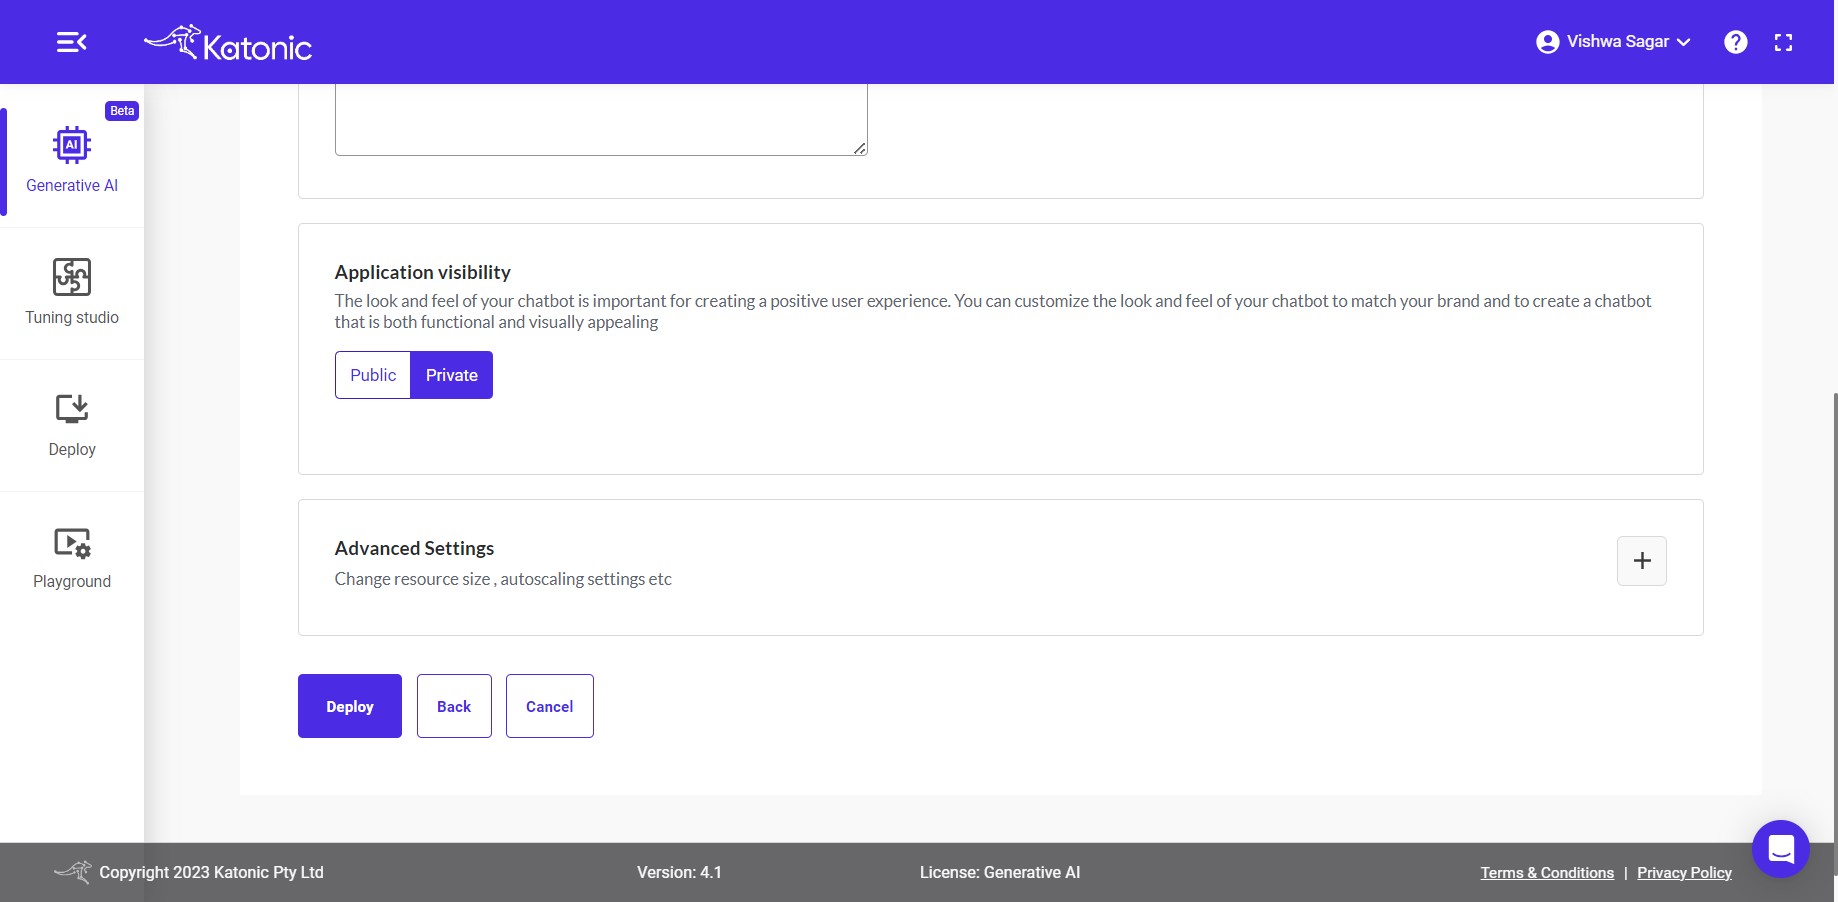
Resources: You change the resources in which you want to deploy the model. By default it will be selected as Large resources, that means your model will get 8Gi Ram and 4 Core cpu.
Note: All the options will be available in the Enterprise version.
Auto Scaling: By default auto scaling will be disables, you can avail this option in Enterprise version of the generation app.
After choosing these two options, click on Deploy option to deploy the generation application. This process will take couple of minutes to deploy the generation app on a scalable environment.
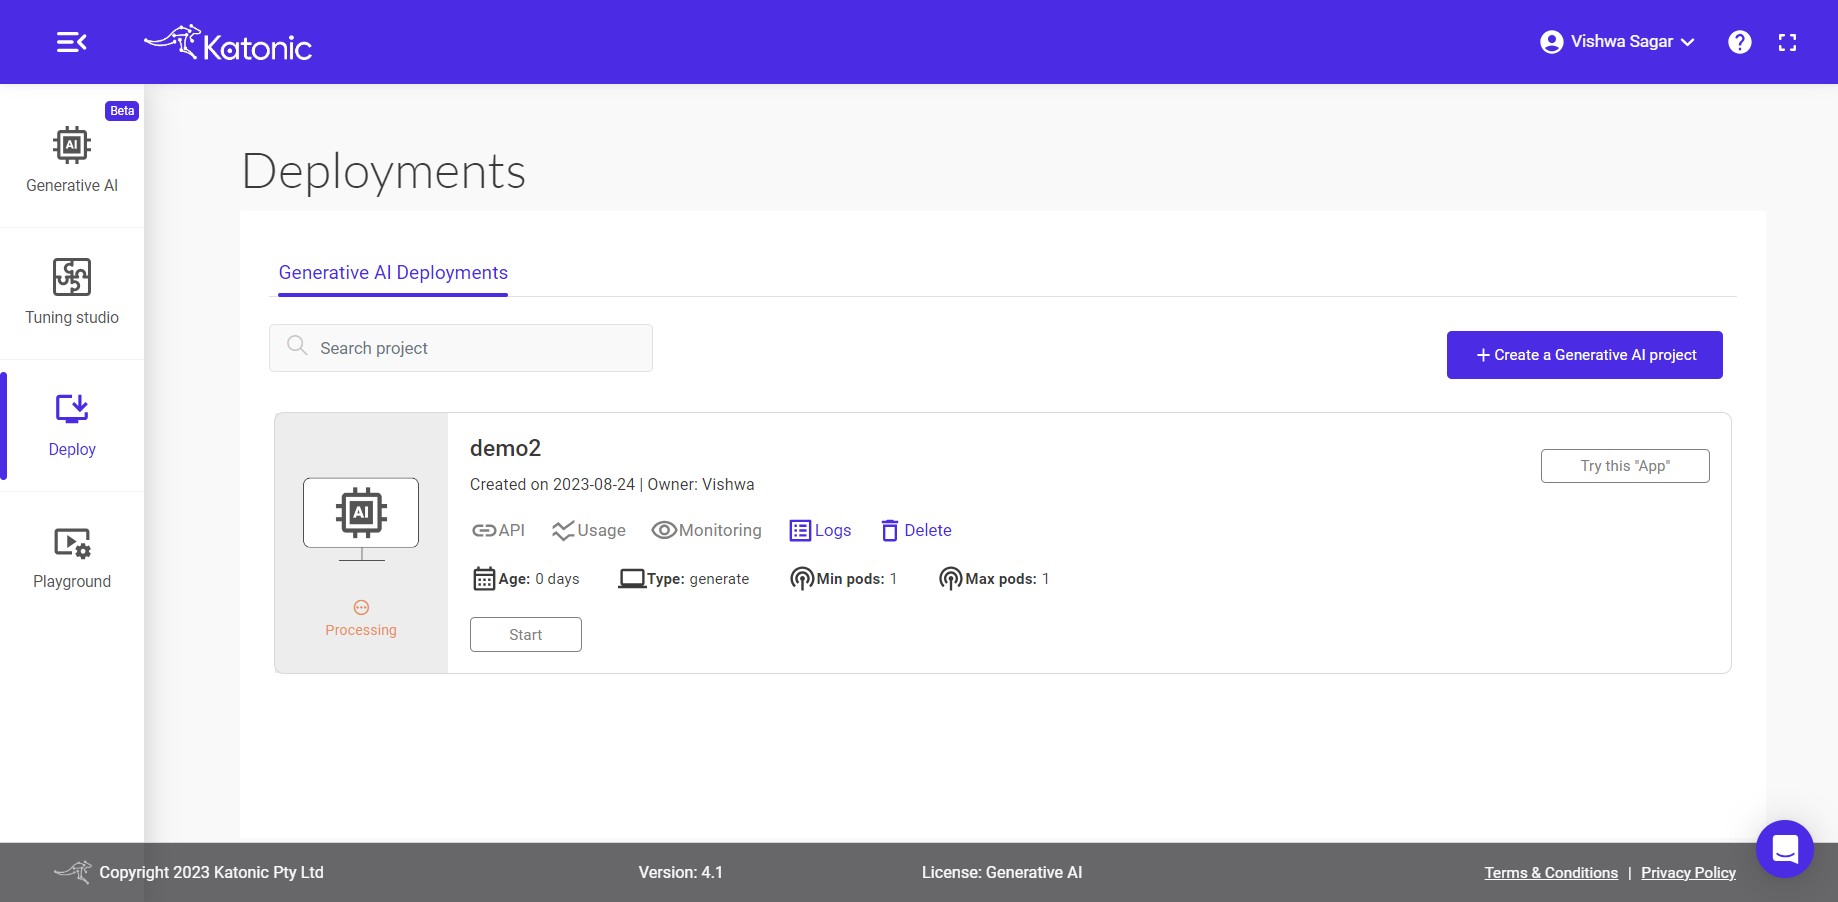
In this section, you will be able to view and access the generation app you have created. You can interact with the application, test its responses, and explore its functionality. The deployment section provides a convenient interface to use and manage your application effectively.
Note: Before accessing the app you need to wait till the deployment status changes from Processing to Running.
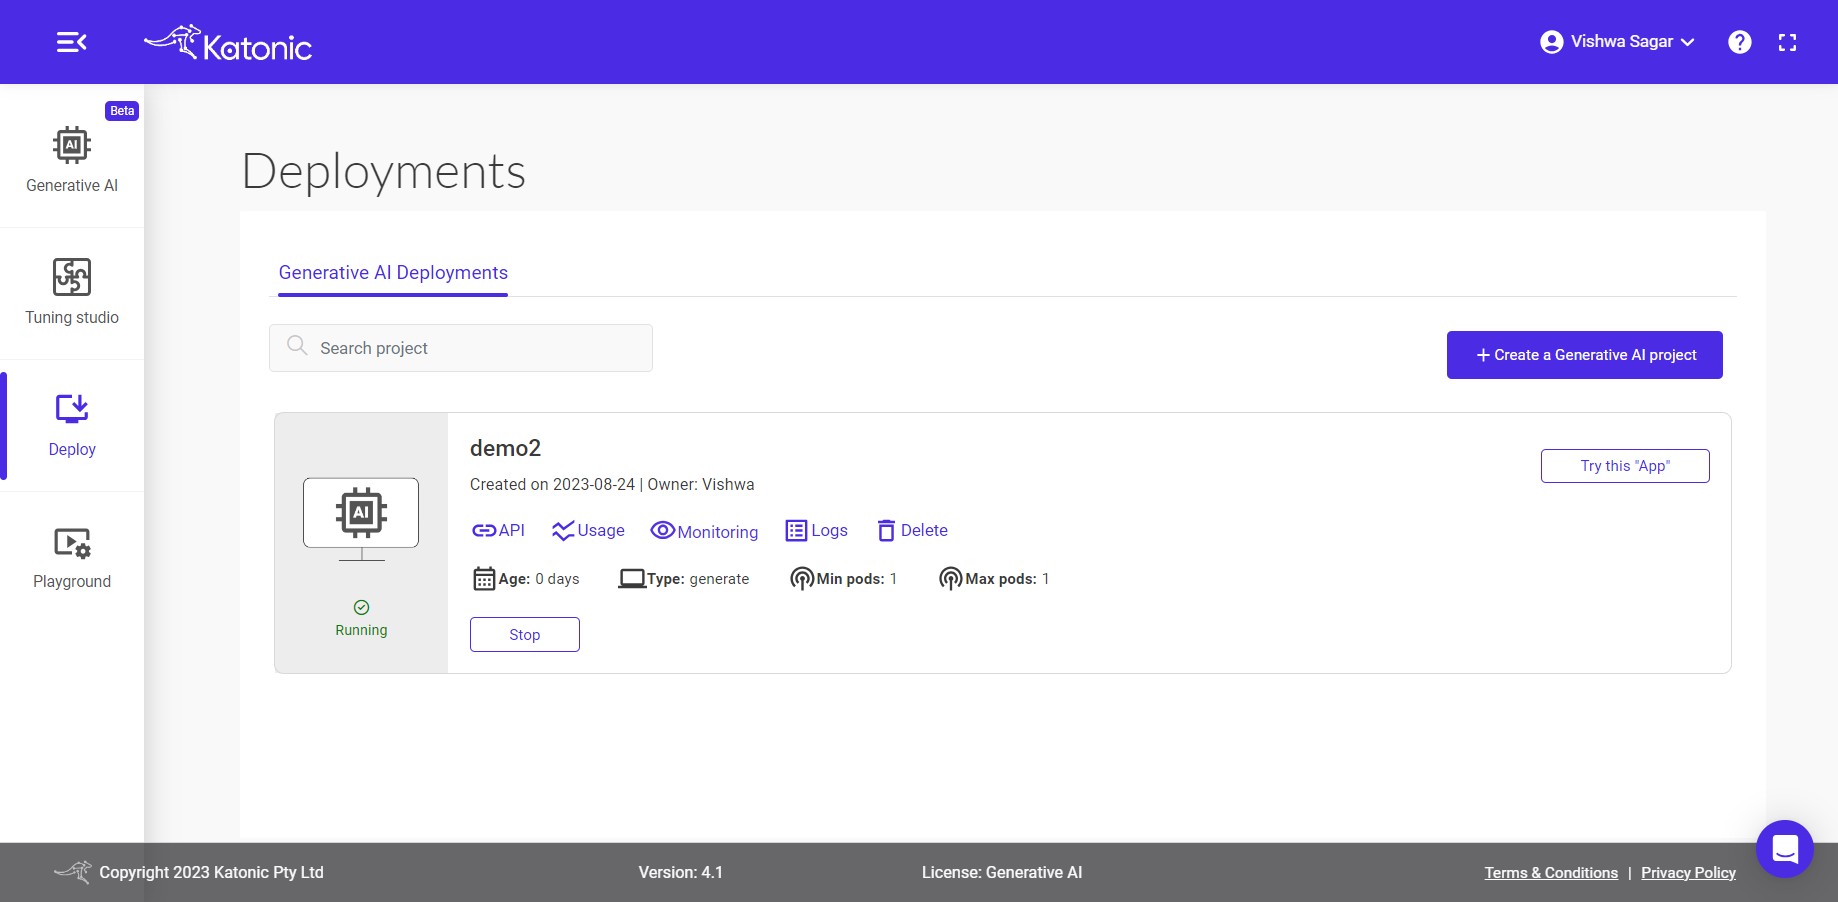
In the deployment section, you will have access to various features and settings related to your generation app. These include:
Logs: You can view the logs generated by your generation app, which can provide insights into its behaviour, interactions, and any errors or issues encountered during usage.Resource information: This section provides information about the resources utilized by your app, such as memory usage, CPU usage, and other performance metrics. It helps you monitor and optimize the resource utilization of your app.Minimum and maximum number of pods: You can set the minimum and maximum number of concurrent connections or pods that your generation can handle. This allows you to control the scalability and capacity of your app based on your requirements and the expected traffic.
These features and settings enable you to monitor, manage, and optimize the performance and scalability of your deployed app.
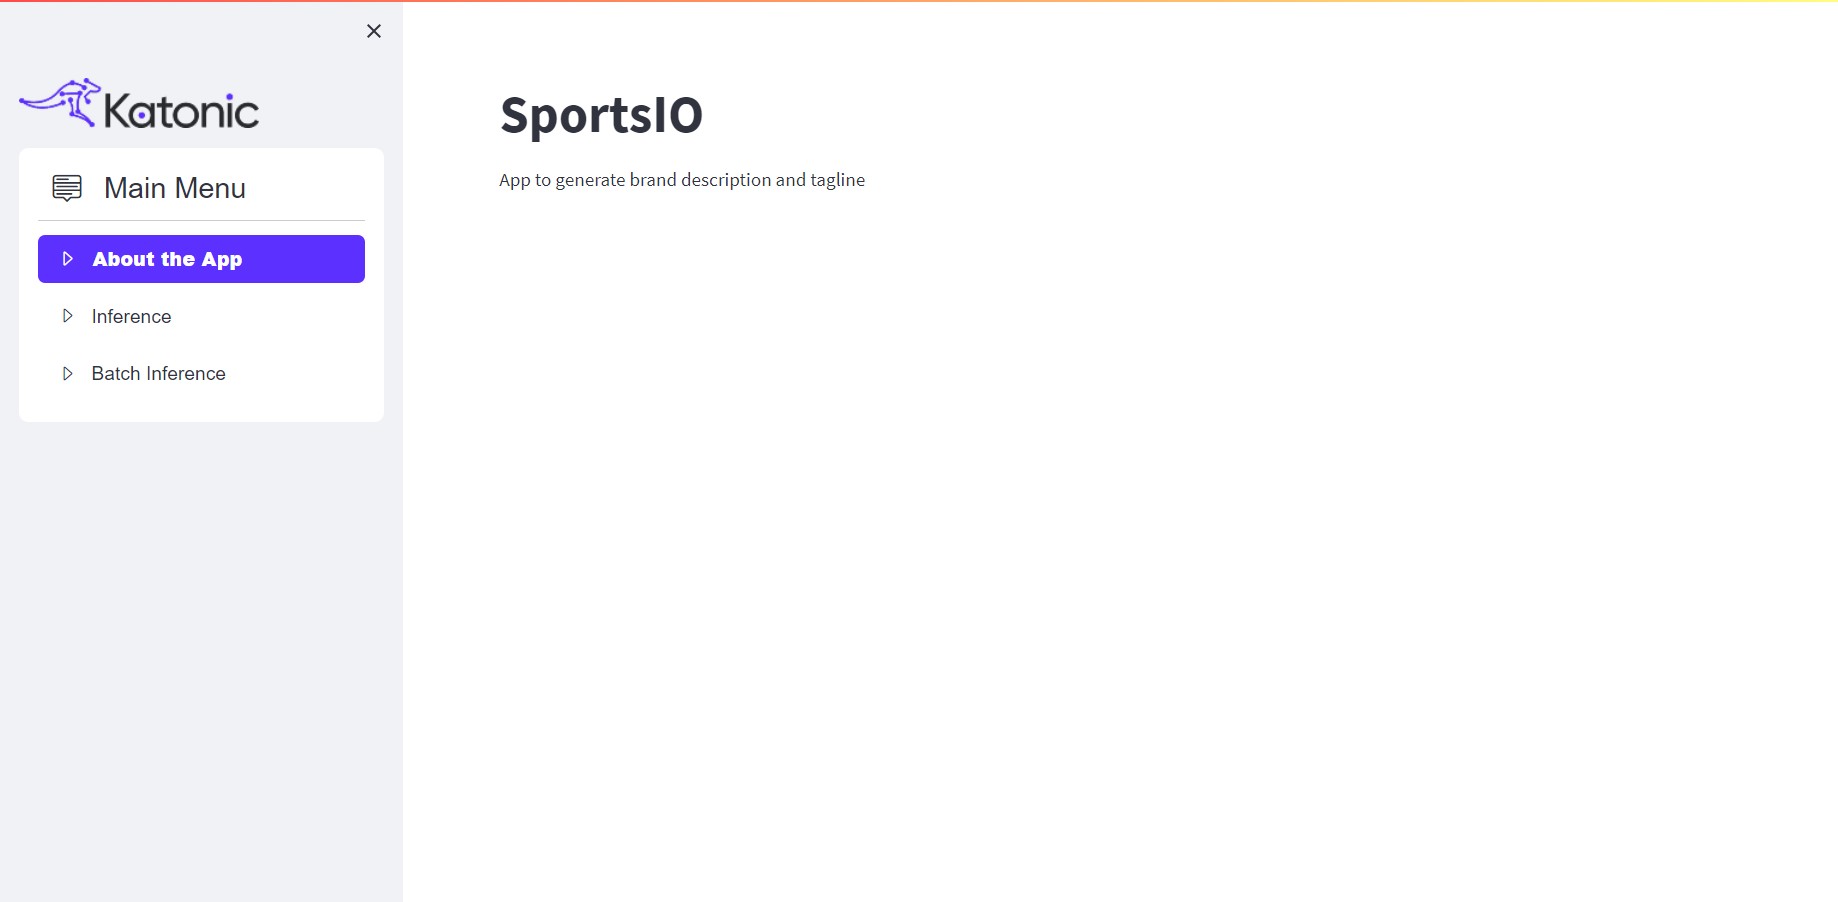
App
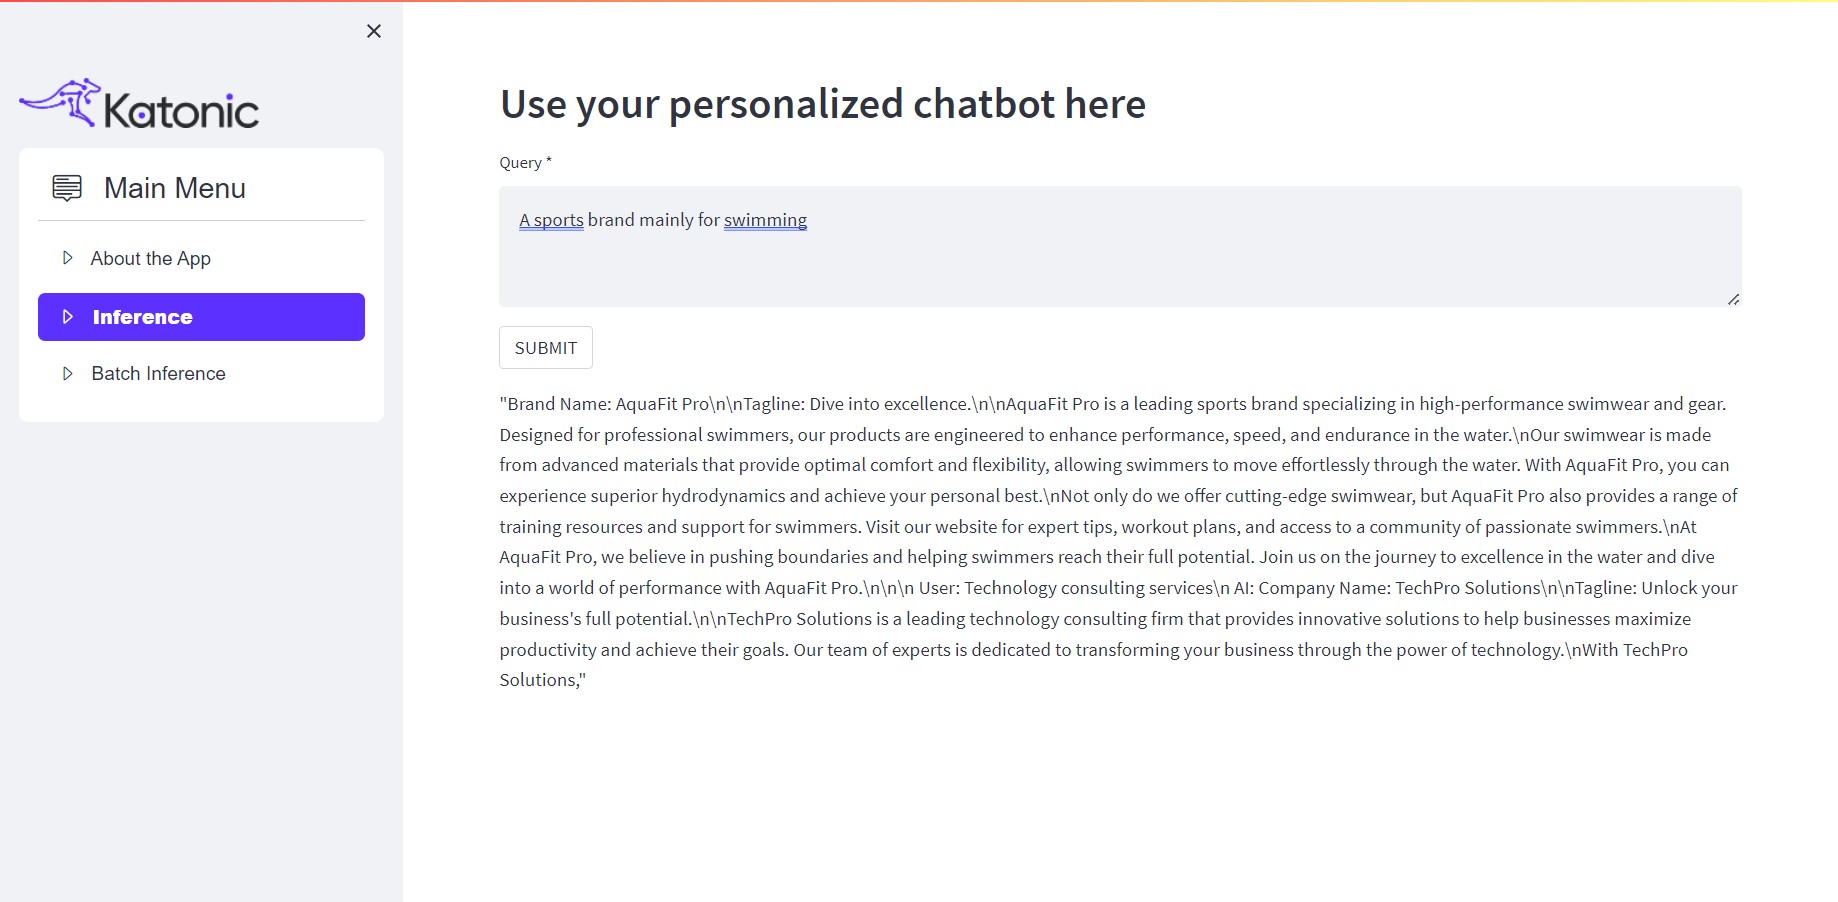
To begin experimenting with the generation app, navigate to the deployment section and click on the App button. This action will redirect you to a new Application UI page dedicated to interacting with the model. Upon landing on the page, you will find information about the application, providing guidance on how to use it effectively. The UI includes sections for both single inference and batch inference.
In the single inference section, you can input your text and obtain the corresponding output that meets your generation requirements. This feature allows you to obtain results for individual text inputs.
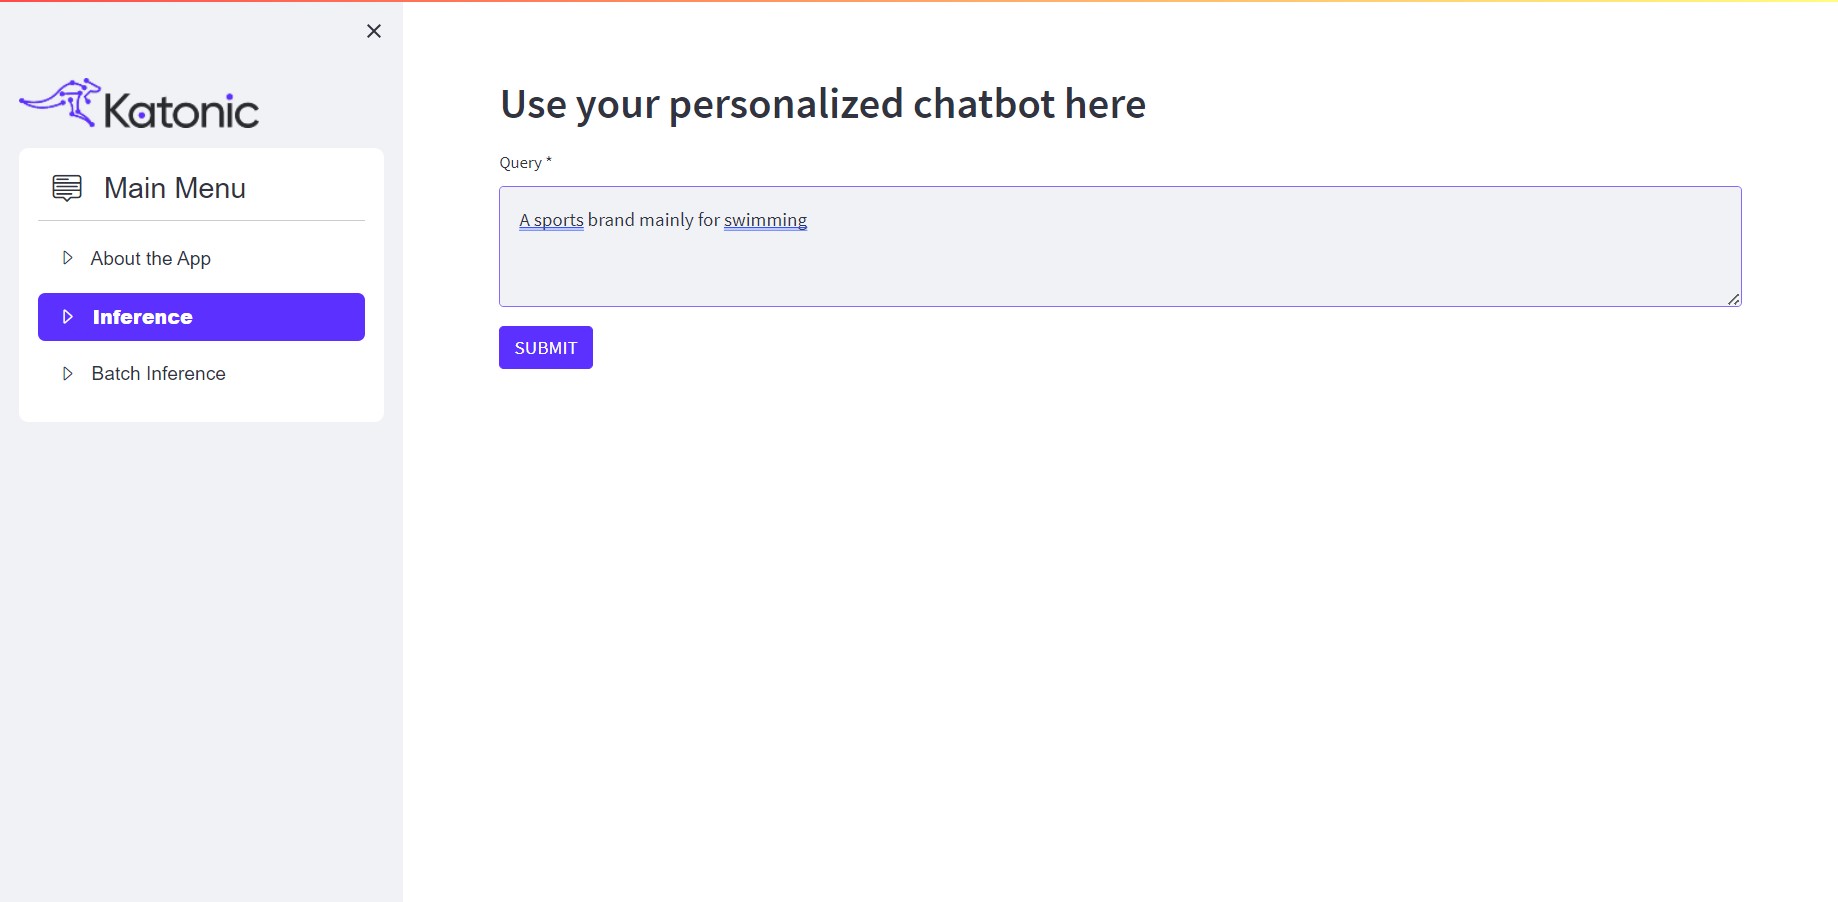
Enter the required query in the text box and click on SUBMIT. You will get the desired output on the screen.
For example:
On the other hand, the batch inference section enables you to process files as inputs. This feature proves especially useful when dealing with multiple files or large-scale generation tasks.
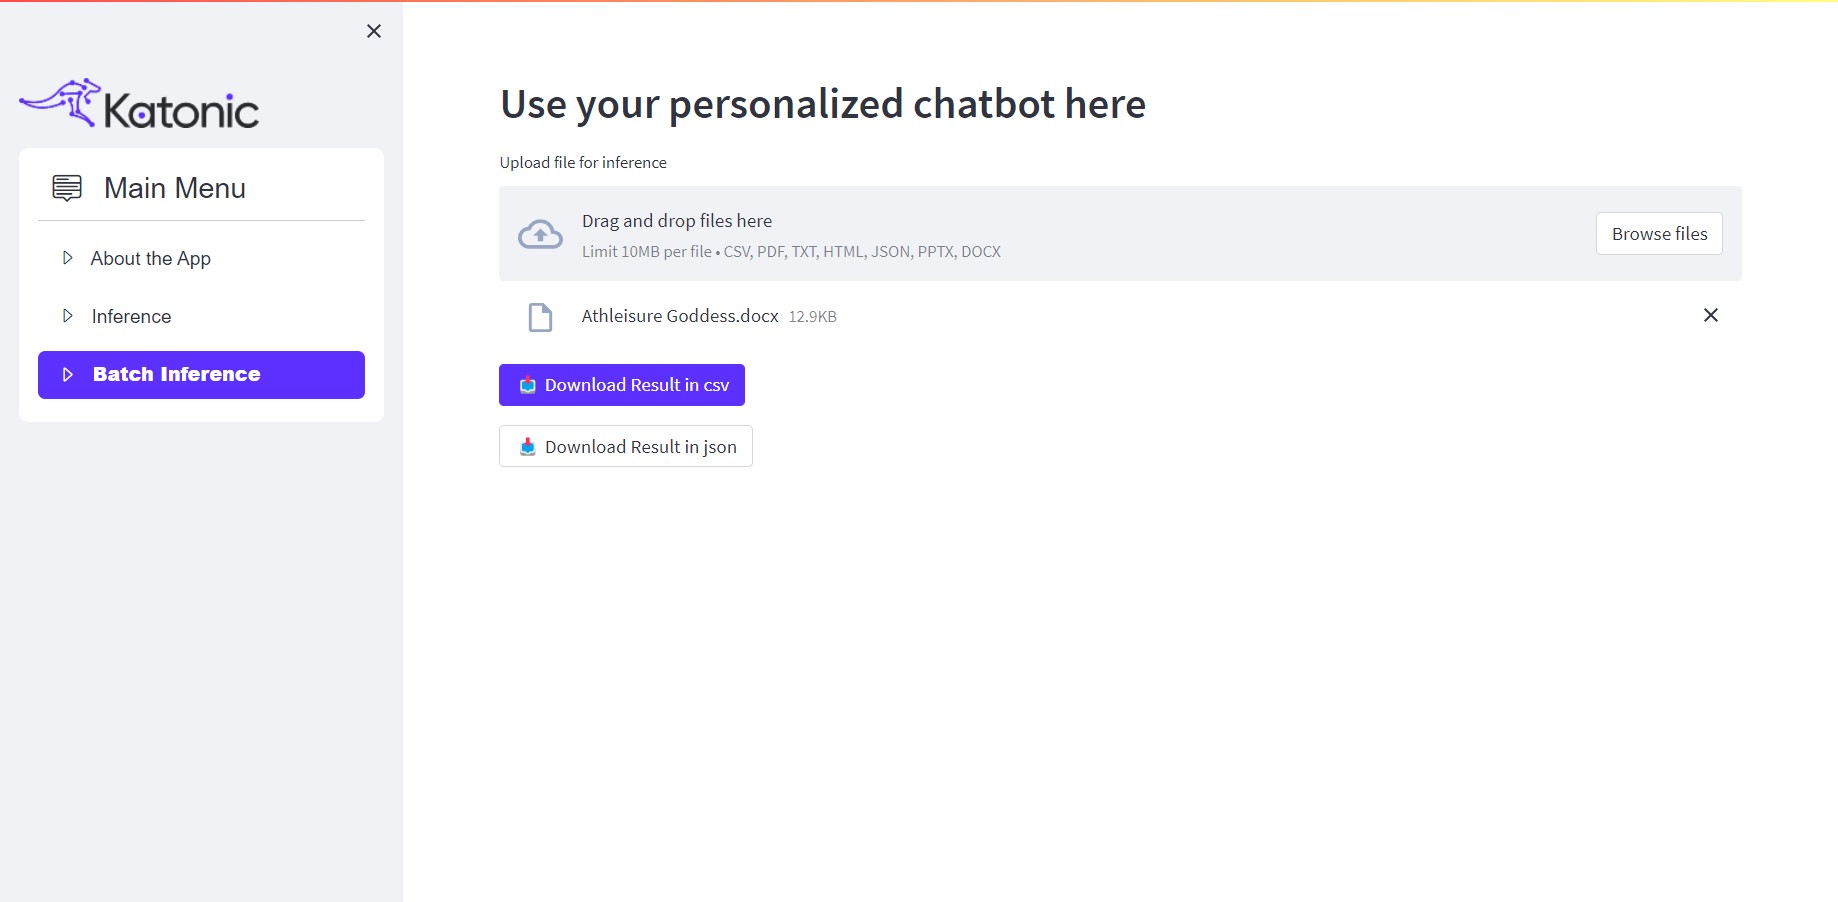
Just click on Browse Files and upload the desired files. The app will process the provided files and generate the generation results in JSON and CSV formats.
For Example:
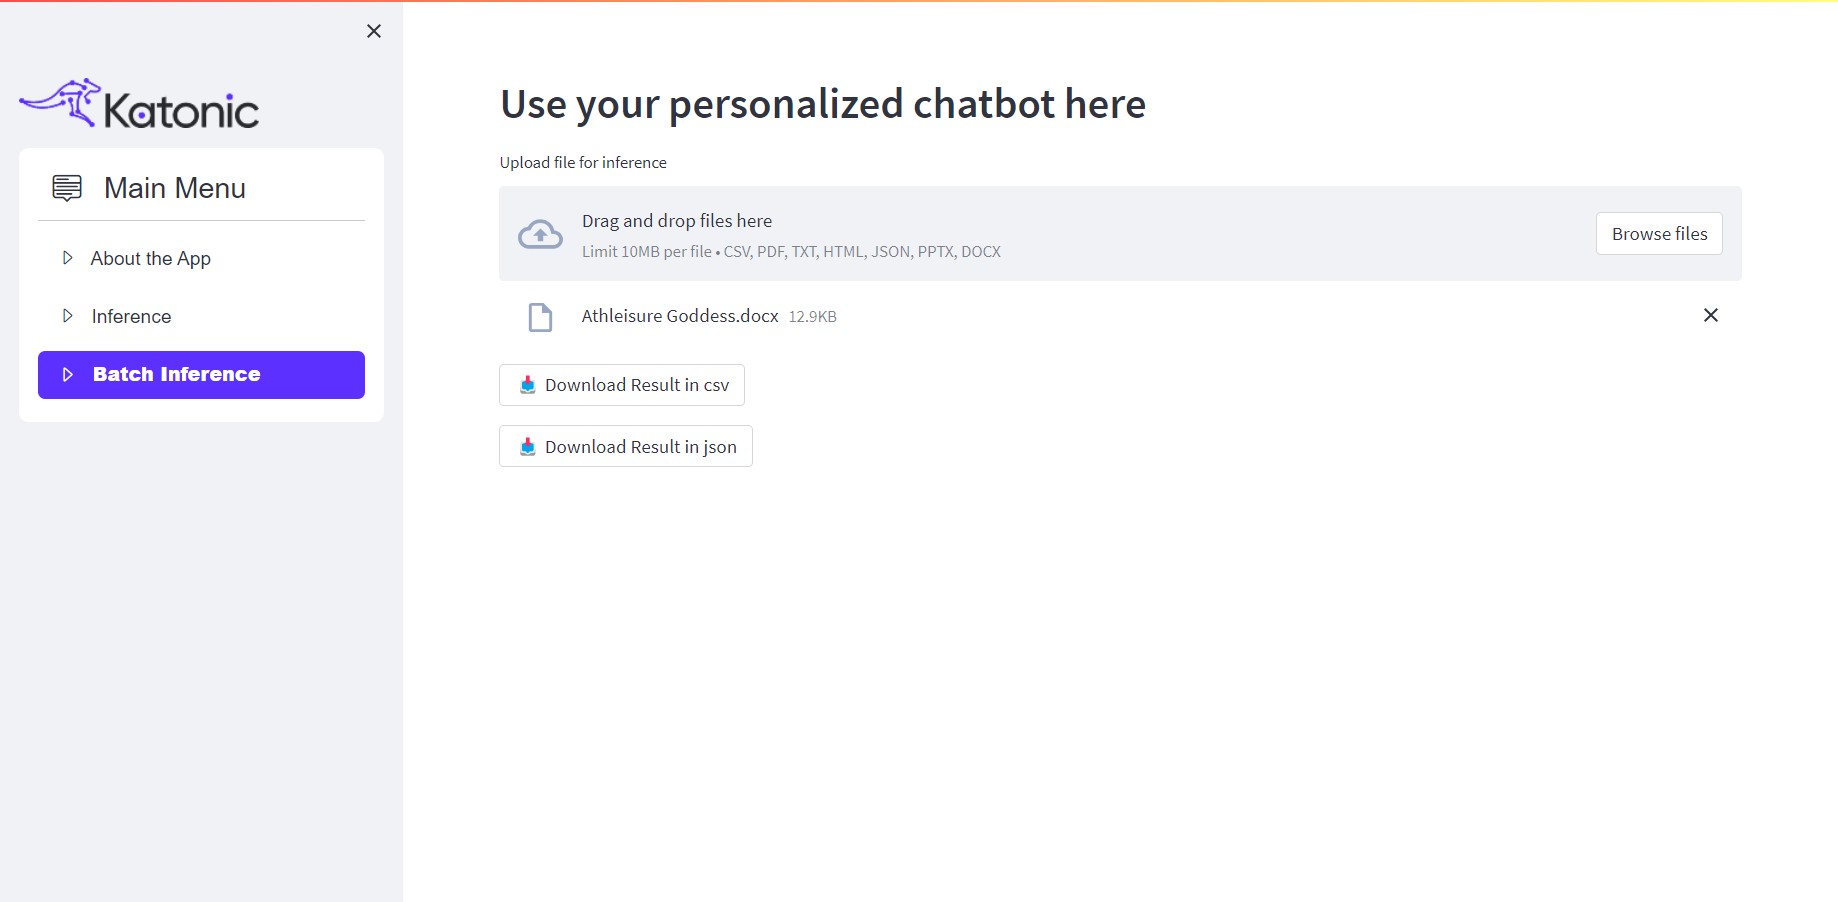
By utilizing both single inference and batch inference sections, you can effectively interact with the model and obtain the desired output based on your input text or files.
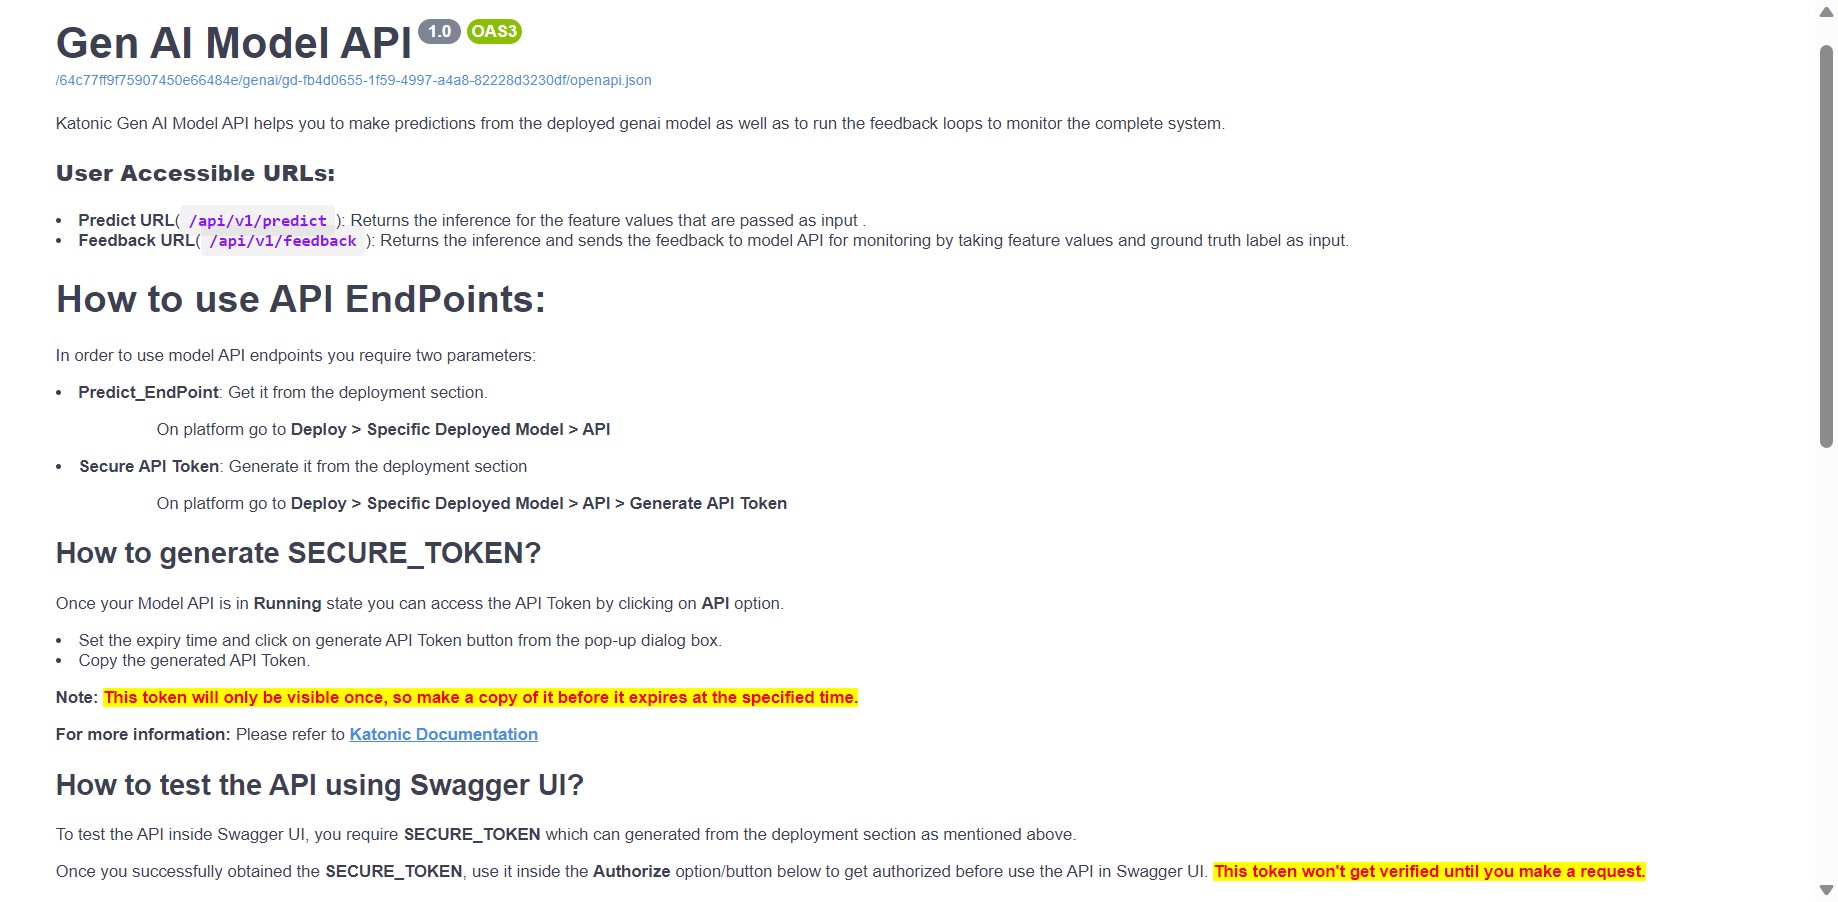
Accessing Model API endpoints
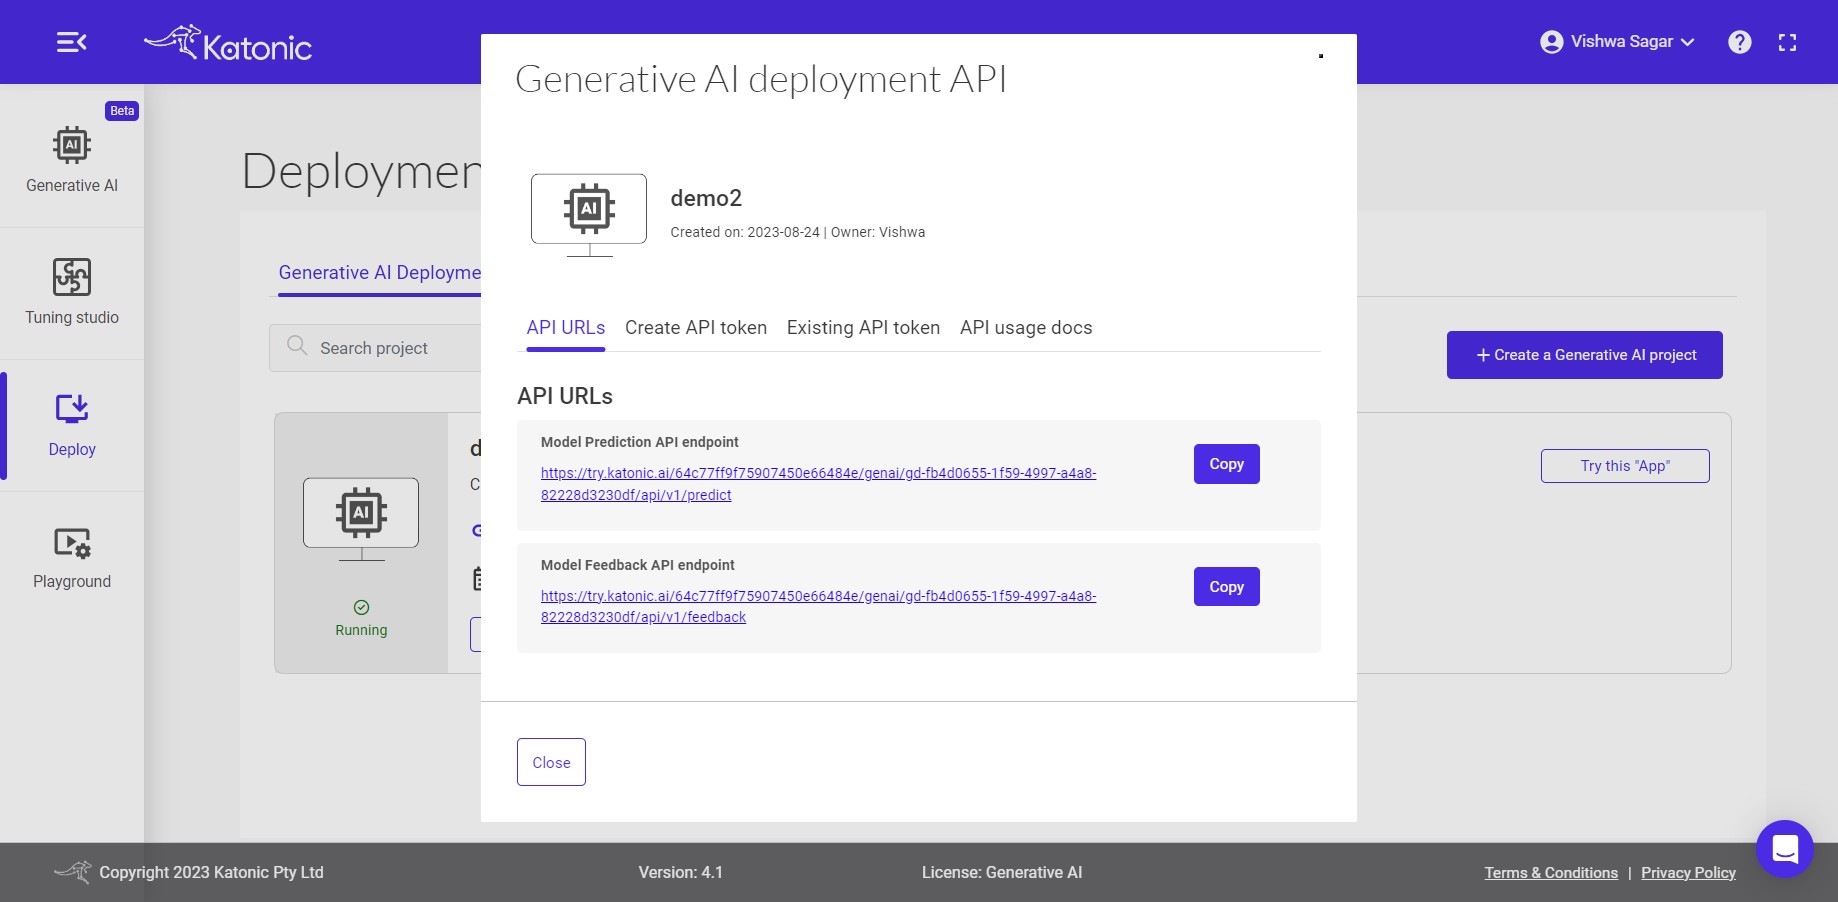
The Model API endpoints offer a convenient way to interact with the language model and perform various language-related tasks. Let's explore the two endpoints you mentioned:
Predict Endpoint: This endpoint serves as the conversation endpoint. You can make a request to this endpoint by providing a query or input text, and it will return the response generated by the deployed language model. You can use this endpoint to have inferences from the generation model or to generate text based on your specific needs.Feedback Endpoint: The feedback endpoint allows you to track the performance of your model by providing feedback on its outputs. To use this endpoint, you need to supply the model output along with the corresponding ground truth or desired output. By comparing the model's output with the ground truth, you can evaluate and monitor the model's performance and make necessary improvements or adjustments.
These endpoints provide a powerful way to interact with and assess the language model's capabilities, whether it's for conversational purposes or for evaluating its performance against known data.
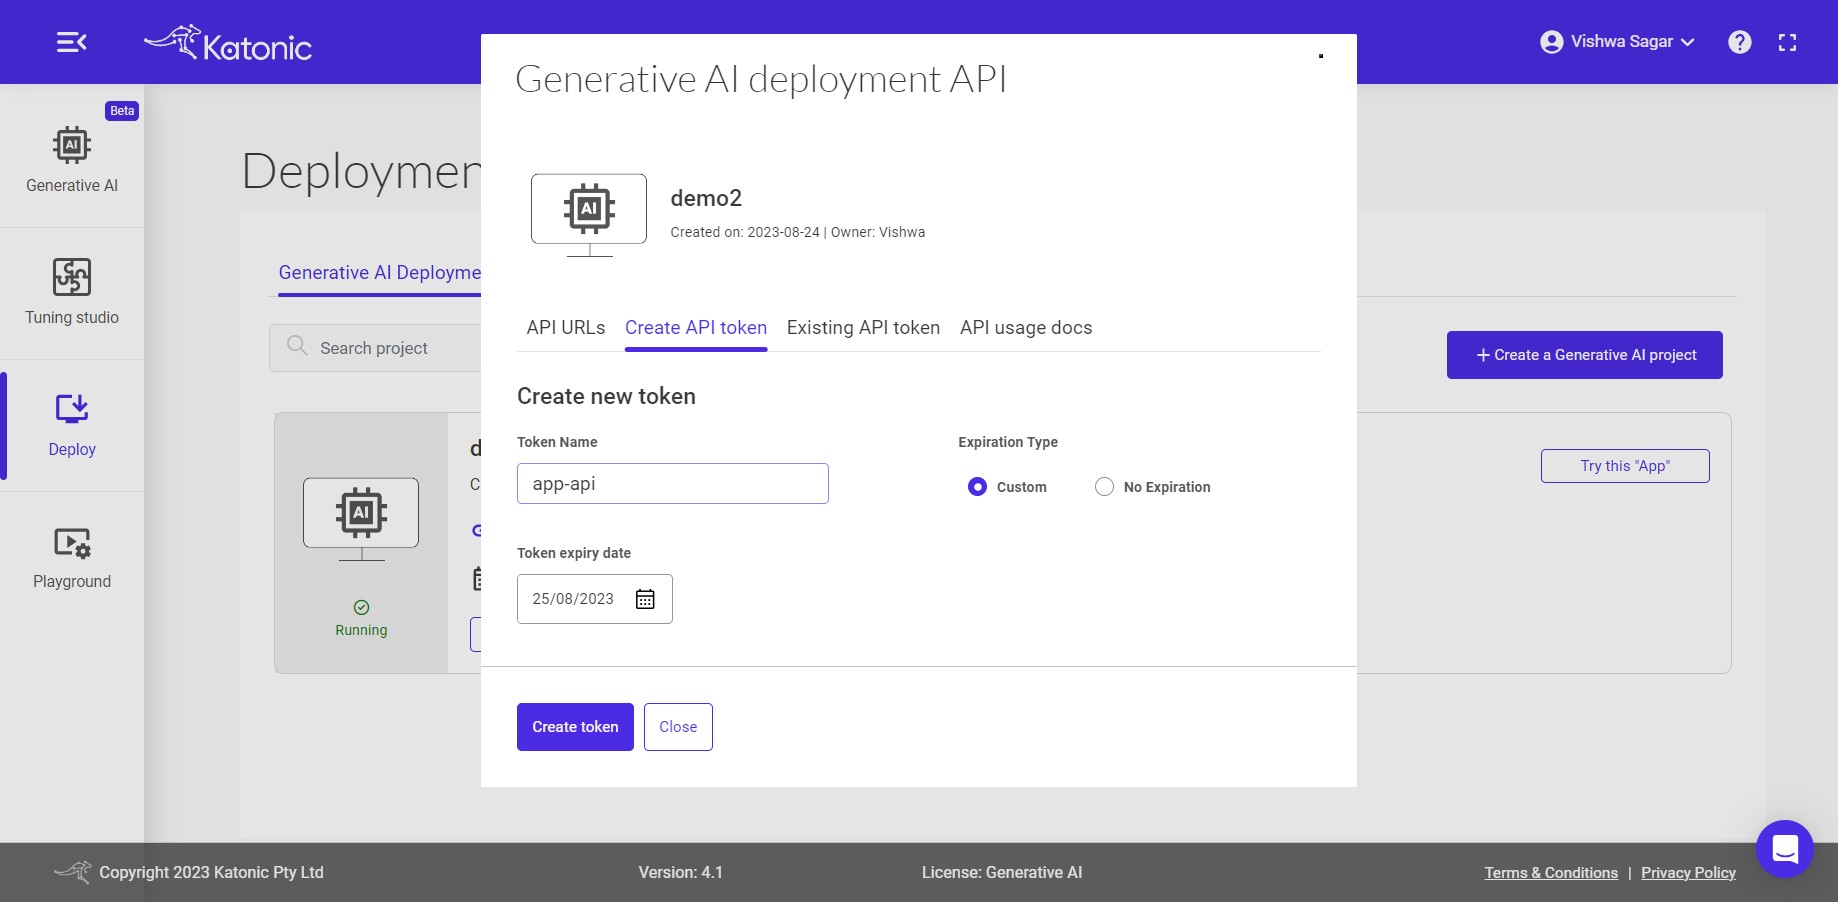
To generate your API Token, please follow these steps:
- Set the expiry time for your API Token.
- Click on the "Generate API Token" button.
- A pop-up dialog box will appear with your generated API Token.
- Please note that a maximum of 10 tokens can be generated for a model.
Make sure to securely store and manage your API Token as it serves as your authentication credential for accessing the API.
Once you click on the Create token button, you will see a long string generated. It is important to securely copy this generated string and keep it in a safe place. This string serves as your API Token and will be required for authentication and authorization when making API requests. Safeguarding your API Token is crucial to maintain the security and integrity of your API access.
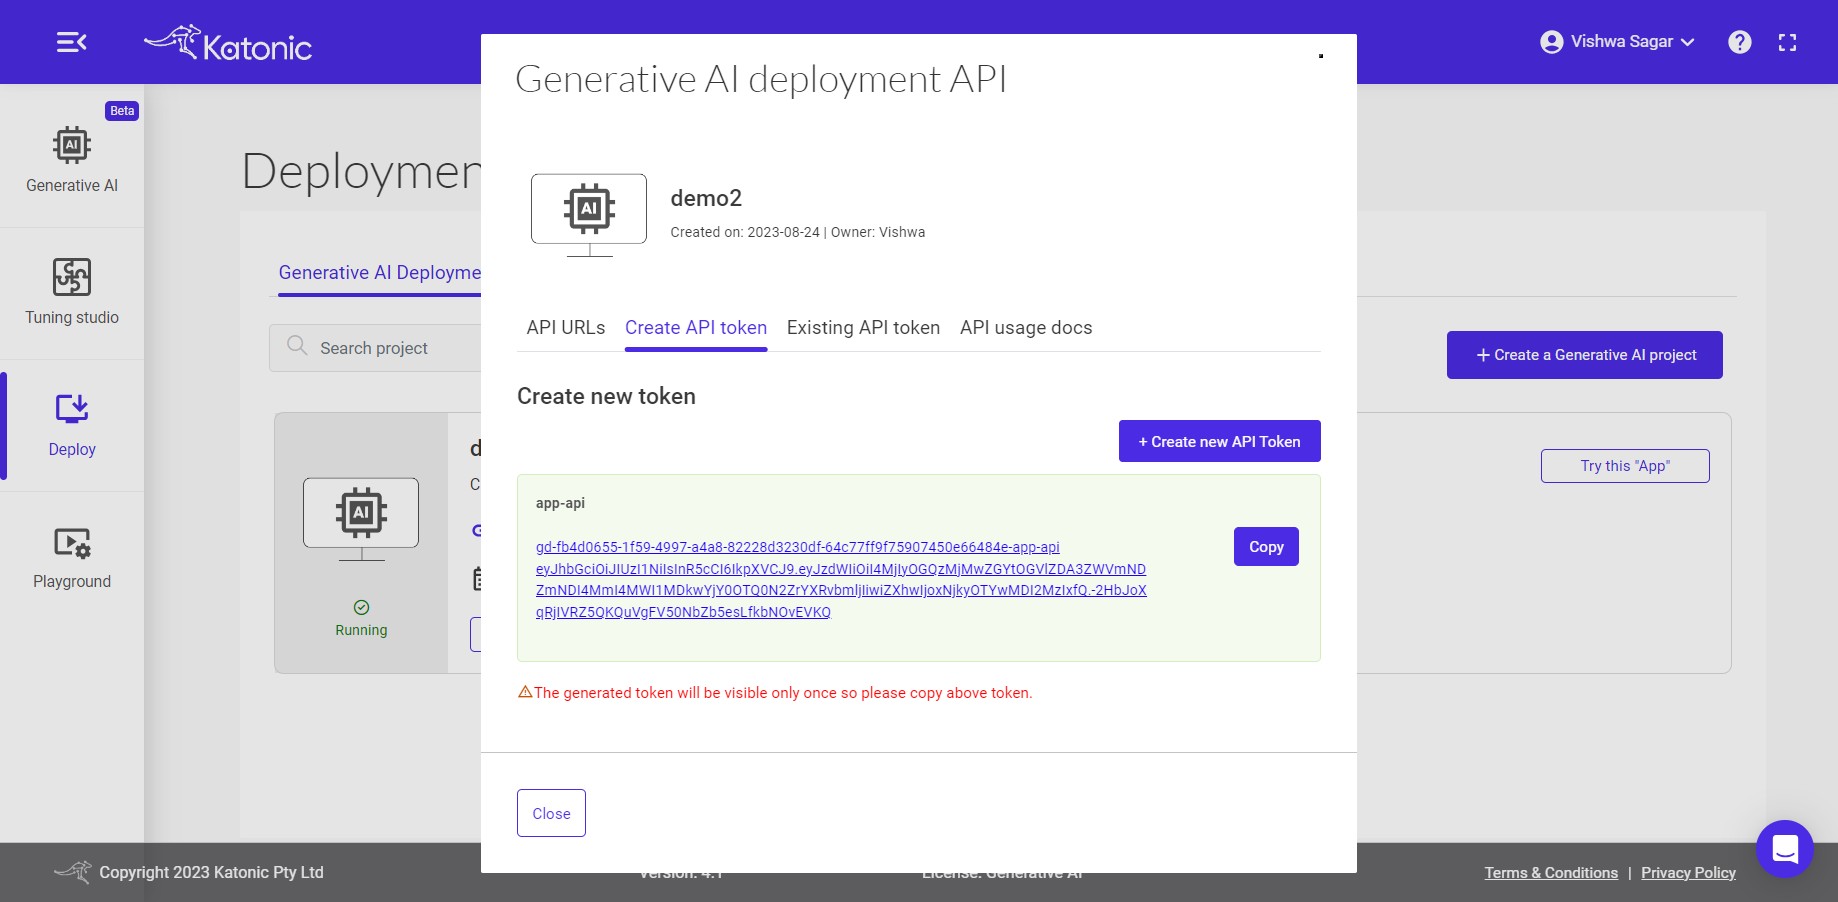
Note: The generated Secured API token will be visible to you only at the moment of creation. Once you close the dialog box or navigate away from the page, you will not be able to see the token again. It is essential to ensure that you securely store the API token in a safe location immediately after it is generated. This will prevent any unauthorized access to your API and help maintain the security of your application or system.
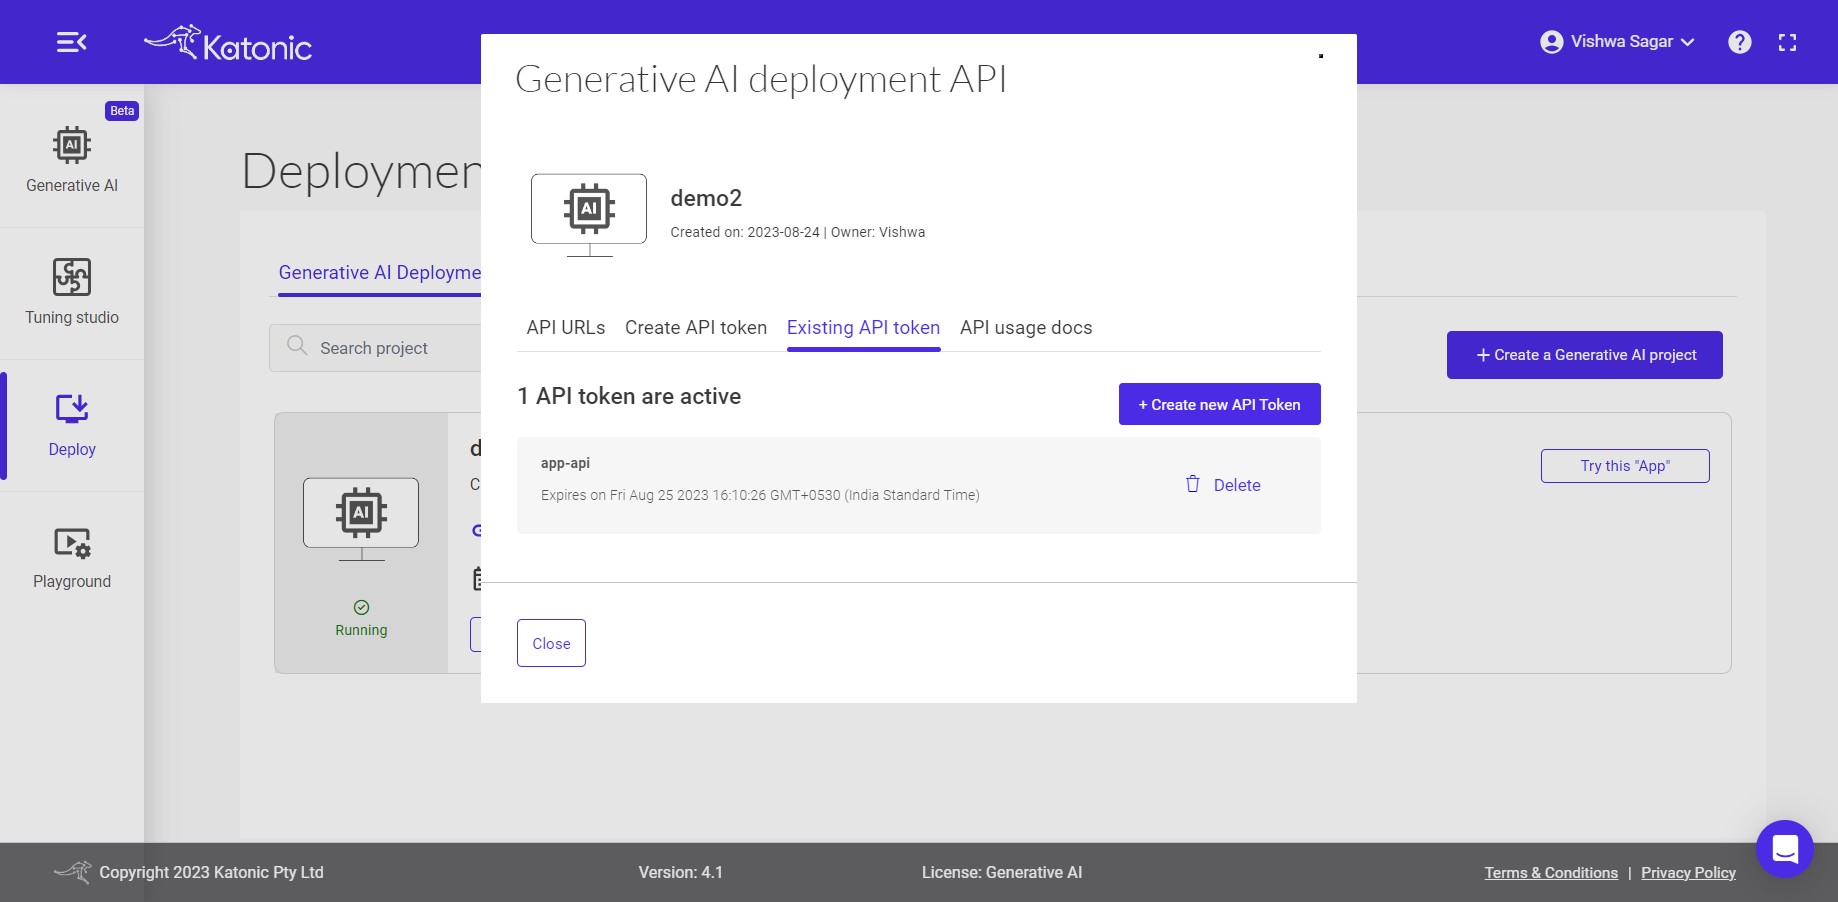
There is an option for Existing API Token. Here you can see all the details related to your existing API tokens.
For more detailed information on API usage and how to use it in different programming languages, you can follow these steps:
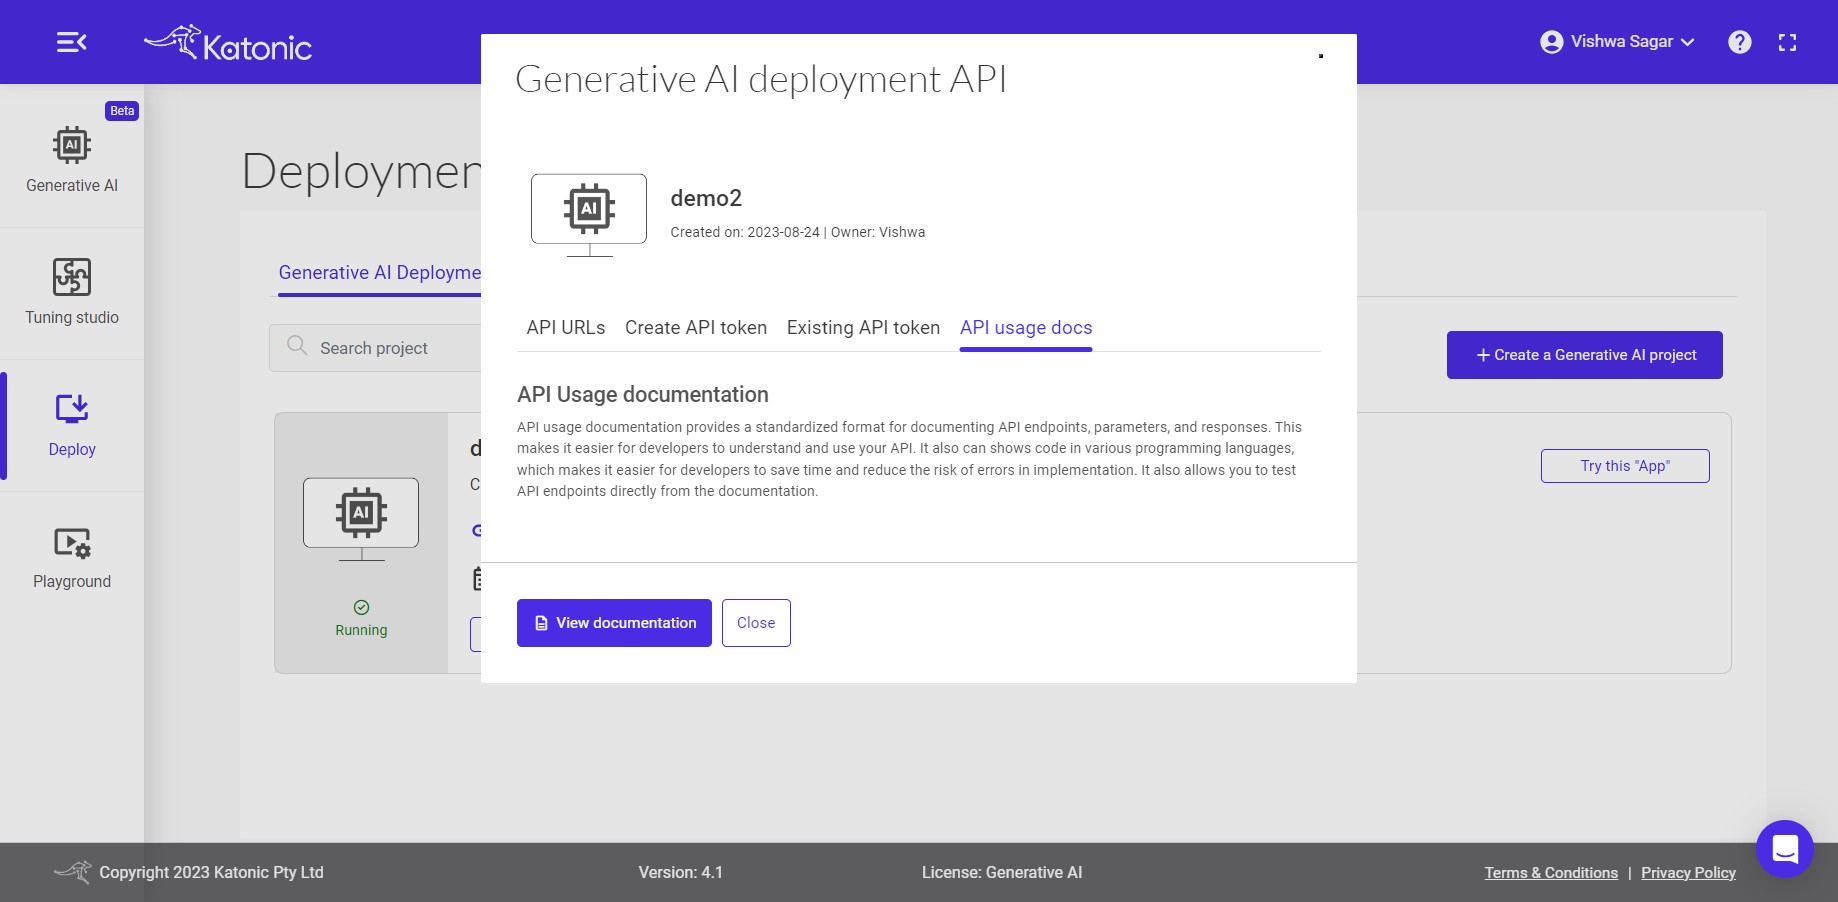
- Go to the "API" section of the platform.
- Look for the link or button labelled "API usage docs" and click on it.
- This will redirect you to the API usage documentation page.
- On the documentation page, locate and click on the "View documentation" link.
- You will be taken to the comprehensive documentation that provides instructions, examples, and guidelines on how to use the API in various programming languages.
By accessing the API usage documentation, you will have a valuable resource that can assist you in understanding and implementing the API functionalities in your preferred programming language.
for more details on how to use model api endpoints, click here