Get started with Streamlit App
Overview
This article will show you how to publish a Python App with Streamlit in Katonic Platform.
In this tutorial you will:
- spin a workspace environment with the necessary dependencies to publish a Streamlit App.
- setup and create sample Streamlit app.
- publish an App to the Katonic Deploy Launchpad.
You’ll be working with sample-streamlit app.
Setting-up your Workspace
The first step is to create a VS code Workspace capable of running your App.
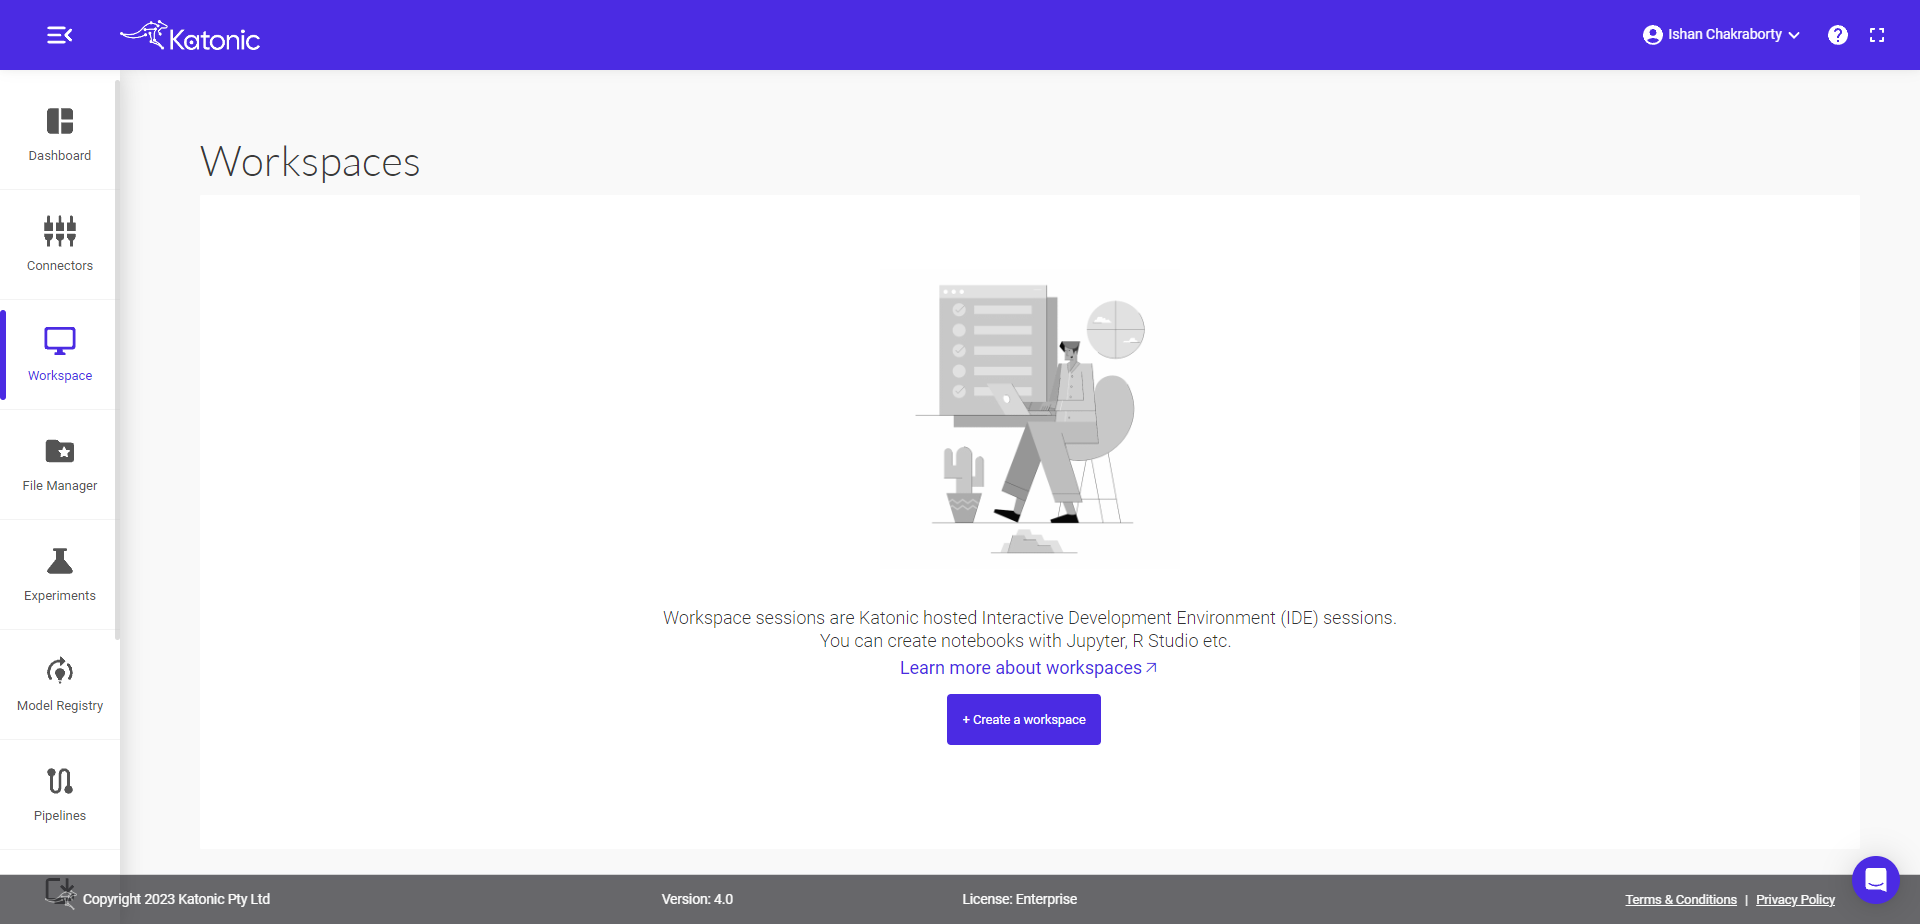
From the platform , Select Workspace and then click on Create Workspace.
Fill the following details there:
Name : fill your workspace name.
Select Environment: select VSCode environment.
Webapp: select Streamlit.
Image: select streamlit version.
Additional Port: select port where you want to run.
Resources: Desired compute resource for workspace.
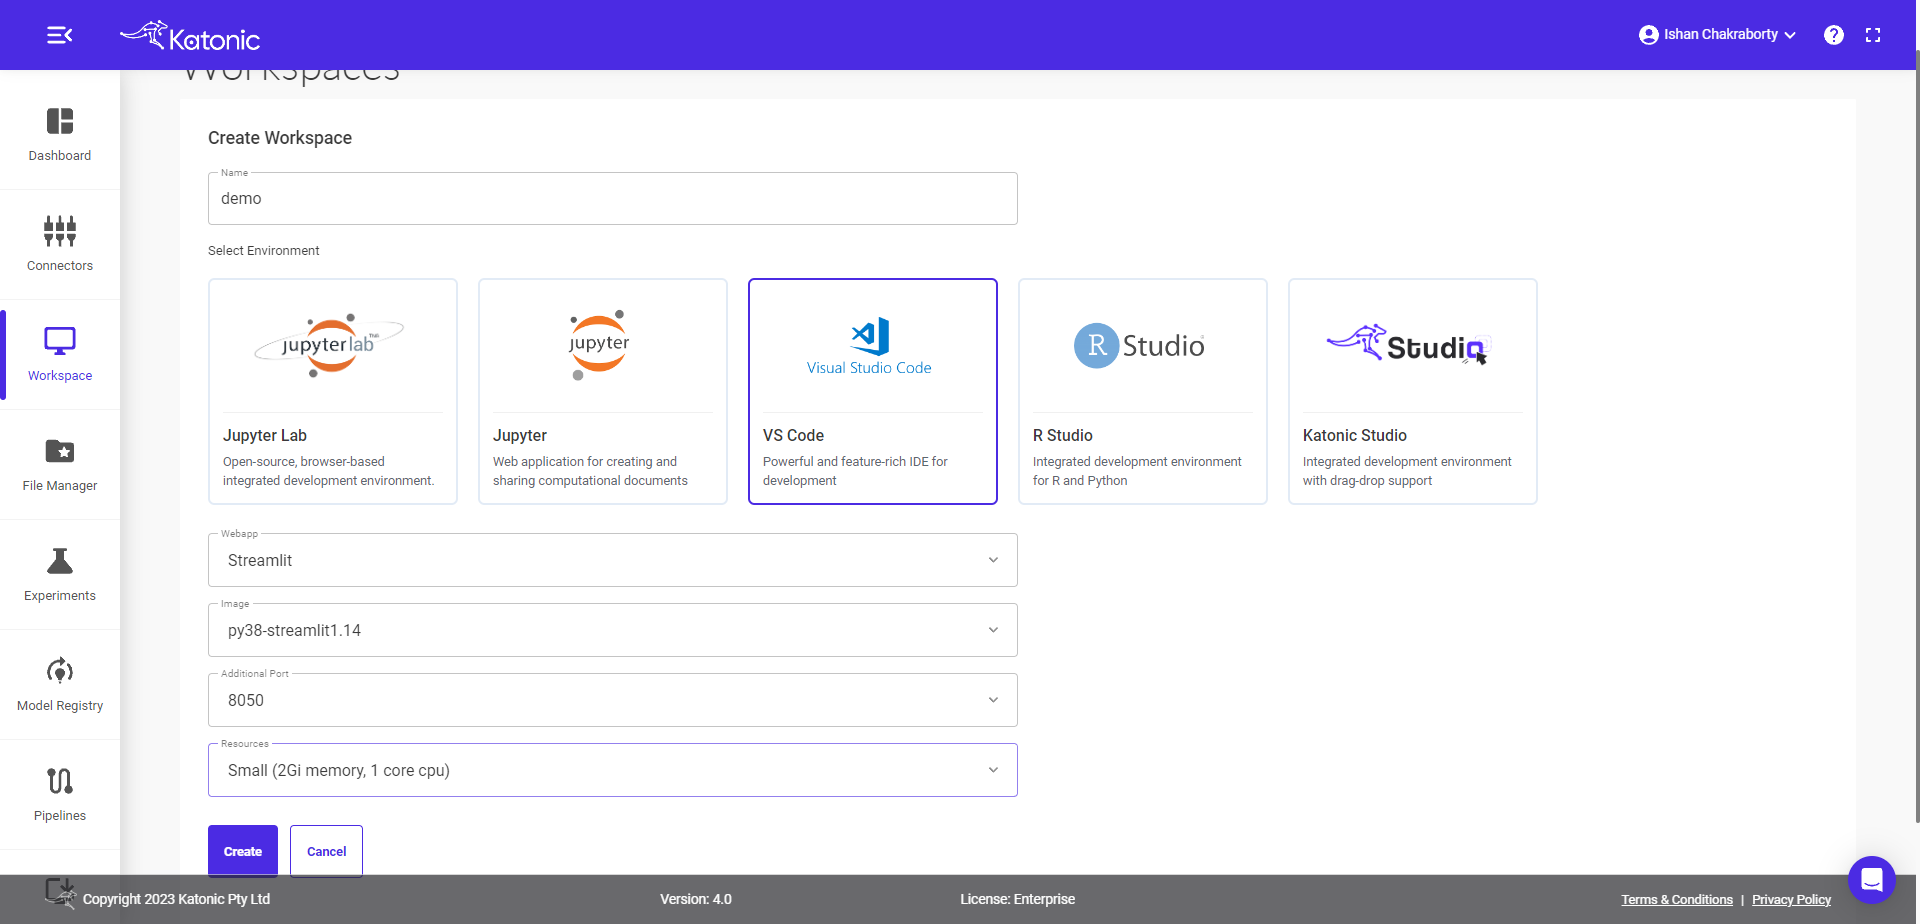
Click on Create.
You will be directed to the Workspace overview window, where you can see your workspace under processing.
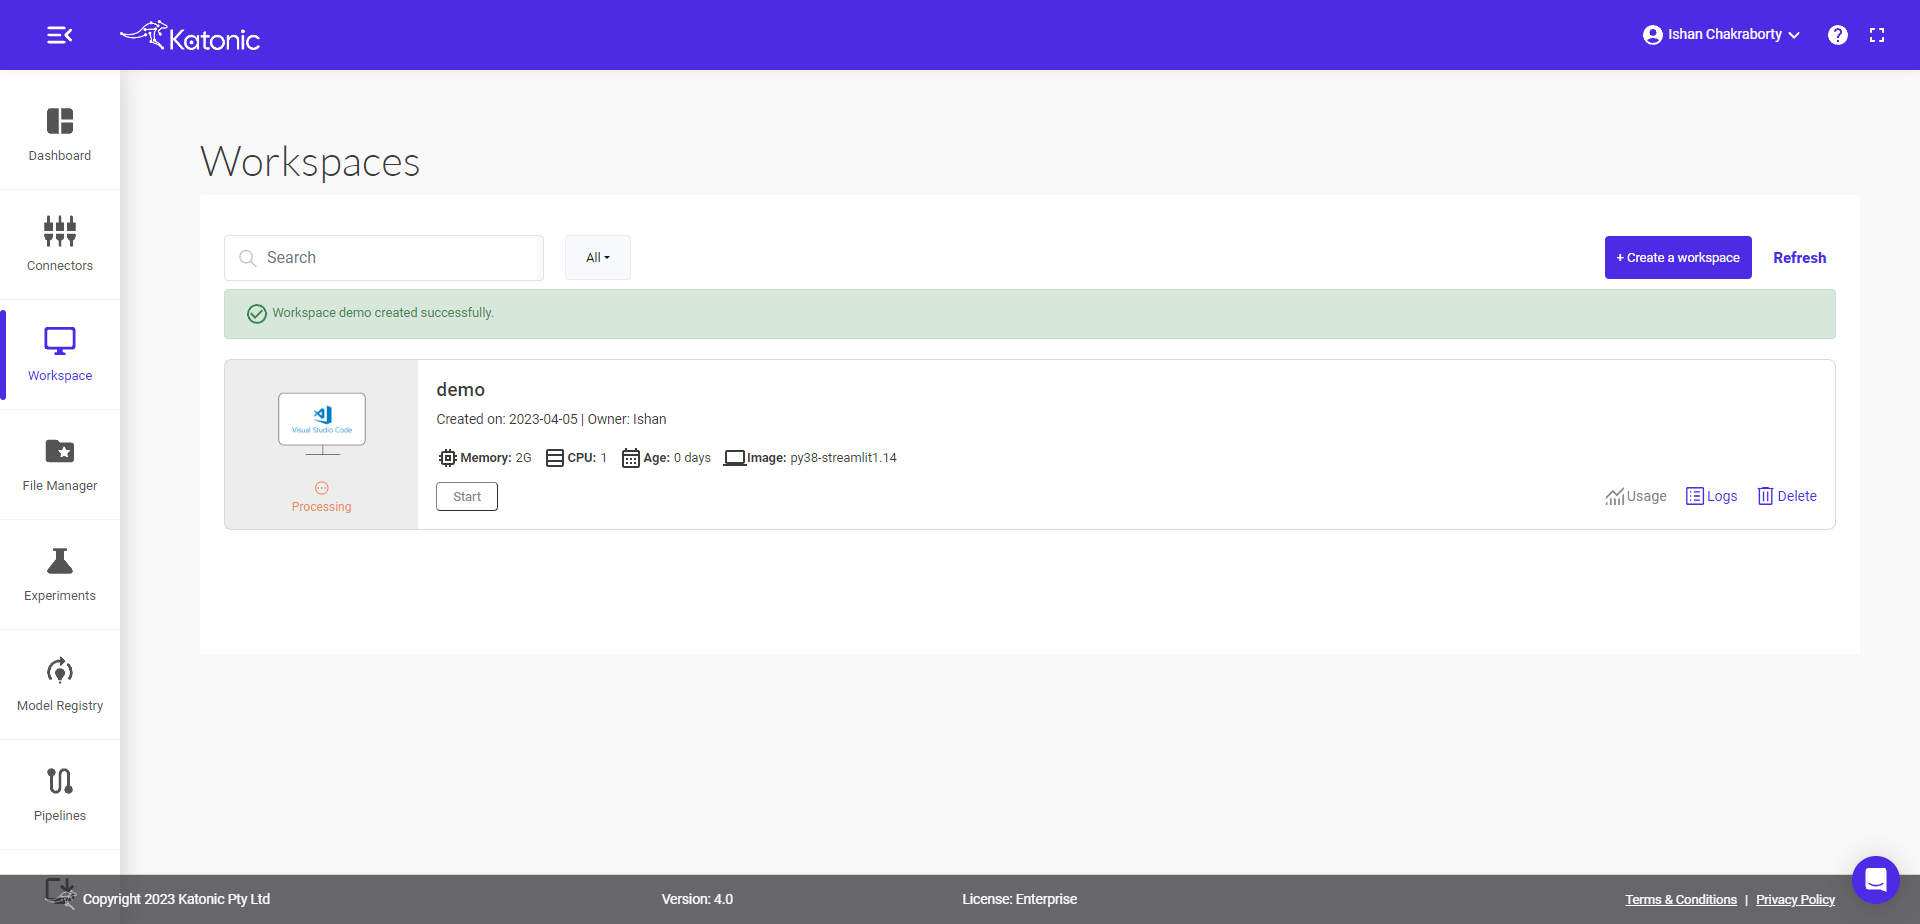
It will take approximately 2-3 minutes to get this workspace ready.
Note: Refresh the page, if your are not seeing processing to running status change after 2-3 minutes.
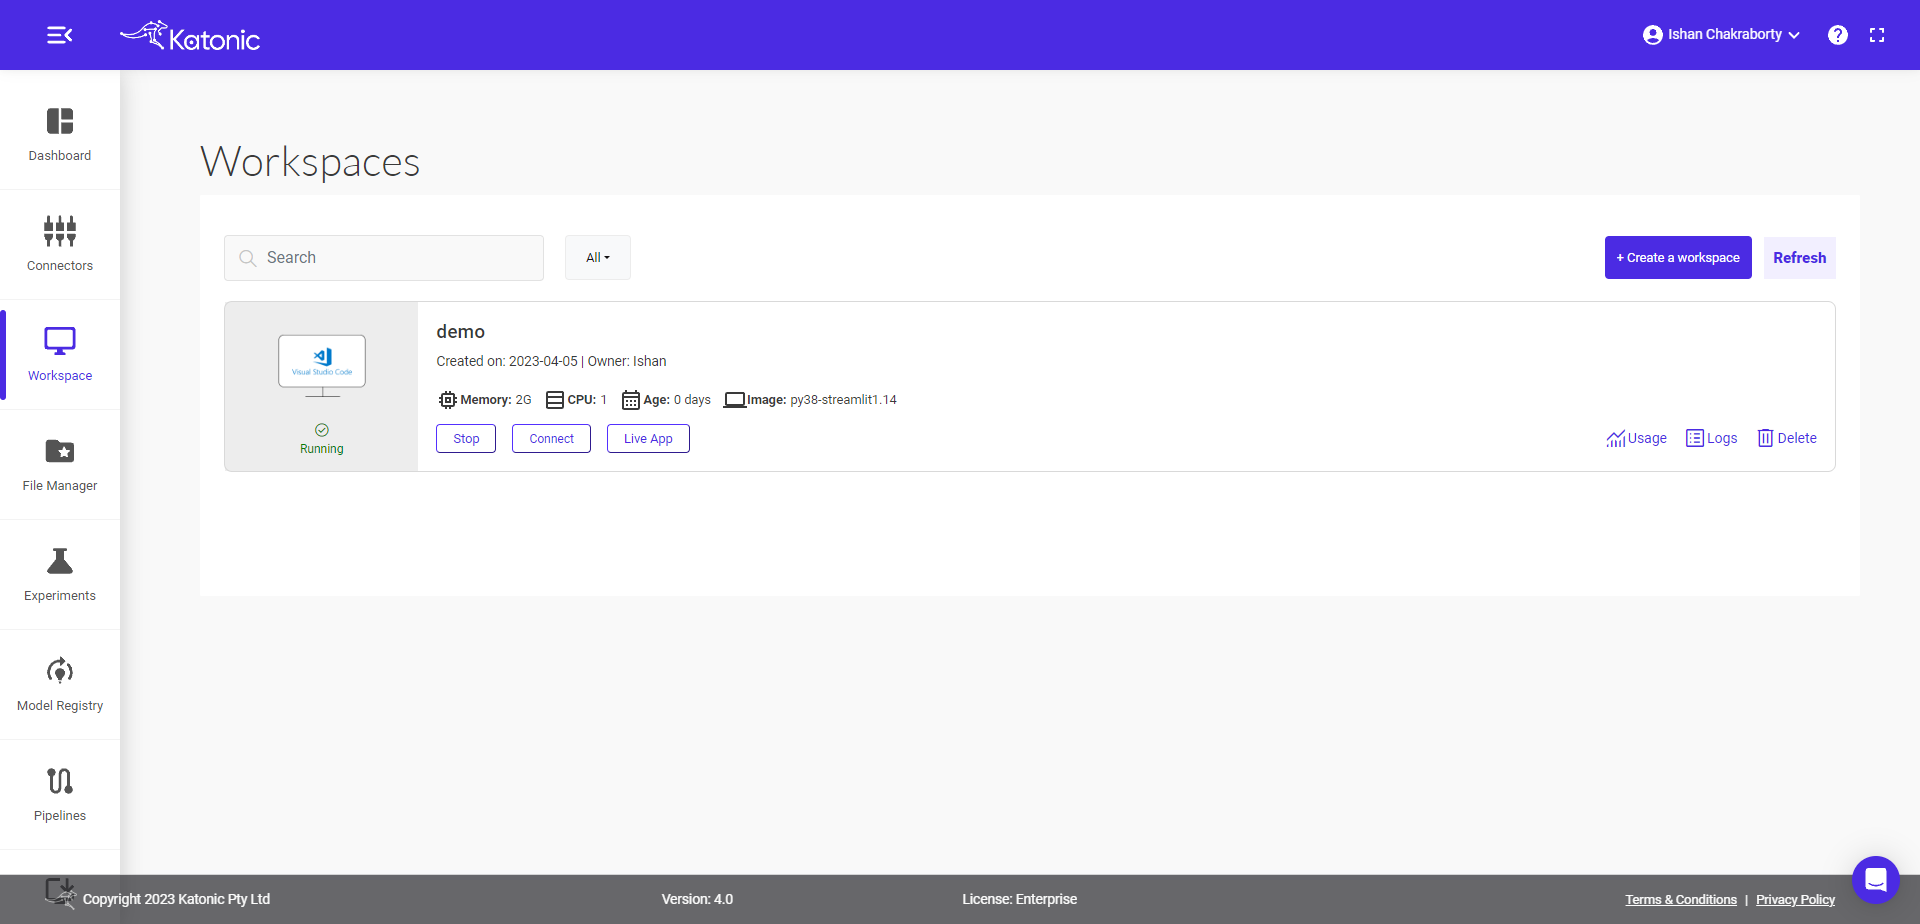
You can connect to your workspace ,when the processing tab changes to running.
Click on the connect to use this Workspace for App building.
Start the app development
Write your sample app.py code there or copy below sample code.
from collections import namedtuple
import altair as alt
import math
import pandas as pd
import streamlit as st
import os
"""
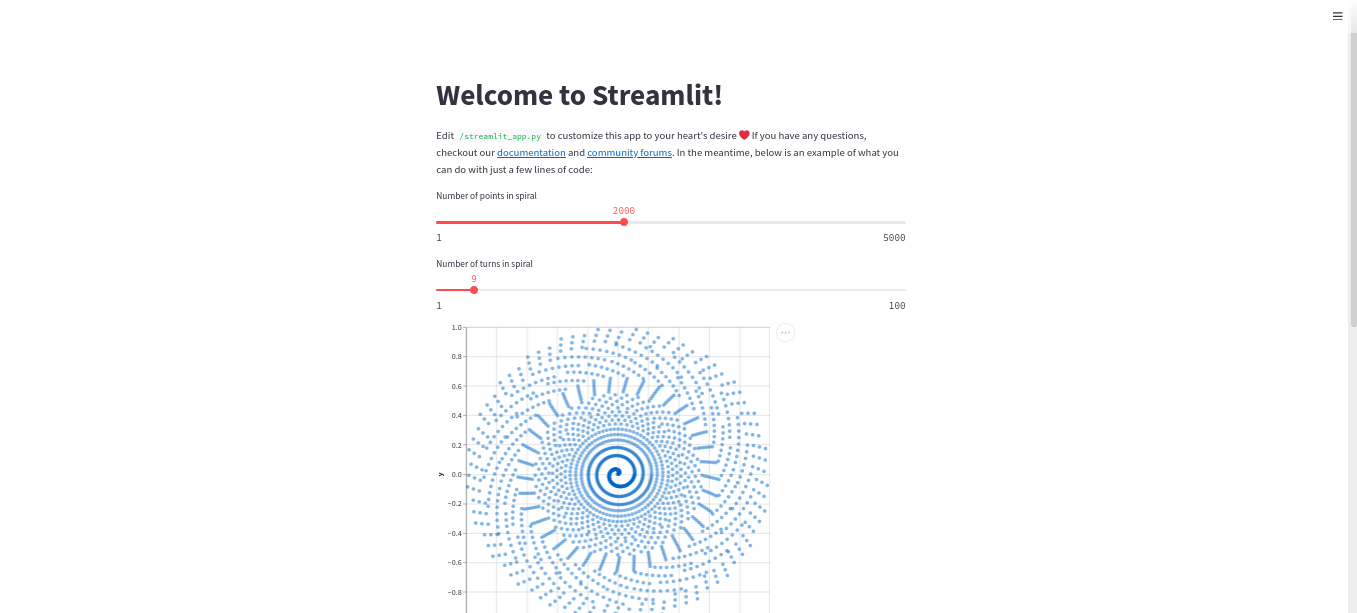
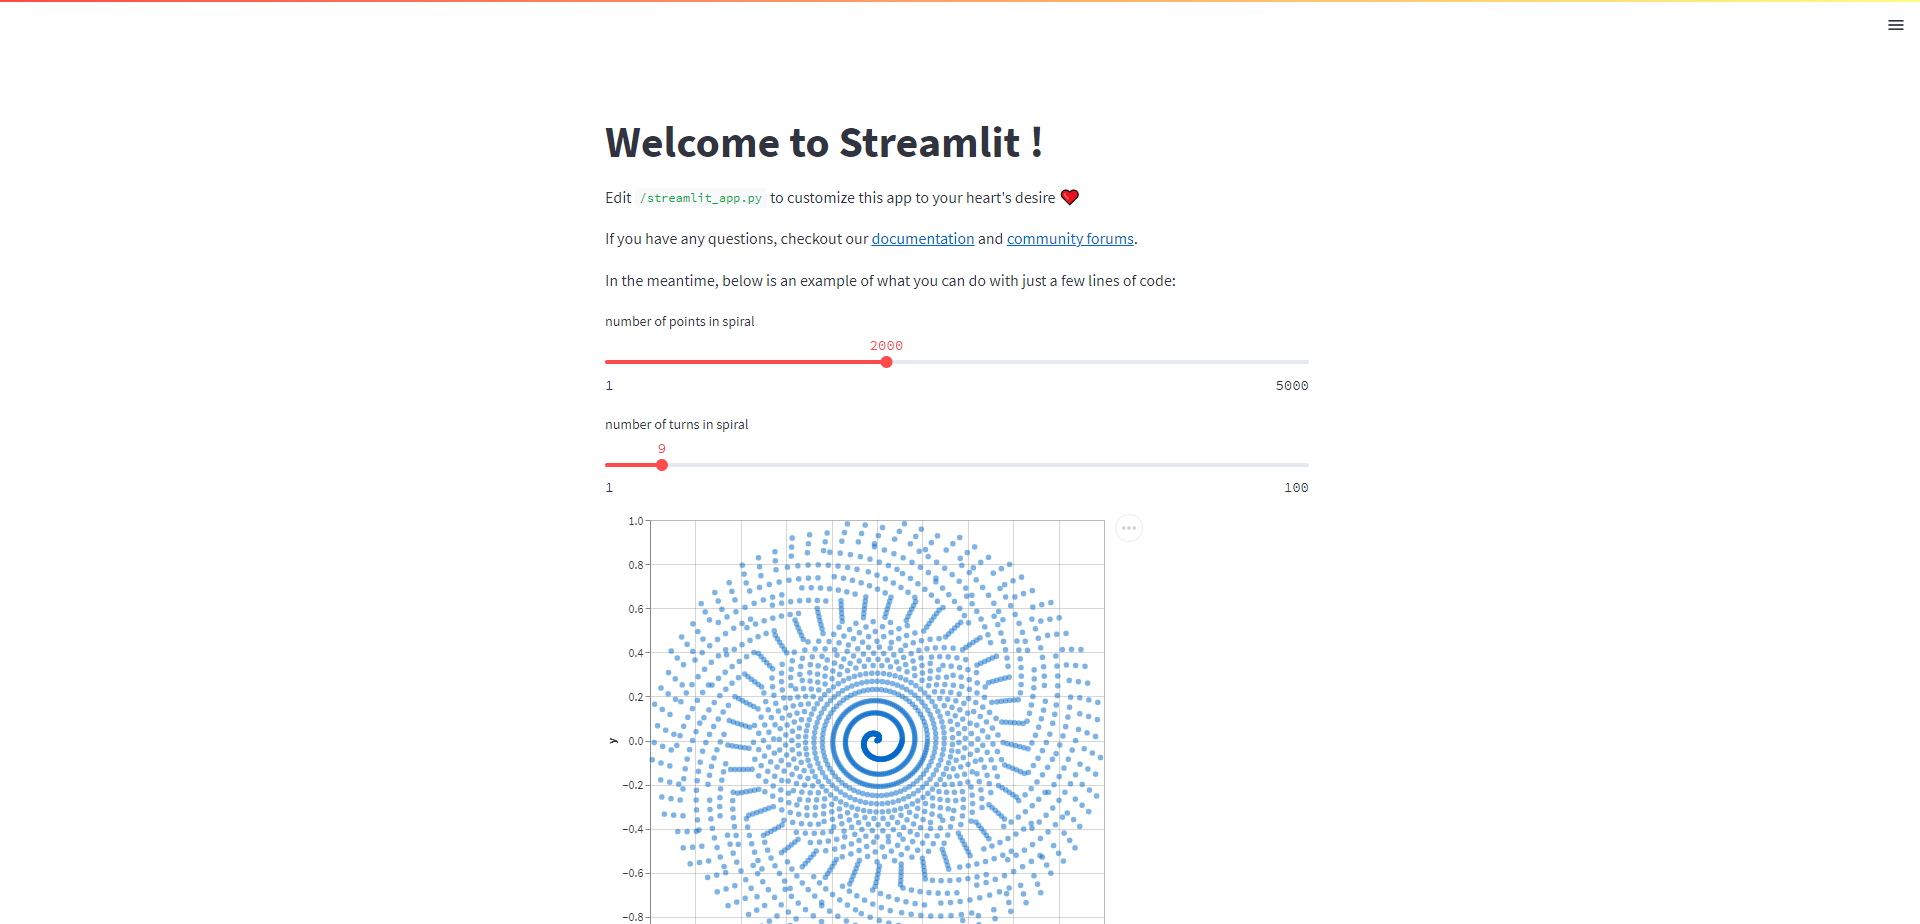
# Welcome to Streamlit!
Edit `/streamlit_app.py` to customize this app to your heart's desire :heart:
If you have any questions, checkout our [documentation](https://docs.streamlit.io) and [community
forums](https://discuss.streamlit.io).
In the meantime, below is an example of what you can do with just a few lines of code:
"""
with st.echo(code_location='below'):
total_points = st.slider("Number of points in spiral", 1, 5000, 2000)
num_turns = st.slider("Number of turns in spiral", 1, 100, 9)
Point = namedtuple('Point', 'x y')
data = []
points_per_turn = total_points / num_turns
for curr_point_num in range(total_points):
curr_turn, i = divmod(curr_point_num, points_per_turn)
angle = (curr_turn + 1) * 2 * math.pi * i / points_per_turn
radius = curr_point_num / total_points
x = radius * math.cos(angle)
y = radius * math.sin(angle)
data.append(Point(x, y))
st.altair_chart(alt.Chart(pd.DataFrame(data), height=500, width=500)
.mark_circle(color='#0068c9', opacity=0.5)
.encode(x='x:Q', y='y:Q'))Note: Always keep the port = 8050
Test your app
Create the requirements.txt file with all required dependency.
Here is the requirements.txt code used in above app.
altair<5
pandas<2.0.0
streamlit==1.20.0Note: type following command in the terminal.
pip install -r requirements.txt
streamlit run app.py --server.port=8050 --server.address=0.0.0.0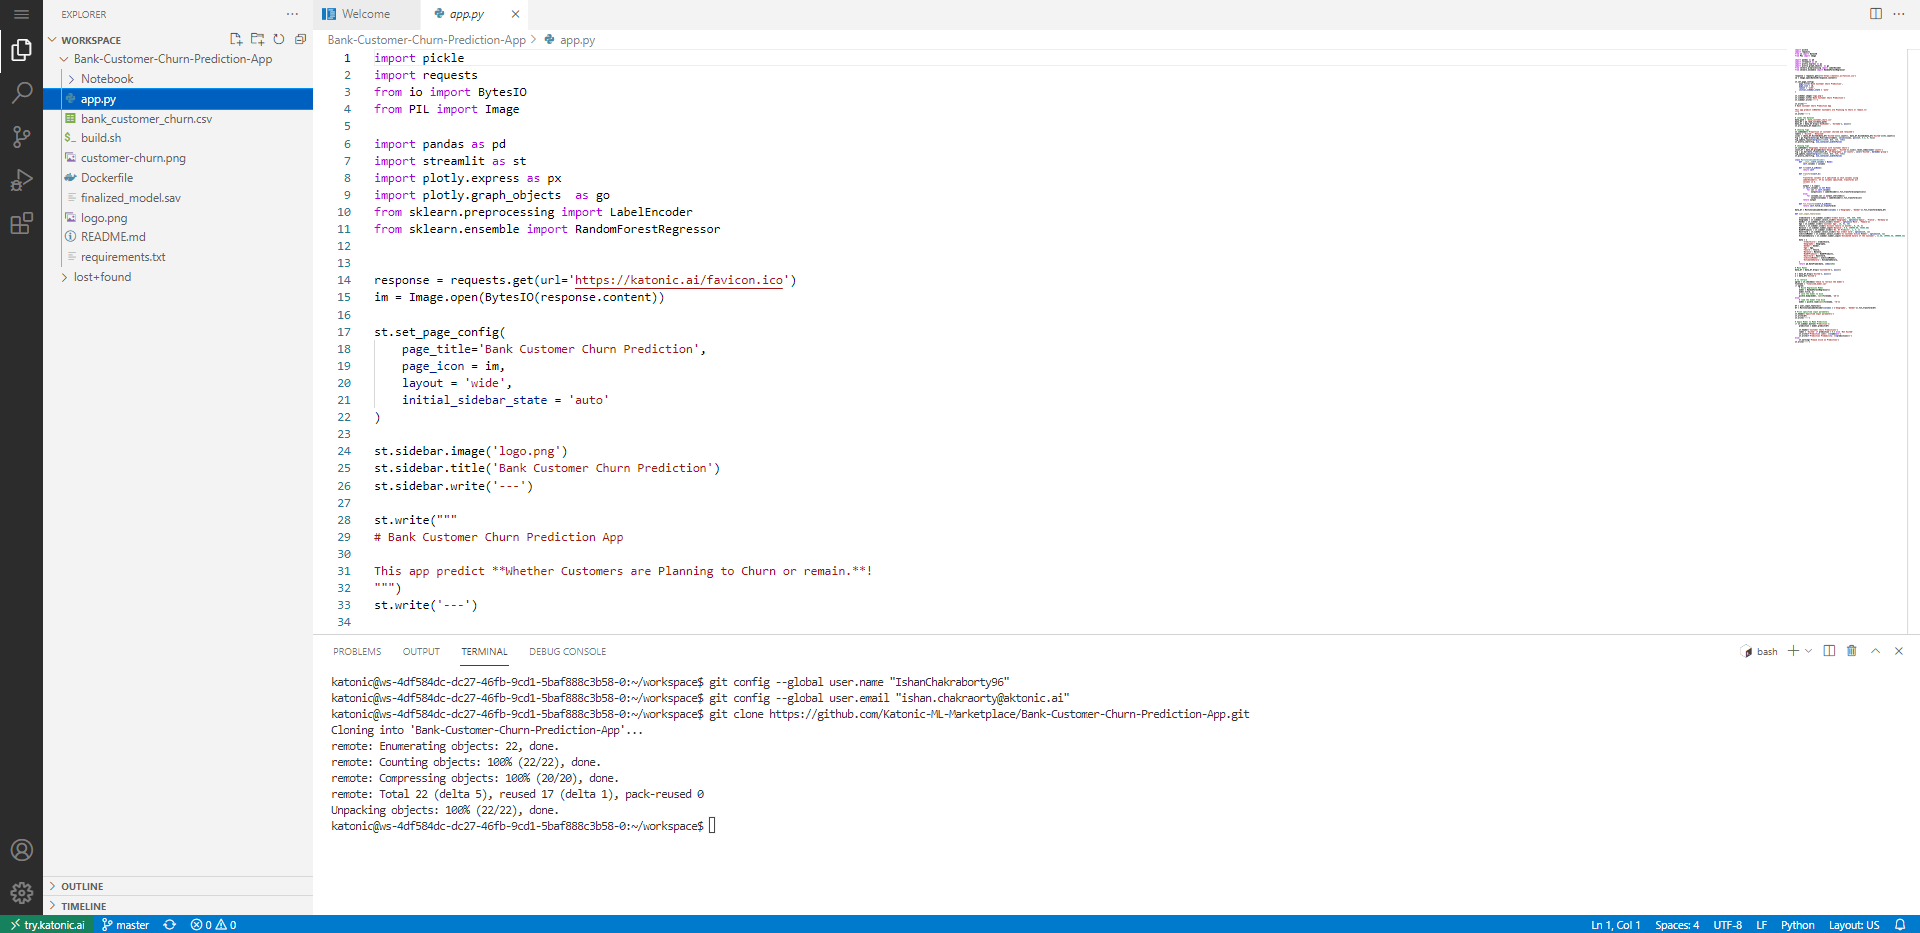
> Note: keep the path relative to your folder structure.

> Note: keep your app name as `app.py` and requirement file as `requirements.txt`
Go back to the Workspaces.
Click on the Live app to see your app.

Your app will open on the new tab.
You can also monitor your running workspace usage by clicking on Usage.
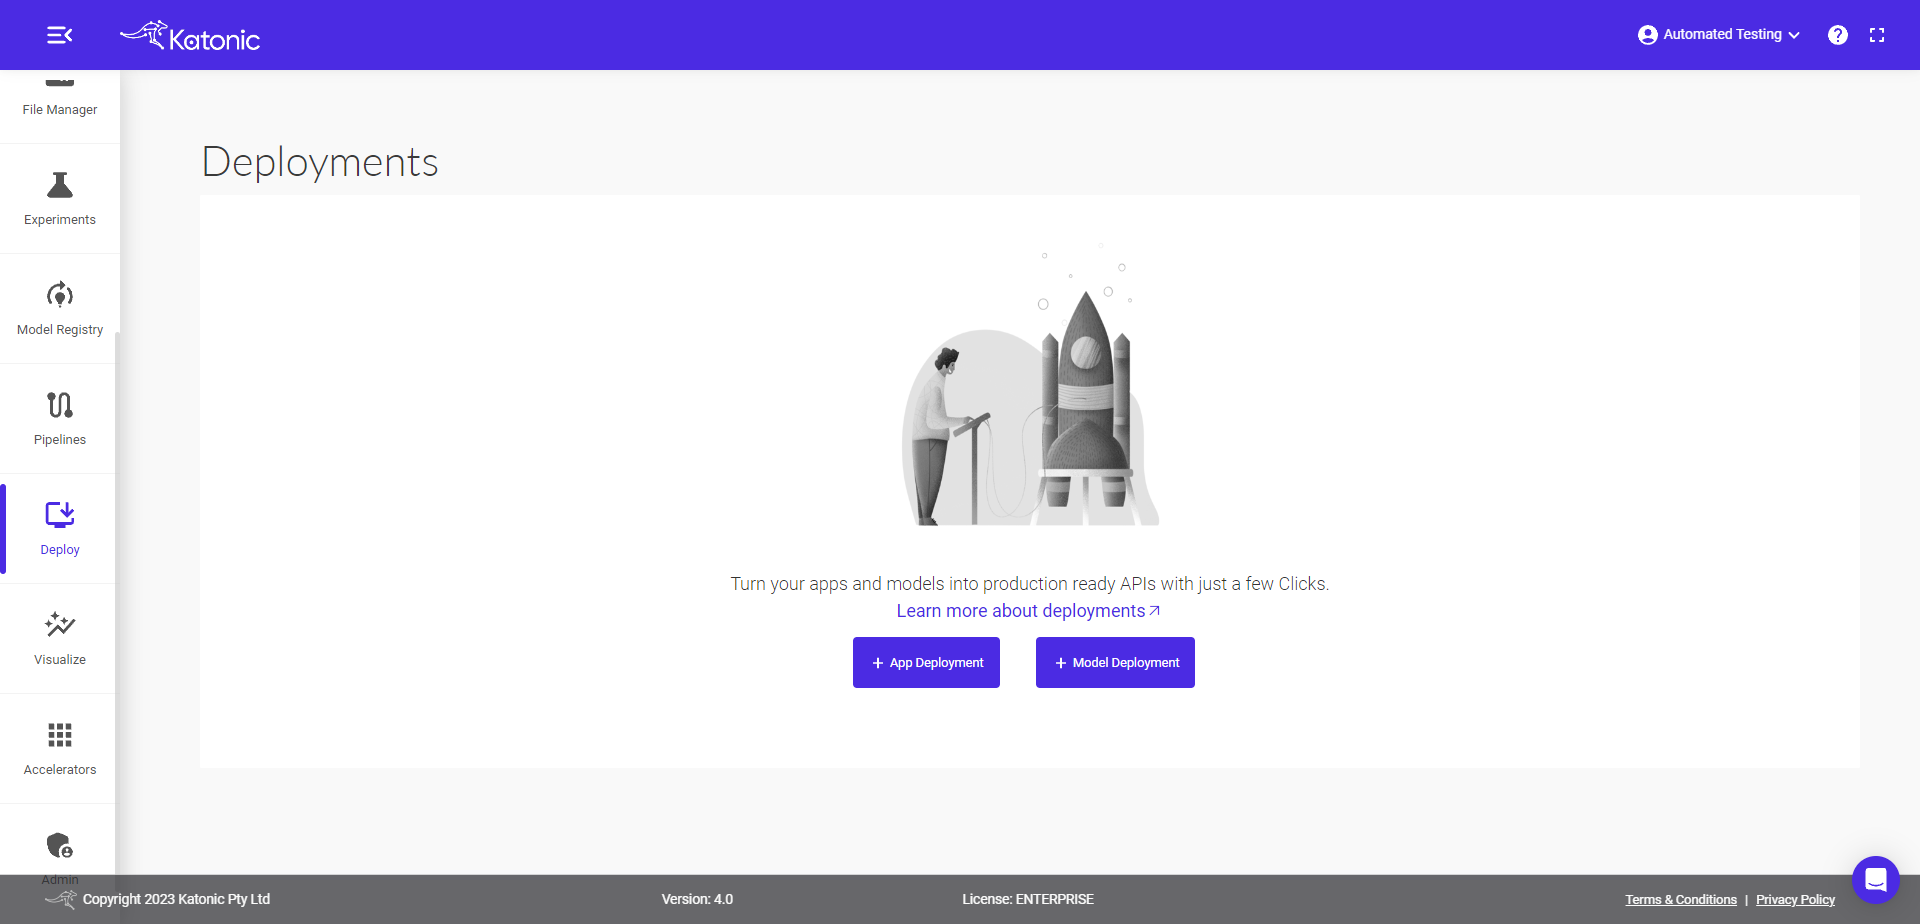
Deploy your App
To deploy your app, go to the Deploy tab and click on the +create Deployment button and select Apps.
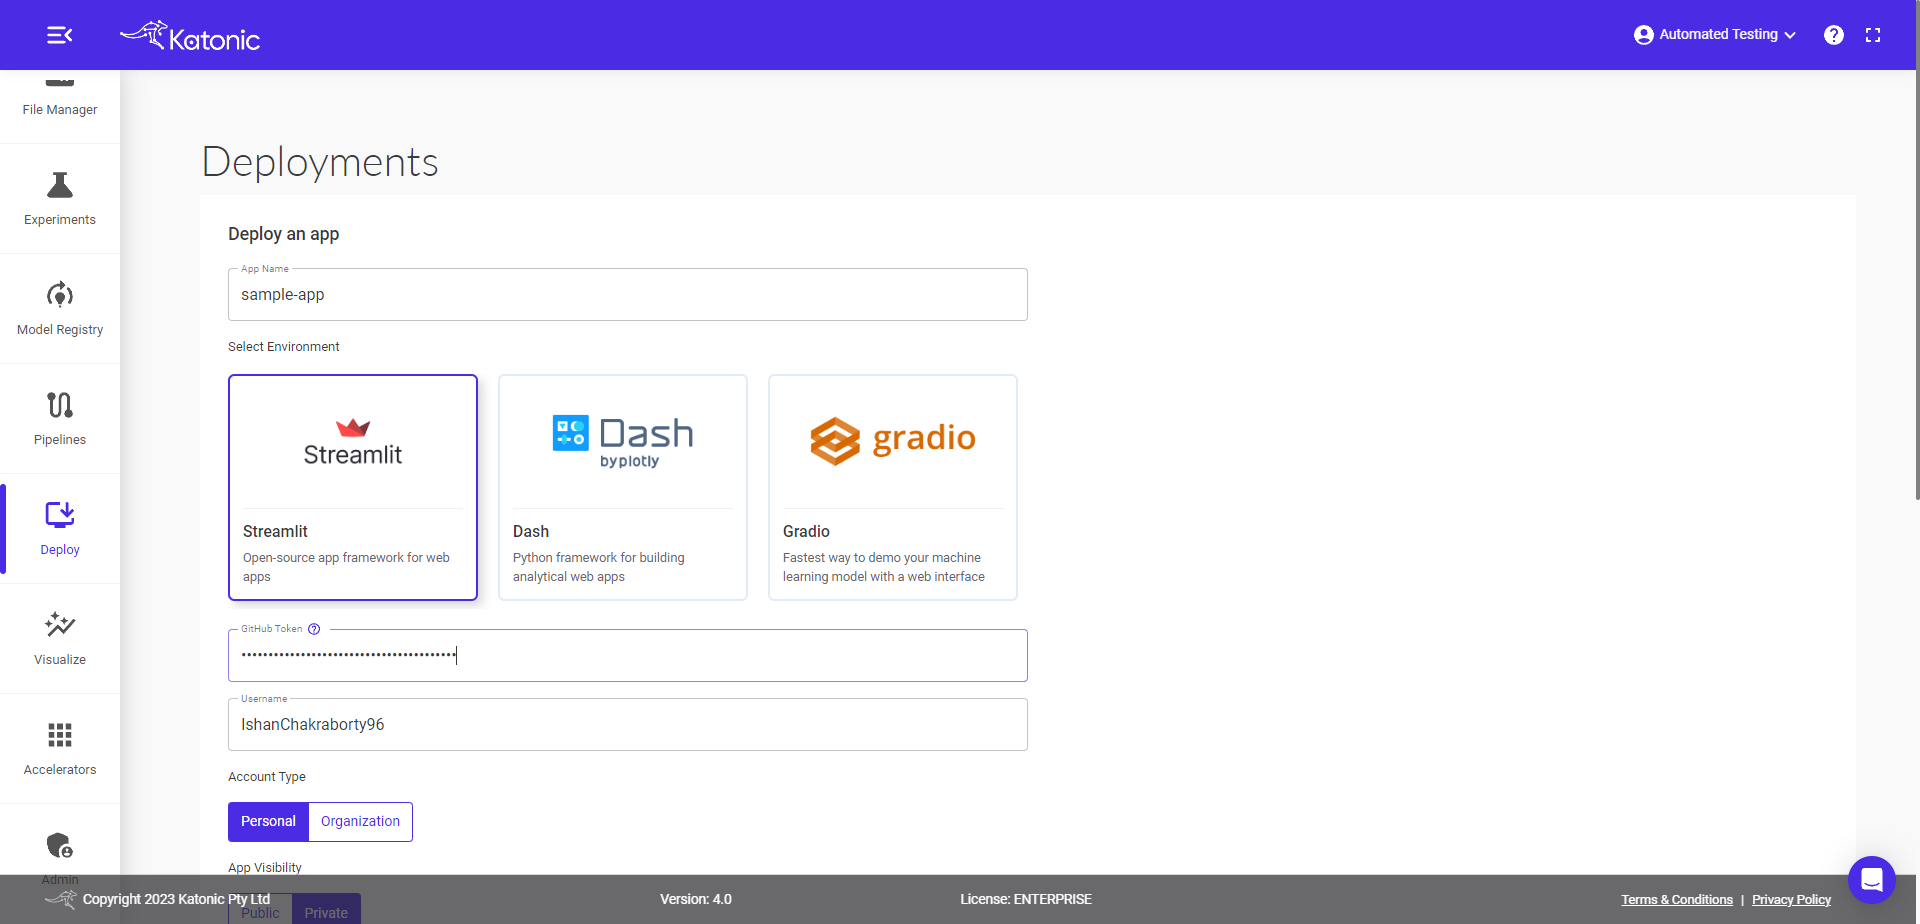
Fill the details as follow:
App Name: your app name.
Select Environment: your app environment.
Github Token: your github token.
Username: your github account.
Account Type: select your account personal or organisation.
Branch: Select the master branch of the repository from drop down.
Main file path: appfile name with extention.
Python Version: choose desired python version for app.
Autoscaling : Choose the minimum and maximum pods value
Resources: choose desired compute resources.
Click on the Deploy button , it will take you to the Deploy window again.
Here you can see your App deployment status processing.
After few minutes status will change to running.
Check the logs.
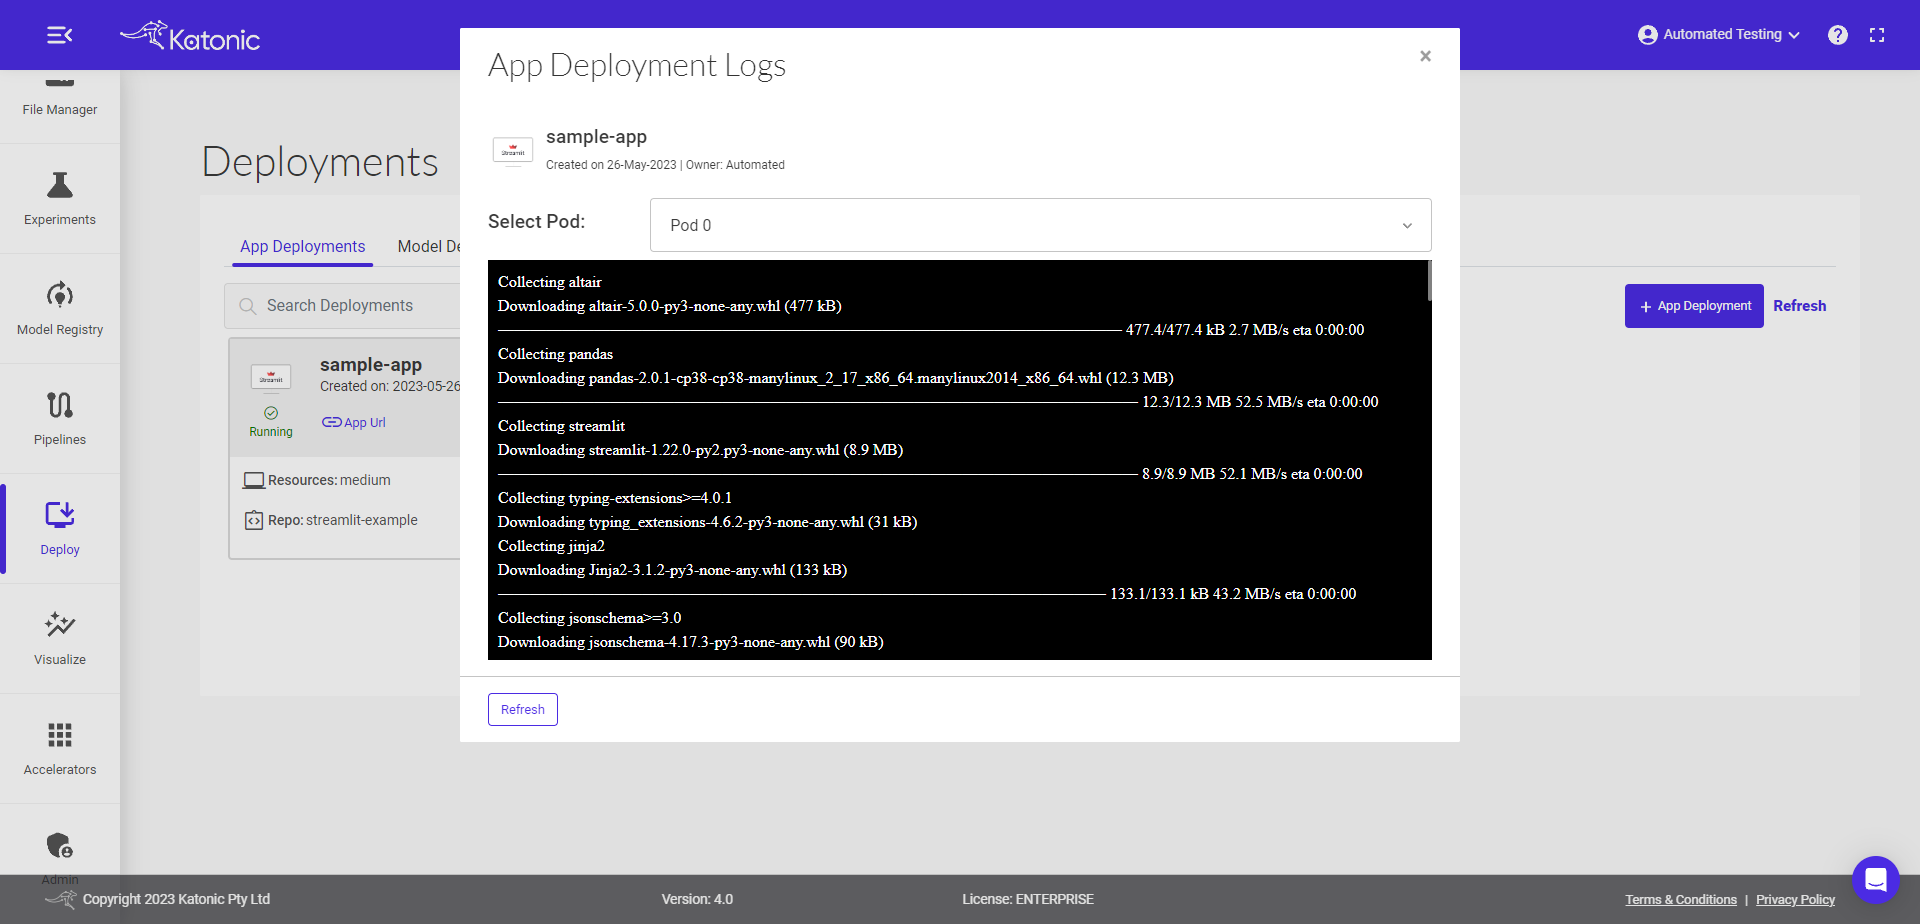
You can view the current status and check if the deployed app is ready to go.
To launch your app, click on App URL.
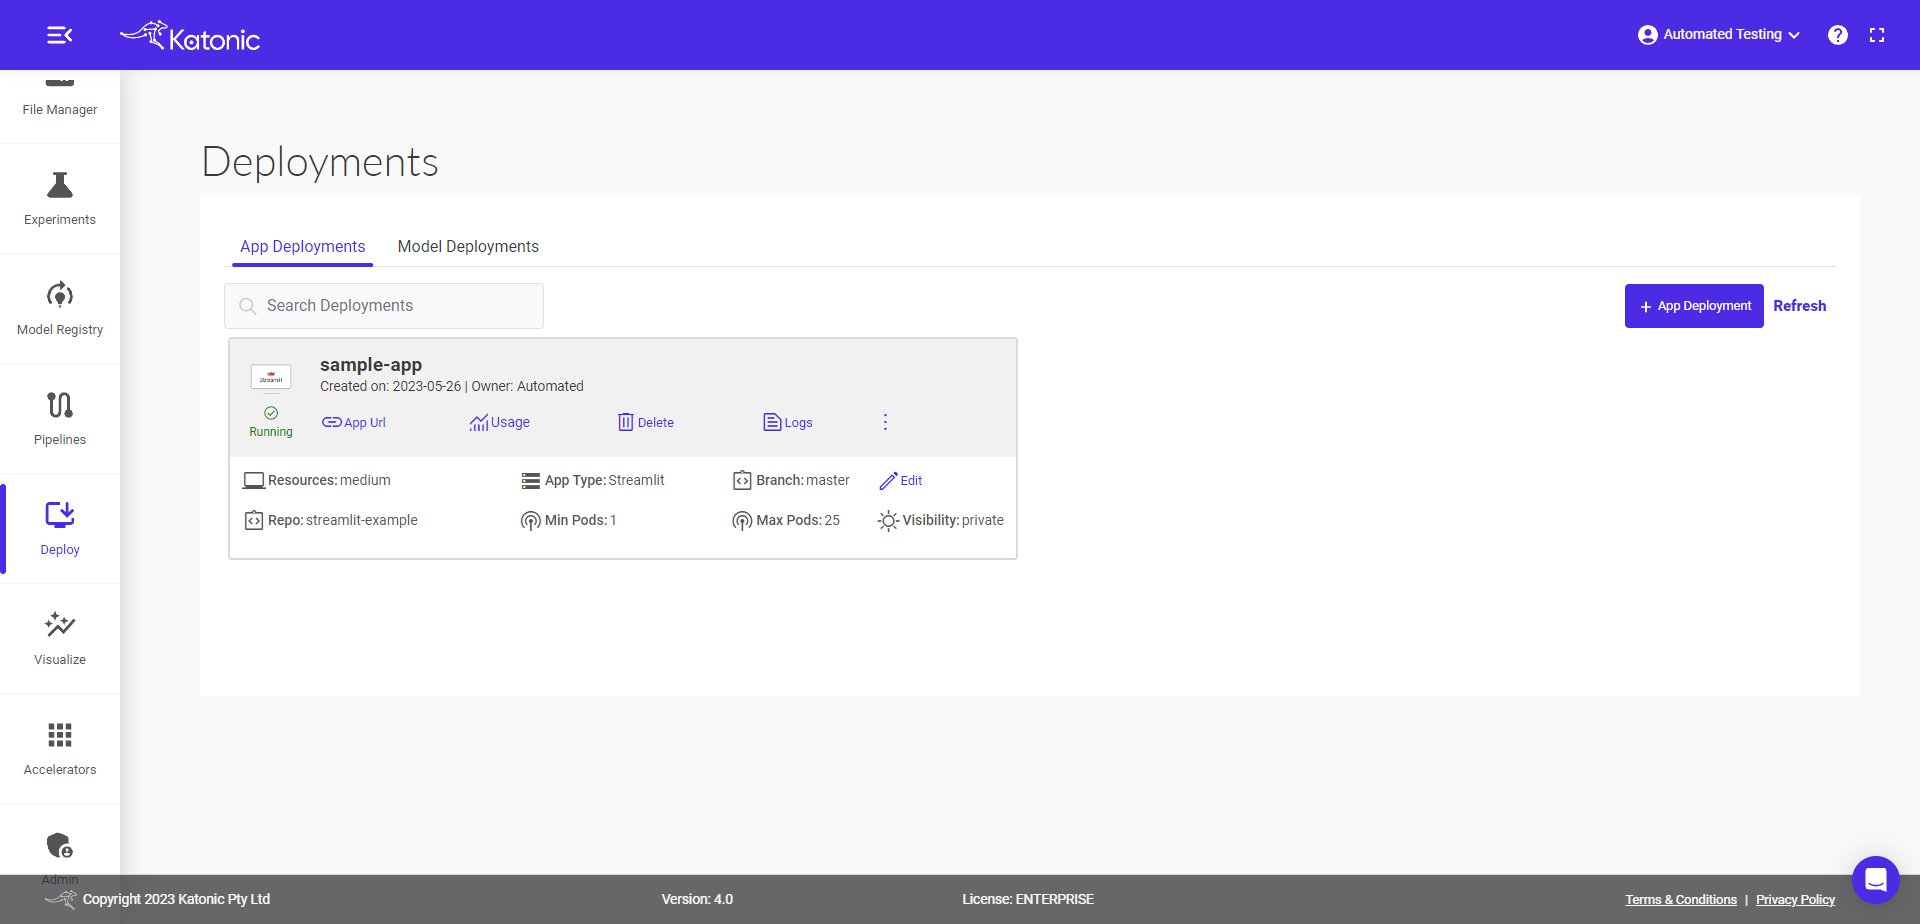
The app will launch in a new tab.
You can share the App Url to showcase your work.